
Cockpit is a web-based graphical interface for Linux servers. It is mainly intended to make managing Linux servers easier for new/expert users.
In this article, we will discuss Cockpit access modes and how to switch administrative access to Cockpit from the Cockpit Web UI.
The cockpit has two access modes:
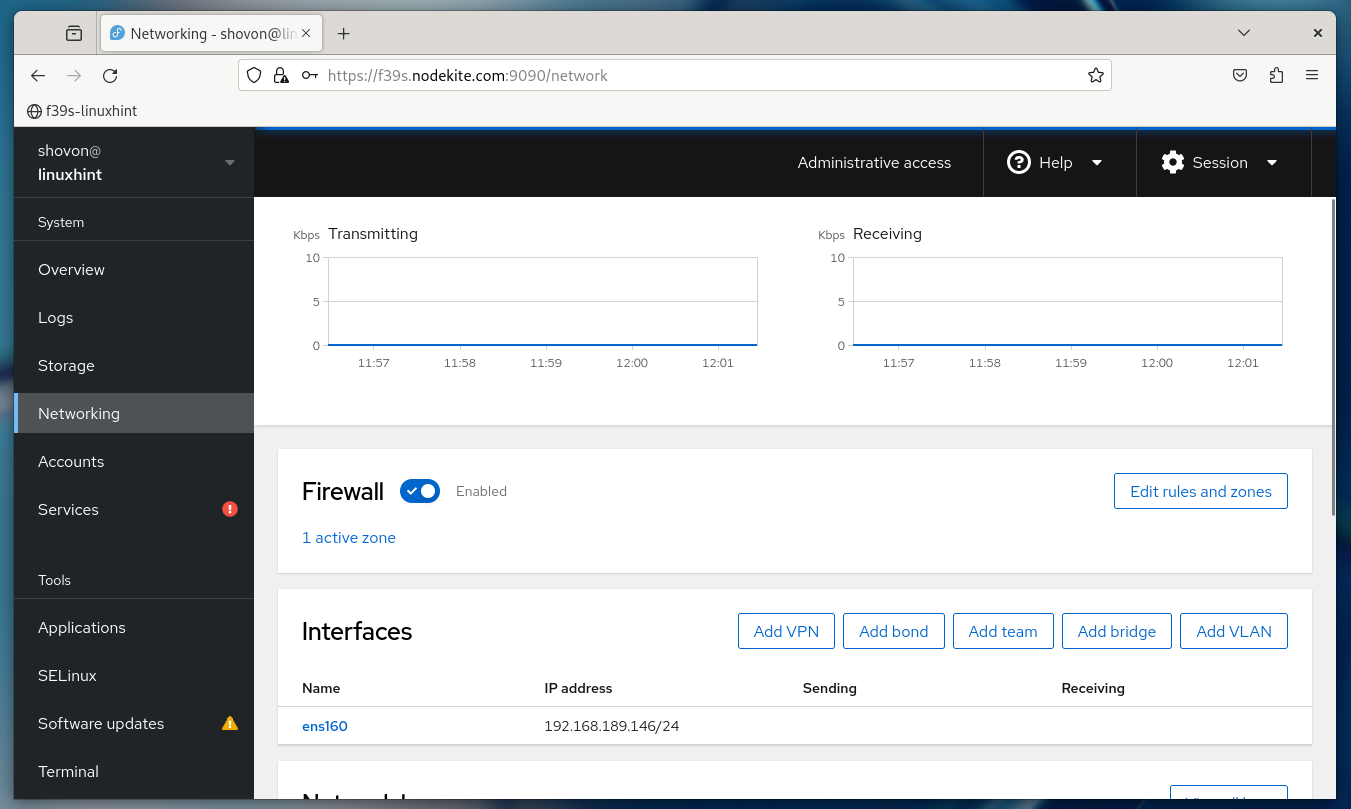
Cockpit access mode is displayed in the upper right corner of the cockpit web user interface. Currently enabled by default is "Restricted Access" mode, which limits your ability to configure your Linux server on the Cockpit web UI.
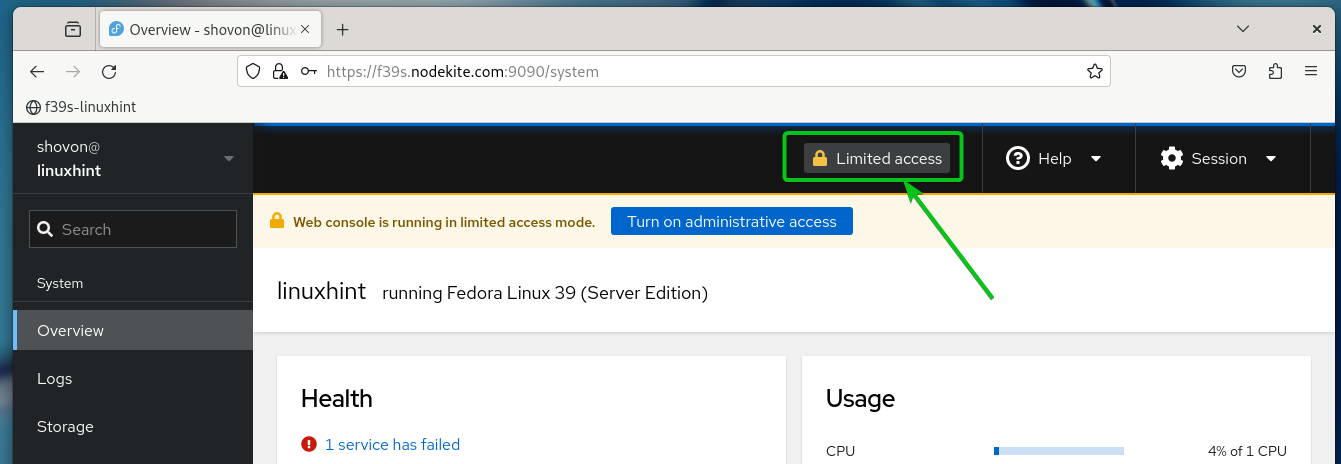
To configure your Linux server from the Cockpit web UI, you must enable "Administrative Access" mode for Cockpit from the Cockpit web UI.
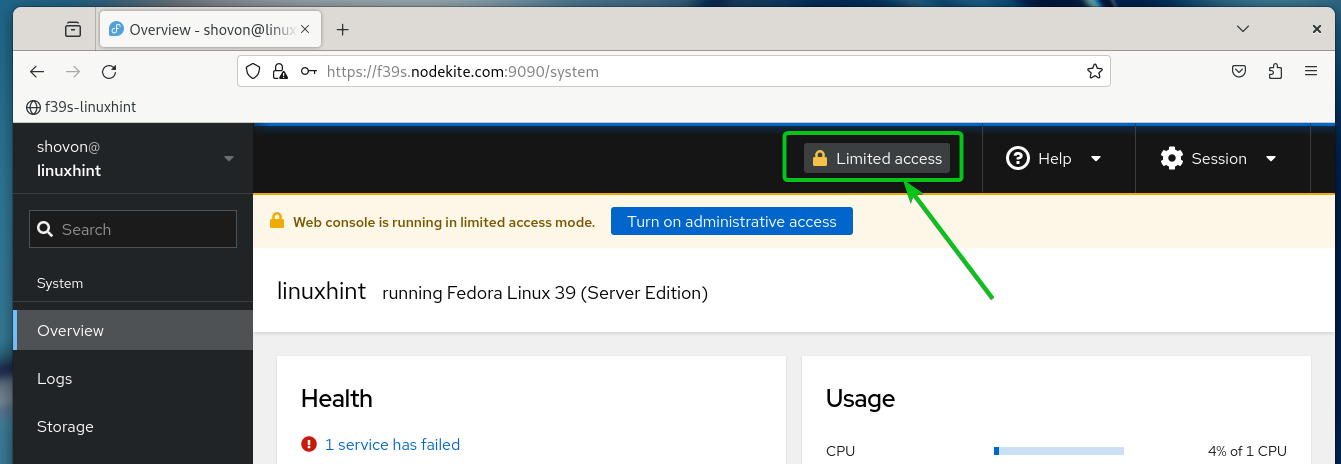
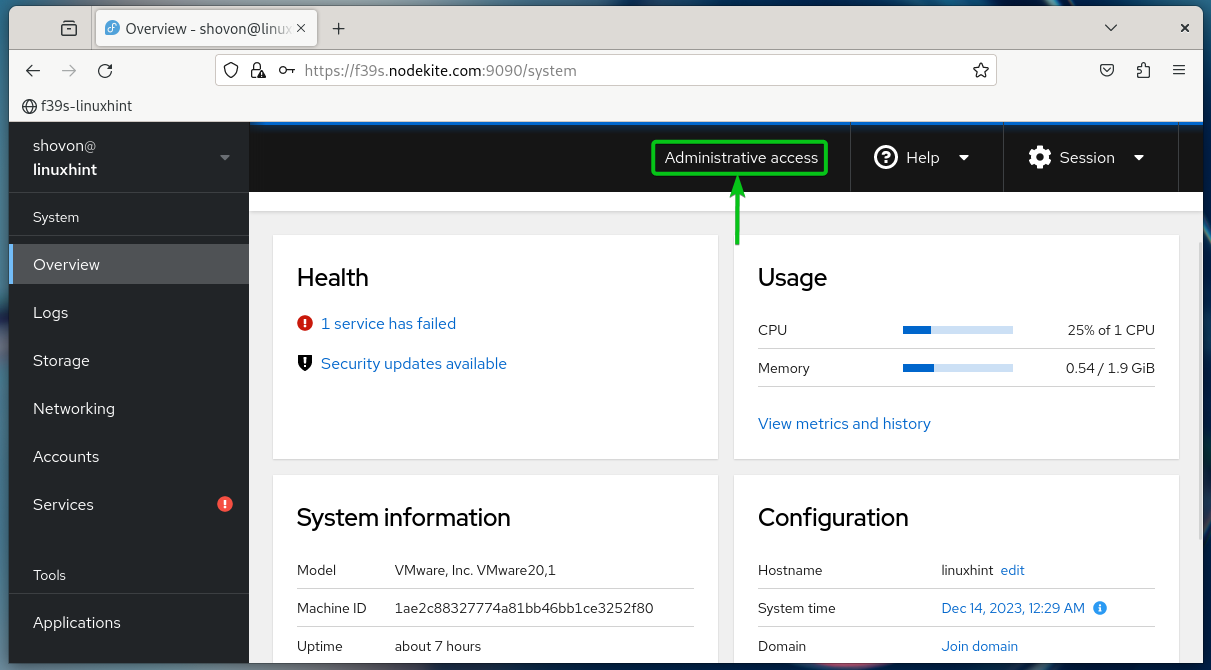
To enable "Administrative Access" mode on the cockpit, click "Restrict Access" in the upper right corner of the cockpit web UI, as shown in the following screenshot:
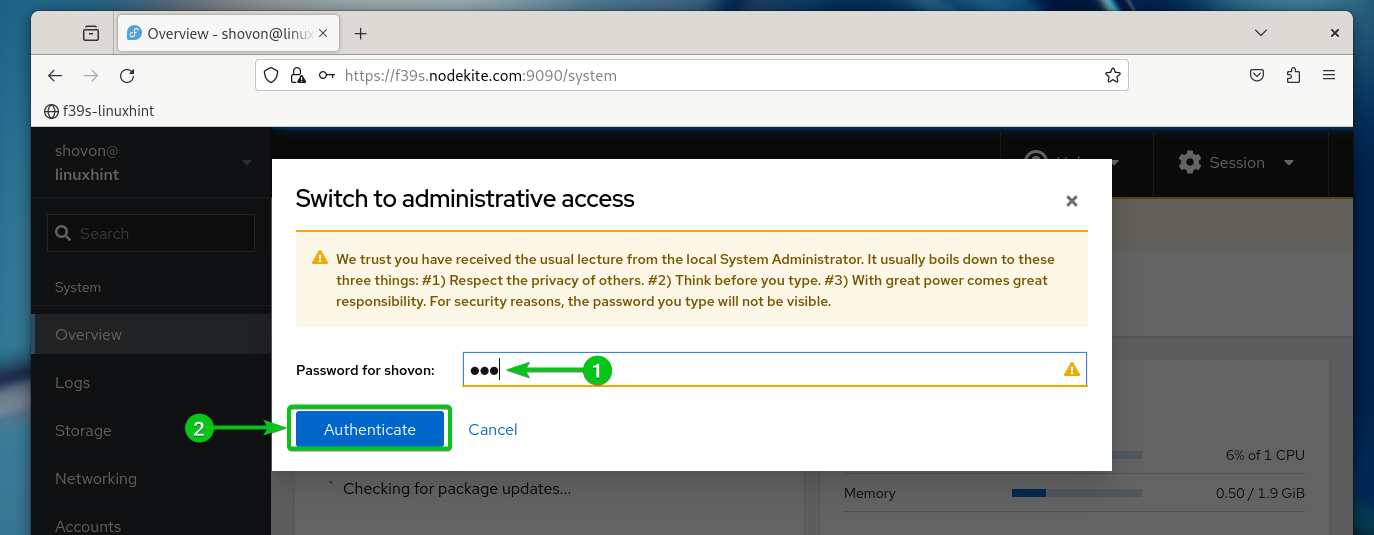
Enter the password of your login user [1], and then click "Authentication" [2].
Please note: To perform this operation, the logged in user must have sudo permissions. Normally, users created when installing operating systems such as Fedora, Ubuntu, or Debian automatically receive sudo privileges.
The access mode of the cockpit should be changed to administrative access, as shown in the following screenshot:
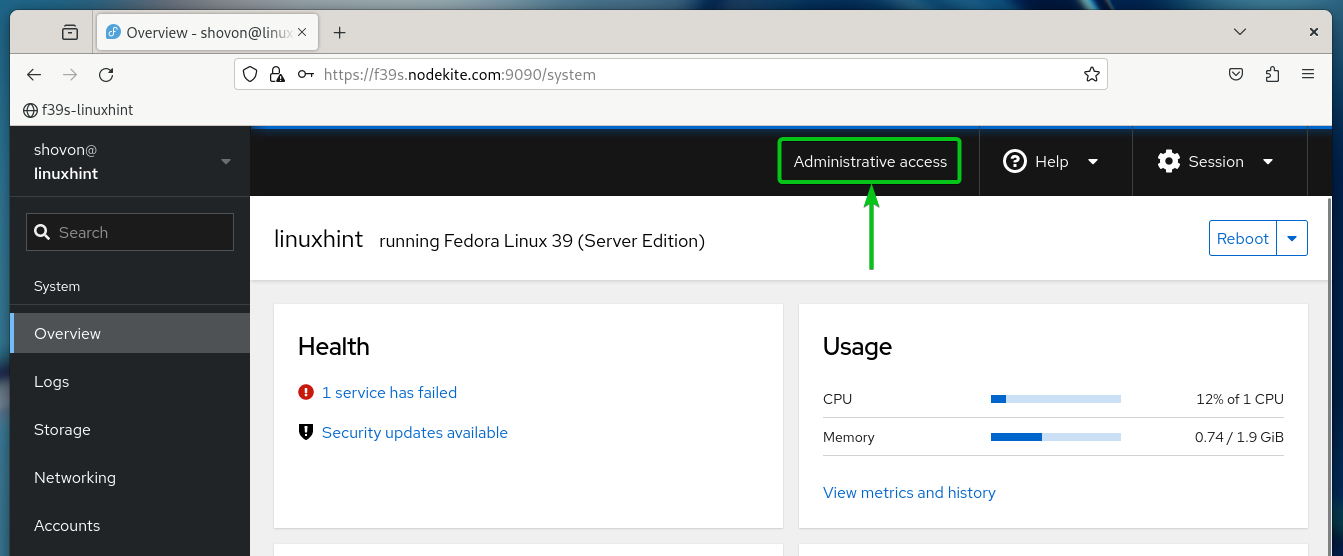
Now you can manage storage, networking, firewalls, packages, system maintenance, and more from the Cockpit Web UI.
To enable "Restricted Access" mode on the cockpit again, click "Manage Access" in the upper right corner of the cockpit web UI, as shown in the following screenshot:
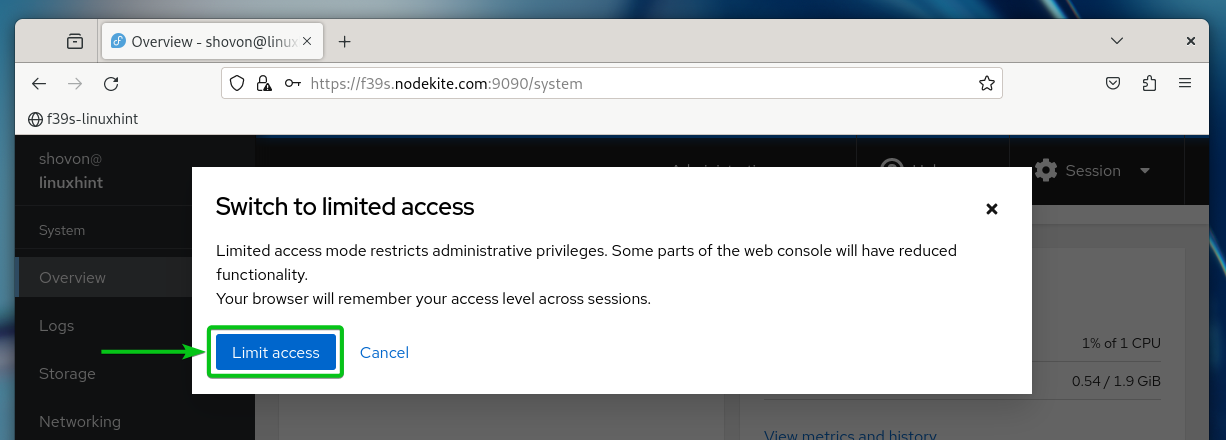
Click "Restrict Access".
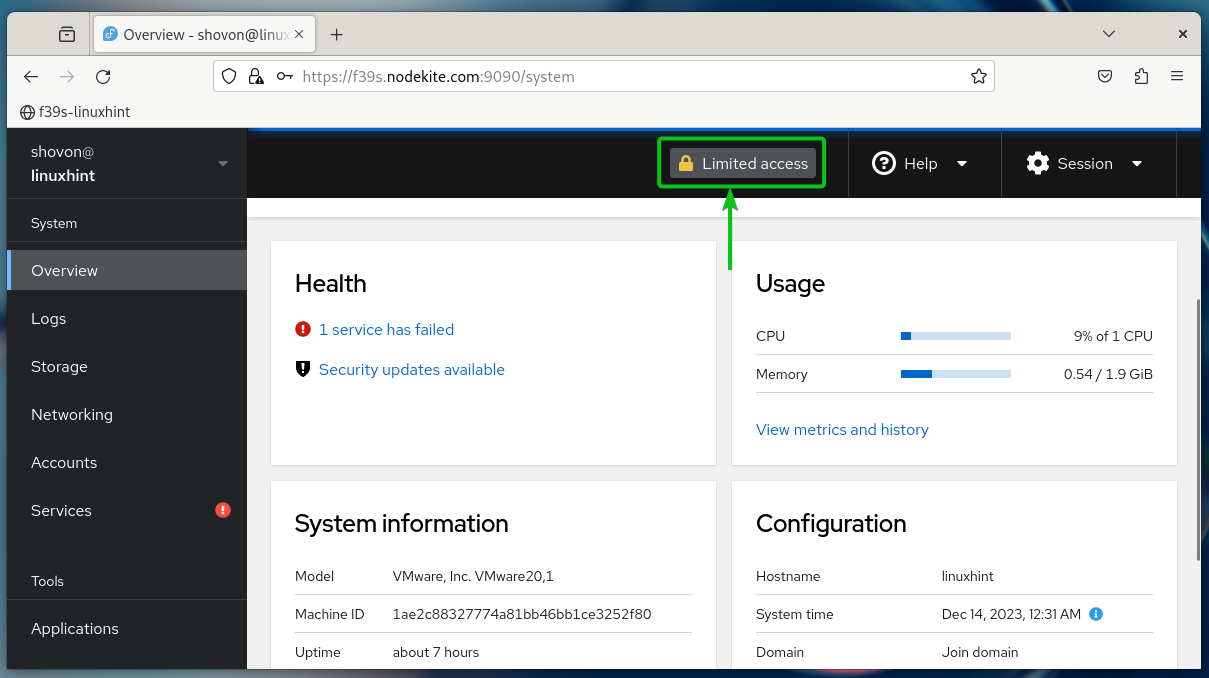
"Restricted Access" mode should be enabled on the cockpit. You should now be unable to make any configuration changes to your Linux server from the Cockpit Web UI.
In this article, we discussed the "Limited Access" and "Managed Access" modes of the cockpit. We also covered how to toggle the Cockpit's "Restricted Access" and "Administrative Access" modes in the Cockpit Web UI.
The above is the detailed content of How to enable administrative access from the cockpit web UI. For more information, please follow other related articles on the PHP Chinese website!
 ps brightness contrast shortcut keys
 Introduction to the three core components of hadoop
 node.js debugging
 What is the customer service phone number of Meituan Food Delivery?
 How to fix winntbbu.dll missing
 Why does the printer not print?
 How to resume use of gas after payment
 Website creation software


