
php Xiaobian Strawberry will introduce you in detail how to batch cut pictures in Adobe PhotoShop CS6. In daily design work, batch processing is a very practical skill that can improve work efficiency. By learning the methods provided in this article, you will be able to cut multiple pictures easily and quickly, saving a lot of time and energy. Follow this article to learn together and master the batch cutting skills of Adobe PhotoShop CS6 to make your design work more efficient!
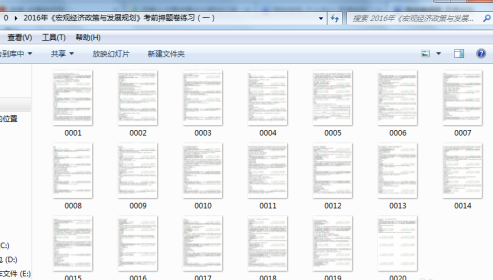
Step 1: First put all the pictures that need to be processed in a folder (as shown below), and the splicing scheme for all pictures is the same.
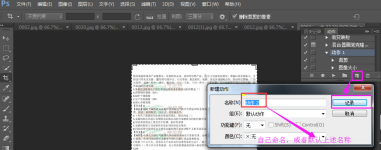
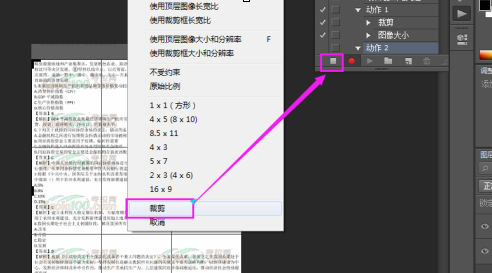
In the second step, you need to open Adobe Photoshop CS6 software and create a new action. First, click on "Create New Action" and then select the "Record" option. Then, select "Split" in the left toolbar, and finally click "Pause" to complete the settings of the new action.

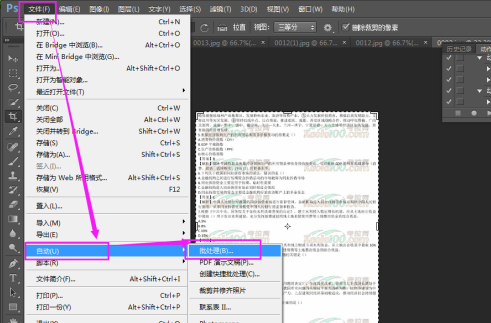
Step 3: Adobe Photoshop In the CS6 software menu bar, click "File" - "Automatic" - "Batch Processing" - "Select the name of the new action" - "Select the folder to be processed in step 1" - "Select the address to save the file after processing" ”——Click “OK”——Keep clicking “OK” to complete the batch processing
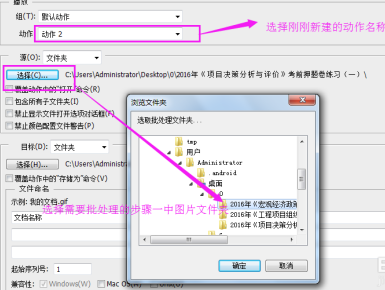
Step 4: Complete the above steps to complete the batch processing
The above is the detailed content of How to batch cut pictures in Adobe PhotoShop CS6 - How to batch cut pictures in Adobe PhotoShop CS6. For more information, please follow other related articles on the PHP Chinese website!
 What software is adobe
 How to check computer IP
 Solution to the problem that win10 download software cannot be installed
 What are the PHP visual Chinese development tools?
 The meaning of today's headline display volume
 Check disk space in linux
 How to delete elements in jquery
 Self-study for beginners in C language with zero foundation