php editor Xinyi brings a detailed guide on how to encrypt files in WPS Office. In daily use, protecting the security of important files is crucial, and WPS Office provides simple and easy file encryption functions. By setting a password, you can effectively protect your documents, forms, and presentations from unauthorized access. Next, let us take a look at how WPS Office encrypts files to ensure that your files are safe and reliable!
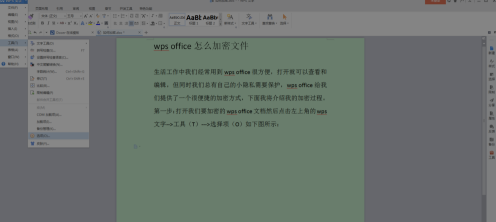
Open the wps office document we want to encrypt and click the wps text in the upper left corner-->Tools (T)--->Selection (O) as shown below:

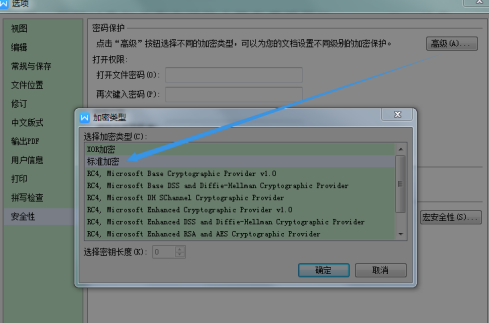
Here we can observe a pop-up option prompt box: Select "Security" --> On the right side, we see "Open Permission" and "Edit Permission", which are the opening password and editing password used for encryption. Click on the "Advanced" option in the upper right corner to use its standard encryption features, as shown in the image above.

We enter the encrypted open password and edit password we loaded. After entering, we close the document and open it again. We can see that we need to enter the open password. After entering the password, select (read-only) or Enter the editing password. Note: Select read-only to open for viewing but not for modification.

The above is the detailed content of How to encrypt files in wps office-How to encrypt files in wps office. For more information, please follow other related articles on the PHP Chinese website!
 What are the office software
 wps replacement shortcut keys
 How to clear the WPS cloud document space when it is full?
 The difference between php and js
 What to do if the documents folder pops up when the computer is turned on
 What is digital currency trading
 How to display two divs side by side
 VIVO is a brand from which country?