
Want to set the Excel table to open in "read-only mode"? no problem! PHP editor Strawberry will share with you a simple and easy-to-understand method today. By setting the protection function of the Excel file, it can be set to read-only mode when it is opened to prevent others from modifying the document. Next, let’s learn how to easily implement this setup!
We can set this mode through the "Save As" method.
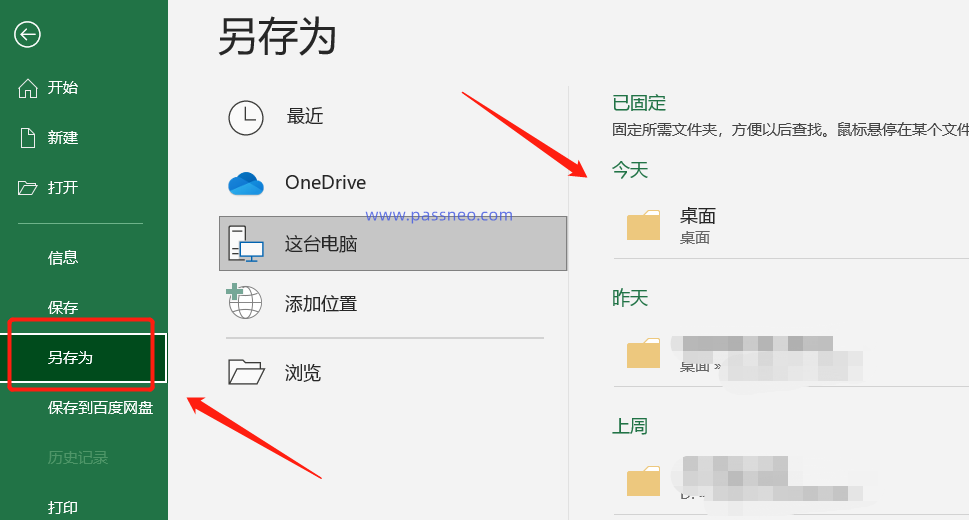
After opening the Excel table, click the [File] option in the menu bar, then click [Save As], and then select the save path on the right.
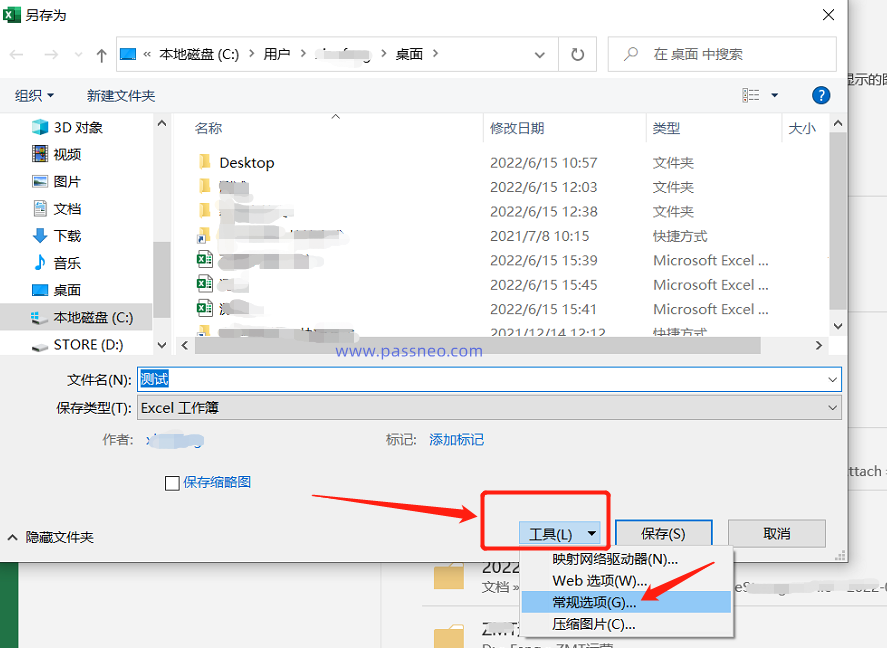
After the new page pops up, click the [General Options] option in the list under [Tools] at the bottom right.
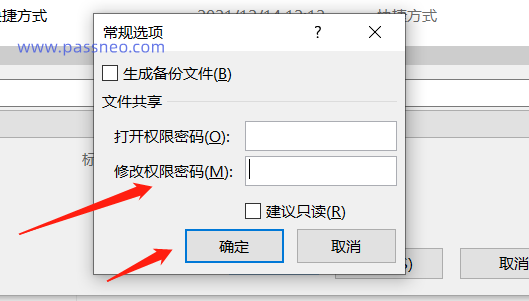
After a new page pops up again, enter the set password in the [Modify Permission Password] column, click [OK] and enter it again to save the form. The name of the table can be modified and saved as a new file; it can also be left unchanged and directly overwrite the original Excel table.
After setting, when opening the Excel table again, a dialog box will appear, prompting [Please enter the password to obtain write permission, or open it in read-only mode].
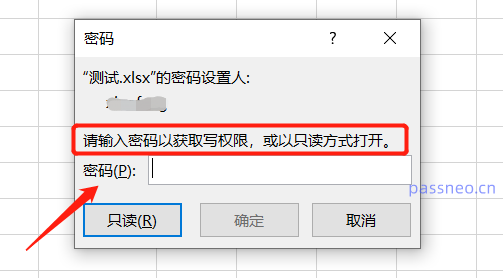
Click the [Read-only] option, and the Excel table can still be opened, but if the content is modified, a dialog box will appear when closing the file, prompting [Documents opened in read-only mode cannot be saved with the original file name]. That is to say, the original file cannot be saved, or the name needs to be changed and saved as a new file. This can prevent the original Excel table from being accidentally modified.
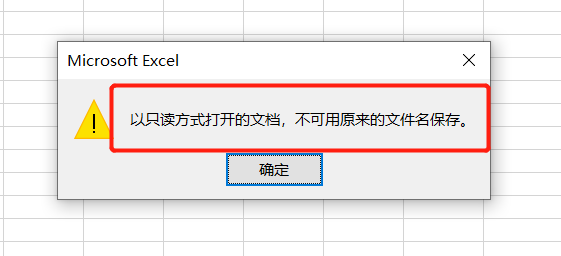
Of course, if the table is for personal use and we don’t want to use the “password input” method and want to prevent accidental modifications, we can also set the Excel table to “passwordless read-only mode”.
The method is also very simple. After opening the Excel table, click the [File] option, then click [Information]-[Protect Workbook]-[Always open as read-only].
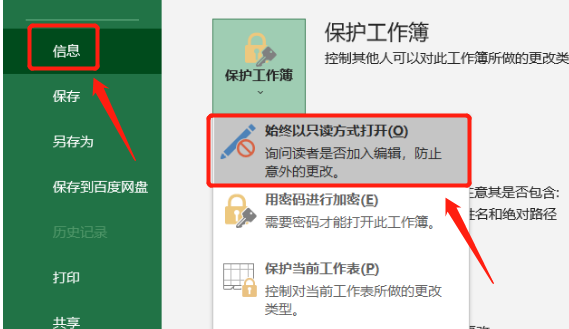
After selection, close and save the Excel table. When you open the form again, a dialog box will pop up, prompting [Do you want to open it in read-only mode]? This method does not require you to enter a password. If you want to prevent accidental modifications, select [Yes] to open it in "read-only mode".

It is no longer needed in the future, and these two modes can also be cancelled.
In the first mode, we only need to resave Excel as a new file to cancel the "read-only mode".
In the second mode, we need to open the Excel table. When you see the prompt [Do you want to open it in read-only mode], select [No], and then follow the setting process and click [File] - [Protect Workbook]. -[Always open in read-only mode], close and save the Excel table, and the "read-only mode" of the table will be released.

Of course, we can also use other tools, such as the Pepsi Niu Excel Password Recovery Tool, which can cancel the "read-only mode" of the Excel table, or remove the "restricted mode" with a password. More importantly, it can remove There is a password "restricted editing", so you don't have to worry even if you forget the "restricted password" of the Excel table!
Select the [Unrestriction] module in the tool, and then import the Excel table.
Tool link: Pepsi Niu Excel Password Recovery Tool

The above is the detailed content of How to set an Excel table to open in 'read-only mode'?. For more information, please follow other related articles on the PHP Chinese website!


