
php editor Xiaoxin will introduce you in detail how to set protection in Excel tables to prevent others from changing the table contents. By setting up password protection in simple steps, you can limit others' ability to edit your form, ensuring the security and integrity of your data. Follow our guidance and easily learn the Excel table protection function to make your data more secure and reliable!
If you need to protect a single worksheet in an Excel spreadsheet and prevent data from being copied, pasted, and edited, you can do so through the following methods:
1. Open the Excel table and click [Protect Worksheet] in the [Review] list of the menu tab;
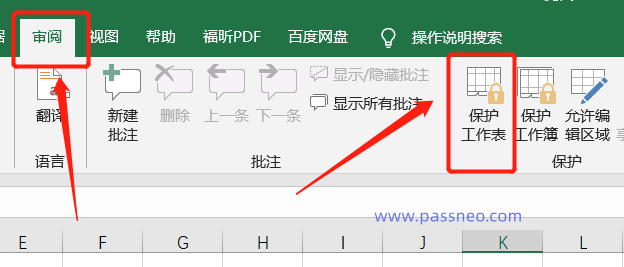
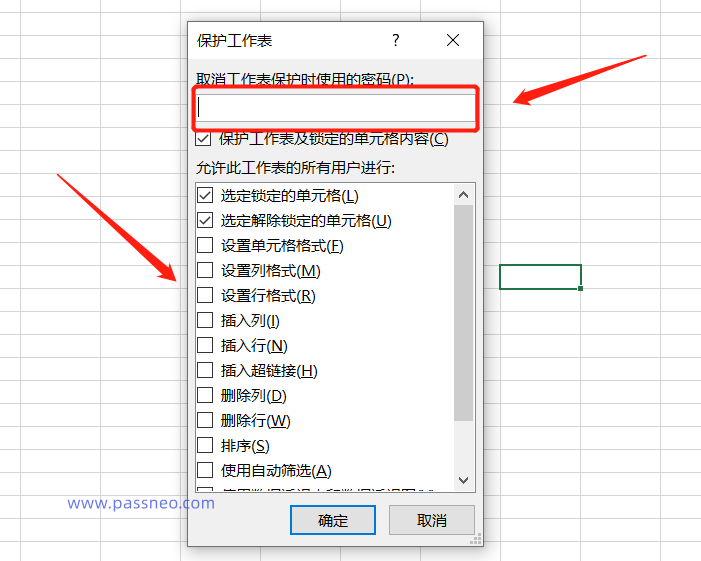
2. After the dialog box pops up, set the password in the password field, click [OK] and enter it again.
You can also check the exception items under [Allow all users of the worksheet] as needed, that is, the checked items will not be prohibited.
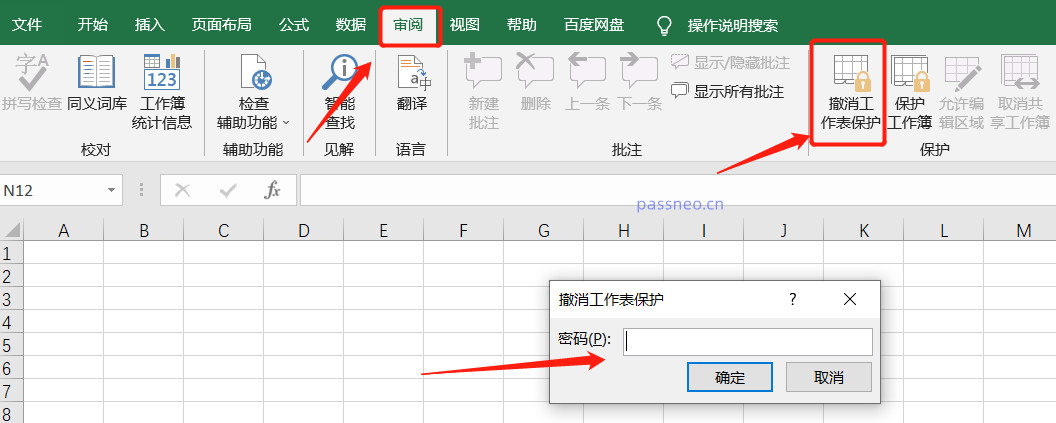
After the setting is completed, the Excel worksheet is prohibited from being changed. You can see that the corresponding editing options become gray and cannot be selected.

If you no longer need to prohibit changes, you can cancel it in Excel. Just click [Undo Worksheet Protection] in the [Review] list of the menu tab, then enter the originally set password in the pop-up dialog box, and click After [Confirmation], the restriction will be lifted.
If you want to protect an Excel workbook, that is, prohibiting operations such as moving, deleting, copying, and renaming between worksheets, which is equivalent to locking the structure of the Excel table, you can operate as follows:
Open the Excel table, click [Protect Workbook] in the [Review] list of the menu tab, after the dialog box pops up, set a password in the password field, and then click [OK].
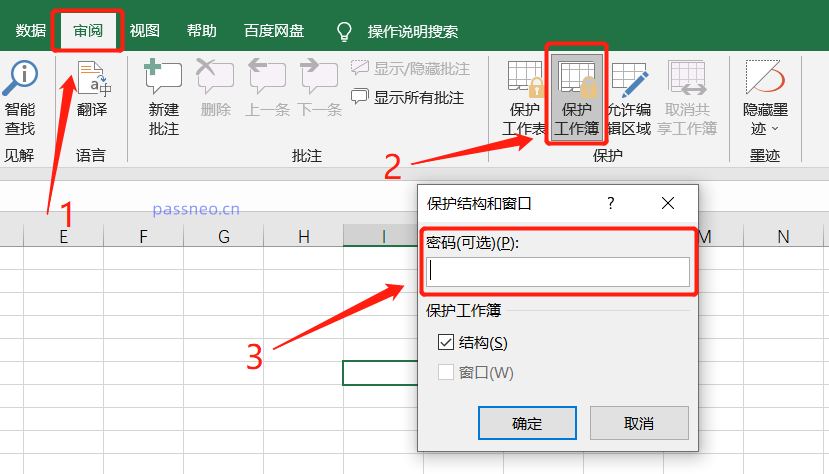
After the settings are completed, you can see that the relevant editing options of the workbook have turned gray and cannot be clicked to select.
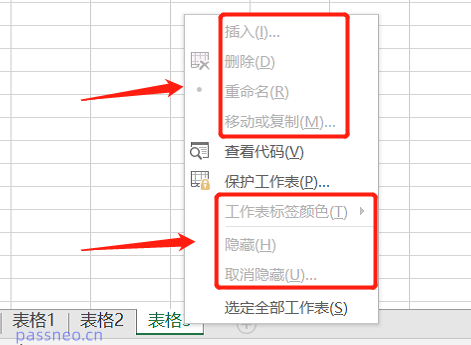
If you no longer need to prohibit changes to the Excel workbook, you can cancel it.
Just click [Protect Workbook] in the [Review] list of the menu tab in the Excel table. After the dialog box pops up, enter the originally set password and click [OK] to lift the restriction.
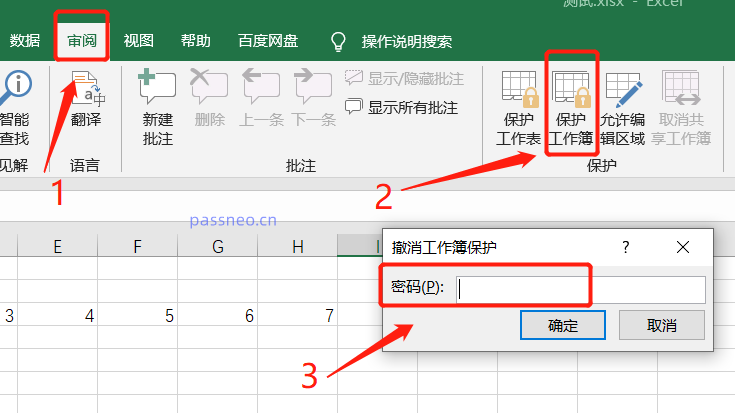
It should be noted that whether it is restricted protection of Excel worksheet or restricted protection of workbook, you need to enter the originally set password when canceling, otherwise it cannot be canceled. Therefore, when setting a password, remember to remember it or save it.
What if you accidentally forget your password? In this case, we can use Excel-related tools to solve the problem.
The above is the detailed content of How to prevent changes to Excel tables?. For more information, please follow other related articles on the PHP Chinese website!


