


Fault phenomenon:
Adding a printer according to the XP method will always prompt "Windows cannot connect to the printer and access is denied or Windows cannot connect to the printer. The local print spooler service is not running."
Cause Analysis:
The machine connected to the printer is a Windows XP system. Only the printer driver under XP is installed. This driver can only support machine sharing printing under XP/200X system and does not support Windows 7 system.
solution:
1. Click Start---Control Panel---Printers;
2. Select to add a printer;

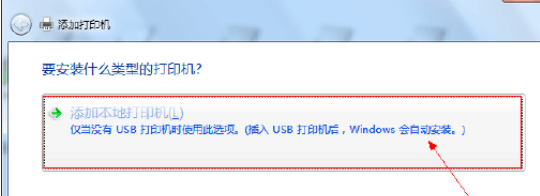
3. Select to add a local printer and click Next;
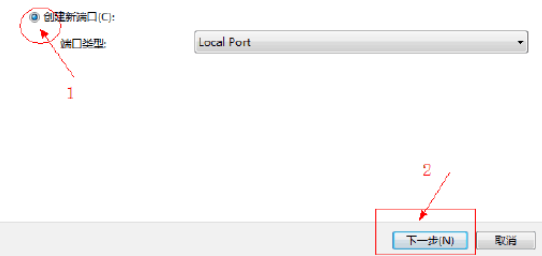
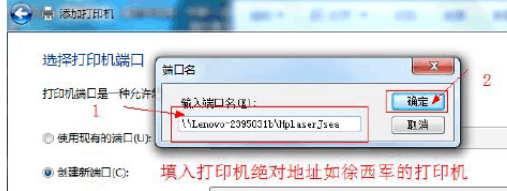
4. Select Create port, select local port, click Next, you will be prompted to enter the port name, enter the absolute path of the shared printer, the format is \*** (the computer name or IP address of the shared printer);
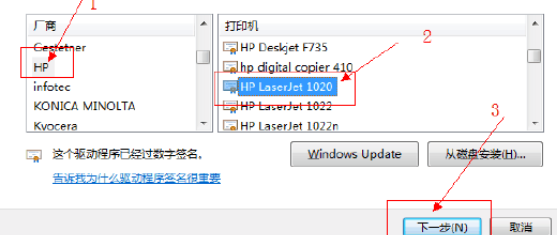
5. Select your network printer manufacturer and model, and click Next. If the printer model to be installed is not in the list, you can choose disk installation and click Browse to find the printer driver.
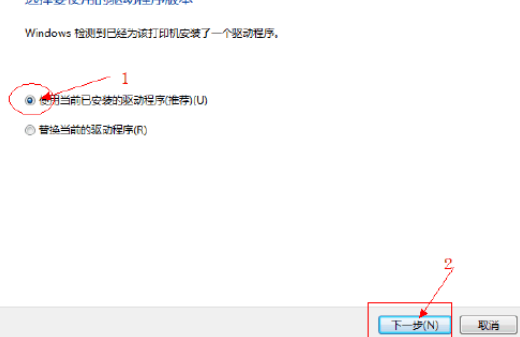
6. Select the driver version and click Next;
7. Enter the printer name and click Next;
8. If added successfully, just test printing.
1.Configure printer host
First we need to configure the printer on the host. For the time being, we call the computer directly connected to the printer a host, and other computers in the LAN that need to share printing with the host are called clients.
Step one: Connect the printer to the host, turn on the printer, go to the printer and fax folder through the host's control panel, right-click the mouse in the blank space, select the Add Printer command, and open the Add Printer Wizard window. Select the local printer connected to this computer and check the Automatically detect and install plug-and-play printers check box.
Step 2: At this time, the host will detect the new printer, and soon the connected printer will be found. Follow the prompts to put the driver CD that comes with the printer into the CD-ROM drive. After installing the printer driver , the printer icon will appear in the Printers and Faxes folder.
Step 3: Right-click the newly installed printer icon, select the share command, open the printer's properties dialog box, switch to the Sharing tab, select share this printer, and fill in the share name input box Enter the name that needs to be shared, such as HP1020Plus, and click the OK button to complete the sharing settings.
2. Configure network protocol
In order to make printer sharing smooth, we must install file and printer sharing protocols on both the host and client computers. Right-click Network Neighborhood on the desktop, select the Properties command, enter the Network Connections folder, right-click the Local Area Connection icon, select the Properties command, if Microsoft Network is not found in the This connection uses the following items list on the General tab For file and printer sharing, you need to click the Install button, select the service in the pop-up dialog box, then click Add, select File and Printer Sharing in the Select Network Service window, and finally click the OK button to complete. 3.
Client installation and configuration
Now that we have completed all the work on the host, we will configure the client that needs to share the printer. We assume that the client computer is also a WindowsXP operating system. Each computer on the network that wants to use a shared printer must install a print driver.
Step one: Click Start→Settings→Printers and Faxes, start the Add Printer Wizard, and select the network printer option.
Step 2: There are several ways to add a network printer on the designated printer page. If you do not know the specific path of the network printer, you can choose to browse the printer selection to find the printer shared in the same workgroup of the LAN. On the computer where the printer has been installed, select the printer and click the OK button;
You can also install it through Network Places. Method: Right-click on the desktop Network Places--Search Computer---Enter the computer name or IP address of the print server in the computer name on the left--then click Search to find the computer to print. After opening the server, right-click on the shared printing icon and click Connect.
Step 3: At this time, the system will ask you to enter the printer name again. After entering, click the Next button, and then press the Finish button. If the host has set a shared password, enter the password here. Finally, we can see that the icon of the shared printer has appeared in the printer and fax folder of the client.
At this point our network printer has been installed
★Attention, please check whether the firewall in your system control panel has been turned off? Or if there is a third-party firewall installed in the system, you can turn off the firewall, or set the security of the firewall to medium or low. For example, for Rising, you can set it to low.
Just complete the following steps on the computer that cannot be accessed:
1. Firewall blocking: You can turn off the system and third-party firewall software or reduce the security of the firewall.
2. Enable the system guest account: Right-click My Computer on the desktop, click Manage, then click Local Users and Groups, and then double-click the user inside. You can see the guest account on it. Right click, select properties, and remove the check mark before the account is deactivated.
3. Modify user access policy
Click Start → Run, enter gpedit.msc in the run box, expand Local Computer Policy → Computer Configuration → Windows Settings → Security Settings → Local Policy → User Rights Assignment in the Group Policy window, and find it in the right column Deny access to this computer from the network, open it and delete the Guest account: Then open the Access this computer from the network item, and add the Guest account in the properties window. In this way, you can use the Guest account to access the shared resources of the machine from the network. This method is suitable for Windows2000/XP/2003 systems.
4. If the accessed computer sets a password, please delete the password and try again. 5. If the above settings are not successful, please try restarting the router or switch.
The above is the detailed content of How to solve the access denied problem of Windows 7 unable to connect to XP network printer. For more information, please follow other related articles on the PHP Chinese website!


![[Web front-end] Node.js quick start](https://img.php.cn/upload/course/000/000/067/662b5d34ba7c0227.png)


