
In the process of operating the win7 system, it is inevitable that we want to put some software shortcuts on the desktop. Generally, this can be achieved by selecting the right-click menu to send to the desktop shortcut. However, some users have encountered the problem of win7 right-clicking and sending. How to restore it when it is blank? Many win7 users don’t know how to solve it? For this reason, the editor has brought you a solution to the problem that the "Send to" menu in the right-click menu of win7 has disappeared.
Win7 system has become a good partner for many classmates and friends around me in life, study and work. So there are many users using the win7 system, but there will always be system failures in the system. This is not the case for some users. When they right-click the mouse, the "Send to" menu in the right-click menu disappears. What should I do? ? Next, the editor will share with you the solution to the problem that the "Send to" menu in the right-click menu of win7 has disappeared.
Win7 right click and send to blank
Method 1: Registration method
This problem is usually caused by a system error or the installation of other software,
The "Send to" item in the registry is gone, so there is no "Send to" item in the right-click menu. The solution is to enter the registry. Start->Run->Enter regedit command.
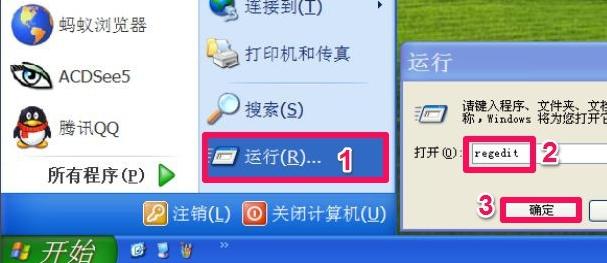
Right-click to send picture-1
After entering the registry editor window, select the "HKEY_CLASSES_ROOT" item .
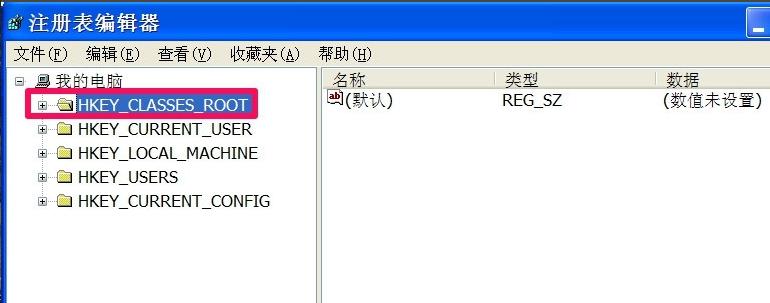
The menu is missing Figure-2
Then press the HKEY_CLASSES_ROOT\AllFilesystemObjects\shellex\ContextMenuHandlers\SendTo path and select Send To item, if there is no Send To item, right click on the ContextMenuHandlers item -> New -> Item. Then change the name of "New Item

Send to Figure-3
If there is a Send To item, or after creating a new item , right click on this item -> New -> String value.

Send to Figure-4
Double-click on "Default" on the right, in the edit string window , enter {7BA4C740-9E81-11CF-99D3-00AA004AE837} in the edit box of the data value, and then press "OK".
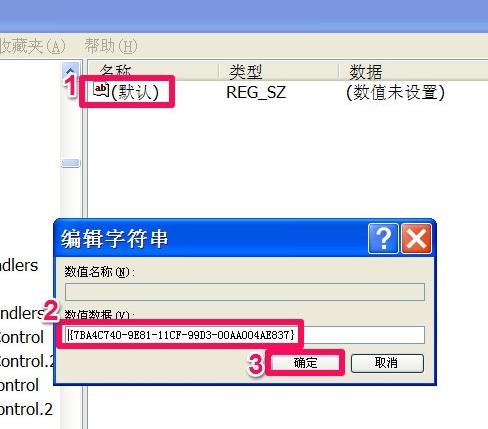
The menu is missing as shown in Figure-5
After modification, select ""Refresh"" under the View menu, Refresh the registry,
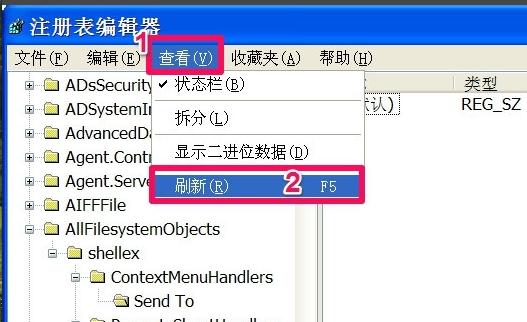
Send to Figure-6
Click "Send to" in the right-click menu Recovered.
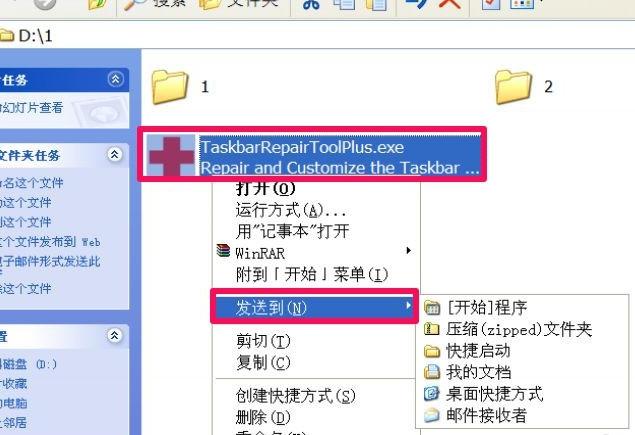
Right click to send picture-7
Method 2: Command method
Use the command method to fix this "Send to" menu. First open the running program, enter the cmd command, and open the command prompt window.

Right-click to send picture-8
In the command prompt window, enter reg add"HKEY_CLASSES_ROOT\AllFilesystemObjects\shellex\ContextMenuHandlers\Send To"/ve /d "{7BA4C740-9E81-11CF-99D3-00AA004AE837}" /t REG_SZ /fFor this command, it is best to copy it directly and paste it into the command prompt window.
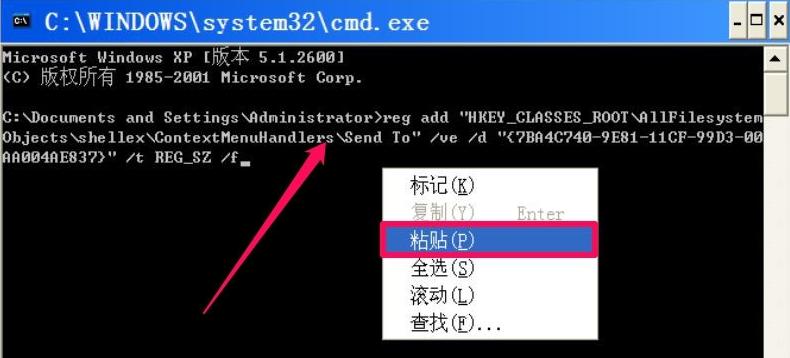
win7Figure-9
Then press Enter to execute this command, and there will be a successful operation prompt.
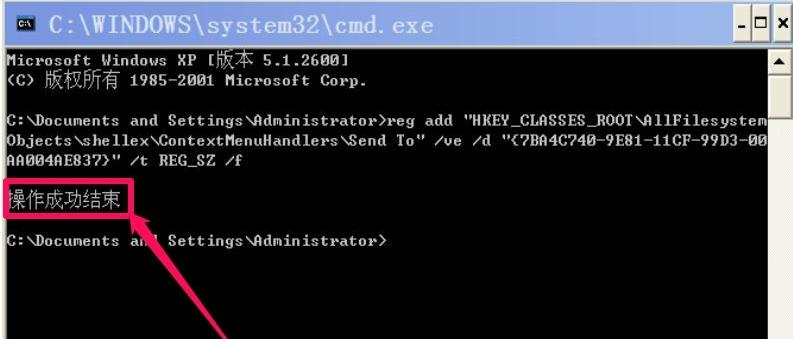
Right-click to send picture-10
The above is the "Send to" menu in the right-click menu of win7. The solution is there.
The above is the detailed content of How to restore the 'Send To' menu in the right-click menu of Windows 7. For more information, please follow other related articles on the PHP Chinese website!
 How to create virtual wifi in win7
 How to change file type in win7
 How to set up hibernation in Win7 system
 How to open Windows 7 Explorer
 How to solve the problem of not being able to create a new folder in Win7
 Solution to Win7 folder properties not sharing tab page
 Win7 prompts that application data cannot be accessed. Solution
 The difference between win7 32-bit and 64-bit


