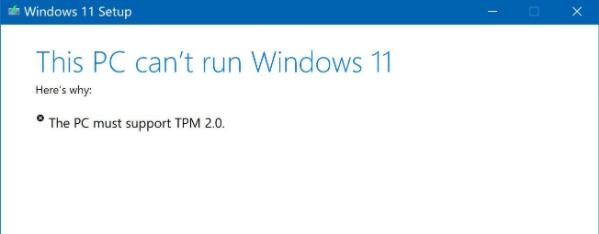
How to deal with non-compliance with requirements when installing Windows 11? How to solve unusual problems during the installation of Win11? Recently, many users have found that their computers cannot be installed smoothly when using the Win11 operating system. And there are situations where the installation requirements are not up to standard, for which we have also provided corresponding solutions.
Method 1: DirectX12
1. First, please press the "win r" shortcut key on the keyboard to enter the run dialog window. Then enter "dxdiag" in this dialog box and hit the Enter key to confirm the input.
2. In the interface that appears, click the "Display" tab at the top of the interface, and then check whether the driver model on the right part meets the required standards.

1. In the first step, please restart the computer to ensure that all processes are closed, and then Follow the prompts and use the hotkey to enter the "bios" setting page.
2. Next, look for the "boot options" menu entry under the "system configuration" directory and enter it.
3. After going through the above steps, you will see "Secure Boot". Without hesitation, select it directly and adjust it to the "enabled" state.
4. Finally, just press the "F10" button to save the current settings, and select the "Yes" option in the pop-up window to complete the settings. After restarting your computer, you will find that the Secure Boot issue has been properly resolved.
Method 3: TPM2.0
1. First, you need to enter "Device Manager" in the search bar and turn on this function.
2. Then expand the "Security Device" branch in the Device Manager. You can quickly check whether you have a TMP2.0 device through this path.
3. If you have a TMP2.0 device, congratulations, just follow the previous method to enter the "bios" setting page.
4. Next, you need to click "Settings">"Security">"Trusted Computing".
5. Next, in Secure Trusted Computing Next, check the Security Device Support option and switch the AMD fTPM switch to AMD CPU fTPM mode.

Method 4: GPT partition
1. First, Right-click "This PC" and select "Manage".
2. In the disk management page, find your C drive and right-click to enter "Properties".
3. After completing the above steps, select your disk and click "Properties" in the lower right corner.
4. In the displayed page, click the "Write" option on the left.
5. After the write operation is successfully performed, you will find that your disk partition has been updated to the "GPT" format.
The above is the detailed content of How to deal with the problem of non-compliance with win11 installation requirements. For more information, please follow other related articles on the PHP Chinese website!


