If you are using Hyper-V to run virtual machines on a Windows 11 machine, you may need to change the display resolution of one or both VMs.
In this guide, we'll cover simple methods and step-by-step instructions to adjust and optimize display resolution in a Hyper-V environment.
How to adjust screen resolution in Hyper-V?
Before moving on to the detailed steps to change Hyper-V screen resolution on Windows 11, make sure to complete the following checks for smoother operation:
- Make sure you are using the administrator Account login.
- Make sure the graphics driver is updated.
- Back up important data in the VM.
- Make sure Hyper-V is enabled.
1. Setup with Hyper-V
First, we will enable enhanced session mode; to do this, follow the steps below.
- Press the key, type hyper-v manager, and then click Open. Windows
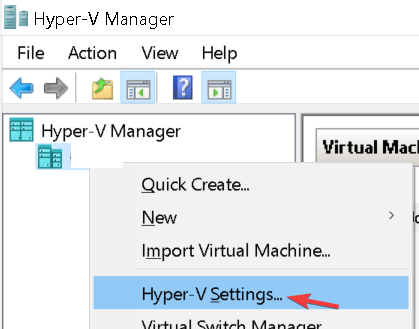
- In the Hyper-V Manager window, locate Hyper-V Settings from the right pane.

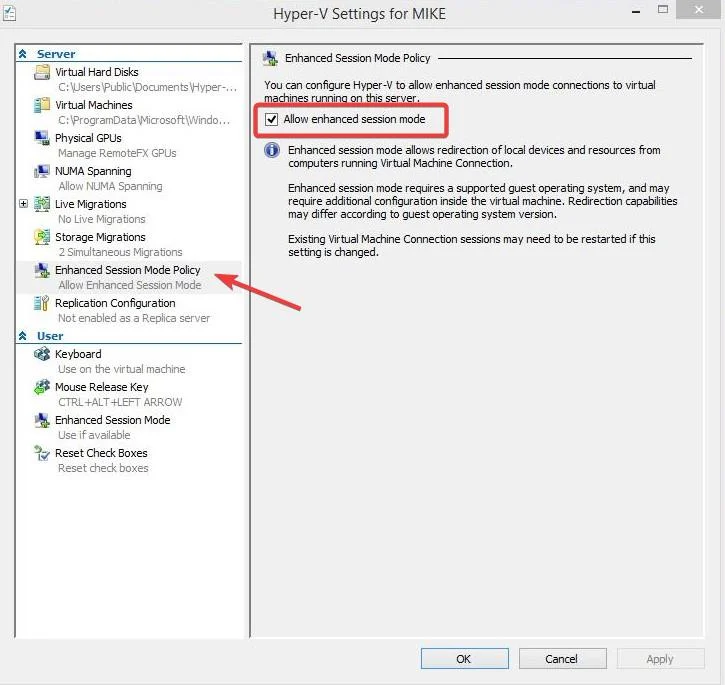
- Click the Enhanced Session Mode policy in the left pane and select Allow enhanced session mode.

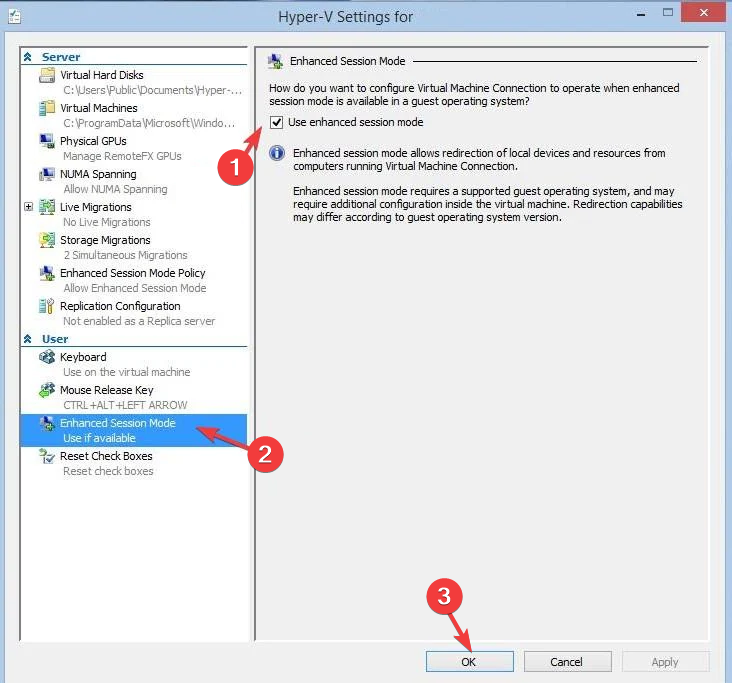
- Next, place a checkmark next to Use enhanced session mode and click OK.

Now we will adjust the display resolution; to do this, follow these steps:
- Right-click on the virtual machine and select Settings.
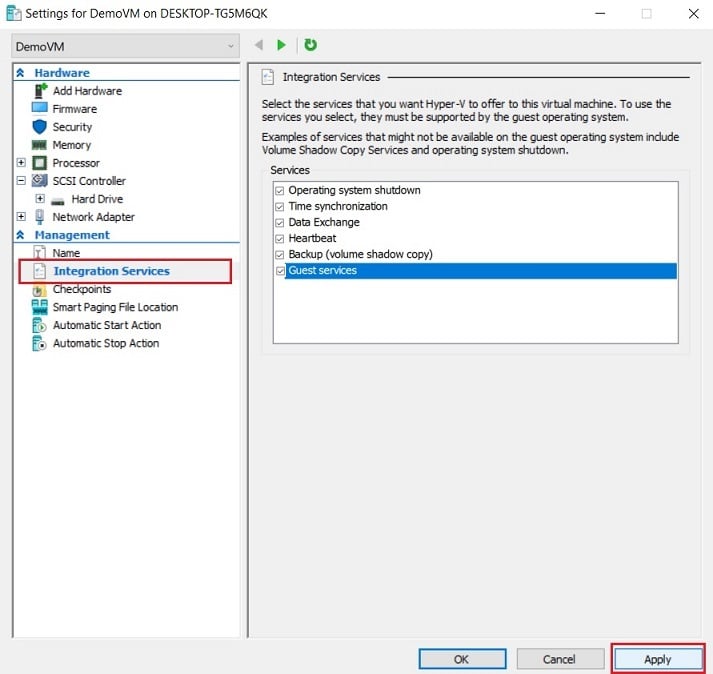
- Go to "Integrated Services" and make sure all services in the right pane are selected. If not selected, select them all and click Apply. .

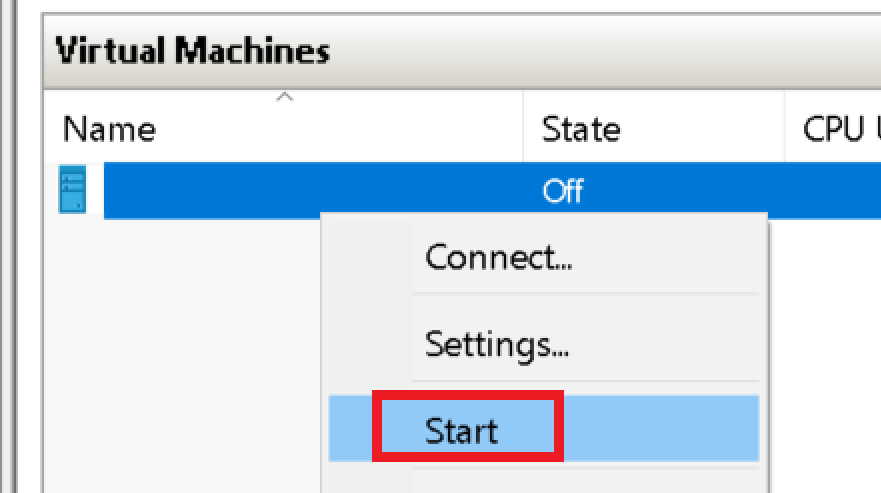
- Next, right-click on the Hyper-V virtual machine and select Start.

- You will see the VMconnect dialog; you can drag the slider to configure the resolution you want for your monitor, then click Connect.
- After launching, find View from the toolbar and select Full Screen Mode.
If you are unable to connect to your virtual machine after making changes, read this guide for a quick solution.
2. Using Windows PowerShell and the Settings
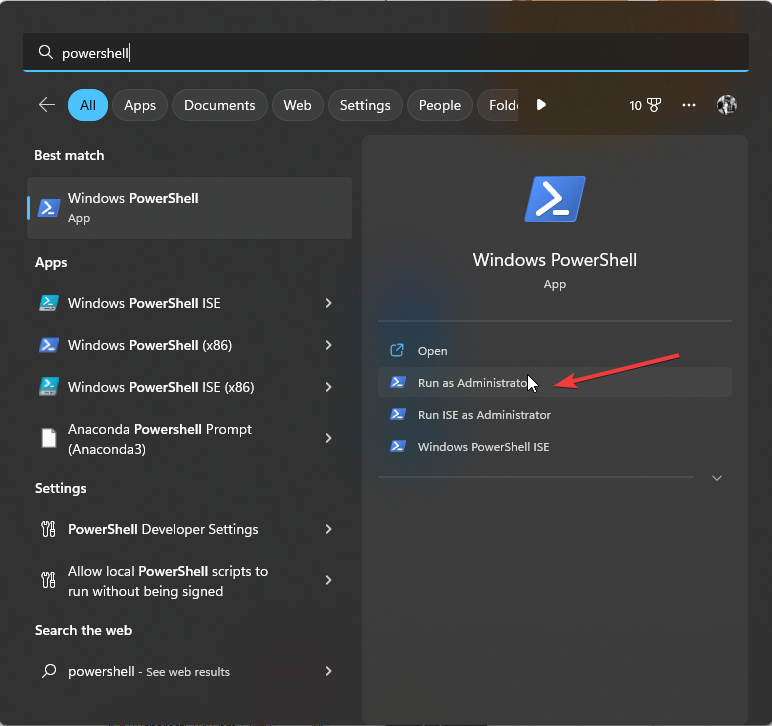
- key, type PowerShell and click Run as administrator. Windows

- Copy and paste the following command to know the status of Hyper-V Enhanced Session Mode for all users and click: Enter
<strong>Get-VMHost | fl -Property EnableEnhancedSessionMode</strong>
- If the status is false, it means that the mode is disabled. To enable it, type the following command and click: Enter
<strong>Set-VMhost -EnableEnhancedSessionMode $True</strong>
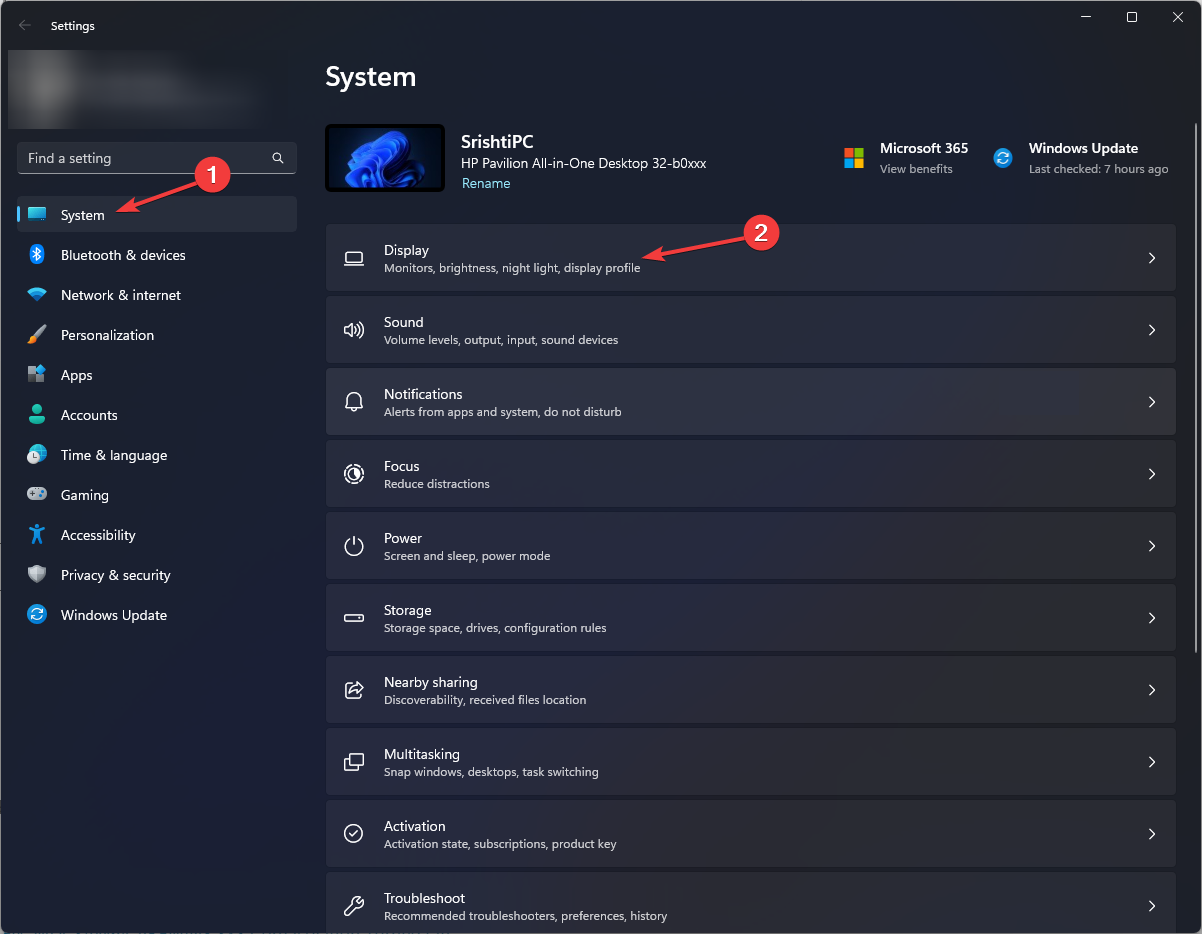
- Close the PowerShell window. Press to open the "Settings" app. WindowsI
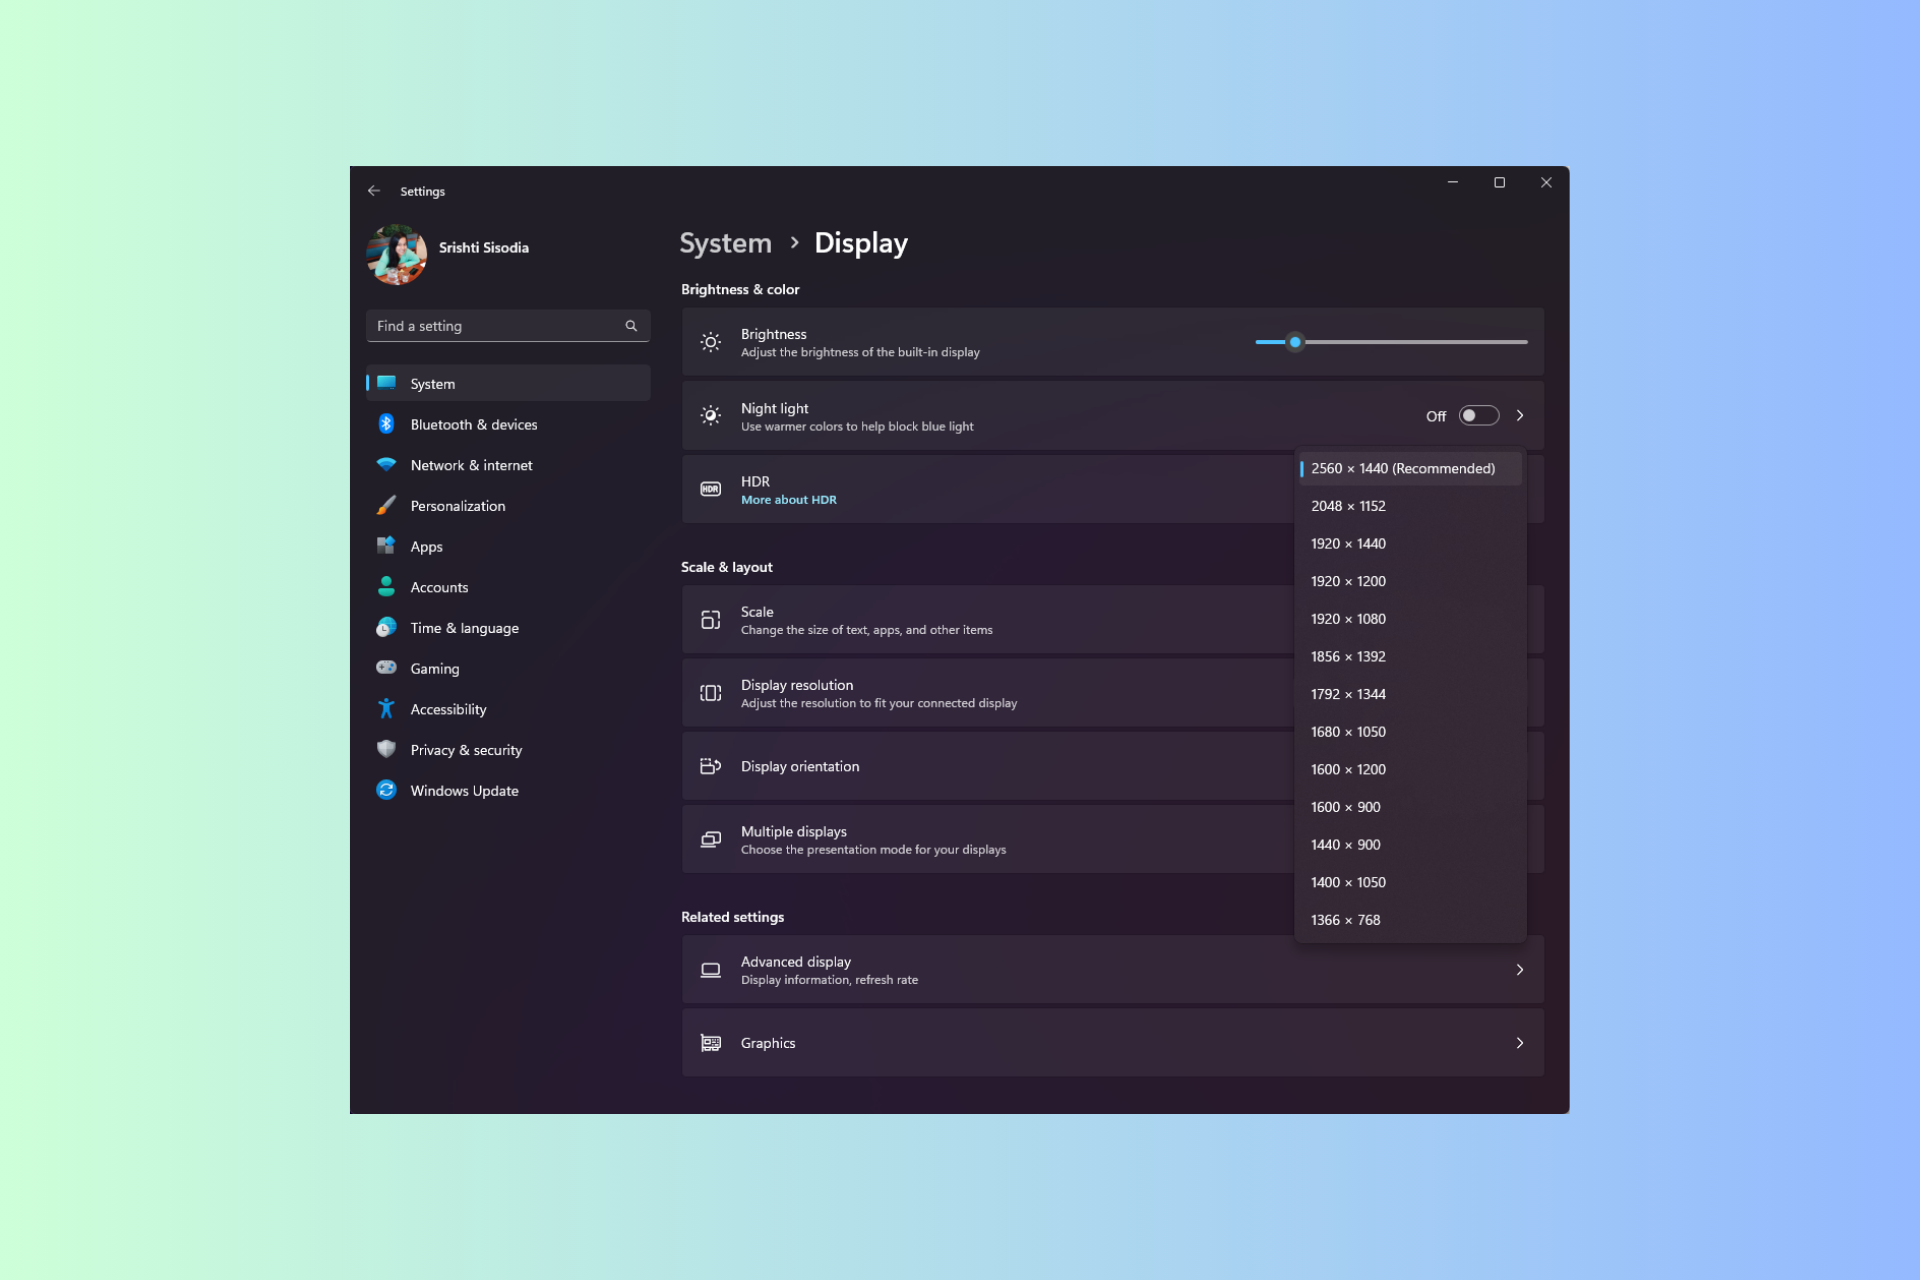
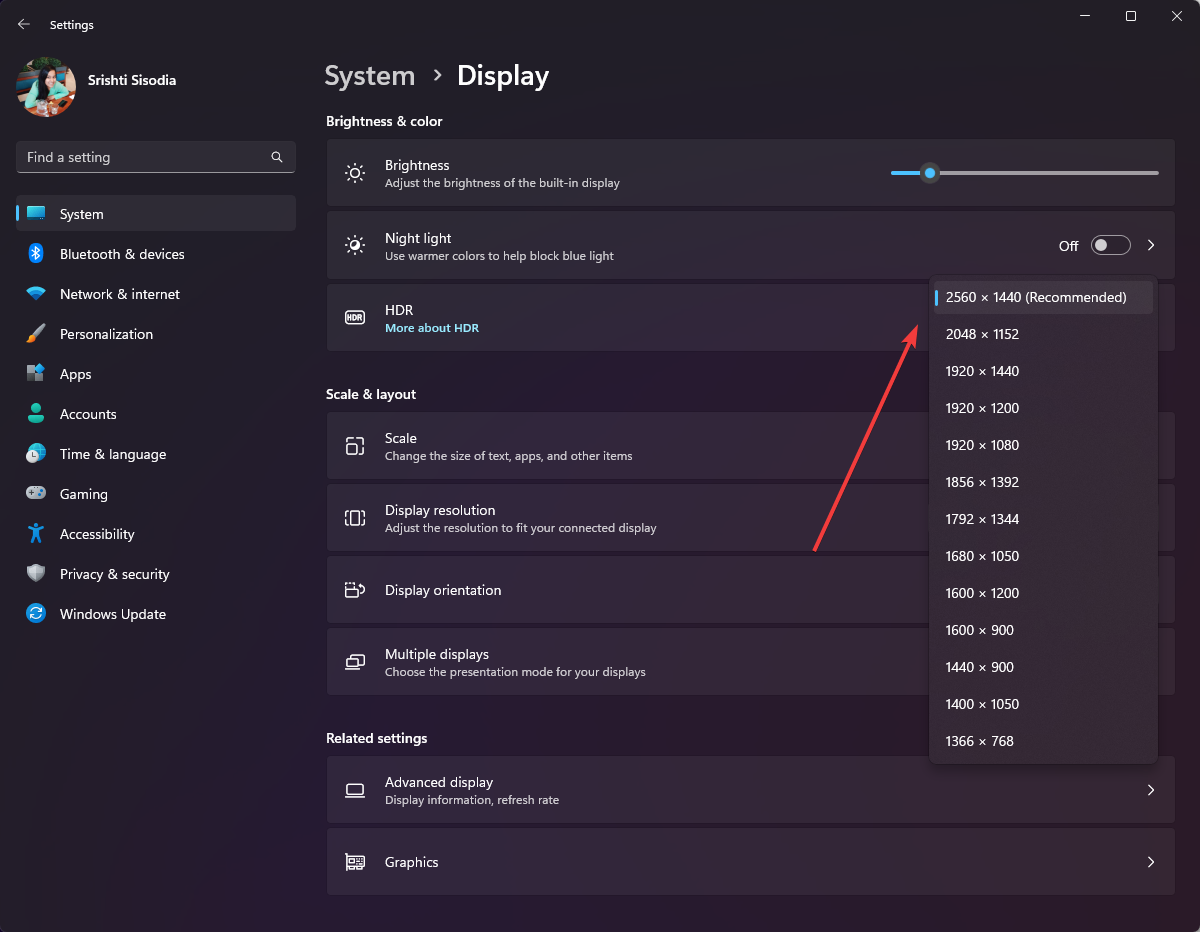
- Go to System, then Display.

- Find the display resolution setting and click the drop-down menu next to it; you will get options such as 1920 * 1200, 1920 * 1080, and 1600 * 1200. You can choose any of them or choose the default screen resolution option for optimal output.

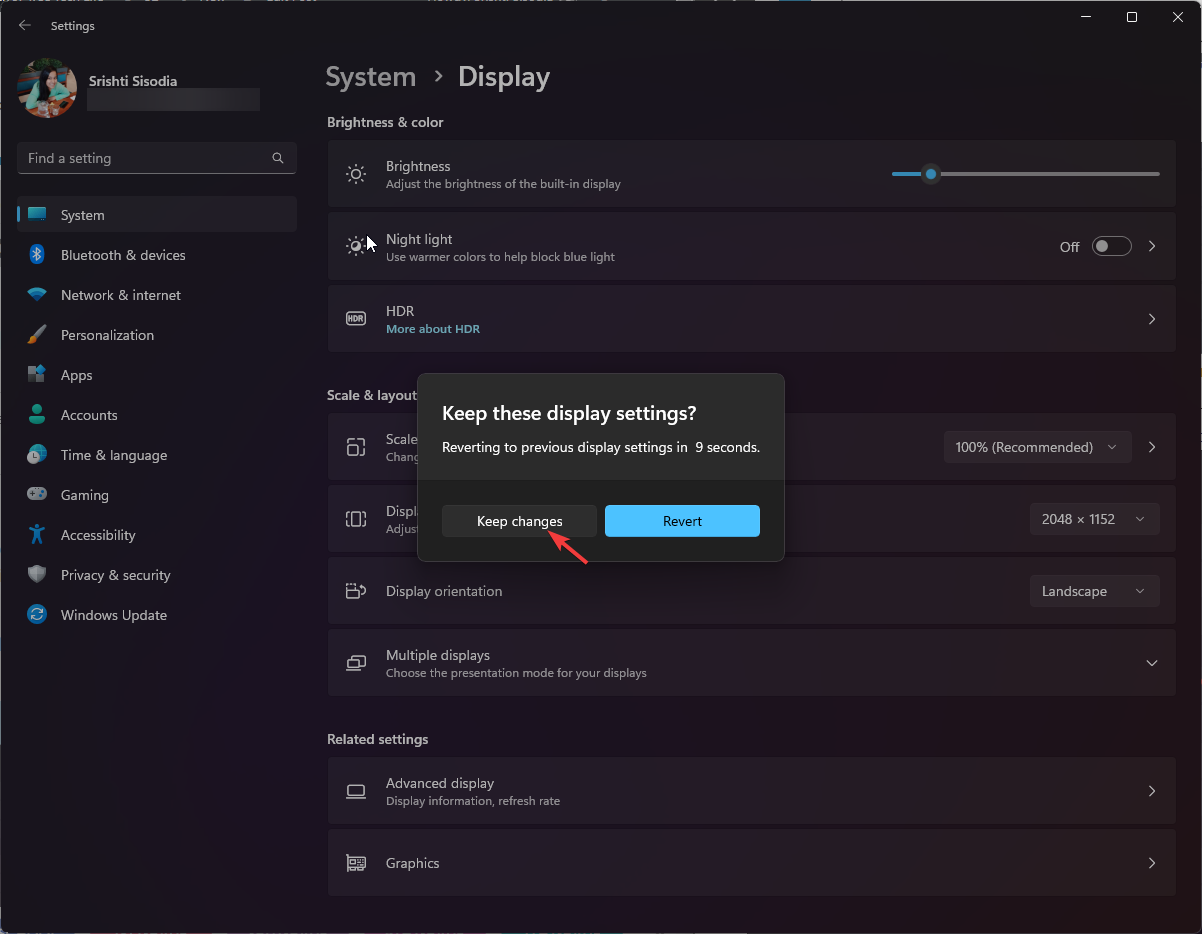
- Click Keep Changes to confirm your choice.

Why can't I resize the Hyper-V console screen?
- Enhanced session mode is turned off.
- Windows Professional or higher is not available on the guest operating system.
- The integration service is not installed or is out of date.
- The host does not support the required display settings, including resolution and aspect ratio.
Personalized displays with optimized visuals improve productivity and a better user experience, making interactions in Hyper-V VMs more effective.
The above is the detailed content of Windows 11 Guide: How to adjust the display resolution in Hyper-V. For more information, please follow other related articles on the PHP Chinese website!

