
monorepo is a single repository with multiple related services, projects and components that can be used by different teams It to store code for related or unrelated projects. The word monorepo is derived from mono, which means single, and repo, which is the abbreviation of repository.
Here are some of the major benefits of using monorepo :
Each tool offers specific benefits and features, so the choice depends on your project's requirements and preferences.
Lerna is a tool designed for managing repositories containing multiple npm packages. It simplifies the process of handling dependencies, publishing and publishing packages across multiple package repositories within a single git repository. Lerna is particularly useful for monorepo as it enables efficient code sharing and collaboration between developers working on different npm packages in the same repository. It improves development lifecycle management by allowing developers to treat projects with multiple packages as a single entity.
npm -v.
#We are creating a single repository that includes the payment services used by the backend server. In addition, the backend server and payment service will share the log service.
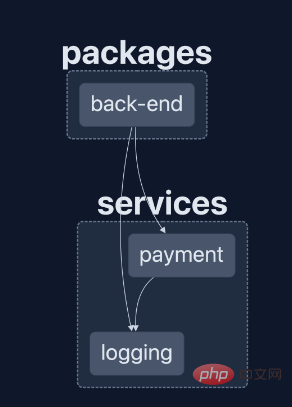
Now let’s dive into implementing Monorepo using Lerna.
Navigate to the root directory of the project and initialize Lerna:
mkdir monorepo # create a repo directory of the monorepo
cd monorepo
npx lerna@latest init # initalize the repo
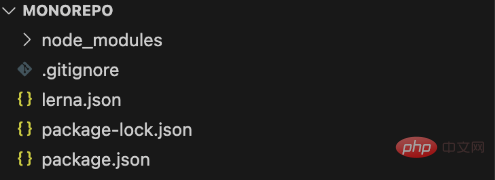
The npx command above will create a new Lerna-managed repository. lerna.json: The configuration file contains settings for Lerna behavior, such as version control mode, package location, etc.
package.json : The root package.json file for the entire repository.
git config user.name ${username}
git config user.email ${email}Make sure you are in the root folder of your project middle.
Lerna command for creating package: npx lerna create #{packageName} #{directory}
here , the directory is the default: packages
npx lerna create back-end
//or
//this will skip the questionnaire related to package
npx lerna create back-end -y
上面的命令,不带-y 会提示你各种问题,比如覆盖包名、添加描述等等。但是,这些详细信息对于本示例来说并不重要,因此请按“Enter”键。
运行后,包后端将如下所示:
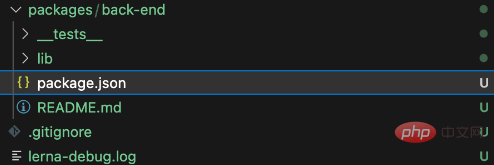
再次执行相同的过程,但指定要创建的服务的目录,因为我们希望包位于该"services/"目录中。
In the root package.json file you must also tell Lerna about the package in the directory services/. Editpackage.jsonWorkspace configuration and add"services/*" into it. The configuration should look similar to the following:
Main package.json## at the root level # file, you must tell Lerna about the packages in the services/ directory. Modify workspace configurationpackage.json and include "services/*" . The configuration should look like this:
在该目录中,通过简单的配置使用 Bunyan 库 在日志服务中安装 Buyan 库,并将 Mocha 作为开发依赖项安装在根目录中,以测试所有服务。 替换日志功能文件的内容 The payment service has a function called In the 我们将使用基本的 GET API 配置服务器,该 API 利用记录器和支付服务。此设置将有助于付款和记录相应的活动。
Create a backend server, payment service and logs The monorepo of logging services highlights the benefits of a unified development approach. This setup promotes efficient code management and sharing by consolidating related components into a single repository. Integrating logging services into payment services and backend servers demonstrates the power of code reusability and consistent logging practices across services. #Adopting a monorepo architecture will lead to an organized and collaborative development environment. Modularization simplifies development, improves efficiency and long-term maintenance. It provides a solid foundation for complex applications, with transparent communication, code reusability and effective testing. The above is the detailed content of Play with Lerna to help you easily build Monorepo. For more information, please follow other related articles on the PHP Chinese website!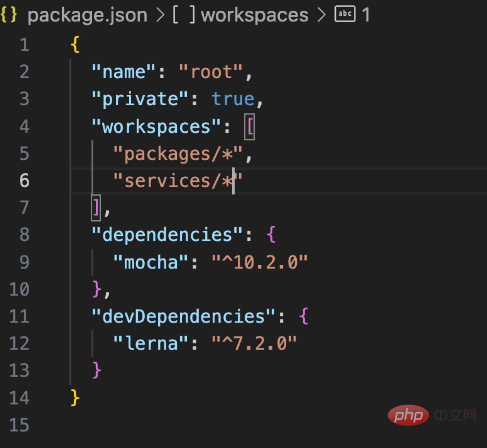 ##
##npx lerna create payment services -y
npx lerna create logging services -y
第 4 步:设置日志服务
services/logging设置日志记录服务。// root folder install test dependencies
npm install mocha --save-dev
//inside logging
cd services/logging
npm install bunyan
services/logging/lib/logging.jsconst bunyan = require('bunyan');
const logger = bunyan.createLogger({
name: 'my-logging-service',
level: 'info',
});
module.exports = logger;services/logging/__tests__/logging.test.jsconst loggingService = require('../lib/logging'); // Import the logging service
describe('Logging Service', () => {
it('should log messages', () => {
loggingService.info('Test log message');
});
});"test": "mocha ./__tests__/logging.test.js"
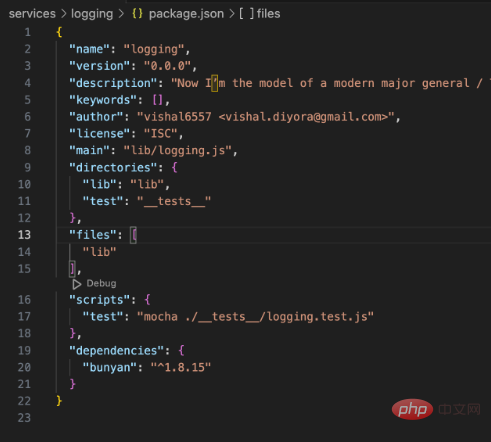
npx lerna run test --scope="logging"
Step 5: Set up the payment service
makePayment, which accepts a single parameter as an amount and utilizes a logger service to log the activity. services/payment directory, and set up payment services through simple functions. npm i在services/payment目录中运行进行安装。"scripts": {
"test": "mocha ./__tests__/payment.test.js"
},
"dependencies": {
"logging": "file:../logging"
}package.json应该如图片所示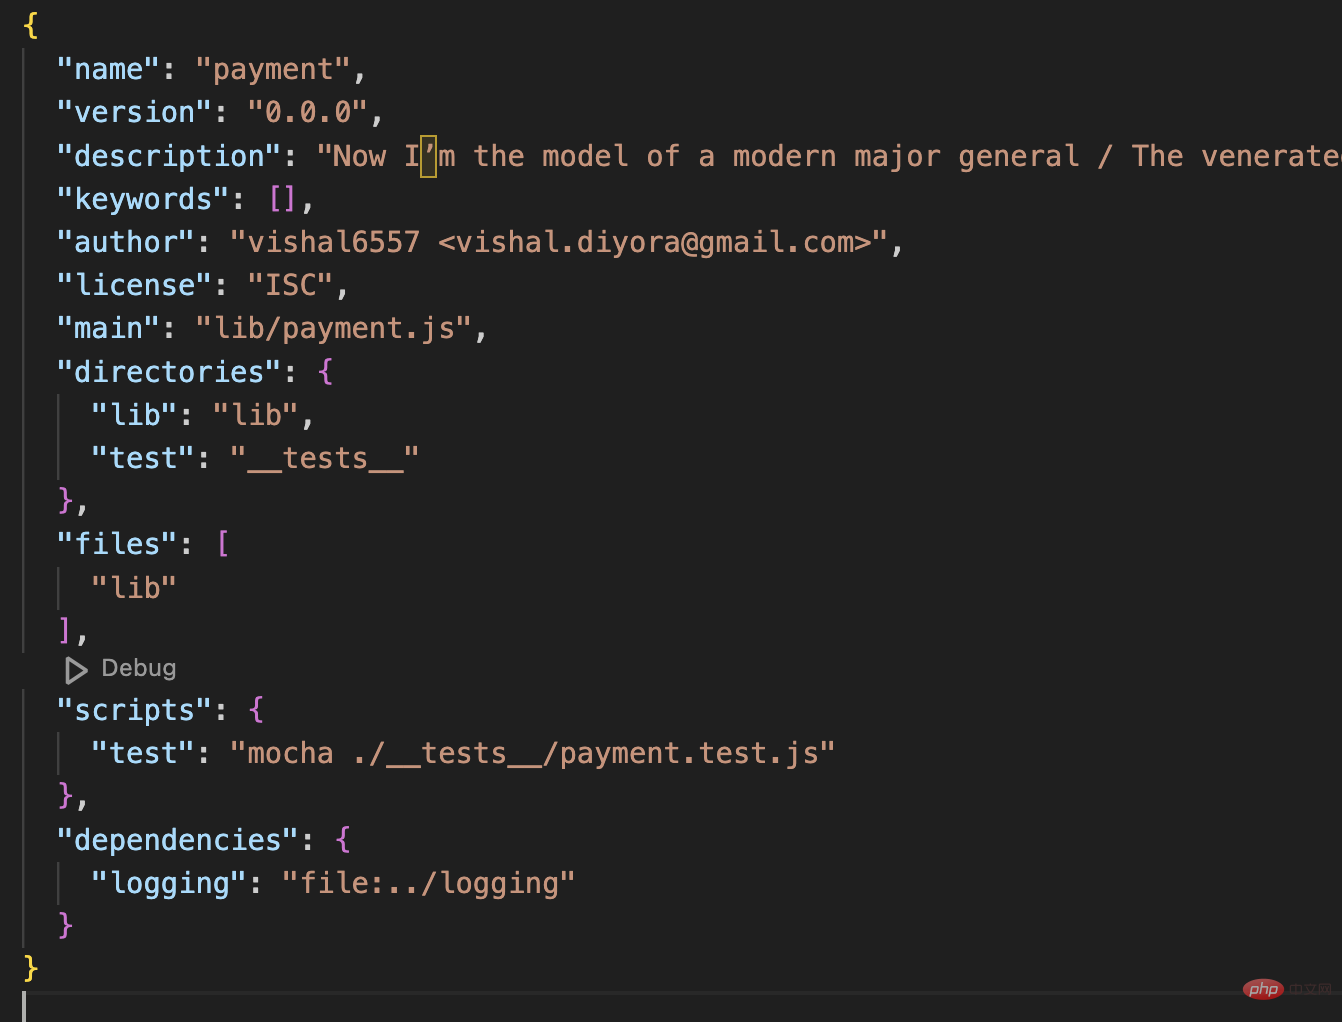
services/payment/lib/payment.jsconst loggingService = require('logging');
const paymentService = {
makePayment: (amount) => {
loggingService.info('Payment processing initiated');
// Implement payment logic here
loggingService.info('Payment processed successfully');
return `Payment of ${amount} processed successfully`;
},
};
module.exports = paymentService;makePayment支付服务功能测试用例。services/payment/__tests__/payment.test.jsconst chai = require('chai');
const paymentService = require('../lib/payment'); // Import the payment service
const expect = chai.expect;
describe('Payment Service', () => {
it('should make a payment successfully', () => {
const paymentResult = paymentService.makePayment(100);
expect(paymentResult).to.equal('Payment of 100 processed successfully');
});
});npx lerna run test --scope="payment"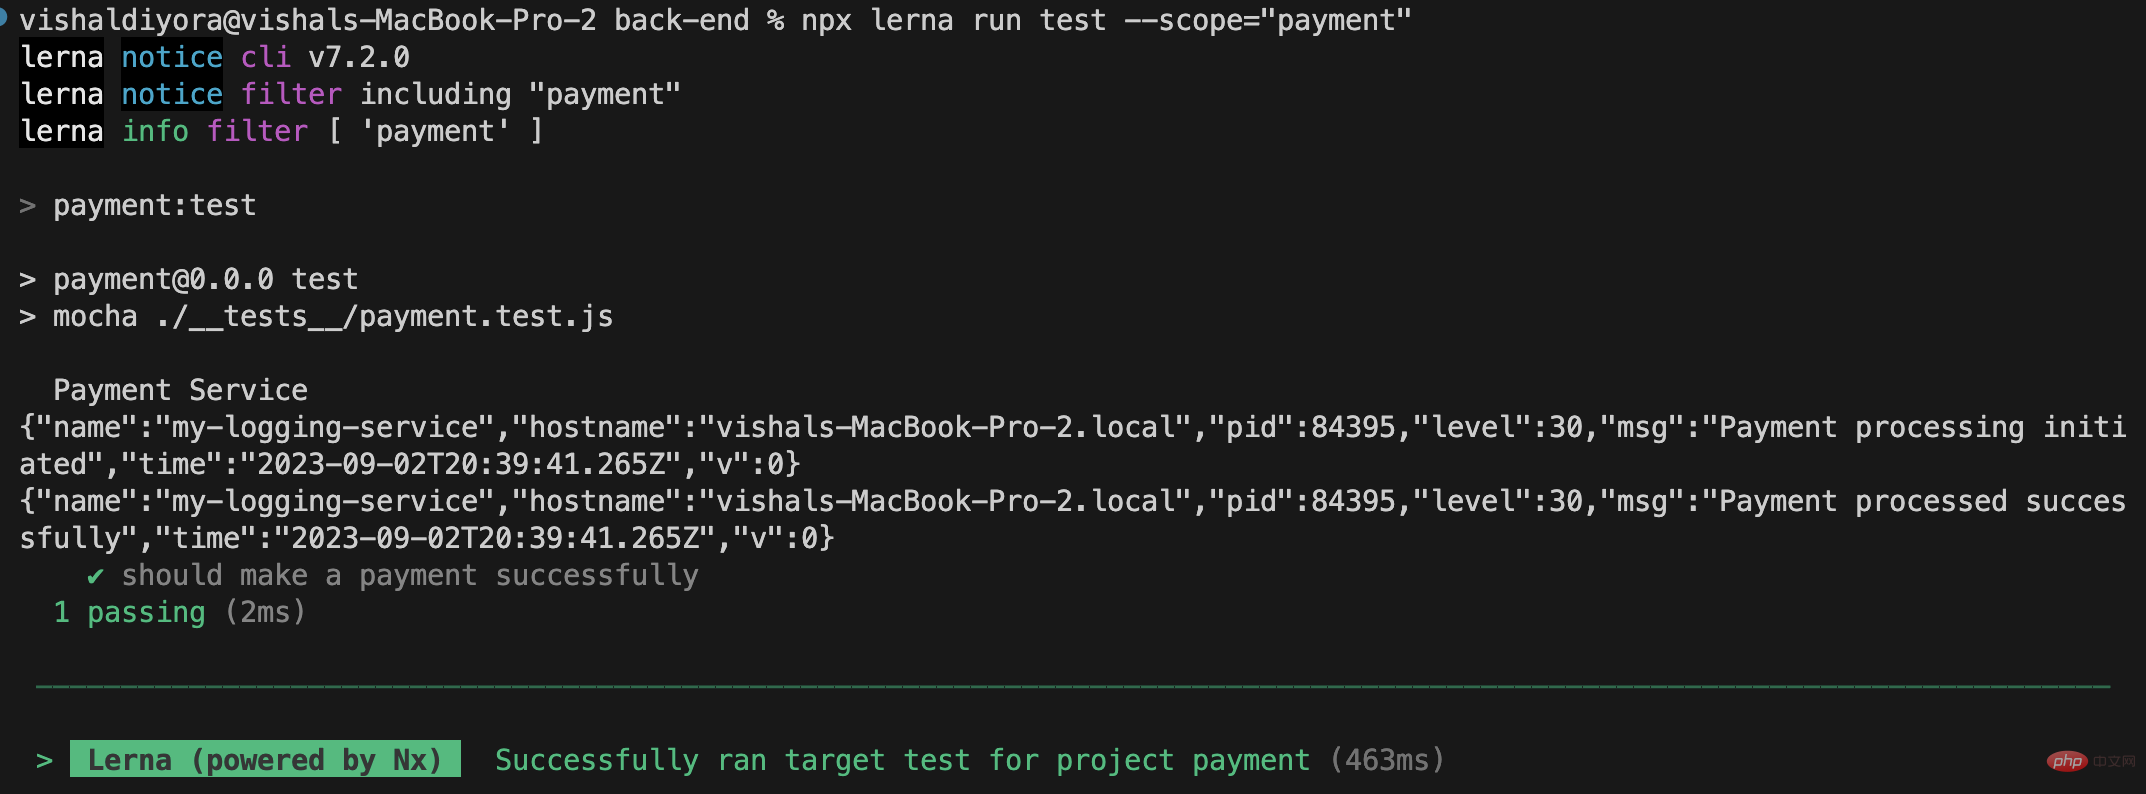
第 6 步:设置后端服务器
//from root
cd packages/back-end
npm install express
packages/back-end/lib/back-end.jspackage.jsonof的依赖项中添加以下代码片段packages/back-end "logging": "file:../services/logging",
"payment": "file:../services/payment"
"scripts": {
    "start": "node ./lib/back-end.js",
    "test": "mocha ./__tests__/back-end.test.js --exit"
}package.json应该如所附图片所示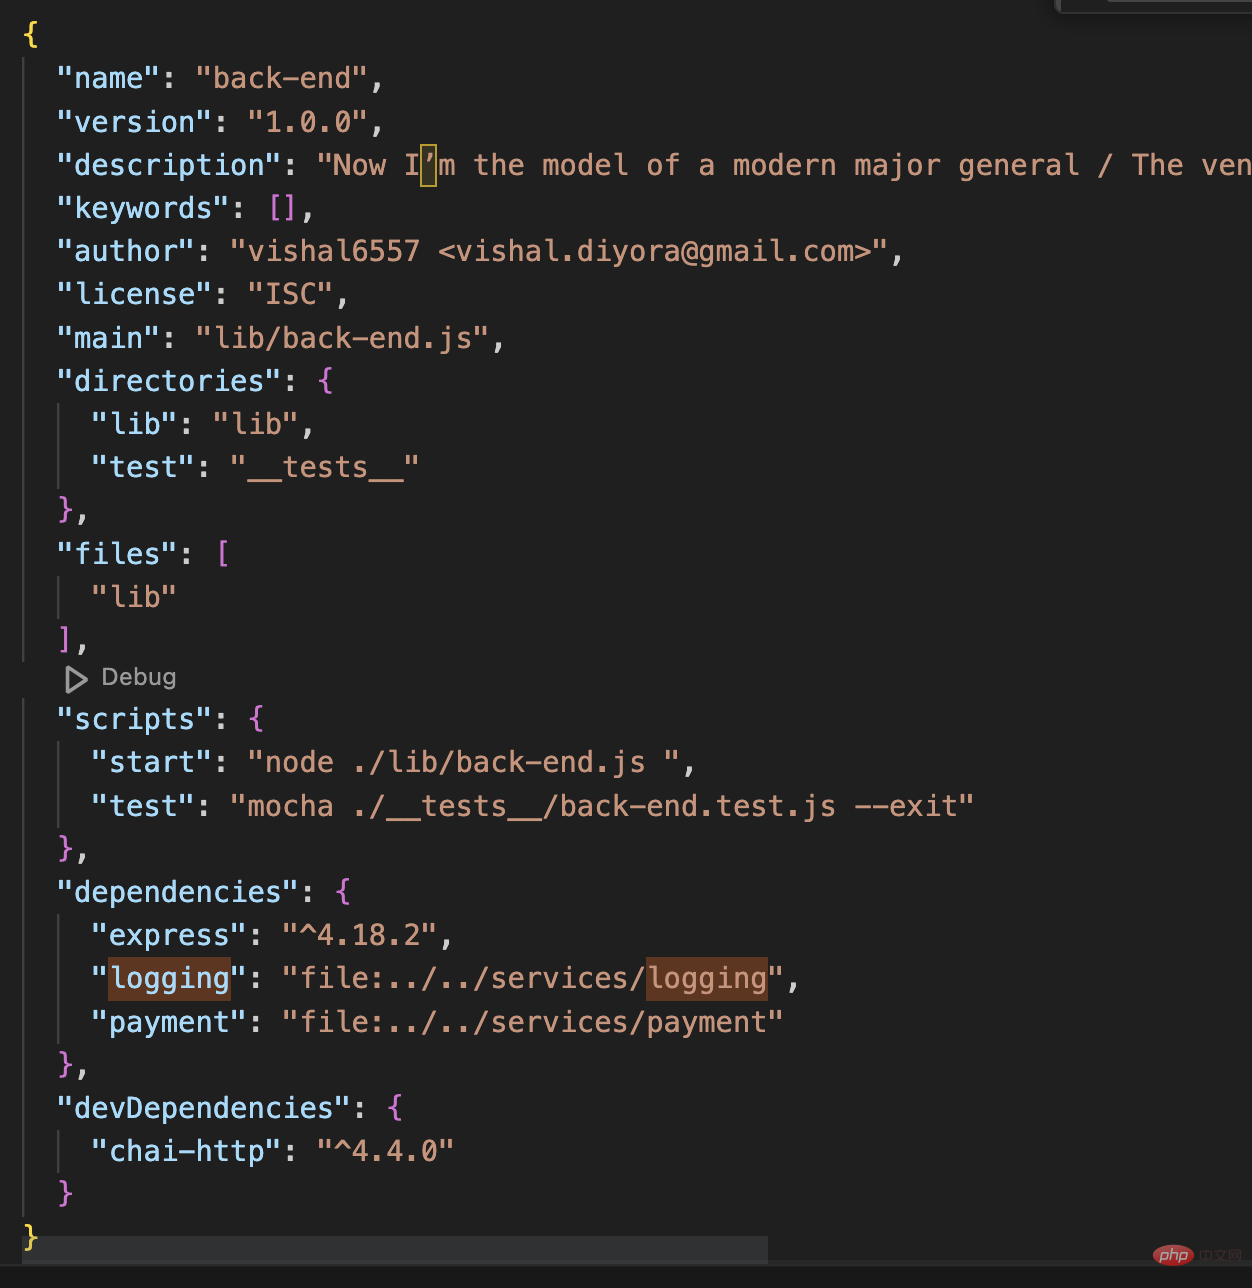
npm update。packages/back-end/lib/back-end.js为以下代码:get / API端口的服务器3000,并使用日志记录和支付服务。 const express = require('express');
const loggingService = require('logging');
const paymentService = require('payment');
const app = express();
app.get('/', (req, res) => {
// Use of logging service
loggingService.info('Backend server received a request');
// Use the payment service
const paymentResult = paymentService.makePayment(100);
loggingService.info('Payment result:', paymentResult);
res.send('Backend Server: Running!');
});
app.listen(3000, () => {
console.log('Backend server is running on port 3000');
});chai-http以对目录上的 API 进行单元测试packages/back-end。npm i chai-http --save-dev const chai = require('chai');
const chaiHttp = require('chai-http');
const app = require('../lib/back-end'); // Import the Express app
// using request server as chaiHttp;
chai.use(chaiHttp);
const expect = chai.expect;
describe('Backend Server', () => {
it('should log a request and process payment', (done) => {
chai.request(app)
.get('/')
.end((err, res) => {
expect(res).to.have.status(200);
expect(res.text).to.equal('Backend Server: Running!');
done();
});
});
});第 7 步:运行应用程序
lerna run start在根文件夹中执行。这将在端口 3000 上启动服务器。打开浏览器并导航至localhost:3000/。您将观察到输出“后端服务器:正在运行!” 显示在浏览器中。

lerna run test, this will run all tests in all microservices because all microservicestestThere are commands in the script.

Conclusion


