How to start using Python to create a website? Well, you can do it all yourself and write a program that runs on a web server, accepts page requests and provides responses in the form of HTML and other resources. However, this is a lot of work, so why bother when there are plenty of existing tools that can do the job for you? These tools are called frames and we will use them today to create our website.
There are many Python web frameworks, but here are some of the best:
If you need other options, you can find a more comprehensive list on the Python website. Today we'll set up Django for development on our local machine and then build a simple blog. We will also review the process of installing it on a remote web server.
Today we will perform most of our work in the terminal. This should work on Mac and Linux; however, if you're running Windows, the process will be different. If you only write Python, you don't need to be familiar with the command line, but if you plan to use Django or run dynamic websites in general, it's worth learning.
Consider checking out these tutorials to get yourself started using Terminal:
The following are the commands required to install Django. You need to install the Python 3 version to run it. First, you need to create a virtual environment using the venv module. From the Python documentation:
<span>venv</span>The module supports the creation of lightweight "virtual environments" with their own site directory, optionally isolated from the system site directory. Each virtual environment has its own Python binary (matching the version of the binary used to create the environment) and can have its own independent set of installed Python packages in its site directory.
Create a project directory and create a virtual environment within the project directory.
mkdir Django_projects
cd Django_projects
python3.8 -m venv env
Activate the virtual environment and create a new Django project.
source env/bin/activate
django-admin.py startproject FirstBlog
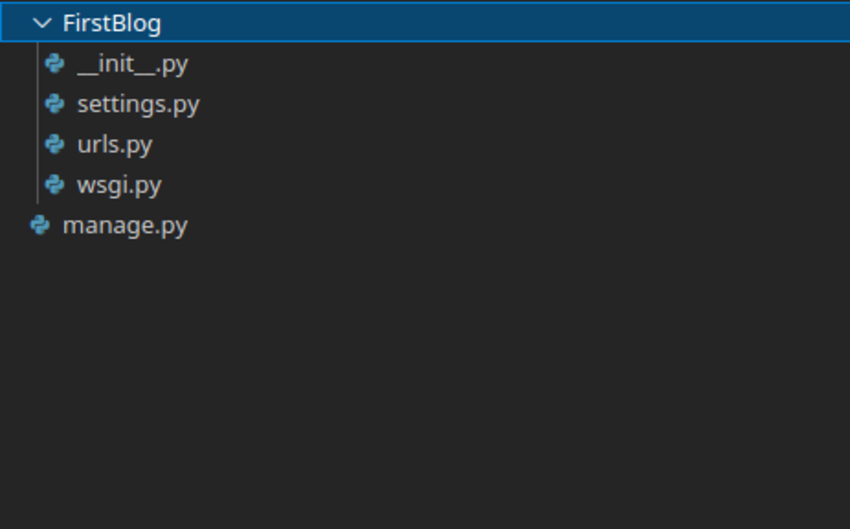
The project directory is as follows:

What is the function of each file?
However, none of these files by themselves constitute a functional website. For this we need applications. Applications are where you write the code that makes your website work, but before we look at them, we need to understand some of Django’s design principles.
First of all, Django is an MVC framework, which stands for Model View Controller. Django calls itself the MTV framework, which stands for Model Template View. It's slightly different from MVC's approach, but fundamentally, they're very similar. Anyway, MVC is an architectural pattern that provides a way to structure projects. It separates the code that processes data from the code that manages the user interface.
Secondly, Django follows the DRY (Don’t Repeat Yourself) philosophy, which means you should never write code that performs a task multiple times. For example, in our blog, if we wrote a feature that randomly selected an article from the archive and implemented that feature on multiple pages, we wouldn't have to code it again every time we needed it. We encode it once and then use it on every page.
那么这与应用程序有何关系?好吧,应用程序允许您以 DRY 风格编写网站。每个项目(就像我们这里的项目一样)都可以包含多个应用程序。相反,每个应用程序可以是多个项目的一部分。使用前面的示例,这意味着如果我们将来创建另一个也需要随机页面功能的网站,我们就不必重新编写它。我们可以简单地从该项目导入应用程序。
因此,每个应用都有一个不同的用途,这一点很重要。如果您在一个应用程序中编写了网站的所有功能,然后您需要稍后再次使用其中的一部分,则必须将其全部导入。例如,如果您正在制作一个电子商务网站,您不会想导入所有博客功能。但是,如果您为随机功能制作一款应用程序,为博客发布系统制作一款应用程序,则您可以挑选所需的部分。
这也意味着在网站内,代码组织良好。如果你想改变一项功能,你不必搜索一个庞大的文件;您可以浏览到相关应用程序并进行更改,而不必担心干扰其他任何内容。
python3.8 manage.py startapp blog
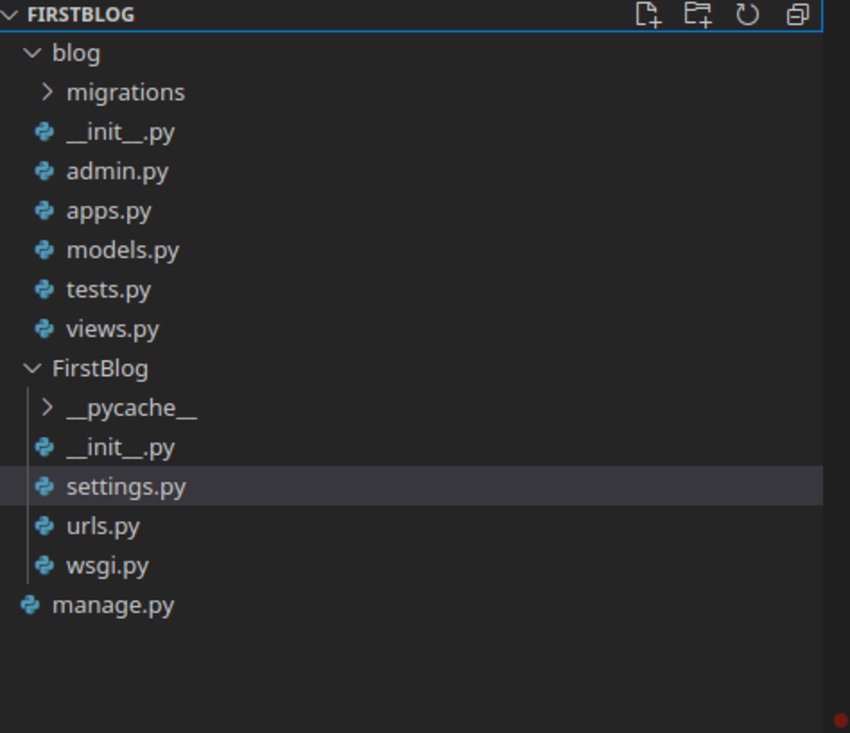
目录结构现在如下所示:

同样,我们有一个 __init__.py 文件来使其成为一个包,以及其他三个文件:模型、测试和视图。我们现在不需要担心测试,但其他两个很重要。模型和视图是 MVC 的 M 和 V 部分。
在模型中,我们定义数据结构。
如果您以前使用过 PHP,您可能使用 PhpMyAdmin 创建 MySQL 表,然后在 PHP 脚本中手动编写 SQL 查询。在 Django 中,这要容易得多。我们在此模型文件中定义所需的所有数据结构,然后运行命令,所有必要的数据库都会为我们创建。
当您希望访问该数据时,您可以通过调用这些模型的方法来访问这些模型,而不是运行原始查询。这非常有帮助,因为 Django 可以使用多个数据库程序。今天我们将使用 MySQL,因为它是最强大的,并且是大多数主机提供的,但如果我们将来需要切换到不同的数据库,所有代码仍然有效!在其他语言中,如果您想切换到 SQLite 或类似的语言,则需要重写访问数据库的代码。
在视图文件中,我们编写实际生成网页的代码。这将所有其他部分联系在一起。当用户输入 URL 时,它会由我们之前看到的 urls 脚本发送到 views 脚本,然后从模型中获取相关数据,对其进行处理,并将其传递到模板中,最终得到服务作为用户看到的页面。我们很快就会看一下这些模板。它们是最简单的部分——主要是 HTML。
将博客应用添加到settings.py文件中的INSTALLED_APPS列表中。
INSTALLED_APPS = [
    'django.contrib.admin',
    'django.contrib.auth',
    'django.contrib.contenttypes',
    'django.contrib.sessions',
    'django.contrib.messages',
    'django.contrib.staticfiles',
    'blog',
]
对于博客,我们需要一个帖子表,其中包含标题、正文、作者、撰写时间等多个字段。真正的博客会有评论,但这超出了今天演示的范围。
from django.db import models

class posts(models.Model):
    author = models.CharField(max_length = 30)
    title = models.CharField(max_length = 100)
    bodytext = models.TextField()
    timestamp = models.DateTimeField()
这些模型只是一个描述。我们需要根据它们创建一个实际的数据库。然而,首先我们需要在我们的系统上运行 MySQL。在实际的网络服务器上,这不会成为问题,因为他们通常已经预先安装了它。
要安装 MySQL,请键入:
sudo apt install mysql-server
要检查安装是否成功,请使用:
mysql --version
这应该返回类似这样的内容:
mysql Ver 14.14 Distrib 5.7.33, for Linux (x86_64) using EditLine wrapper
现在,为 Django 项目创建一个 MySQL 数据库。使用 sudo mysql 运行 MySQL,并在提示符处输入:
CREATE DATABASE django_blog;
CREATE USER 'django'@'localhost' IDENTIFIED WITH mysql_native_password BY 'password';
GRANT ALL ON django_blog.* TO 'django'@'localhost';

FLUSH PRIVILEGES;
您现在可以在新选项卡中运行 python3.8 manange.py runserver 来启动开发服务器。
但首先,我们需要配置数据库设置。我们来看看settings.py。
您需要先更改数据库设置。
DATABASES = {
    'default': {
        'ENGINE': 'django.db.backends.mysql', # Add 'postgresql_psycopg2', 'postgresql', 'mysql', 'sqlite3' or 'oracle'.
        'NAME': 'django_blog',                      # Or path to database file if using sqlite3.
        'USER': 'django_user',                      # Not used with sqlite3.
        'PASSWORD': 'password',                  # Not used with sqlite3.
        'HOST': '',                      # Set to empty string for localhost. Not used with sqlite3.
        'PORT': '',                      # Set to empty string for default. Not used with sqlite3.
    }
}
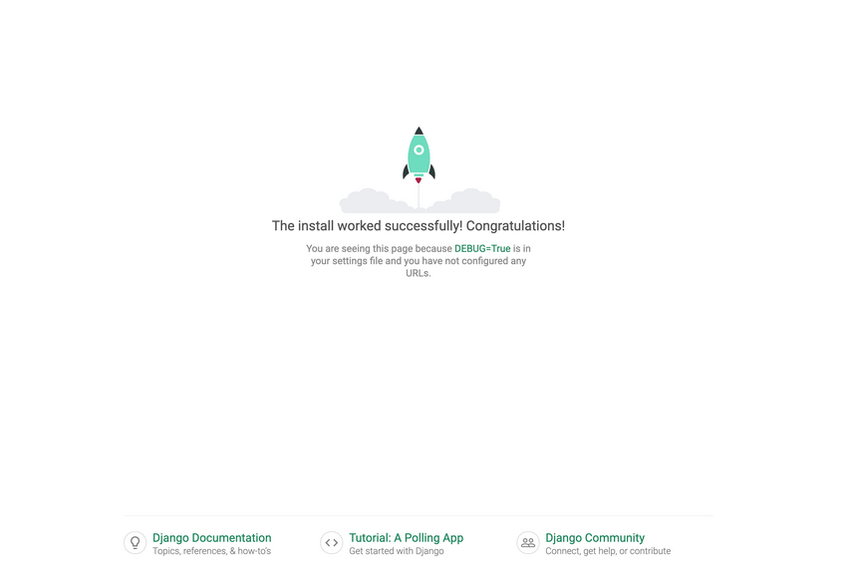
现在运行服务器并在网络浏览器中访问 127.0.0.1:8000。您应该会看到默认的 Django 页面。

现在,让我们将 Django 网站变成一个博客。首先,我们需要使用模型在数据库中创建表,方法是创建以下迁移以影响对模型所做的更改。
python3.8 manage.py makemigrations
Migrations for 'blog':
  blog/migrations/0003_post.py
    - Create model Post
现在,运行迁移以在数据库中创建表。
python3.8 manage.py migrate
现在,您可以创建一个超级用户来管理您的 Django 应用程序。
python3.8 manage.py createsuperuser
让我们在 urls.py 文件中设置应用程序的 URL。我们将包含来自单独文件的博客网址。
from django.contrib import admin
from django.urls import path,include

urlpatterns = [
    path('admin/', admin.site.urls),
     path("", include('blog.urls')),
]
让我们创建第一个视图,它将呈现一个简单的 HTML 页面。打开 blog/views.py 并添加以下代码。
from django.shortcuts import render

from .models import Post

def home(request):
    return render('index.html')
此index.html 文件尚不存在。 Django 会自动从模板目录加载模板。在博客应用中创建一个名为 templates 的文件夹,并在其中创建一个名为 index.html 的文件。文件夹目录应如下所示:
blog
  -templates
     -blog
        -index.html
在index.html中添加以下代码。
<!DOCTYPE html>

<html lang="en">

<head>
    <meta charset="utf-8" />
    <link rel="stylesheet" href="css/style.css">
    <link href="images/favicon.ico" rel="shortcut icon">
    <title>First Blog</title>
</head>

<body>

<div class="container">
    <h1>First Blog</h1>
    <h2>Title</h2>
    <h3>Posted on date by author</h3>
    <p>Body Text</p>

</div>

</body>

</html>
现在,我们将创建博客 URL。在博客目录中创建文件 urls.py 并写入用于提供索引页面的 URL 路径。
from django.urls import path

from . import views

urlpatterns = [

   path('', views.home),


]
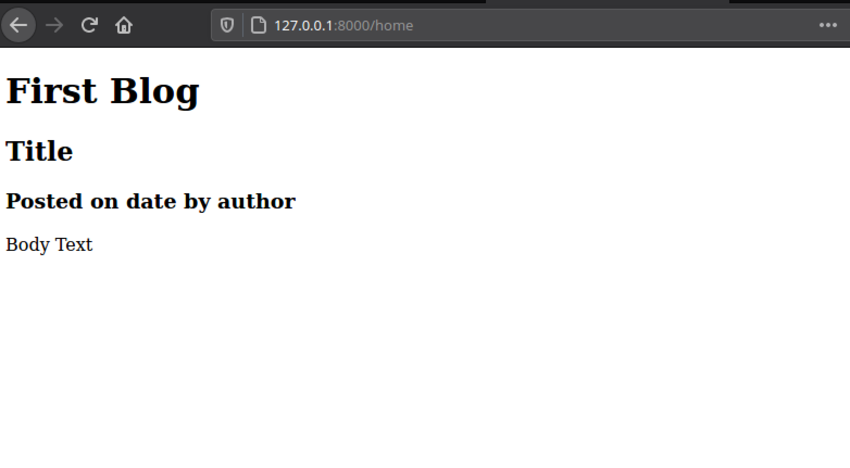
现在,如果您导航到 http://127.0.0.1:8000/home,您应该会看到以下内容页面更新了此新内容。

下一步是从数据库添加动态内容。为了实现这一点,Django 有一种模板语言,允许您使用花括号嵌入变量。将页面的中间部分更改为如下所示:
<div class="container">
    <h1>First Blog</h1>
    <h2>{{ title }}</h2>
    <h3>Posted on {{ date }} by {{ author }}</h3>
    <p>{{ body }}</p>

</div>
然后,我们可以通过创建值字典,将值从 views.py 文件传递给这些变量占位符。
def home(request):
    content = {
        'title' : 'My First Post',
        'author' : 'Giles',
        'date' : '18th September 2011',
        'body' : 'Lorem ipsum dolor sit amet, consectetur adipiscing elit. Etiam cursus tempus dui, ut vulputate nisl eleifend eget. Aenean justo felis, dapibus quis vulputate at, porta et dolor. Praesent enim libero, malesuada nec vestibulum vitae, fermentum nec ligula. Etiam eget convallis turpis. Donec non sem justo.',
    }
    return render(request,'blog/index.html', content)
保存并刷新,您应该看到现在正在将内容从视图文件传递到模板。最后一步是从我们的数据库获取数据并将其传入。幸运的是,我们可以通过使用 Django 模型来做到这一点,而无需 SQL 查询。转到 blog/views.py 并更新代码以从数据库获取数据。
def home(request):
    posts = Post.objects.all()[:10]
    return render(request,'blog/index.html', {"posts":  posts})
接下来,更新模板以访问此数据。
<body>

    <div class="container">
        <h1>First Blog</h1>
        <hr />
        {% for post in posts %}
            <div class="post">
            <h2>{{ post.title }}</h2>
            <h3>Posted on {{ post.timestamp }} by {{ post.author }}</h3>
            <p>{{ post.bodytext }}</p>
            </div>
            <hr />
        {% endfor %}
    </div>


</body>
在这里,我们可以访问 views.py 文件中表中的所有数据,然后仅选择前十个条目。我们将此数据传递到模板中,循环访问条目,并使用我们网站的 HTML 显示数据。
今天我们需要做的最后一件事是回顾 Django 的管理系统。这是 Django 的一个非常强大的功能,它允许您管理站点而无需编写更多代码,如果您从头开始创建站点,则必须这样做。为了让管理员控制您的 posts 表,我们将在 Django 管理中注册我们的 Post 模型,并在数据库中添加一些数据。打开 blog/admin.py 并添加以下代码。
from django.contrib import admin
from .models import Post

# Register your models here.

admin.site.register(Post)
您现在应该可以通过访问 http://127.0.0.1:8000/admin/blog/post/ 添加新的博客条目。
这就是所有要做的事情了。您刚刚创建了一个功能齐全但简单的博客。为了完成本课程,我们将了解如何在 Web 服务器上安装 Django。
网络托管有两种类型,您使用哪一种将影响您是否可以使用 Django。如果您使用共享托管,则您完全受主机的支配。
许多廉价的网络主机不支持 Python。虽然 PHP 几乎可以保证,但对其他语言的支持却常常无法保证。您必须检查控制面板以确定 Python(和 Django)是否可用。显然,每个主机的过程都略有不同。几乎所有托管都运行在 Apache 上,我们可以使用 mod_wsgi 或 mod_python Apache 模块,用它来托管 Django。
大多数网络主机使用 CGI 运行多种语言的脚本。 Django 可以在 FastCGI 上运行,理论上也可以在 CGI 上运行,但这并未得到官方支持,对于实际的生产网站来说速度太慢。您需要检查这些是否已安装。它们通常位于“CGI 和脚本语言支持”等标题下。
如果您有 VPS 托管,或者足够幸运拥有专用服务器,那么您的生活会轻松得多。通常这些都预装了 Python,从那里,您只需要按照我们所经历的相同步骤来获取运行的 Django 本地副本。如果您没有 Python,可以使用包管理器安装它。您的系统甚至可能附带 Django。
在服务器上安装 Django 后,使用任何文件传输客户端上传刚刚创建的站点。您可以将文件放在任何地方,但不要将它们放在 public 文件夹中,否则任何人都可以看到您网站的源代码。我的所有项目都使用 /home 。
接下来,在您的服务器上创建一个名为 django_blog 的 MySQL 数据库。您必须再次为管理控制面板创建帐户,但这是一次性的事情。
如果您尝试运行此程序,您可能会收到错误,这是因为服务器的设置与本地计算机上的设置不同。您可能需要更改 settings.py 中的数据库密码,但根据您的服务器配置,您可能还会遇到其他问题。在这些情况下,Google 是您的朋友!
这次运行服务器的命令略有不同。您必须指定 IP 地址和端口,以便可以通过 Internet 访问该站点。
python.8 manage.py runserver your-server-ip:8000
如果您在网络浏览器中通过端口 8000 访问您的网站,您应该会看到您的网站!
这就是本课......以及我们的系列。我希望您在过去的五堂课中学到了许多有用的技能,并准备好在未来继续学习更多的 Python。如果您喜欢 Django 的外观并希望继续增加对该框架的了解,这里有一些关于该主题的附加教程:
一如既往,我很乐意在评论中讨论有关本教程或 Python 的任何问题。感谢您的阅读。
本文已根据 Esther Vaati 的贡献进行了更新。 Esther 是 Envato Tuts+ 的软件开发人员和作家。
The above is the detailed content of Building dynamic websites with Python: A beginner's guide. For more information, please follow other related articles on the PHP Chinese website!
 What to do if the blue screen code 0x0000007e occurs
 The difference between paste mask and solder mask
 How to connect php to mssql database
 mobile phone screen tft
 What are the data collection technologies?
 What is a UI designer?
 What is the core of a database system?
 MySQL changes the storage engine method of a table


