
In this tutorial, I'll guide you through creating a preconfigured server instance running WordPress (or other LAMP-based application) that you can repeatedly clone and transfer to clients. I use Digital Ocean's image feature to sell my WordPress Quickstart and a few LAMP-based apps like Simplify Email and Simple Monitor. Partly because of this feature, Digital Ocean has become my web host of choice this year.
For Digital Ocean, a snapshot is a copy of a specific cloud-based server instance at a certain point in time. It allows you to copy instances and transfer them to customers via email. This makes it quick and easy to get started with preconfigured server images and application stacks.
For example, I offer a preconfigured, pre-optimized version of WordPress that I call a "Quick Start." It is a version of WordPress that comes pre-installed with a set of super useful plugins and is also pre-optimized with W3TC and Varnish caching, as described in my Tuts tutorial “Optimizing WordPress with Varnish and W3 Total Cache”. When I transfer a copy of this image to a client, it's the fastest, simplest, best-configured version of WordPress I can offer. This process makes launching a new WordPress website incredibly easy. In this tutorial, I'll show you how to build your own images in Digital Ocean to share with clients.
If you want to try this using a LAMP application, you can find my guide to registering and setting up a universal instance on Digital Ocean here. If you want to use WordPress, you can follow the steps below. I'll walk you through creating a droplet, installing WordPress, adding themes and plugins, taking snapshots, cloning snapshots, and transferring them to clients. I have published a more detailed WordPress installation guide over at Digital Ocean.
First, let's create a water droplet. Click the Create button:
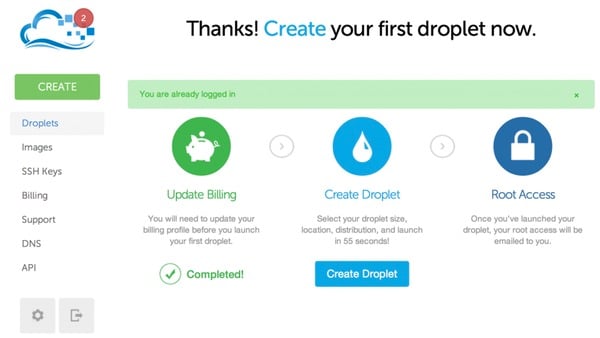
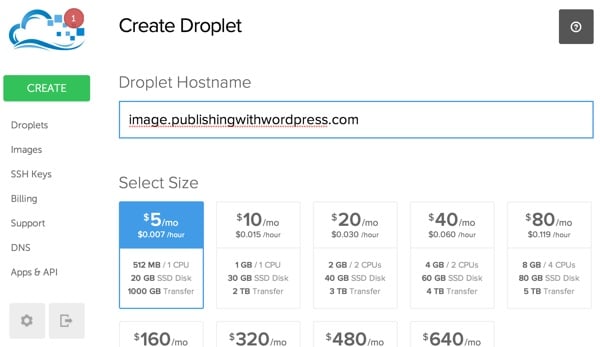
I named mine image.publishingwordpress.com but you can name yours anything generic. I will use 512 MB image size:
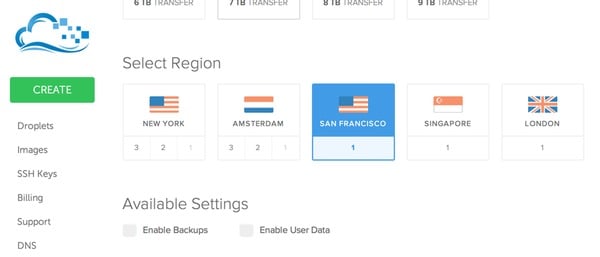
Take note of the region you selected, as your client will only be able to instantiate your image in the same region - however, you can also transfer it before sending to the client if needed The area of the snapshot.
Click on the Applications tab and select LAMP on Ubuntu 14.xx:
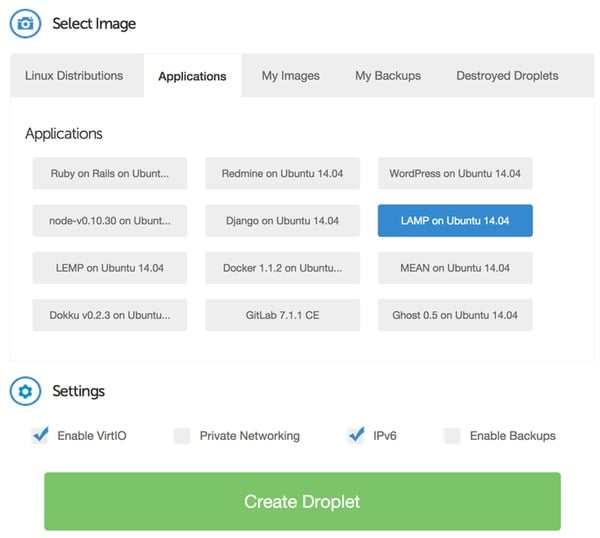
Digital Ocean will start creating your Droplet:

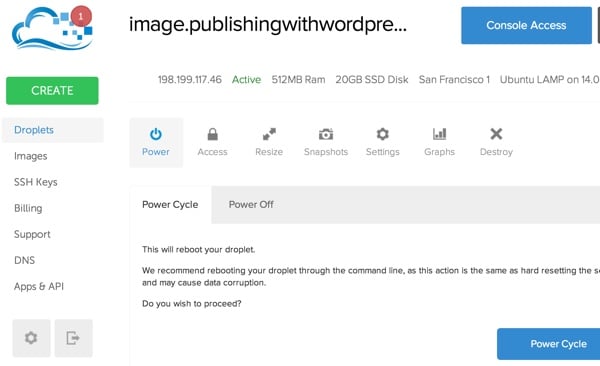
When completed, you will see this page:
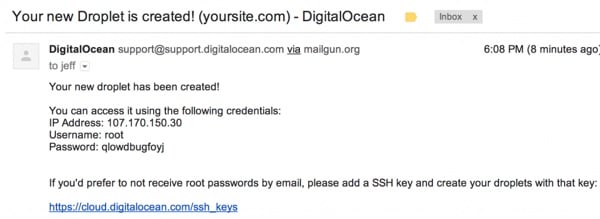
You will also receive an email as shown below:
Now you can visit your domain registrar and modify your DNS records to point your domain or subdomain to the new IP address. In my case, I pointed the A record for image.publishingwithwordpress.com to 198.199.117.46. Obviously, yours will be different.
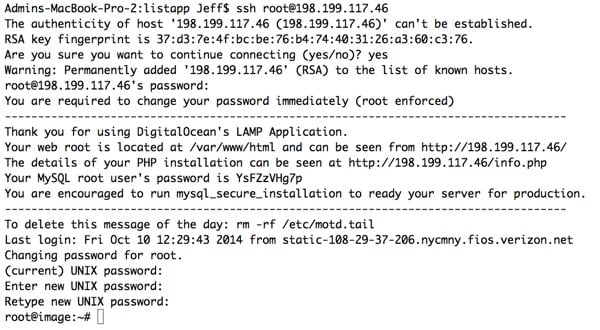
You do not need to wait for DNS propagation before you can start configuring your instance. Log in via SSH using your IP address. You need to change the password you received in the email:
Let’s update the picture:
sudo apt-get update
sudo apt-get dist-upgrade
sudo reboot
I also recommend installing the following components, which we will utilize in WordPress and various plugins:
sudo apt-get install zip php5-curl
sudo a2enmod rewrite
Opening Apache mod_rewrite will allow the use of permalink addresses in WordPress, which is more user-friendly and enhances SEO.
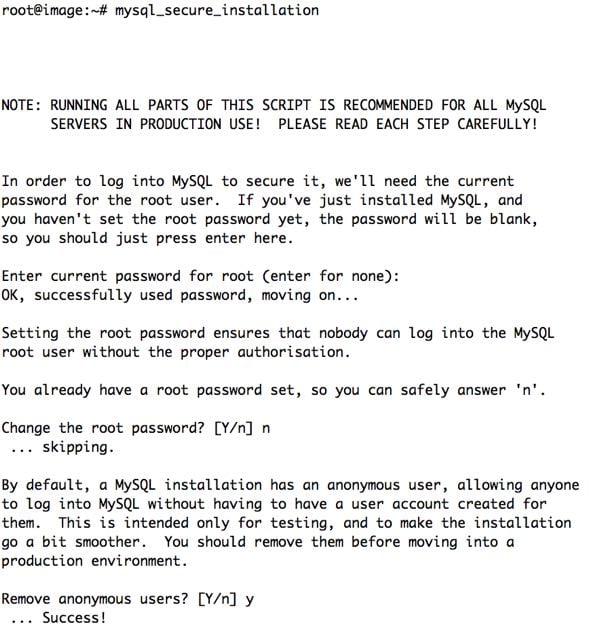
I recommend also running mysql_secure_installation:
mysql_secure_installation
To run this script, you need to write down your MySQL root password, which will be displayed when you log into the instance.
如果您使用每月 5 美元的 512MB RAM Droplet,您需要为 WordPress 创建一个交换文件正确操作,否则系统会耗尽内存并反复崩溃:
dd if=/dev/zero of=/swapfile bs=1M count=1024
mkswap /swapfile
swapon /swapfile
然后我们将添加到 fstab 文件以告知系统有关交换文件的信息:
sudo nano /etc/fstab
添加这一行:
/swapfile swap swap defaults 0 0
每月 10 美元的 1 GB 实例可以毫无问题地运行 WordPress。
现在,我们准备安装 WordPress:
创建一个具有 Apache Web 服务器权限的 www 目录:
sudo mkdir /var/www
sudo chown www-data:www-data /var/www
cd /var/www
下载最新版本的 WordPress,展开存档并设置权限:
cd /var/www
sudo wget http://wordpress.org/latest.tar.gz
sudo tar -xzvf latest.tar.gz
sudo chown -R www-data:www-data wordpress
现在让我们在 MySQL 中创建 WordPress 数据库。记下您的用户名和密码:
mysql -u root -p
create database wordpress;
grant all privileges on wordpress.* TO "your-mysql-username"@"localhost" identified by "your-mysql-password";
flush privileges;
exit;
让我们为 WordPress 创建 Apache 配置文件:
cd /etc/apache2/sites-available
sudo nano 000-wordpress.conf
粘贴并自定义以下虚拟主机配置:
<VirtualHost *:80>
   ServerName yourdomainname.com
   DocumentRoot /var/www/wordpress
   DirectoryIndex index.php
   <Directory /var/www/wordpress/>
      AllowOverride All
      Order Deny,Allow
      Allow from all
   </Directory>
</VirtualHost>
为 WordPress 启用 Apache 站点并禁用默认 Ubuntu 站点:
sudo a2dissite 000-default.conf
sudo a2ensite 000-wordpress.conf
sudo service apache2 reload
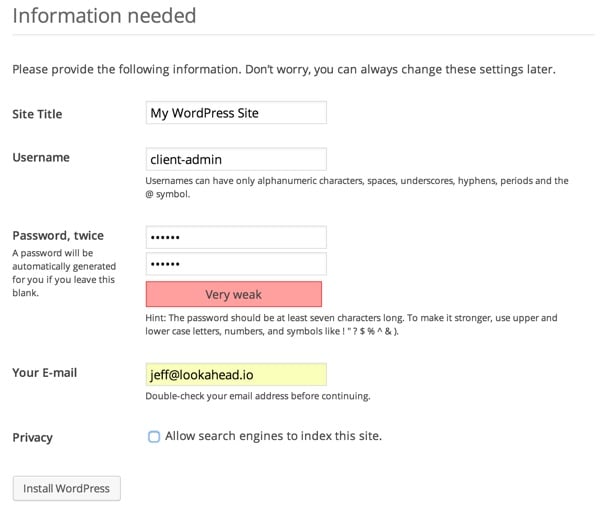
访问您的网站,使用上面的数据库设置通过网络用户界面配置 WordPress。选择头衔和登录名时,请选择通用的,并记下登录名。
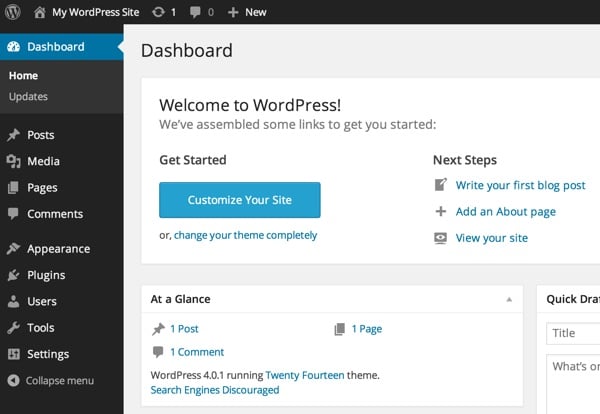
使用您的通用凭据登录,您应该会看到仪表板:
由于这是您将复制和传输的通用图像,因此用户将需要 WordPress 来更新网站 URL为了他们自己。让我们编辑 WordPress 配置文件以包含重定位标志。您会希望您的客户在仪表板常规设置中编辑其网站 URL 后禁用此功能。
sudo nano /var/www/wordpress/wp-config.php
现在,添加以下行:
define(‘RELOCATE’,true);
当用户在仪表板中更新其站点 URL 时,WordPress 将更新整个数据库。完成一次后,客户端可以注释掉或删除此行。
我还建议添加 FS_DIRECT 标志以简化插件安装:
define('FS_METHOD', 'direct'); // for automatic plugin installation
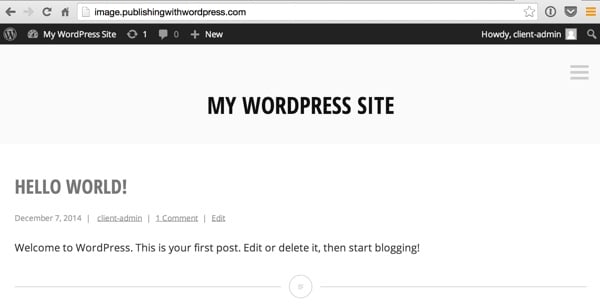
出于演示目的,我将安装新的简单 Minnow 主题。您可以通过搜索来安装:
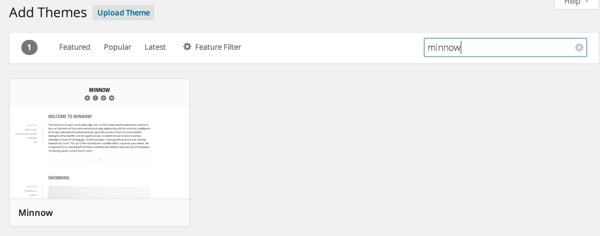
如下所示:
接下来,我们将安装我们希望客户拥有的任何插件。
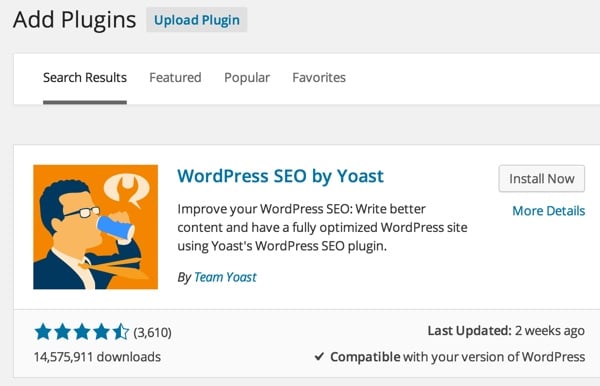
您想安装哪些插件取决于您。我在这里保留了推荐插件的列表。让我们继续安装 Yoast SEO 插件,它对我来说是一个支柱。我使用它是因为它有助于搜索引擎优化和生成站点地图。
您可以访问添加新插件页面并搜索它来安装并激活它:
此时,您可以进行任何您希望与下游所有客户共享的常见 WordPress 配置。例如,您可能会安装更多主题和插件。您可以打开永久链接。您可以配置一些基本的主题设置。这完全取决于你。
当您克隆即将发布的快照并将其传输到您的客户端时,您自定义的任何内容都将被复制。您的客户将需要自定义和配置您选择不更新的任何内容。
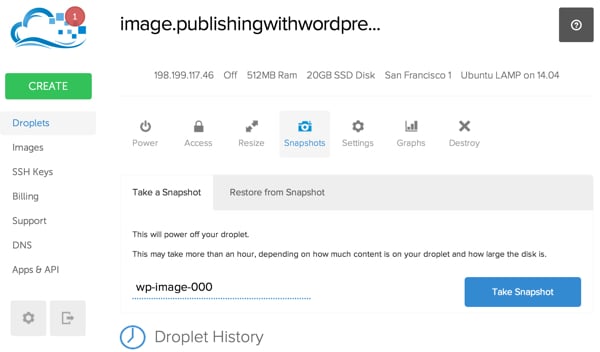
当您完成所有常见的安装和配置后,我们可以继续为您的 Droplet 拍摄快照。 Digital Ocean 要求我们关闭实例电源。最好从命令行控制台执行此操作。
sudo poweroff
访问 Digital Ocean 的 Droplet 页面,然后单击快照选项卡。我通常为快照选择一个名称,该名称指示克隆的连续数量,例如wp-image-000。然后,点击拍摄快照。
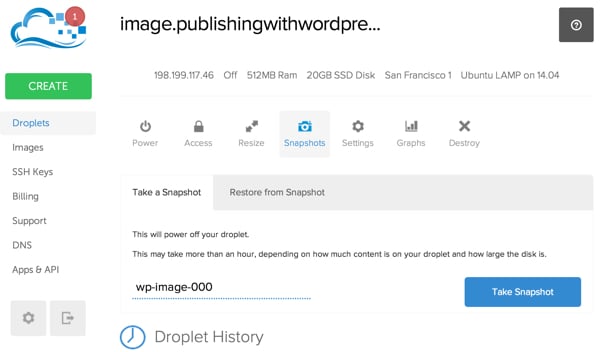
Digital Ocean 可能需要几分钟时间来创建您的快照。
图像完成后,Digital Ocean 将自动重启您的 Droplet。
要创建更多图像副本,您只需重复上述步骤即可。从命令行关闭 Droplet 电源。再拍一张快照。这有点耗时,但相当简单。
在下一个教程中,我将向您展示如何使用 Digital Ocean API 来自动执行此过程。
Digital Ocean does not charge for snapshot storage (except for small amounts). You can choose whether to destroy the original Droplet to avoid monthly fees. If you do this, you can always recreate it from the snapshot when you need it again.
To transfer the snapshot to the client, visit the Image page:
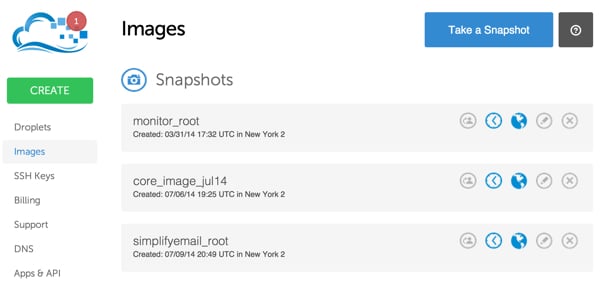
Click on the leftmost profile icon to specify the email address of the Digital Ocean account holder you want to transfer to:
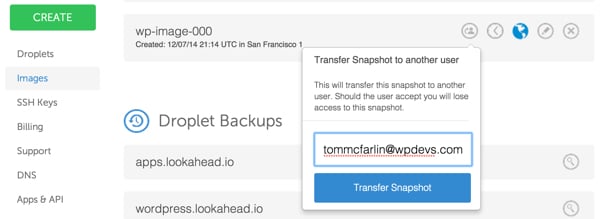
Within a few minutes, the snapshot will appear on the Pictures page of your client account. They need to approve the image before it can be accepted into their account.
It's important to remember that your customers can only accept snapshots from trusted users because it's easy for someone to install malware on the image before the snapshot is created and transferred. Digital Ocean may provide a trusted snapshot system in the future.
Creating a Droplet from a snapshot is very simple. Simply visit the Create Droplet page, select the area where the image will be created, and click the My Snapshots tab. You can then select the image used to instantiate the droplet.
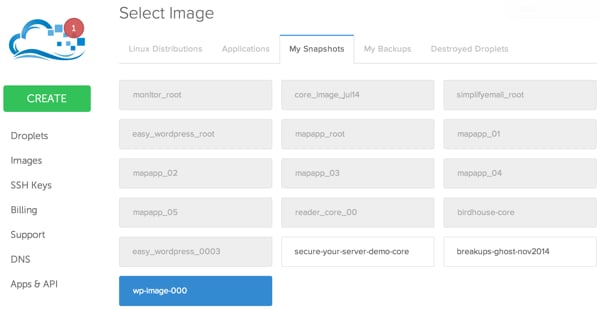
Clients can customize the hostname if desired, but all other settings will remain the same.
In other words, they will log into the instance using the same administrative username and password as the original snapshot, not the new snapshot Digital Ocean sends them. They will also initially use your client admin WordPress dashboard login and password. It would be better for them to change all server, MySQL and WP dashboard passwords after configuring the Droplet.
Once they create the droplet from the snapshot, they must configure their DNS to point their site URL of choice to their droplet's IP address. Also, they need to edit their domain’s WordPress Apache virtual host and restart Apache.
I find this WordPress quickstart to be the fastest way for me to help my clients get started with their new website. You can also use this method with any LAMP application, such as streamlined email.
Now that you know how to build a cloud-based application instance (such as WordPress), you can repeatedly clone the instance and transfer it to the client. In an upcoming tutorial, I'll show you how to use the Digital Ocean API to automate the process of cloning a snapshot.
I hope you found this article interesting and useful. Please feel free to post your questions and comments below. You can also contact me on Twitter @reifman or email me directly. Please follow my Tuts Instructor page for future articles in this series.
The above is the detailed content of Create marketable application images for Digital Ocean resale. For more information, please follow other related articles on the PHP Chinese website!


