
What is setting a restore point in win7? It is to create a system restore point, and then when the system fails, restore it to the normal state at a specified point in time through the restore point. If you want to use a restore point to restore the system, you must first set a restore point. So how to set a restore point in win7? Friends who don't understand can take a look at the following tutorial.
Win7 setting restore point tutorial:
1. First, click Start in the lower left corner.

#2. After clicking Start, the search box pops up. At this time, we enter control panel and click on all control panel items.

#3. After clicking, we search to create a restore under all control panel items.

#4. Enter the property panel of system protection and click Configuration in the lower right corner.
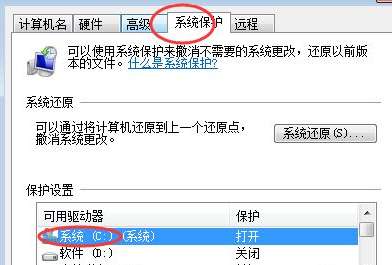
#5. Here, select the default C drive for configuration.

#6. After completing the configuration of the restore point, we can create the restore point.
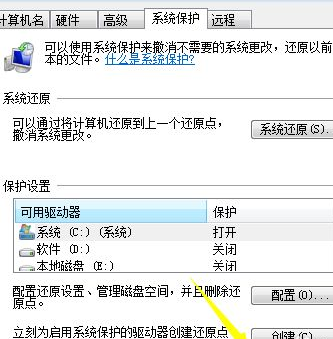
#7. When creating, you need to enter a name, for example, enter Baidu Experience here.

#8. After the input is completed, it will prompt that it is creating---created successfully.

#The above is the tutorial for setting restore point in win7. I hope it can help you.
The above is the detailed content of Quickly learn how to set up a restore point in Windows 7. For more information, please follow other related articles on the PHP Chinese website!
 What are the e-commerce platforms?
 What is disk quota
 Top ten digital currency exchanges
 Introduction to dex concept digital currency
 How to view stored procedures in MySQL
 What drawing software are there?
 The difference between static web pages and dynamic web pages
 Introduction to laravel components


