
Audio output and input require specific drivers and services to work as expected on Windows 11. These sometimes end up running into errors in the background, causing audio issues like no audio output, missing audio devices, distorted audio, etc.
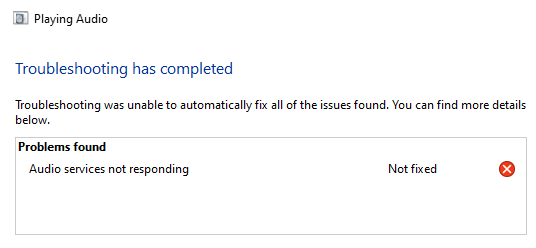
We recommend you to start with the fixes mentioned below and work your way through the list until you Try to solve your problem. The audio service may become unresponsive for a number of reasons on Windows 11.
This list will help you verify and fix most issues that prevent the audio service from responding on Windows 11. Please follow the relevant sections below to help you through the process.
You may encounter a one-time error where the Audio Service simply cannot start on your PC. You can resolve this issue simply by restarting the audio service on your Windows 11 system. Follow any of the following methods to restart the audio service on Windows 11.
PressWindows Rto startRun.
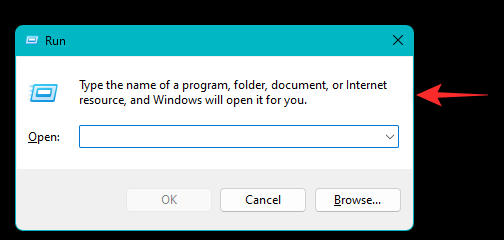
Now type CMD in the run window and pressCtrl Shift Enterto open the command prompt with administrator privileges.
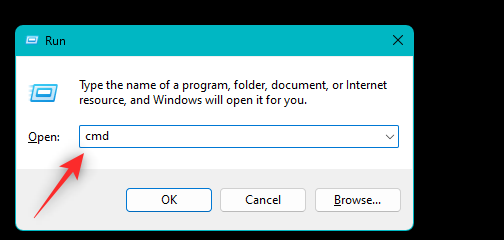
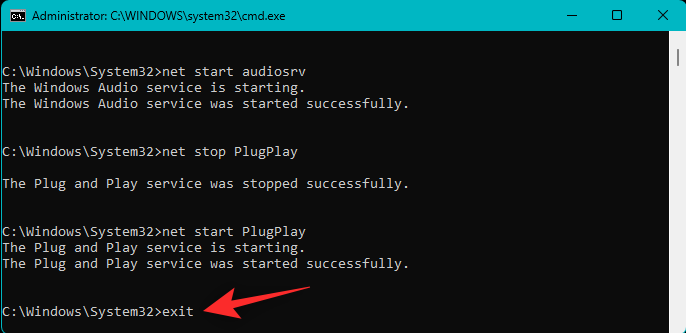
Now use the following command to stop the audio service on Windows 11.
net stop audiosrv
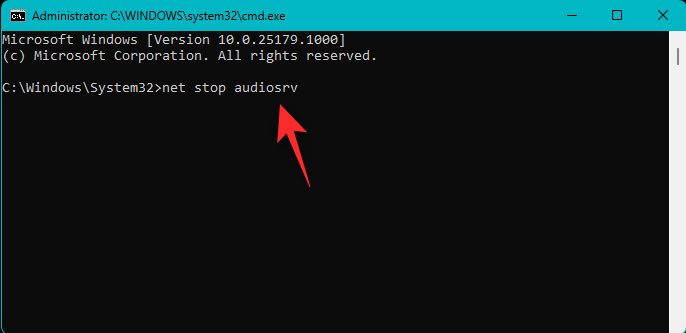
Once completed, use the following command to start again and start the audio service.
net start audiosrv
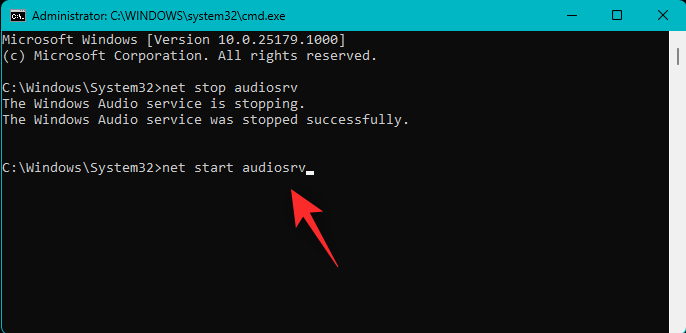
Now use the following command to restart the Windows Audio Endpoint Builder service.
net stop AudioEndpointBuildernet start AudioEndpointBuilderPressY when prompted Confirm your choice.
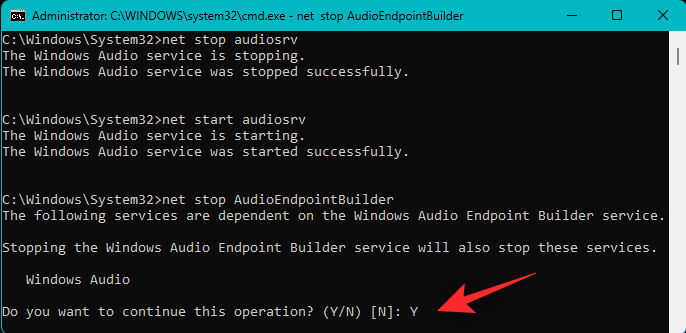
Note:Restart the Windows Audio Service using the command we used earlier when restarting Windows Audio Endpoint Builder.
Similarly, use the following command to restart thePlug and Playservice on the system.
net stop PlugPlay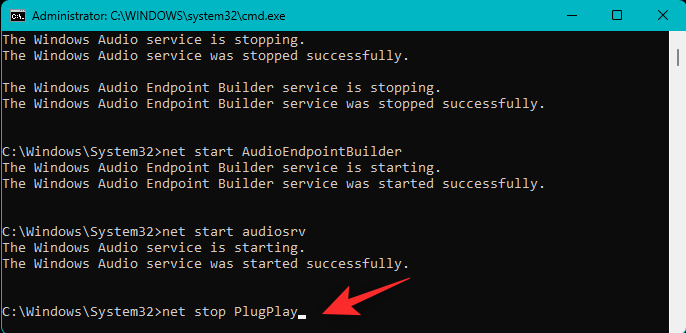
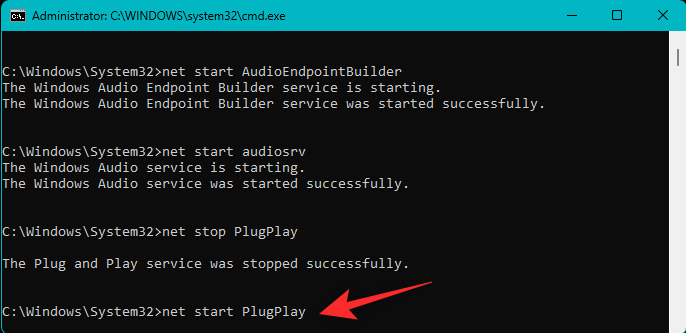
exit
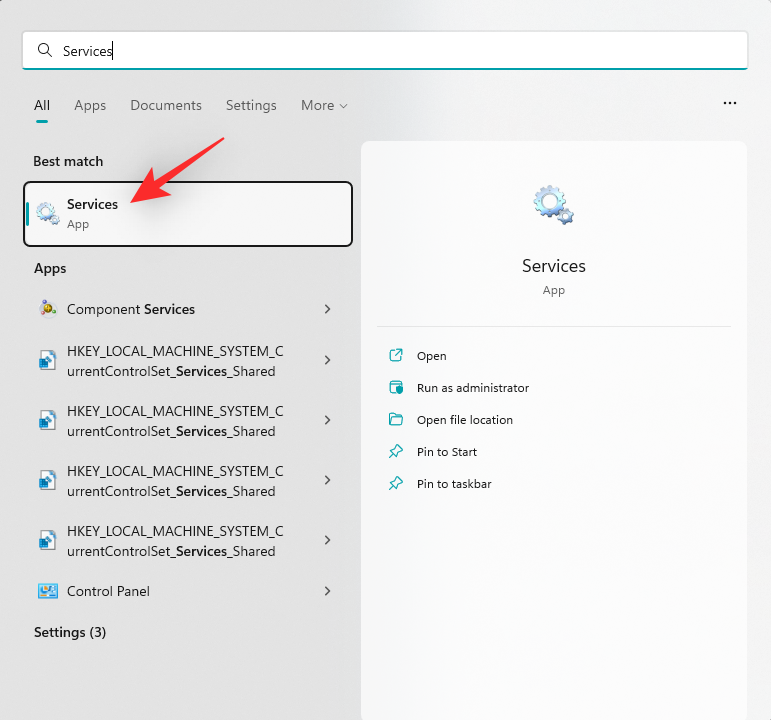
Services” and start it from the search results.
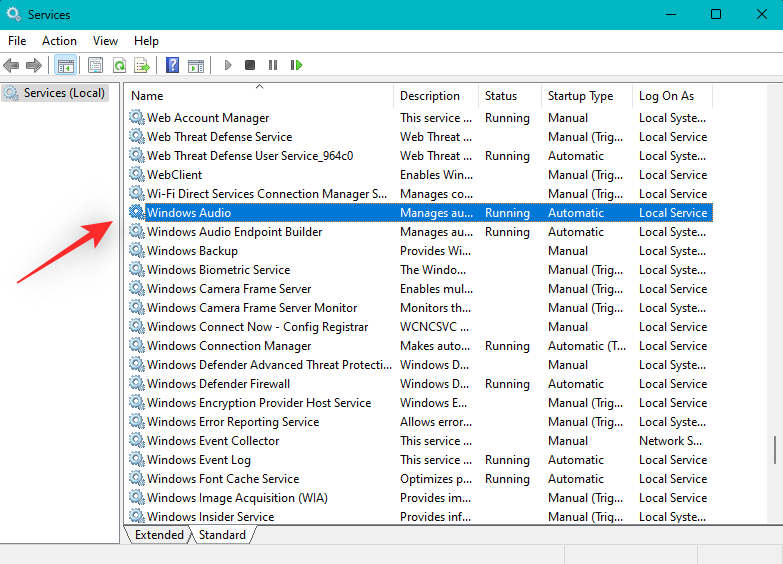
Windows Audio from the list on the screen.
Restart.
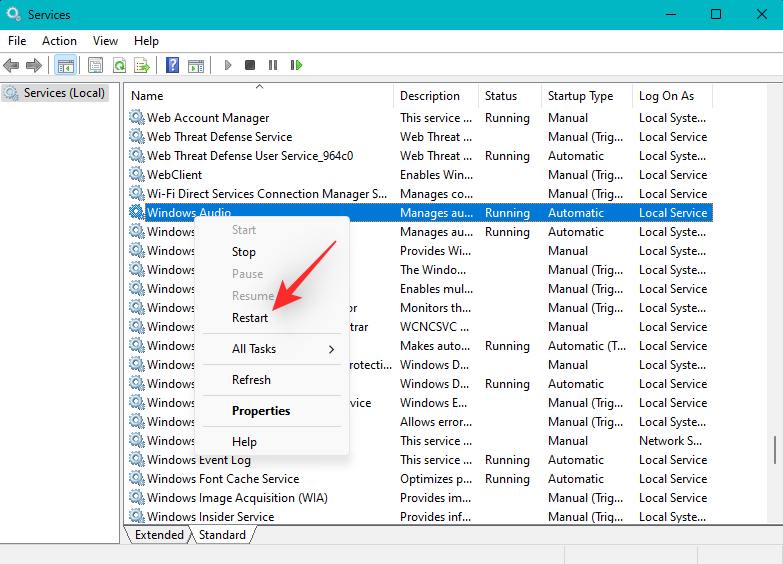
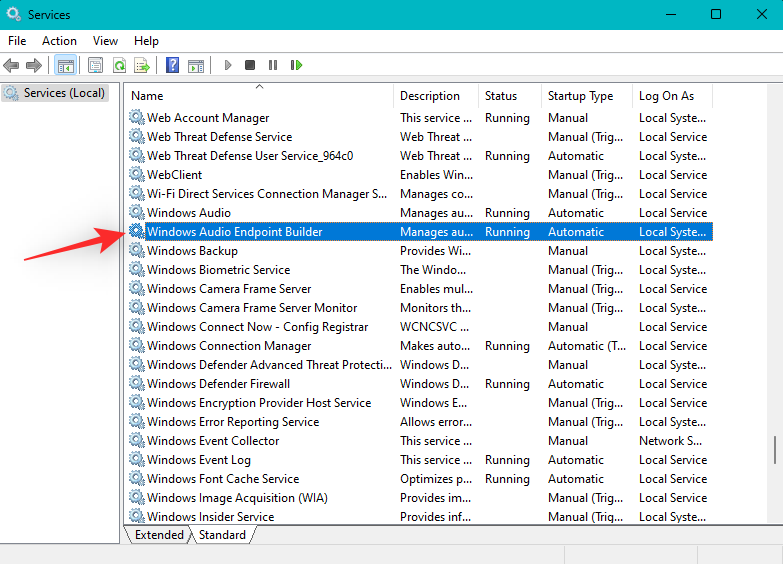
Finally, use the steps above to restart thePlug and Play service.
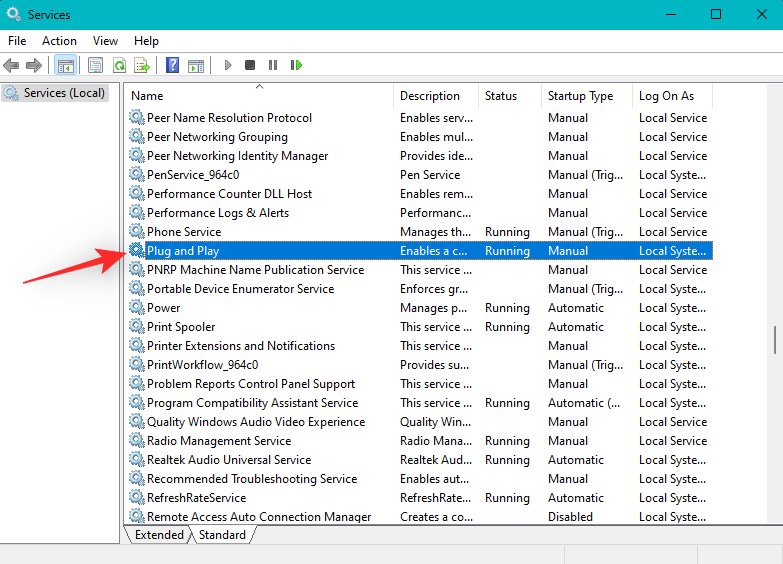
That's it! You will now restart the audio service on your PC.
The Windows troubleshooter has come a long way and can now help solve most problems with your system. We recommend that you try running the audio troubleshooter now to see if that resolves the issue for you.
PressWindows ito launch theSettings application. Now click onTroubleshooting on the right.
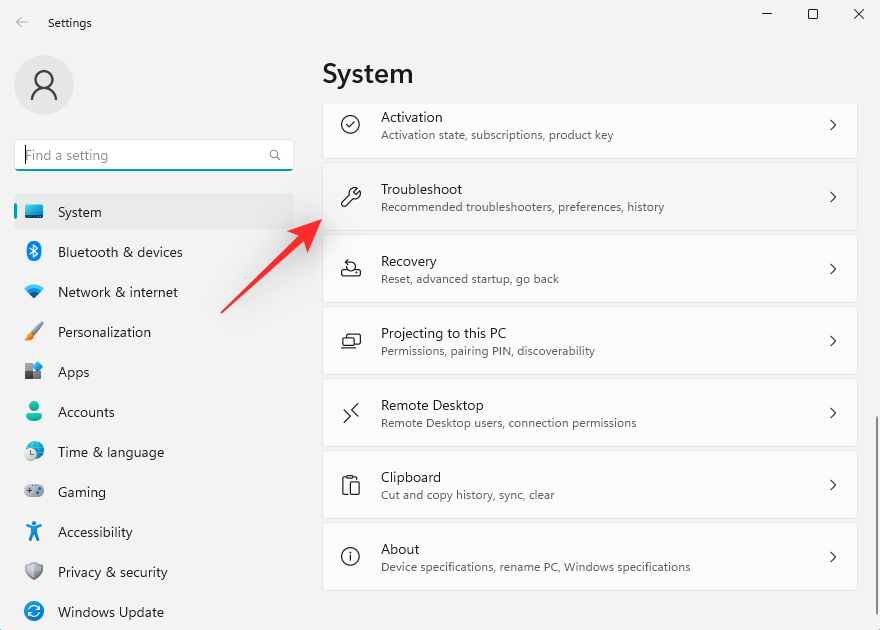
ClickAdditional Troubleshooting.
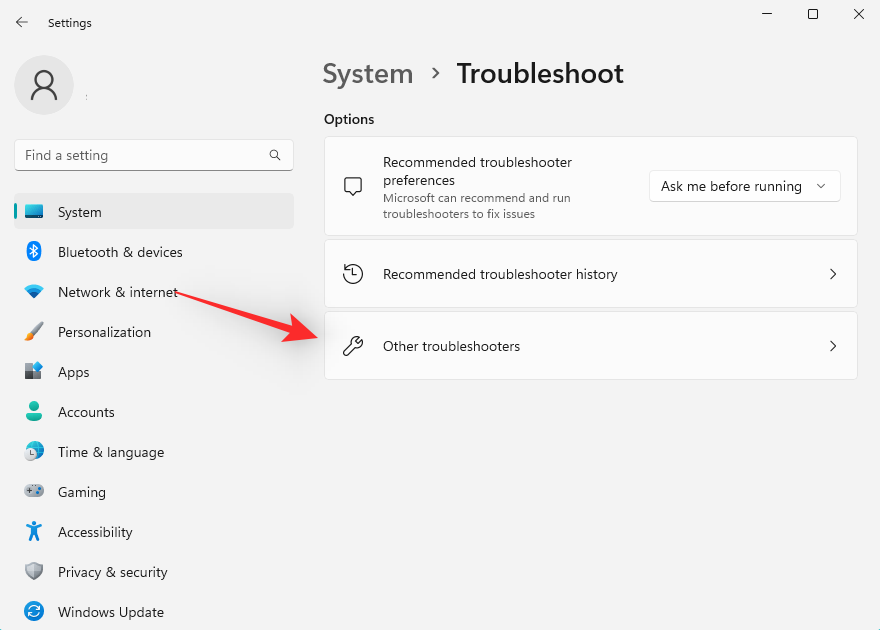
ClickRunnext toPlay Audio.
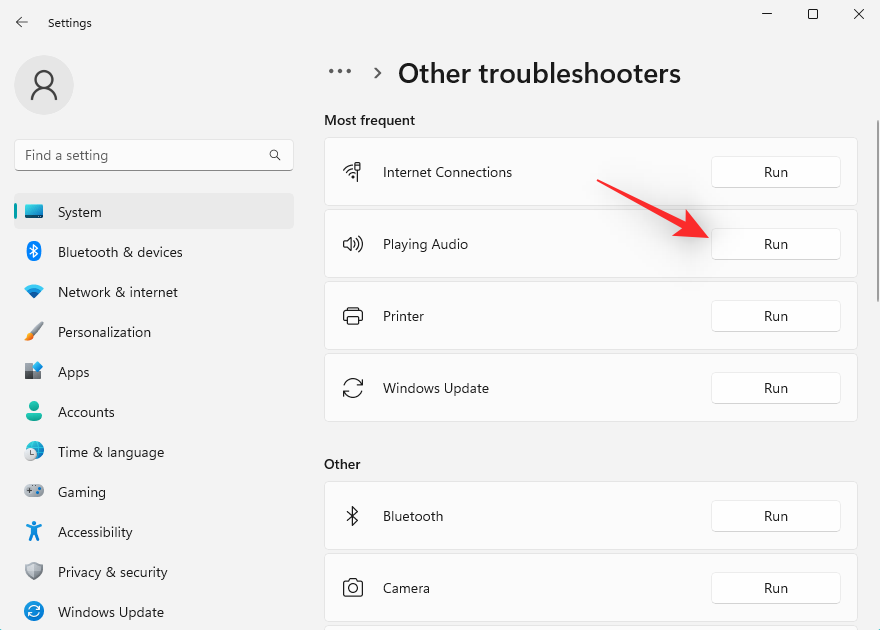
The troubleshooter will now scan your system for audio device related errors. If you have multiple audio devices installed on your PC, you will be asked to select the device you are experiencing problems with. ClickNextwhen finished.
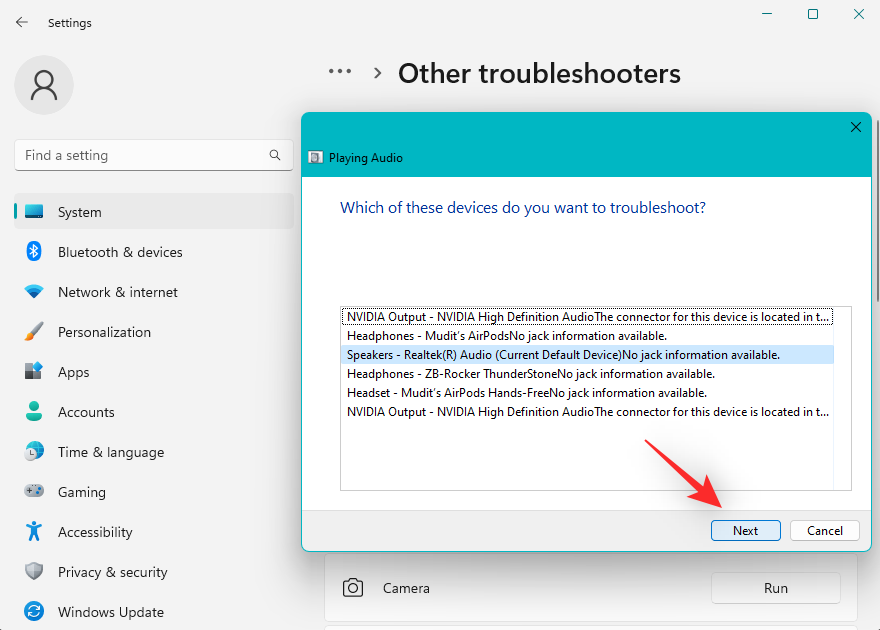
Windows will now detect problems with the selected device and suggest appropriate fixes. Follow the on-screen instructions to apply the recommended fixes based on your selected audio device.
When finished, clickClose.
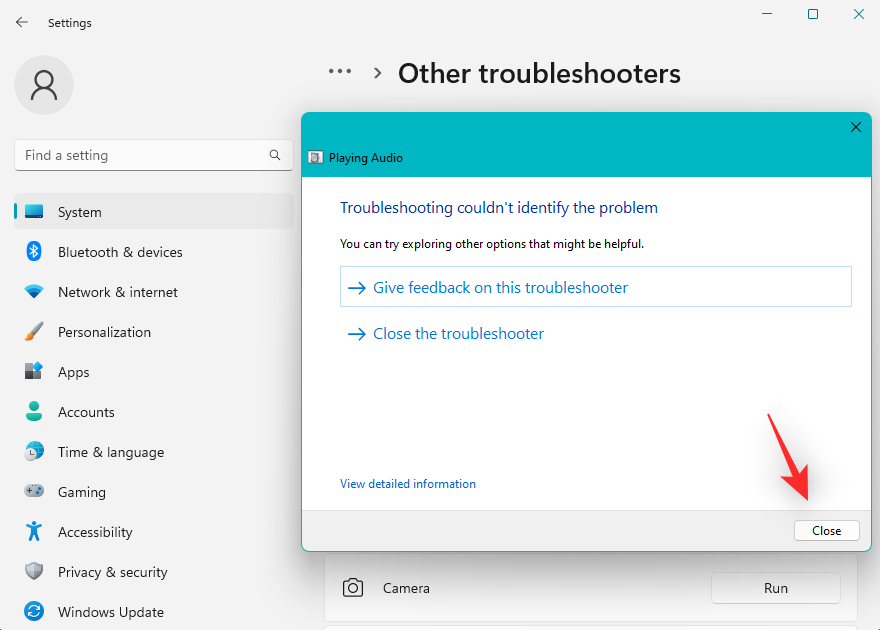
We now recommend that you run the following troubleshooter as well.
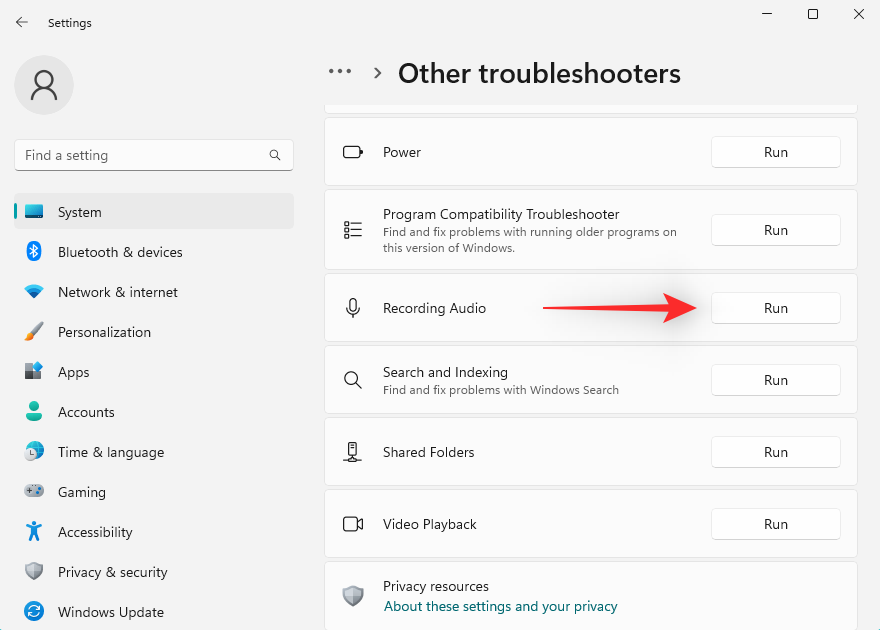
That’s it! We recommend that you restart your PC after running the necessary troubleshooters.
Windows Audio Services does not handle all audio tasks on your PC. Instead, it relies on additional services that help the audio on the device function as expected. If everything seems to be fine with the Windows Audio Service, we now recommend that you try starting its supported services if they are not already running. Depending on your preference, use any of the following methods to restart support services on your system.
NOTE:In most cases, when the services mentioned below fail to start on your system, you will receive an error while logging into your user account information. In some cases, it can also cause crashes and blue screens of death. If you are experiencing any of these situations on your system, then this could be the reason for the audio service failure on your system.
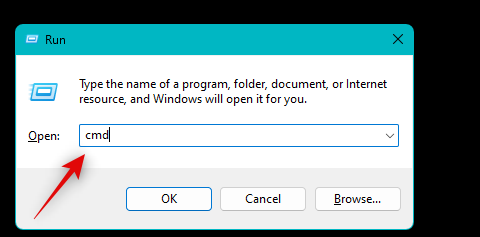
PressWindows Rto startRun.

Now type CMD in the run window and pressCtrl Shift Enterto open the command prompt with administrator privileges.
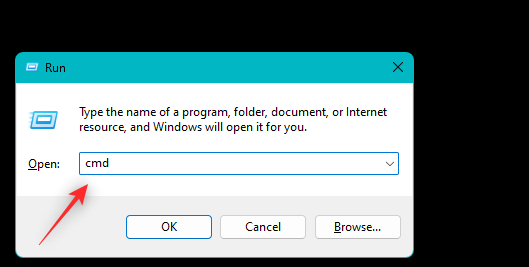
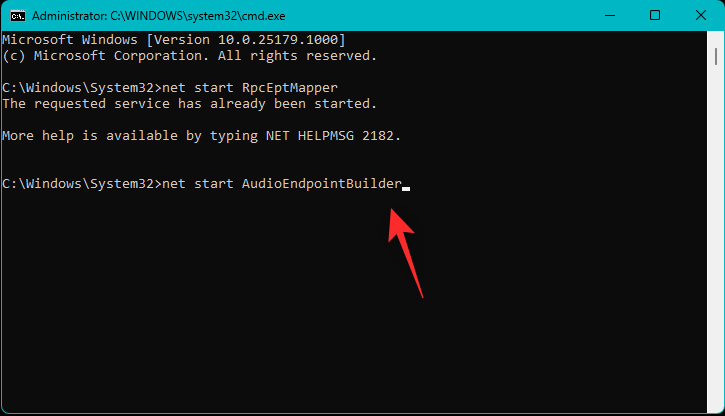
#Use the following command to start the support service on your PC.
net start RpcEptMapper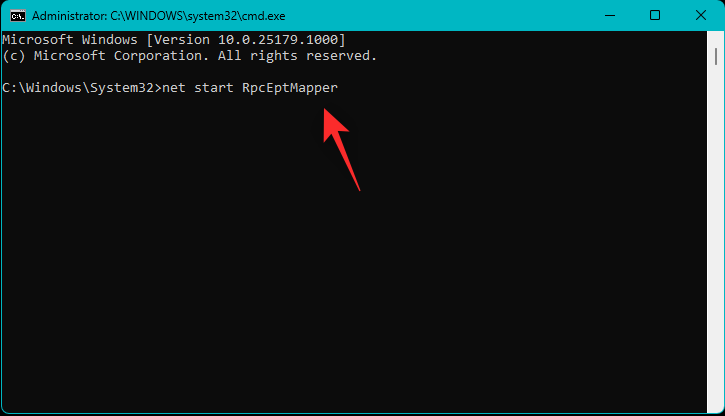
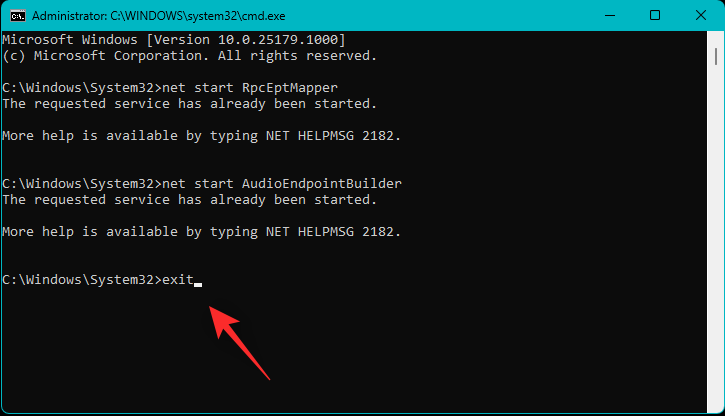
exit
Services” and start it from the search results.

Now find and check the following services on your PC. If one of them is not running, right-click on them and selectStart.
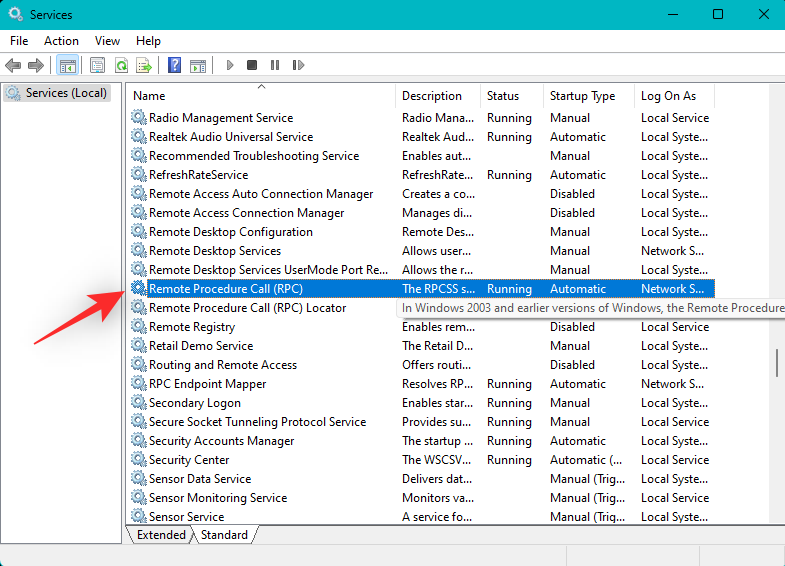
That's it! You will now start the supporting audio services required by Windows 11 on your system.
We now recommend that you try switching audio drivers on your system to see which one works best for you. Please follow the steps below to help you through the process.
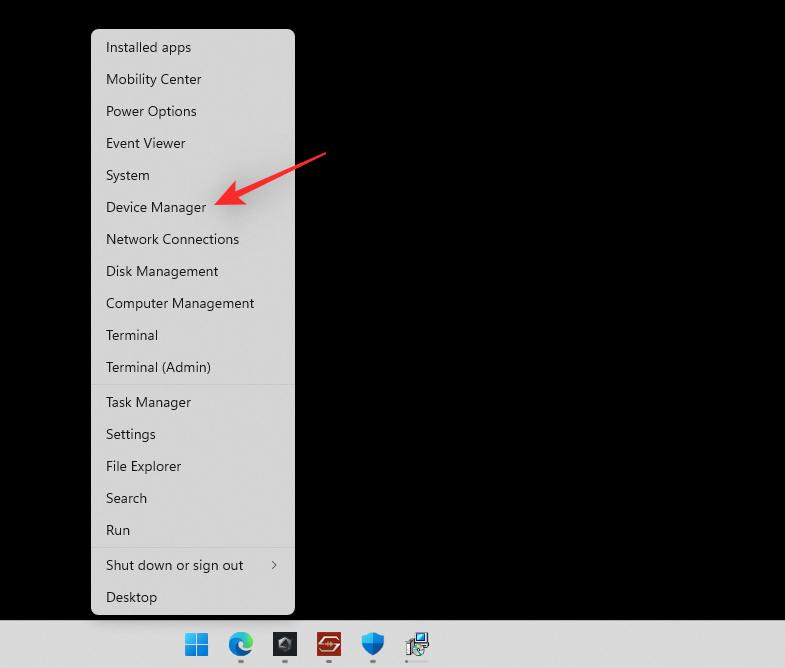
PressWindows Xand clickDevice Manager.
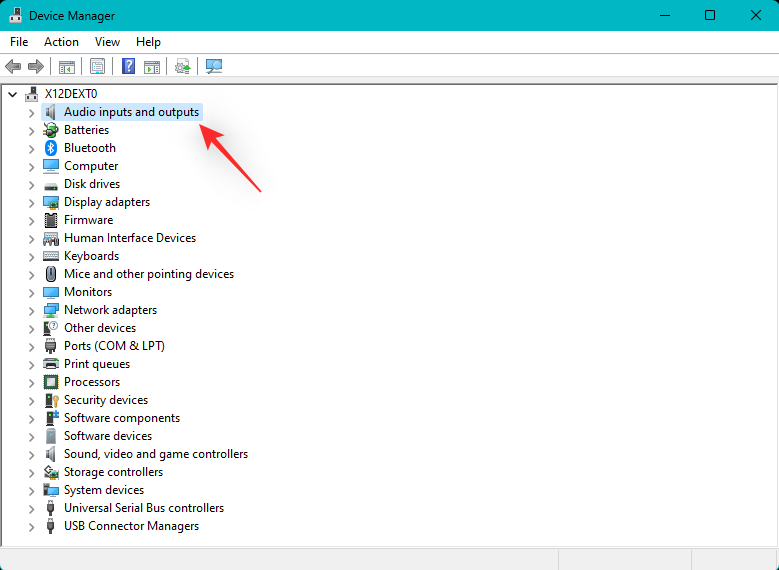
Double-click and expand theAudio Input and Output at the top.
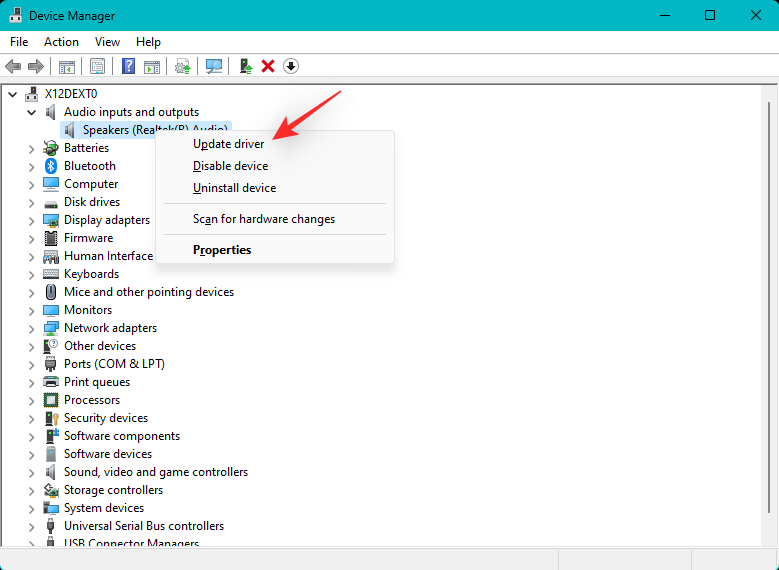
Now right-click on the relevant audio device you are having issues with and selectUpdate Driver.
ClickBrowse my computer for drivers. Now clickLet me selectfrom a list of available drivers on my computer.
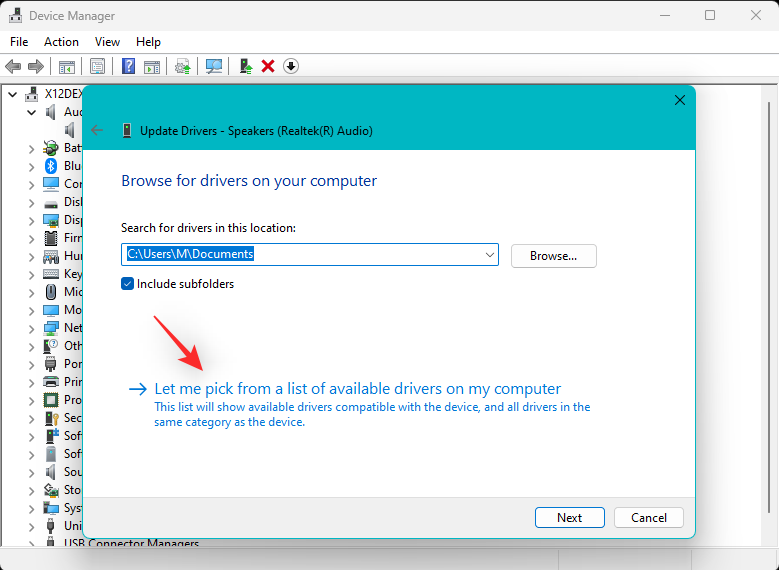
# Click and select an alternative driver from the available drivers in the on-screen list.
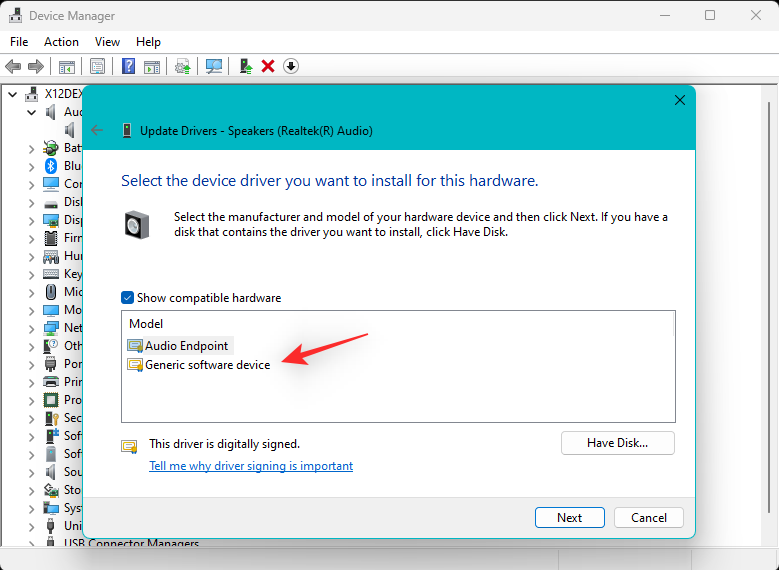
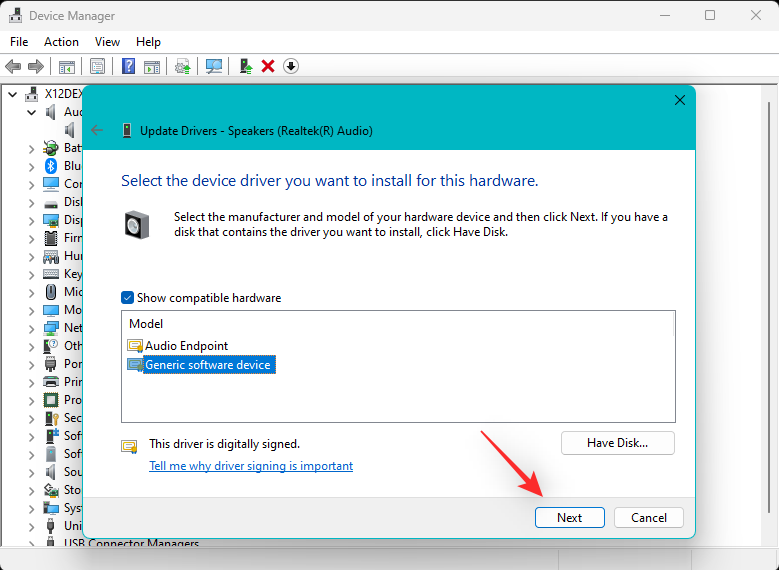
ClickNext.
The selected driver will now be used for the selected device. ClickClosewhen finished.
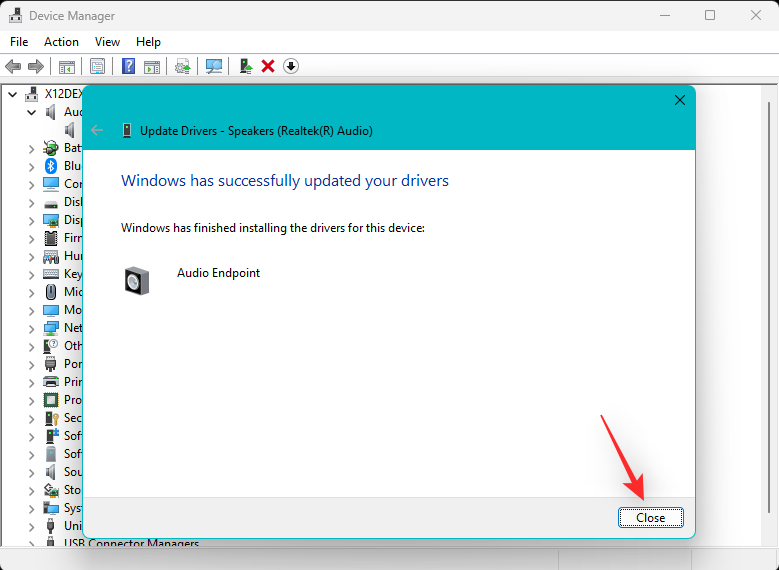
You can now try using audio on your PC. If everything is fine, then you can continue using the selected driver. However, if the audio service is still unresponsive, we recommend that you repeat the above steps, but this time select a different driver for your device. You should be able to find a valid driver from the drivers installed on your device.
Recent Windows updates may also cause the audio service to malfunction on some systems. We recommend using the tutorial below to uninstall recent updates and see if that resolves the issue for you. Please follow the steps below to help you through the process.
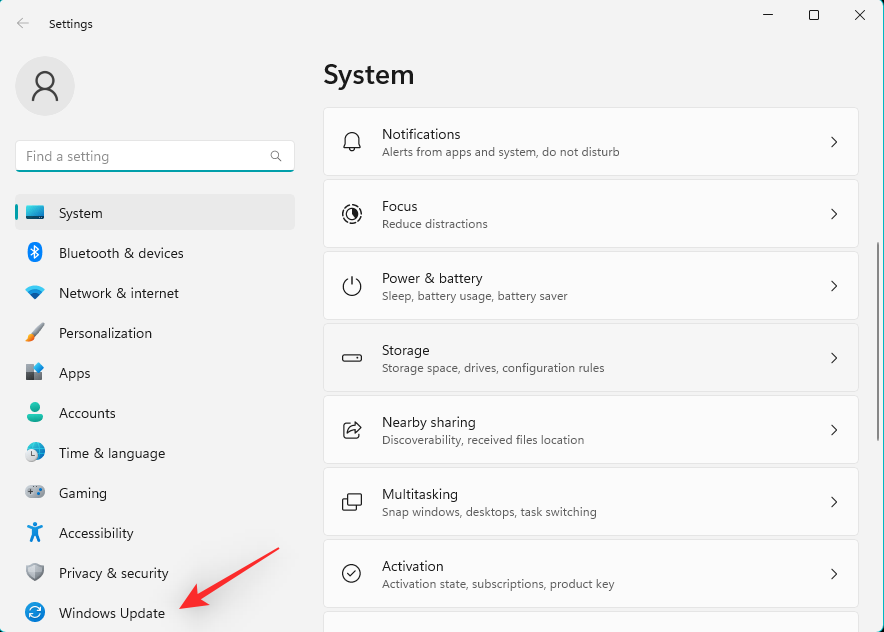
PressWindows ito open theSettings appand clickWindows Update on the left.
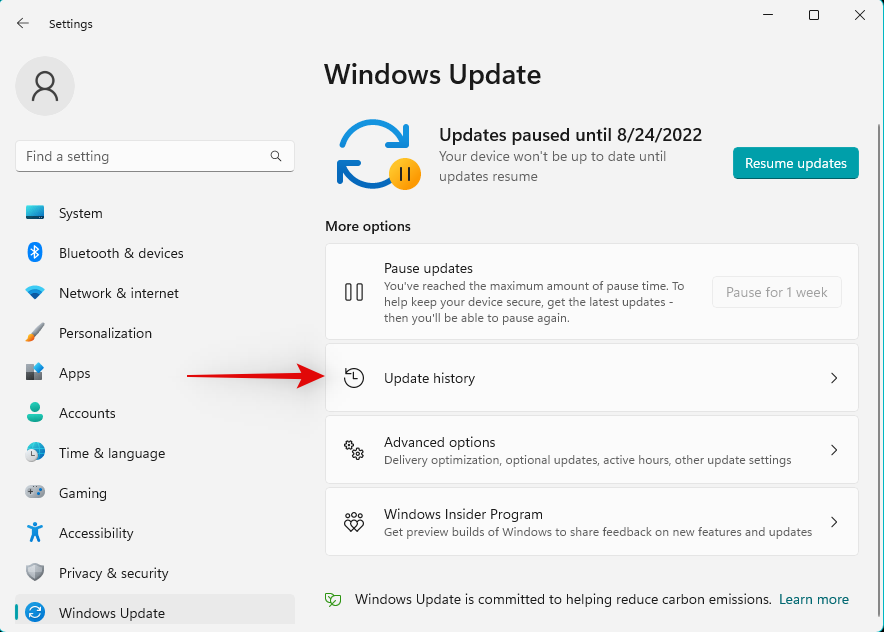
ClickUpdate History.
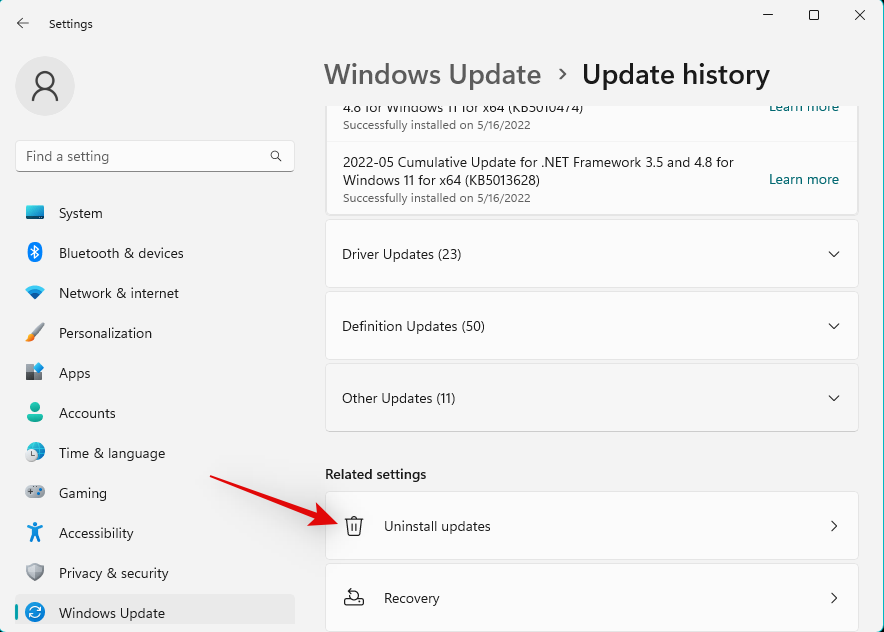
Now scroll to the bottom and clickUninstall updates.
Use the details to identify the latest update installed on your PC and clickUninstall next to Same.
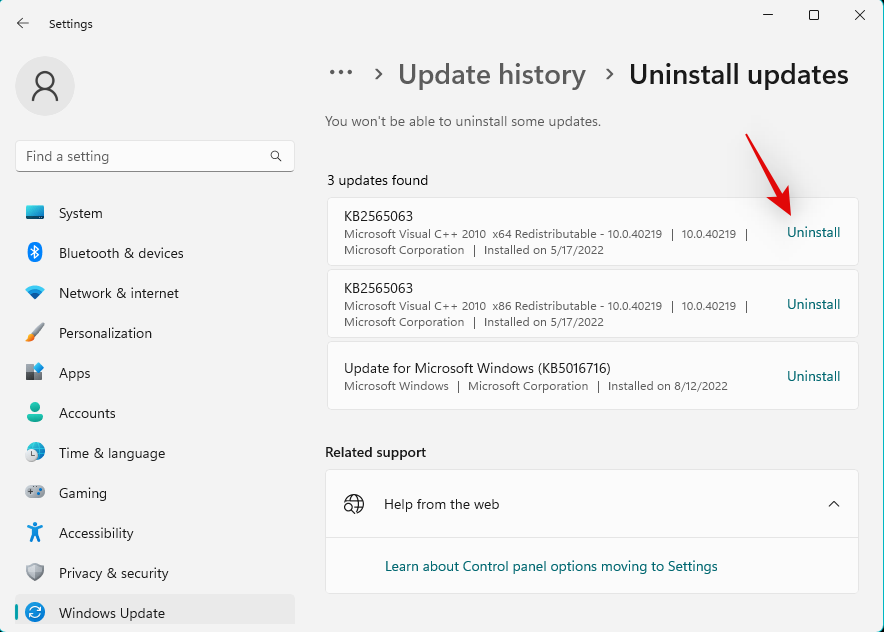
ClickUninstallagain.
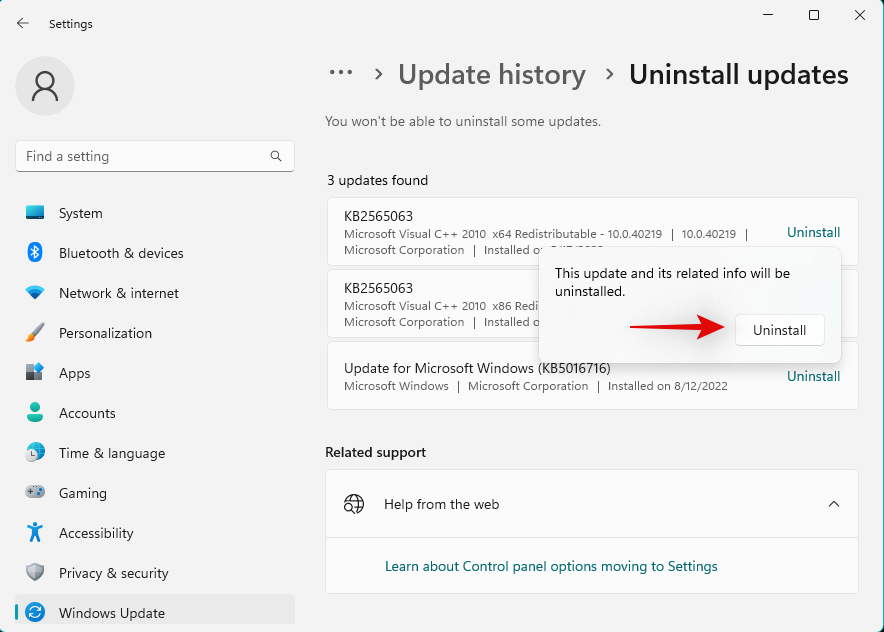
The selected updates will now be uninstalled from your device. Restart your device and try testing the audio on your PC. If everything is working fine, a recent update may be causing problems on your system.
If you are still experiencing audio issues, we recommend using the steps above to uninstall any other updates that you suspect may be causing audio issues.
Once you find the culprit, use the following tools to permanently block updates on your system. This will prevent Windows from installing updates in the background, which may cause your system to have audio issues again.
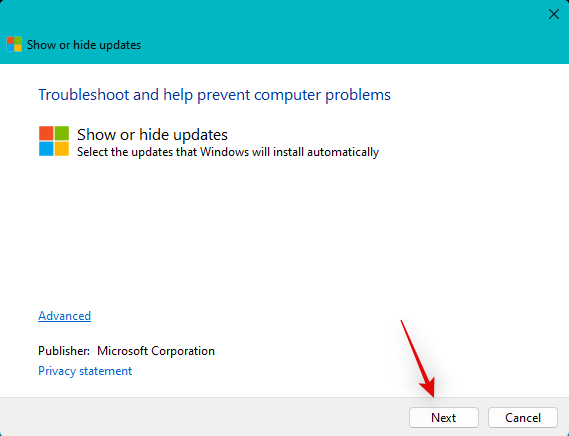
Download and launch the Windows Update Tool linked above on your system and clickNext.
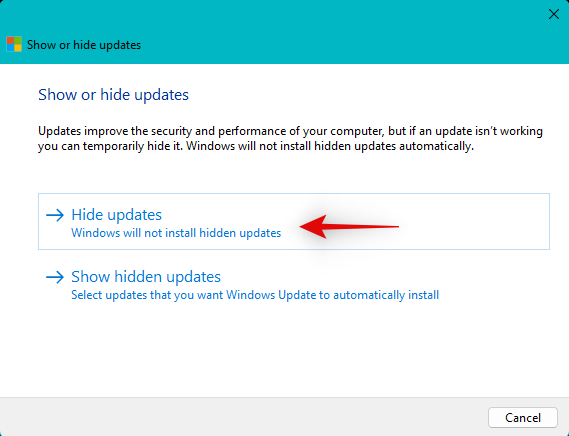
Now clickHide Updates.
The tool will now scan and display a list of available updates for your system. Check the culprit update box from the list on the screen.
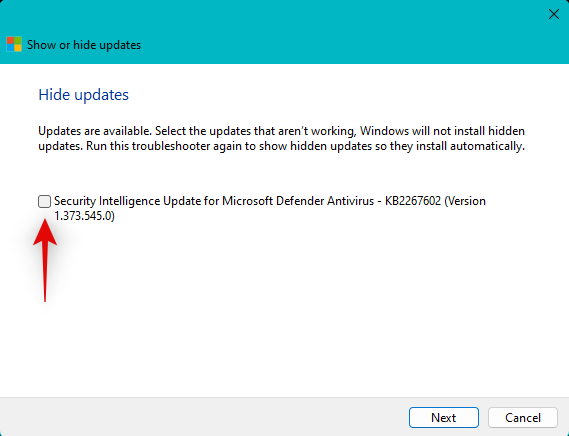
ClickNext.
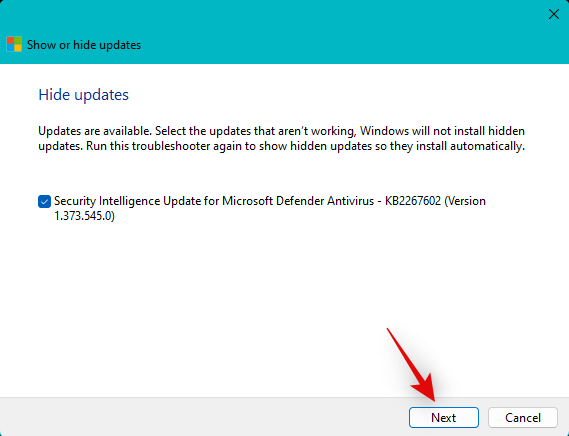
The selected updates will now be hidden from your PC. ClickClosewhen finished. That's it! You will now uninstall the problematic update from your system. Future update packs may help you fix the same issue on your PC after Microsoft releases it.
If you have a custom DAC or dedicated audio enhancer installed on your system, you may have a custom driver released by the OEM . In this case, due to the limited user base, the latest drivers may end up encountering bugs and issues that have not yet been documented. In this case, you can download the older driver from the OEM and try using the same driver on your PC. Use the following steps to help you through the process.
PressWindows Xand selectDevice Manager.

Double-clickSound, Video and Game Controllers.
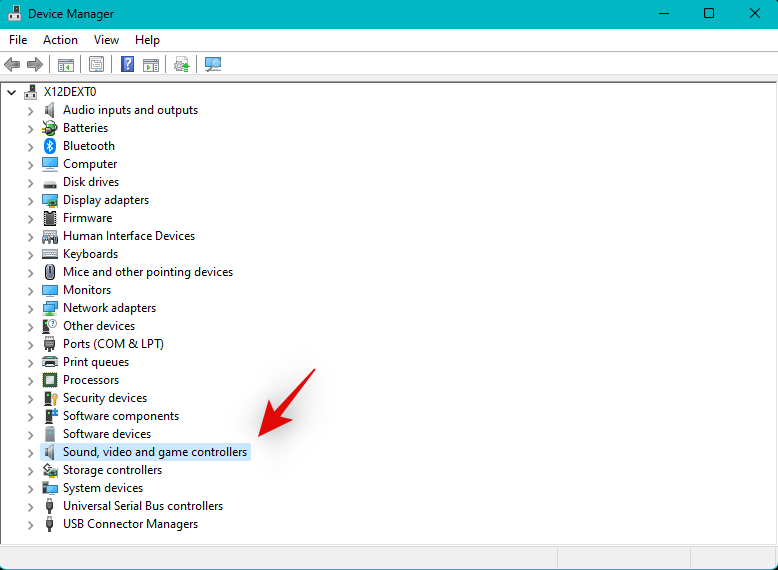
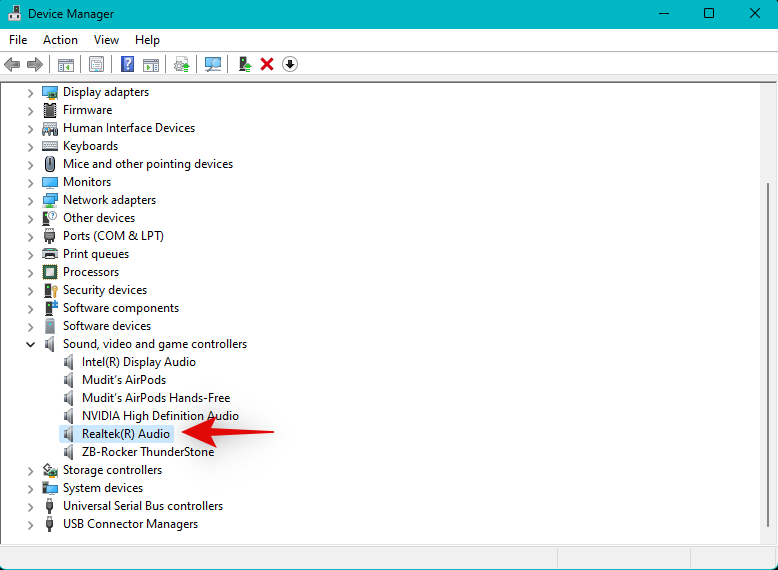
Now right click on the relevant audio device where you are facing the problem.
SelectUninstall device.
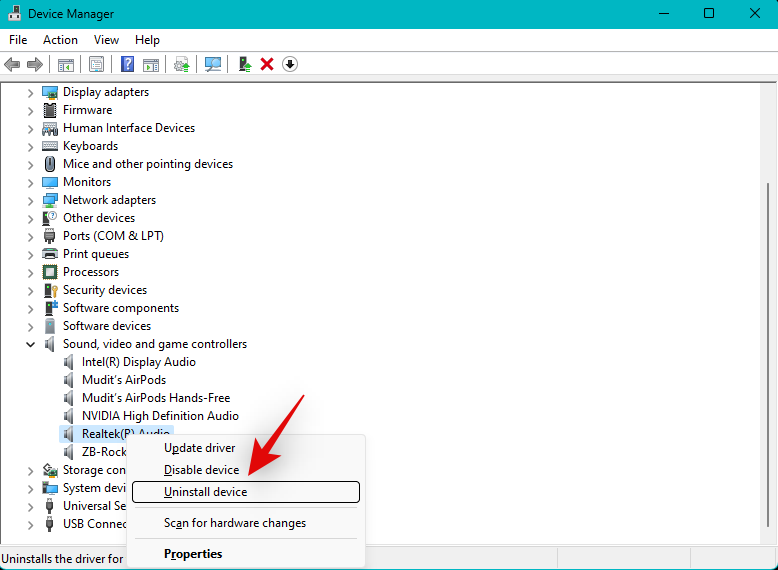
#If available to you, select the Try to remove the driver for this devicecheckbox.
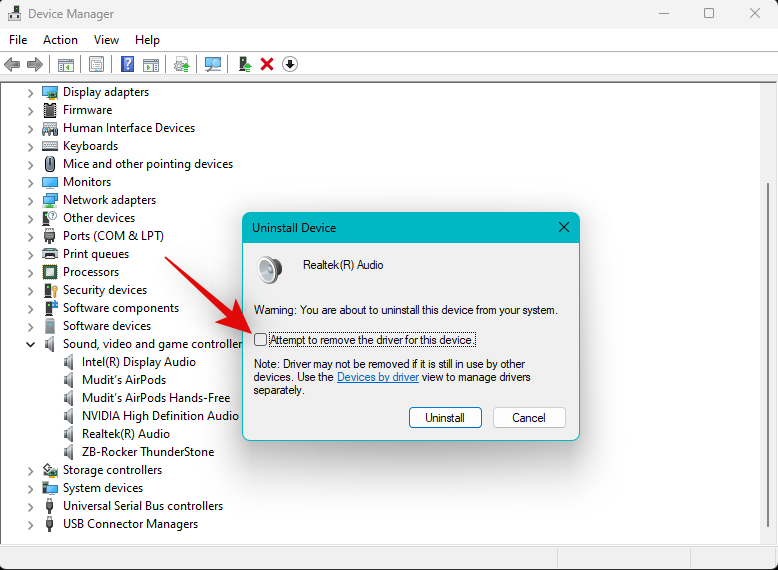
ClickUninstallto confirm your choice.
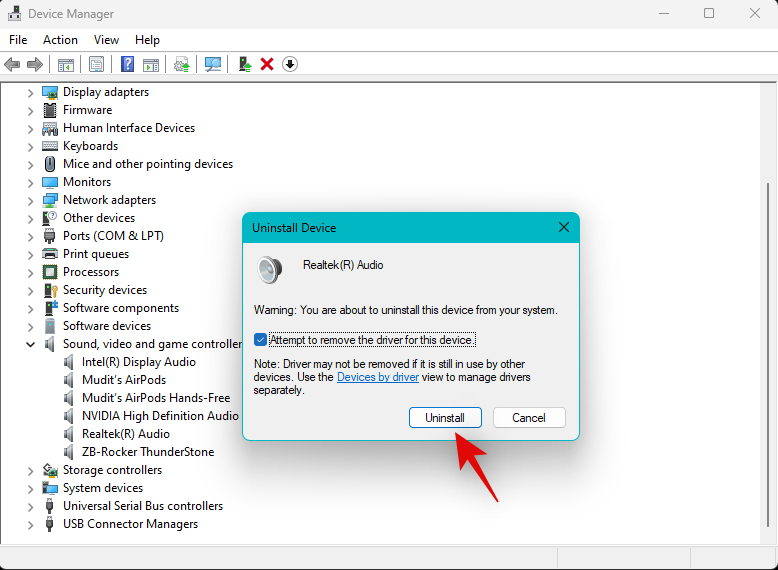
After uninstalling, click theAdd driver icon at the top of the screen.
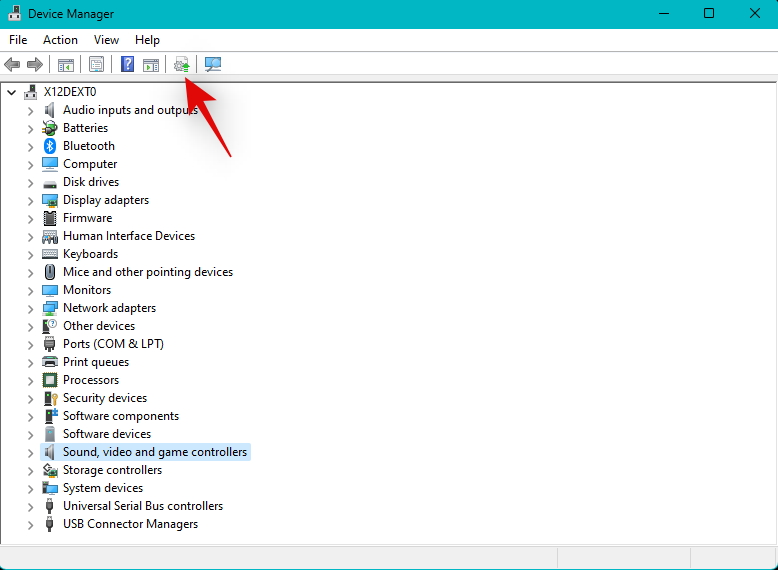
ClickBrowse.
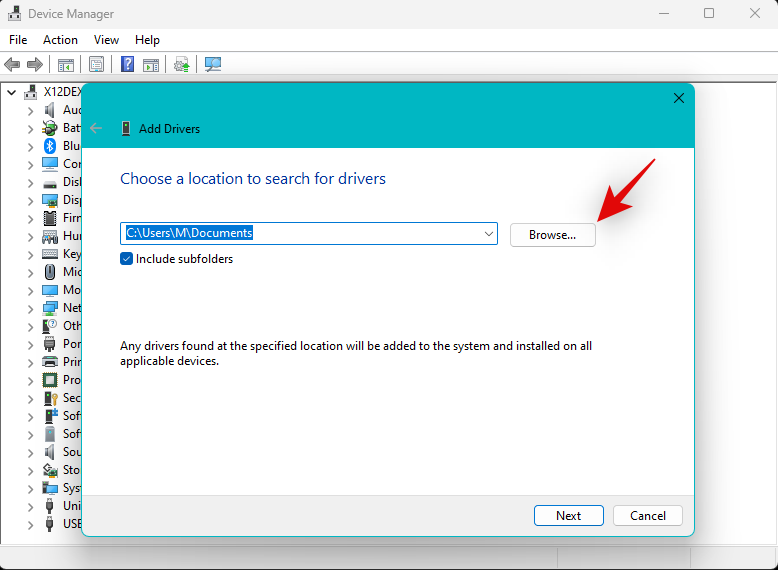
Now select the driver you downloaded from the OEM support site.
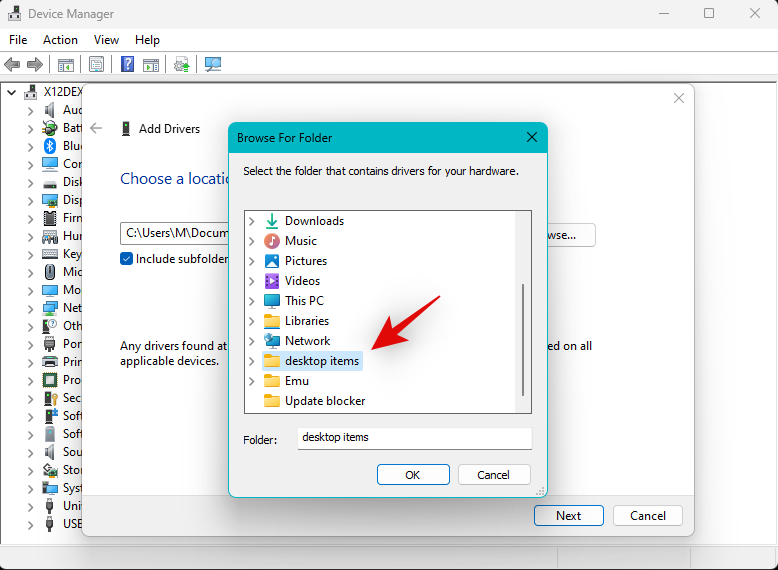
Note:If your OEM provides a .msi package for your driver, then we recommend that you unzip it first to Find the .INF driver file associated with your device.
ClickNext.
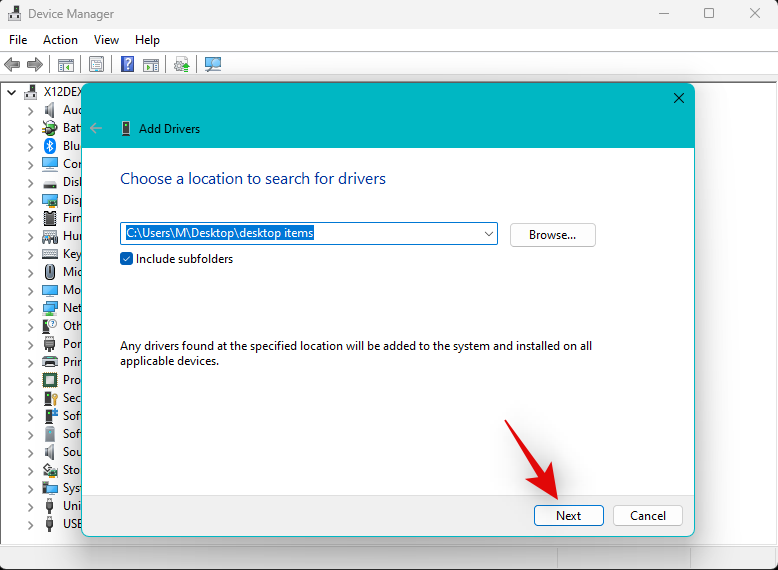
The driver will now be installed on your system. When finished, clickClose.
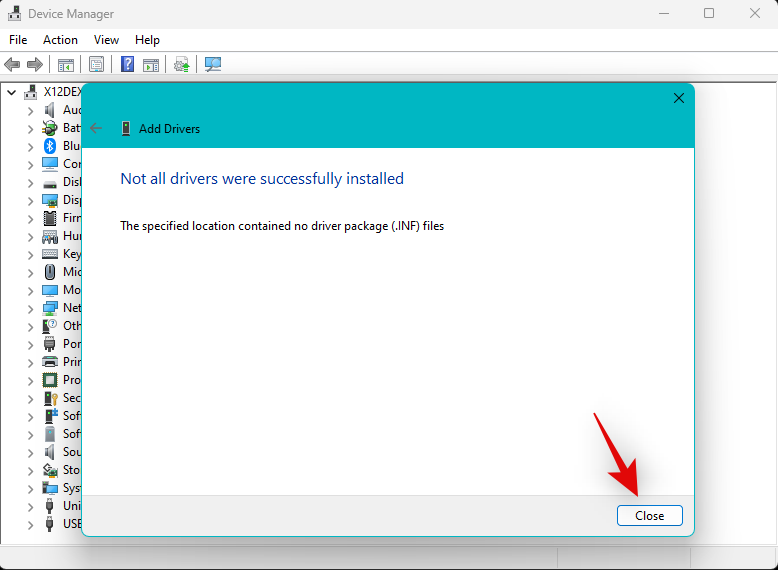
If the new driver is causing issues with the audio service, all drivers should now work as expected on your device.
Recent third-party programs and updates can also cause audio issues on your system, especially if you use your PC for audio production or editing . This requires specialized drivers to aid correct audio output and customizable sample rates.
However, misconfiguration or faulty drivers can end up causing audio issues on Windows 11 and, in the worst case scenario, break everything. Uninstalling any such third-party programs and applications should help fix the same issue on your system.
You can then reinstall the old version of the program on your system to repair the audio service. Please follow the steps below to help you through the process.
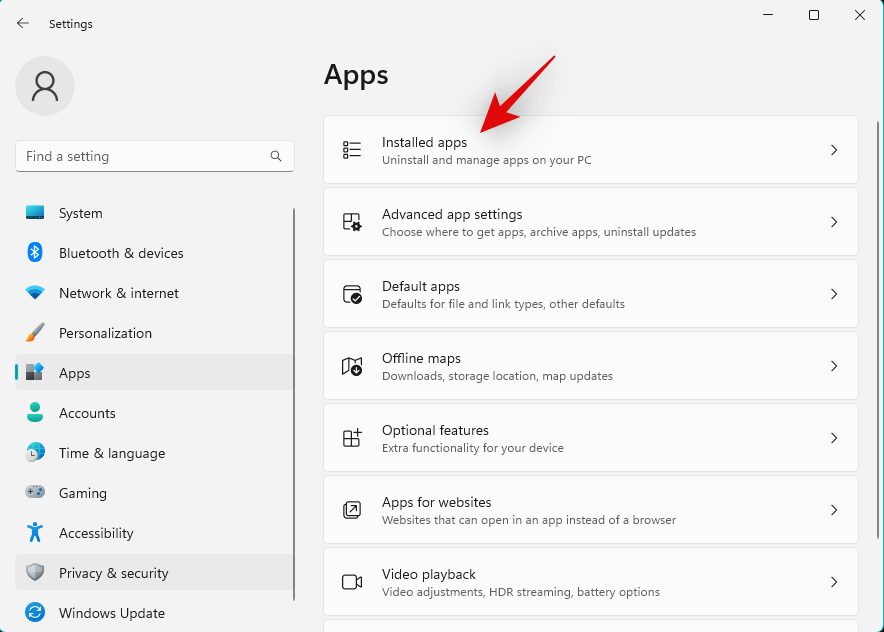
PressWindows ito open theSettingsapplication and clickApplications.
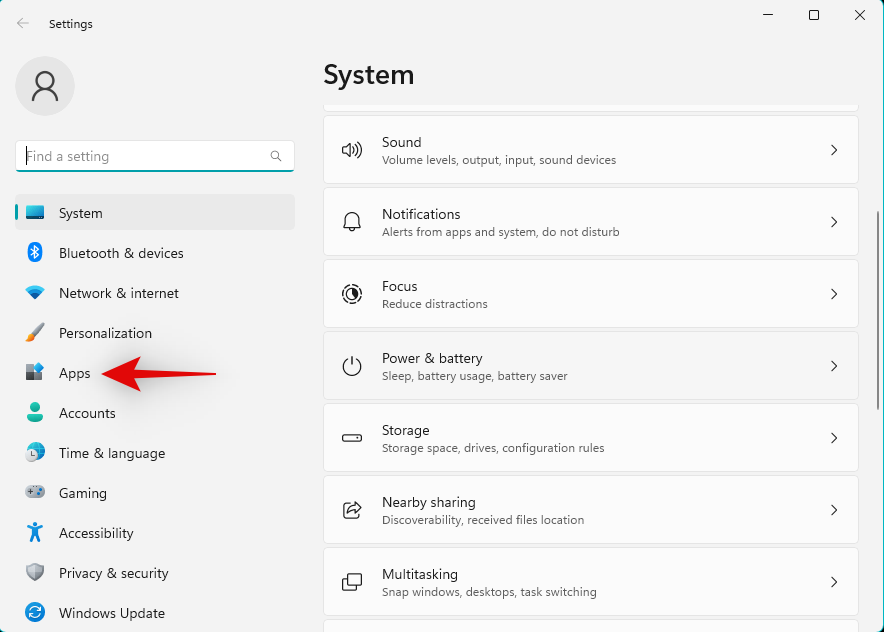
ClickInstalled Applications.
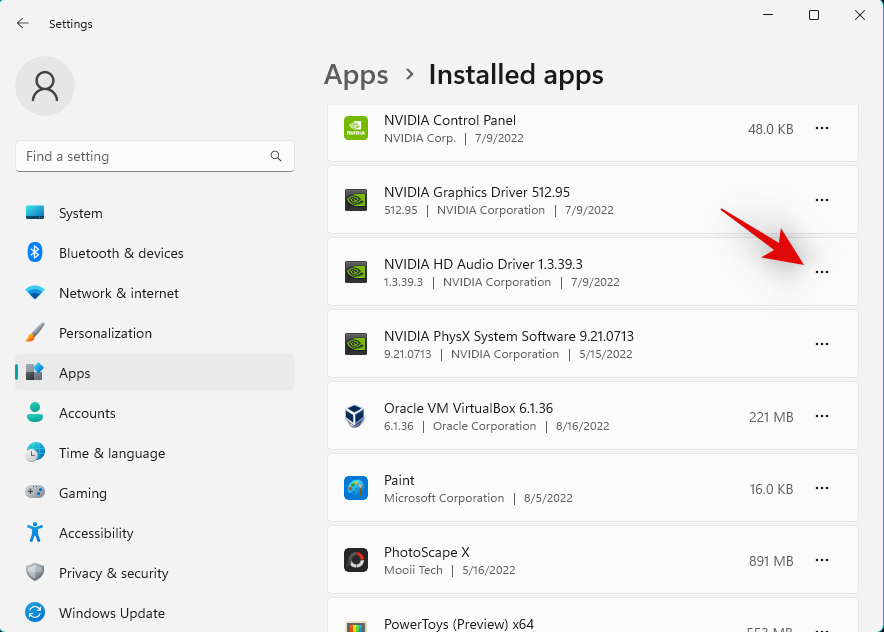
Now click on the3 dots ( ) icon next to the relevant program in the on-screen list.
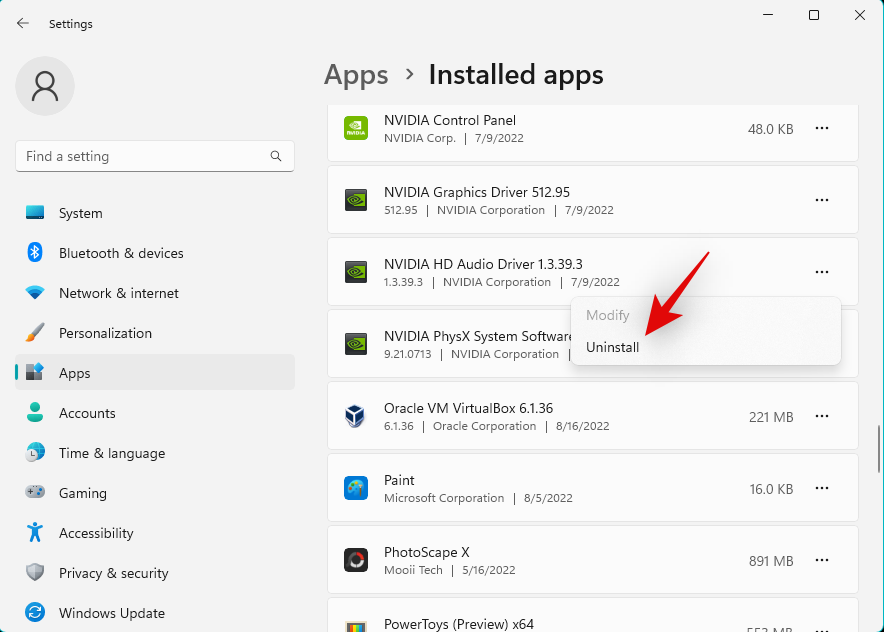
ClickUninstall.
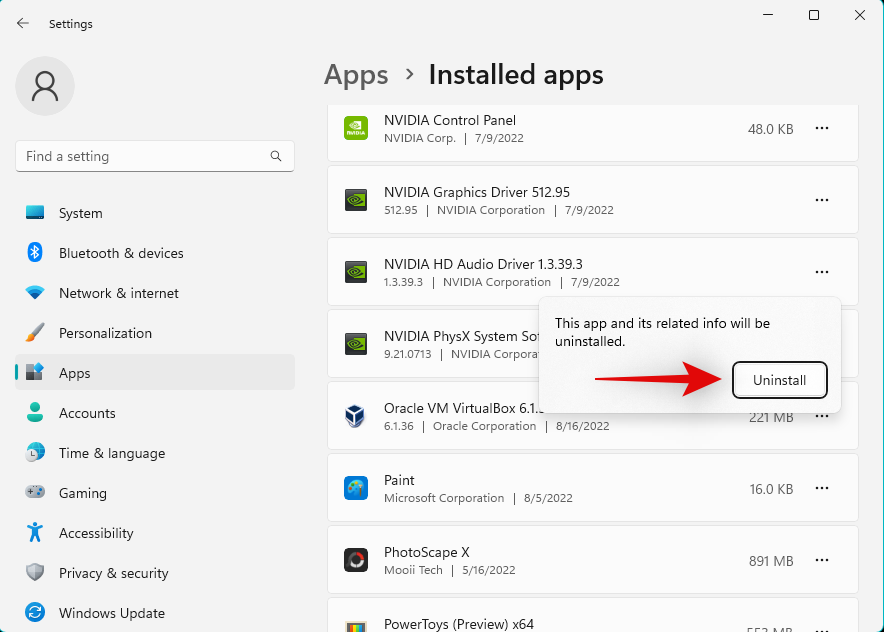
ClickUninstallagain to confirm your choice.
#After uninstalling the program from your system, please restart your PC. If a suspicious third-party program is causing issues with the audio service on your Windows 11 system, the issue should now be fixed on your system.
The audio output format helps you determine the audio output quality on your system to support high-end audio devices. Changing and switching it can help refresh background services, which may cause issues with audio on your system. Use the following steps to help you through the process.
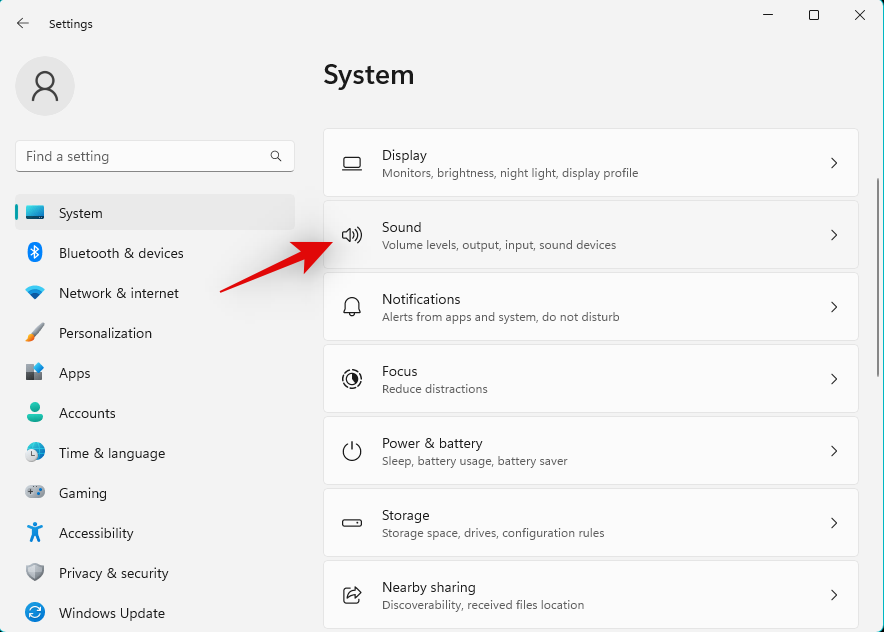
PressWindows ito open theSettingsapplication and clickSound on the right.
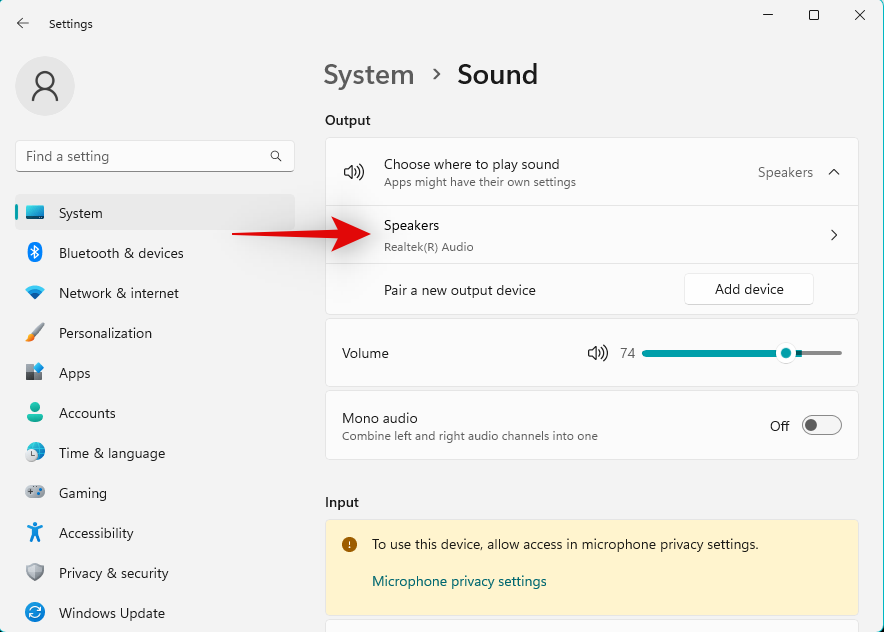
Now click and select the relevant audio output device underOutput.
Click the drop-down menu next to Formatand select an alternative to the default selection. The idea is to toggle this option between the available options a few times until the audio is back up and running on your system again.
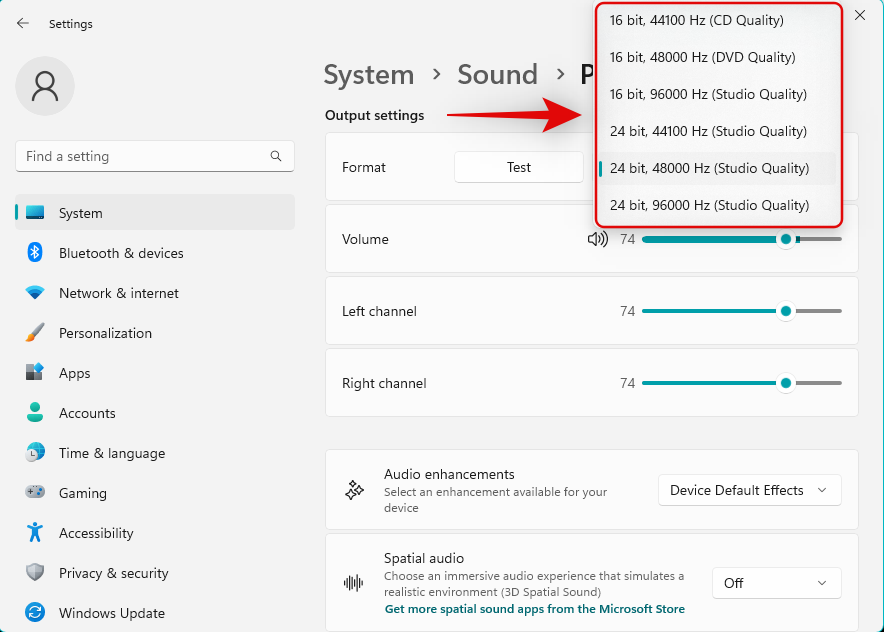
#If you manage to get your audio to work at a lower sample rate or with a single channel, you may face compatibility issues with your current output device. In this case, you can switch to another output device or try updating the driver from your OEM to resolve your issue. Your PC OEM or audio output device OEM may release specific drivers. You can refer to your device's support page for more information.
Registry changes and incorrect values may also prevent the audio service from becoming unresponsive on Windows 11. Use the following steps to help verify and fix the same issue on your system.
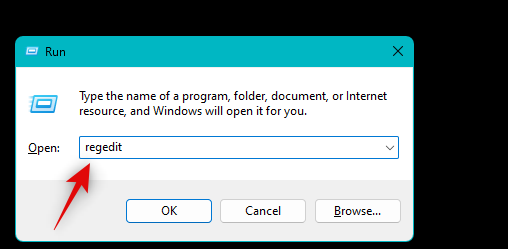
PressWindows Rto startRun.

Now enter the following and press Enter. You can also click "OK" if necessary.
regedit
Use the left sidebar to navigate to the following path. You can also copy and paste the address below into the address bar at the top of the screen.
Computer\HKEY_LOCAL_MACHINE\SYSTEM\CurrentControlSet\Services\AudioEndpointBuilder
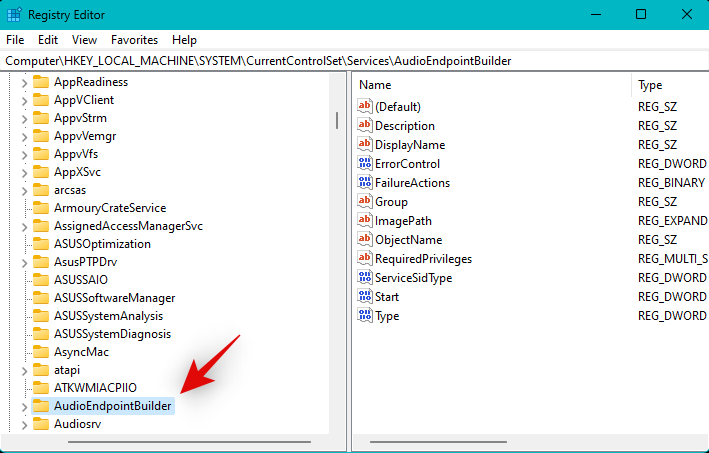
AudioEndpointBuilderkey on the left and selectParameters.
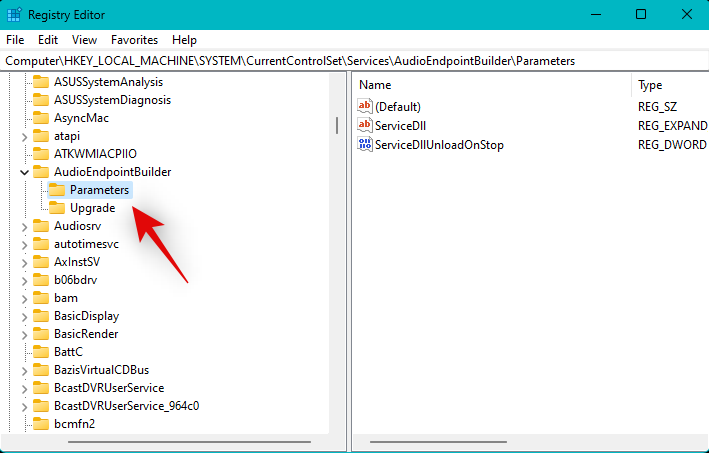
ServiceDll on the right.
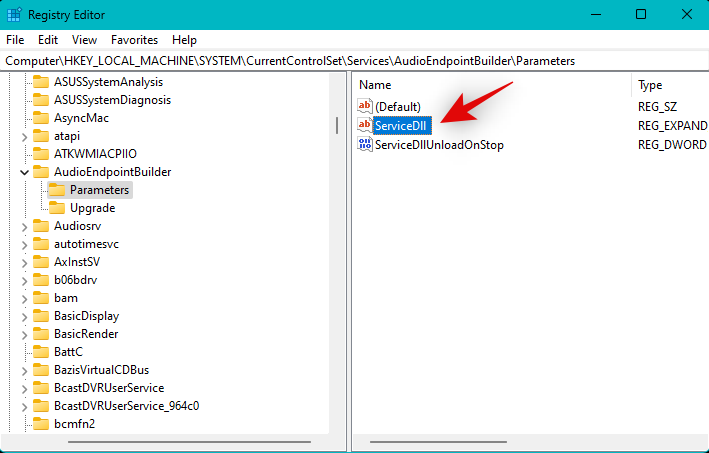
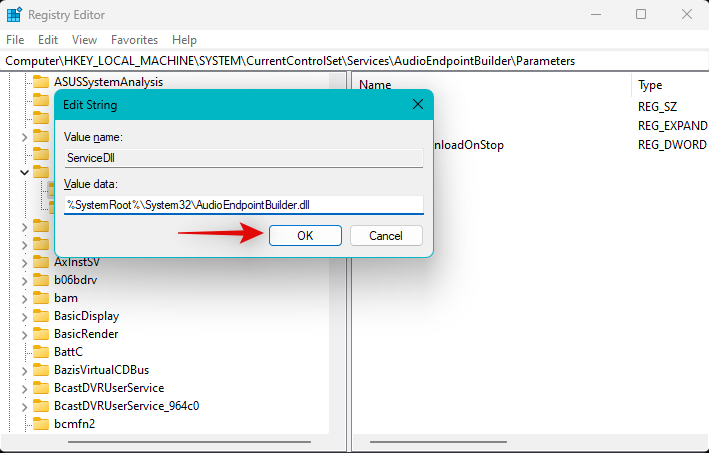
value data. If not, enter the values below and clickOK.
%SystemRoot%\System32\AudioEndpointBuilder.dll
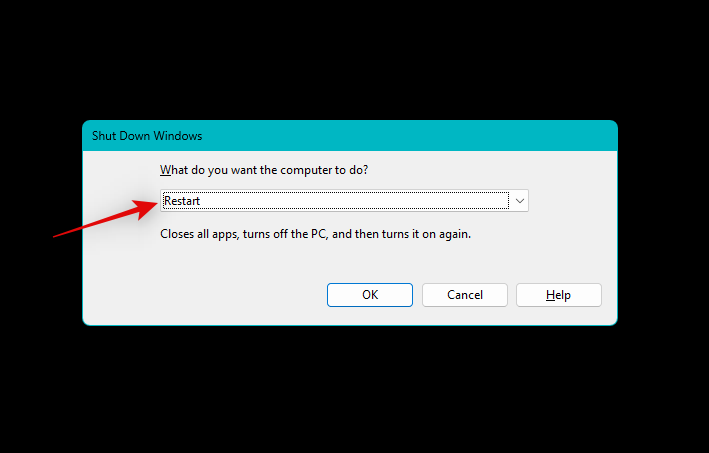
Windows Rto startRun.

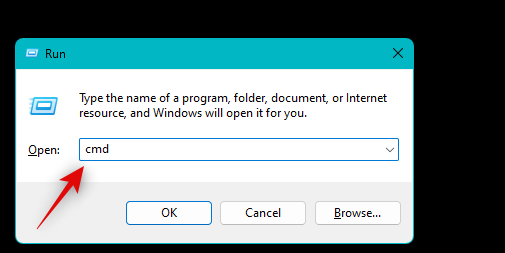
Ctrl Shift Enter.
cmd
net localgroup Administrators /add networkservice

net localgroup Administrators /add localservice

exit

Tips:We recommend that you play videos or songs in the background. This will help you determine when audio starts working on your PC again.
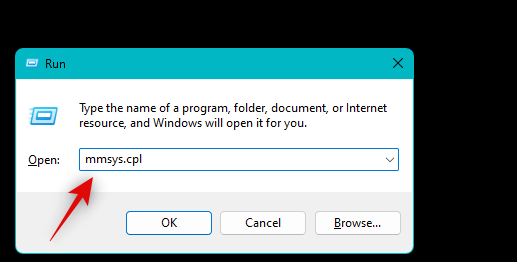
PressWindows Rto startRun.

OK".
mmsys.cpl
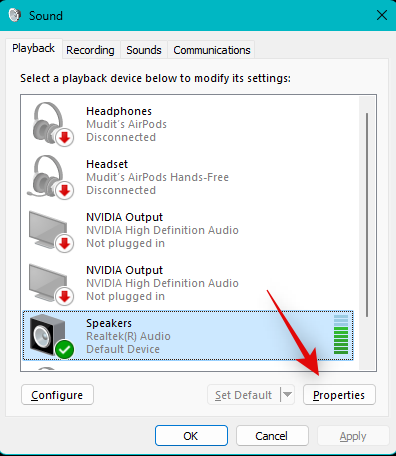
Click and select the relevant audio device from the list in thePlaybacksection.
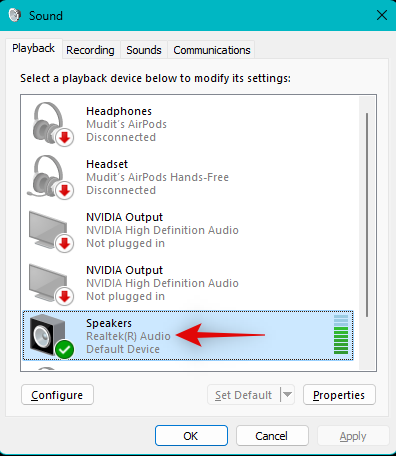
ClickProperties.
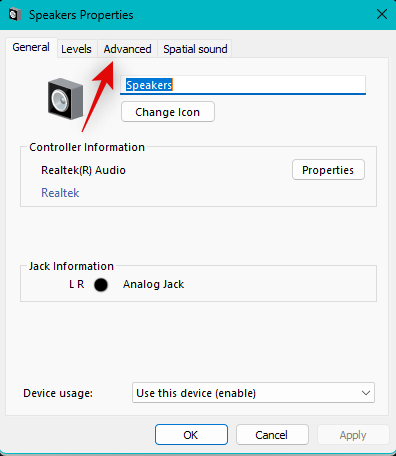
Click and switch to theAdvancedtab.
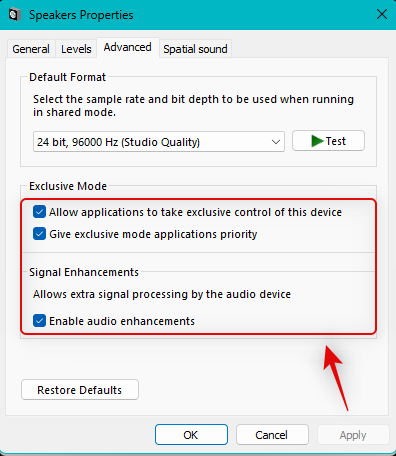
Now uncheck the checkboxes of the following items on the screen.
Apply.
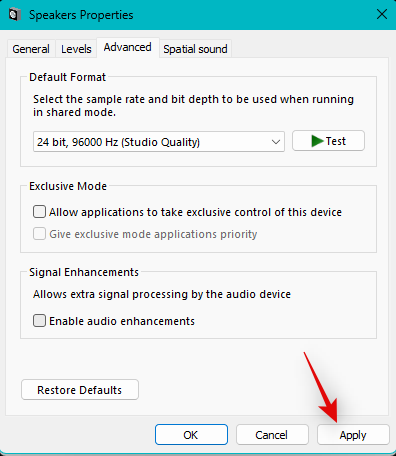
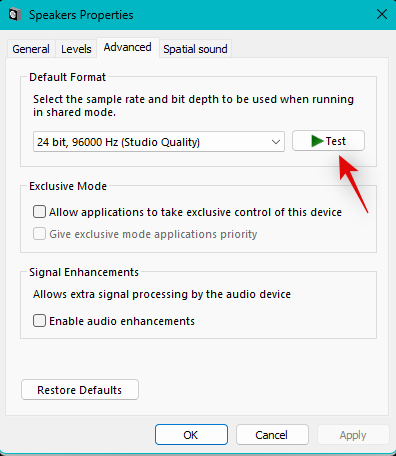
Test at the top.If you can hear the test tone, audio enhancement may be causing problems on your PC.
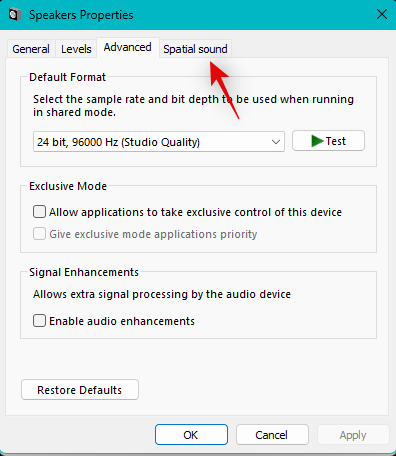
Spatial Sound tab at the top.
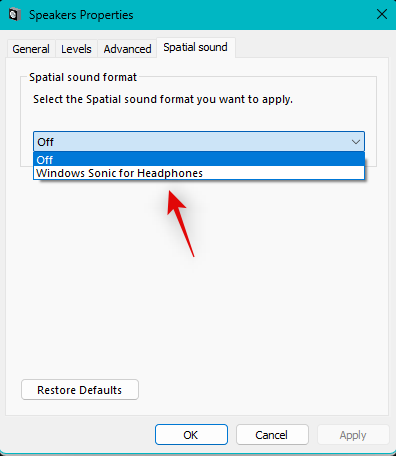
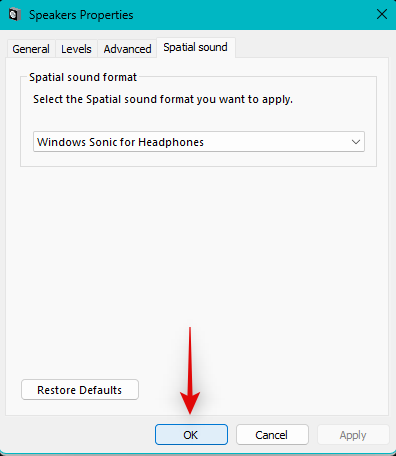
OKwhen finished.
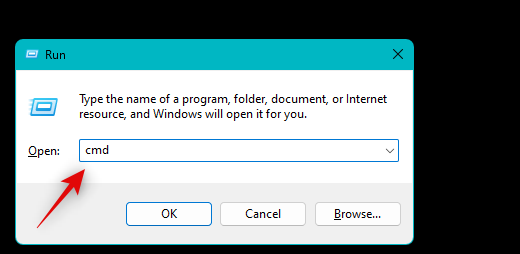
Windows Rto startRun.

Ctrl Shift Enteron your keyboard.
cmd
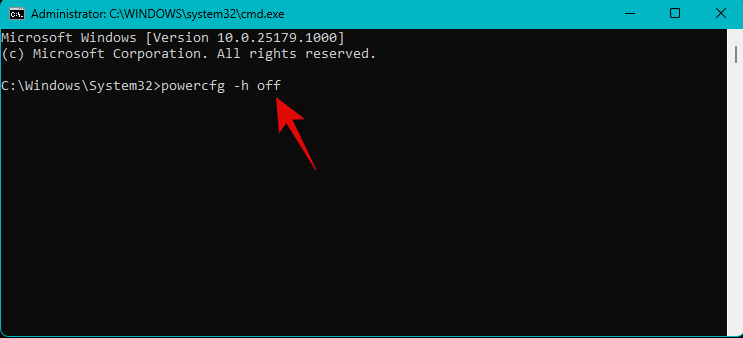
powercfg -h off
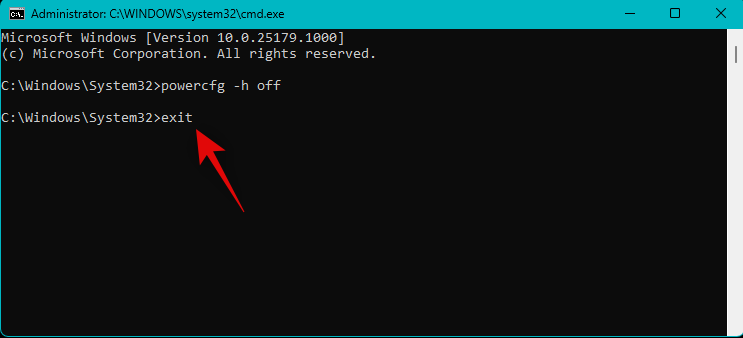
exit
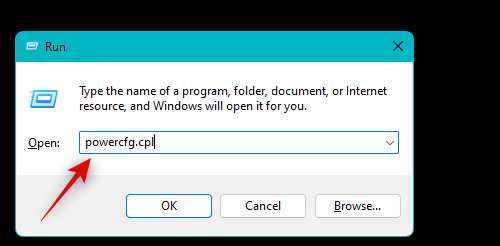
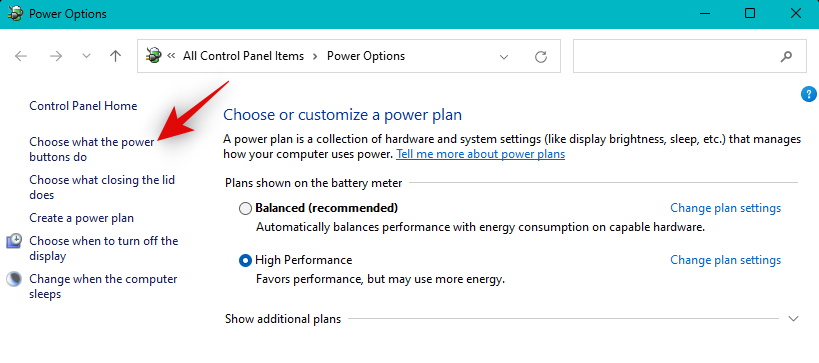
Windows Rto boot Run again and use the following commands to access your power options.
powercfg.cpl
to select the function ofthe power button on the left.
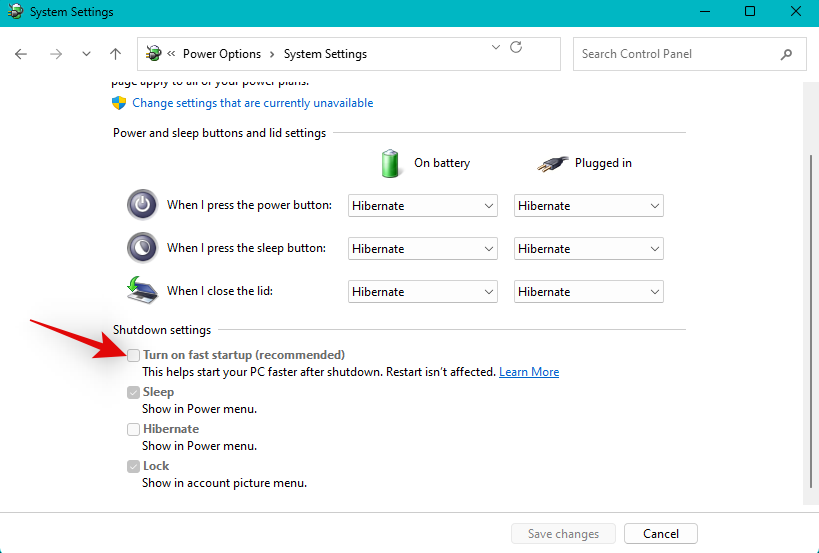
Open Quick Start (recommended)checklist.
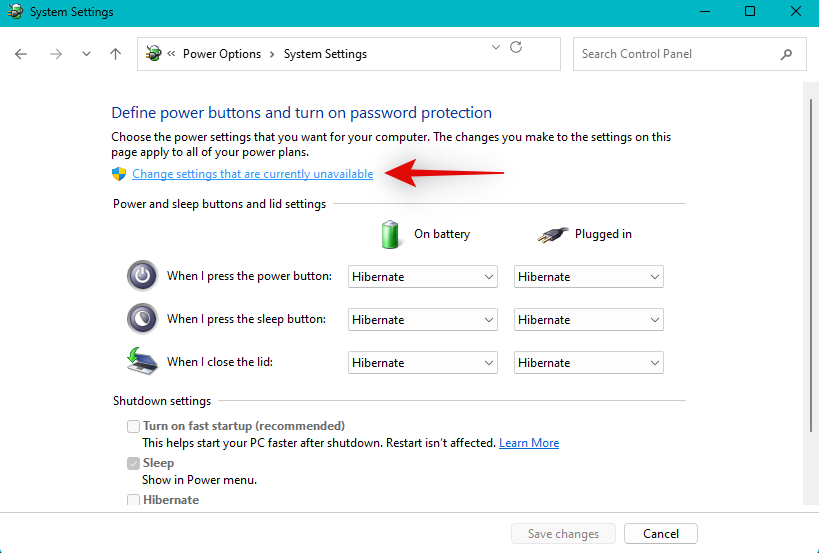
Change settingsthat are currently unavailable.
You can now uncheckTurn on Fast Startup(Recommended).
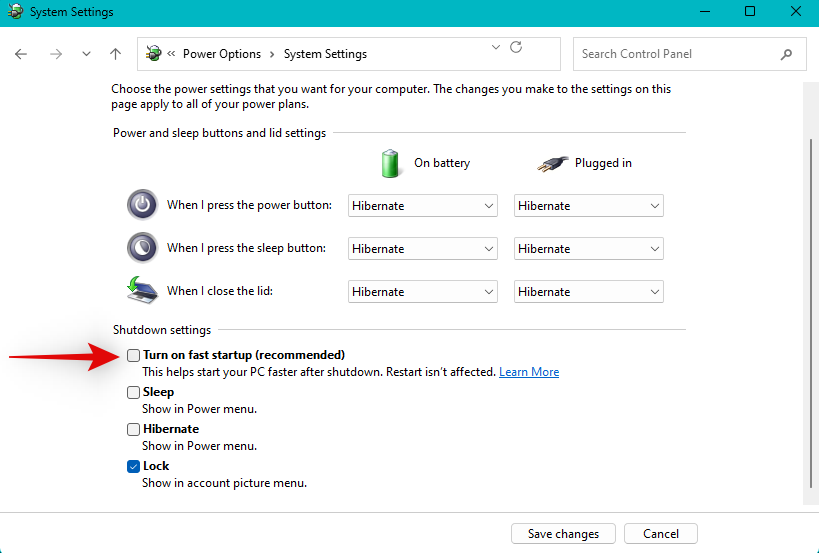
Clickto save changes.
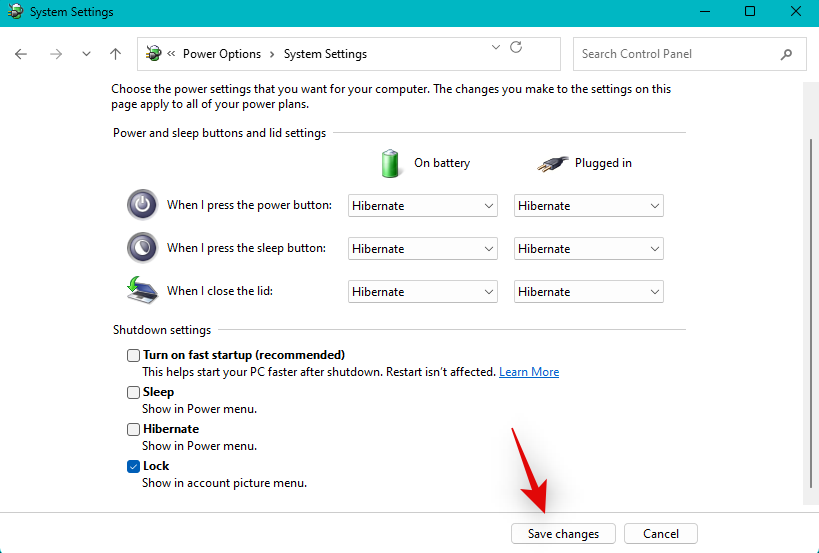
Restart your PC when finished.

# If fast boot is causing problems with the audio service on your system, now is the time to fix the audio.
Plug and Play allows you to use Plug and Play devices without even booting your operating system. However, some systems may experience bugs with certain devices and drivers that break Windows 11 audio services. Disabling Plug and Play in the BIOS can help you prevent errors. Unfortunately, depending on your motherboard, you may not be able to use this option, but if your PC was built in the past 5 years or less, you should be able to use this option.
Use this tutorial we provide to find out your BIOS key, then use the same key when restarting your PC to boot into the BIOS. You should be able to find your Plug and Play settings in the Advanced BIOS options.
Sometimes a custom driver from your OEM may not work completely properly. This may be mostly caused by outdated drivers that have not been updated for Windows 11. Windows 11 significantly changes the way drivers are handled in the background.
This requires OEMs to specifically update most existing hardware components. However, if your OEM has not released an update, this may be the reason why the audio service is failing in your setup. In this case, we recommend that you try using a universal driver to see if that solves your problem. Please follow the steps below to help you through the process.
Open the Start menu, search forDevice Installation Settings, and launch the same settings from the search results.
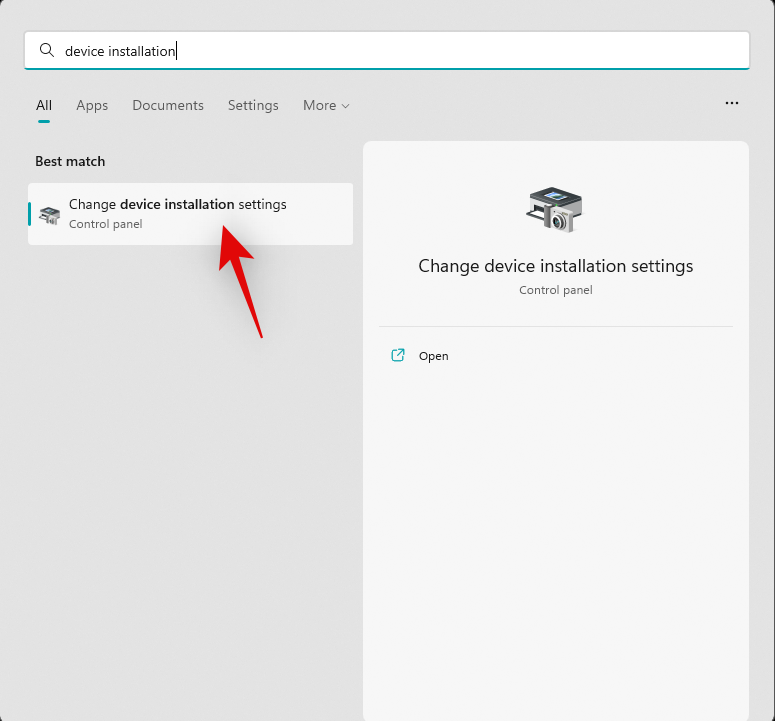
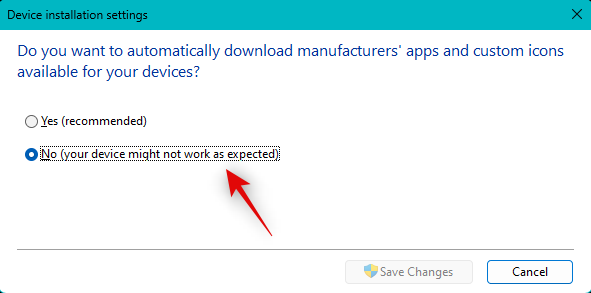
Click and selectNo.
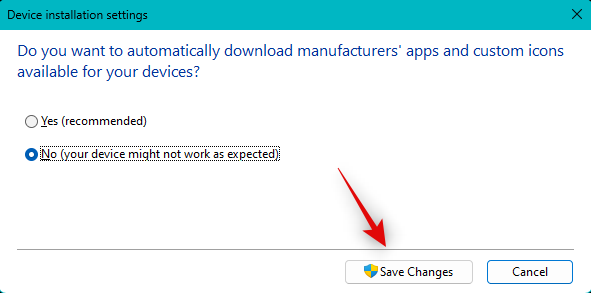
Now clickSave Changes.
PressWindows Xand selectDevice Manager.

Now right-click on the relevant audio device you are having issues with and selectUninstall device.
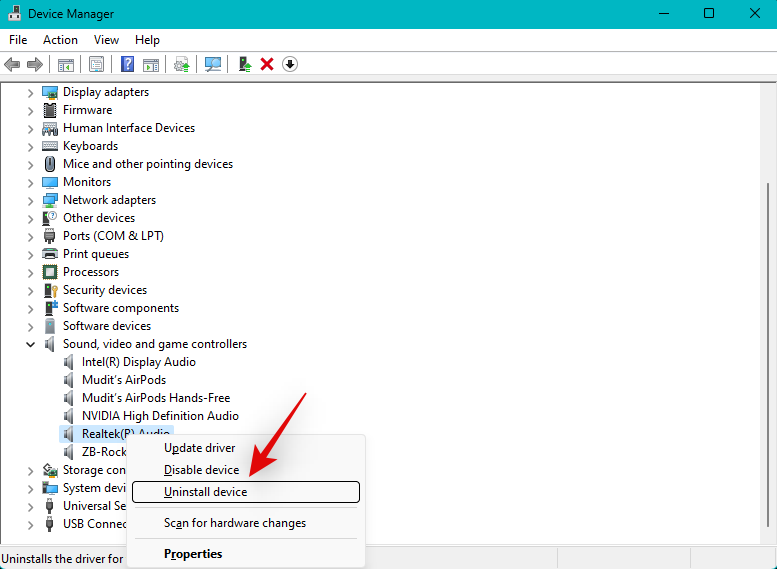
Select the "Attempt to remove the driver for this device" checkbox.
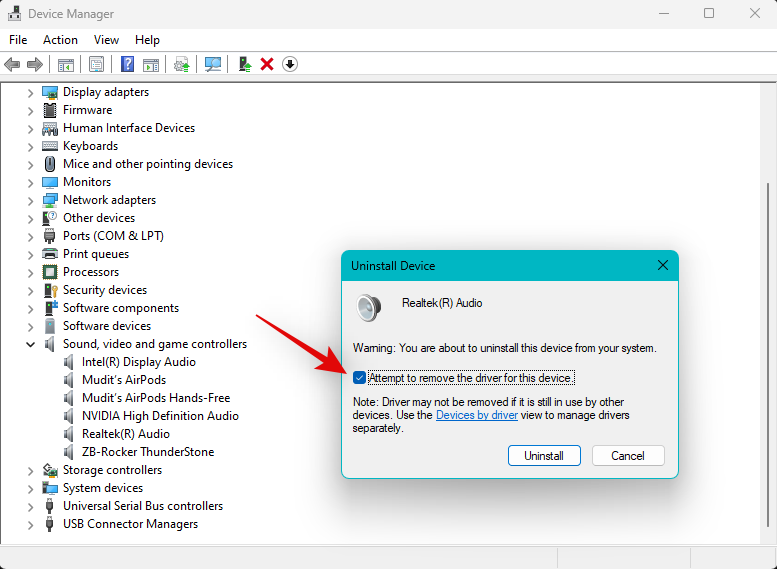
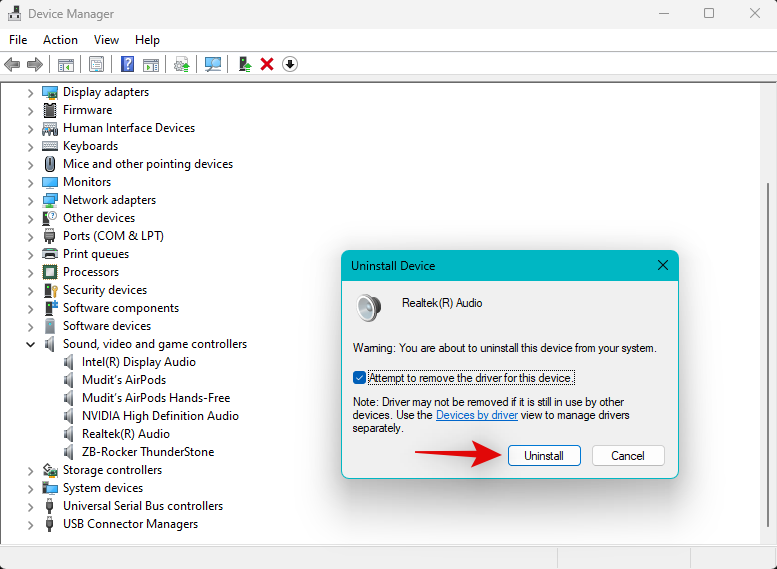
Now clickUninstall.
The selected device will now be removed from your PC. Click theScan for Hardware Changes icon at the top.
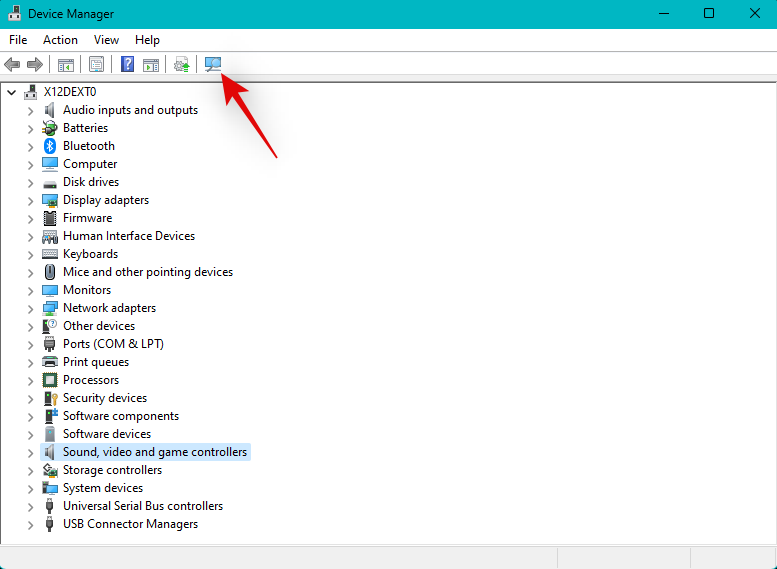
#Windows will now scan your PC and install universal drivers for your audio devices.
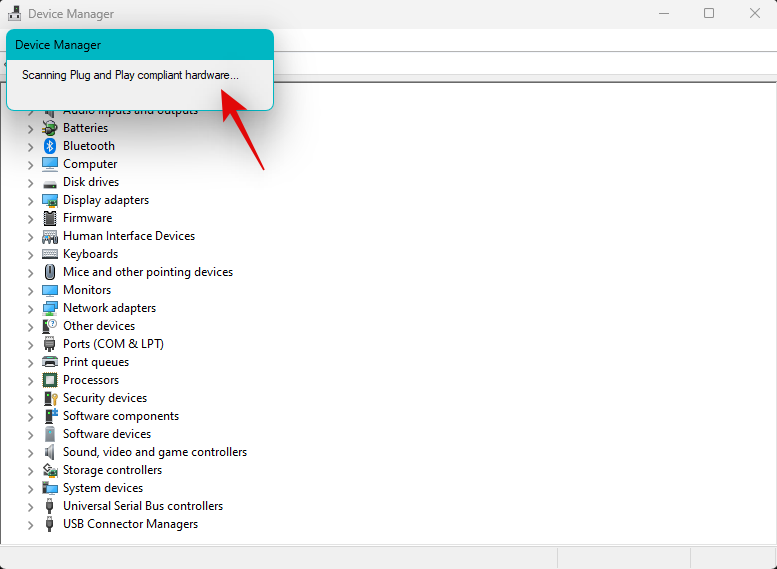
If a custom driver was the cause of audio service issues on your system, it should be fixed by now.
If you use a custom DAC or have a custom audio utility from an OEM to help you enhance the audio on your PC, then we recommend that you check the any errors.
A simple restart of the utility can help with the same. We recommend that you open the sound utility, close it and restart your PC. You can then test the audio again and restart the utility if everything works as expected on your system.
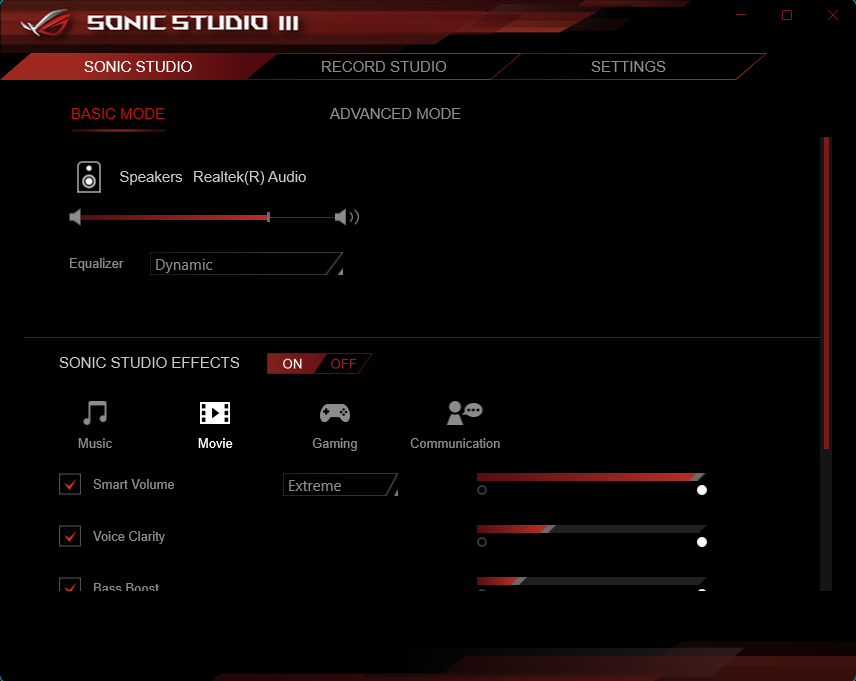
In some cases, you may have to reduce the output quality to match your output device, especially if you have recently changed it on your system. We also recommend that you check for any updates that the OEM may have released for your audio utility. This may be a known issue that may be fixed with a recently released bugfix for the utility. You can find updates and more information using PC's dedicated support page.
If you are still facing audio service issues, then we now recommend you to use System Restore. If you have a valid restore point, System Restore can help you restore your PC to a previous point in time when everything was working as expected. Please follow the steps below to help you through the process.
PressWindows Rto startRun.

Type the following and press Enter. You can also click "OK" if necessary.
rstrui.exe
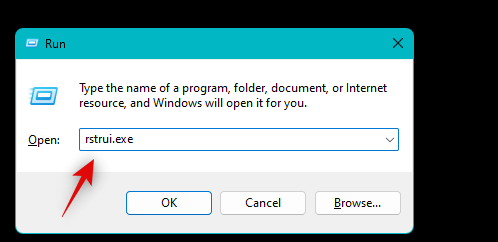
to select a different restore point.
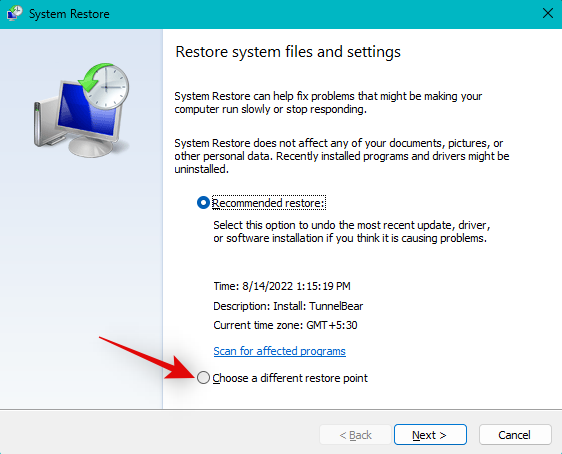
Next.
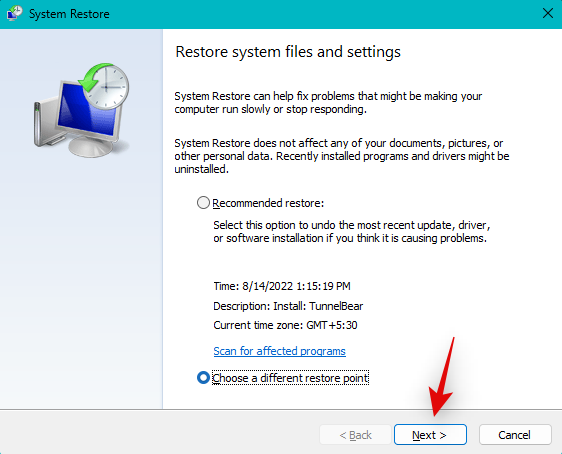
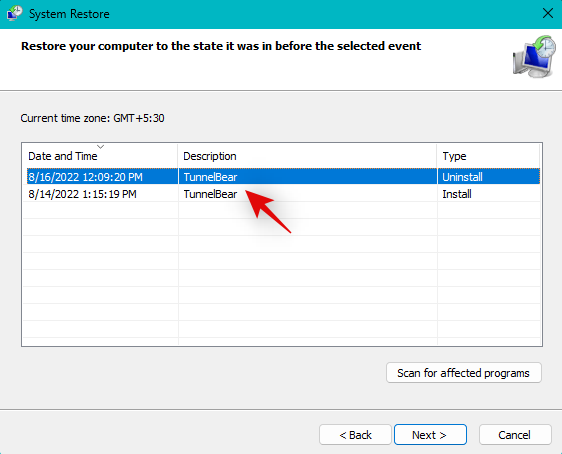
Next after making your selection.
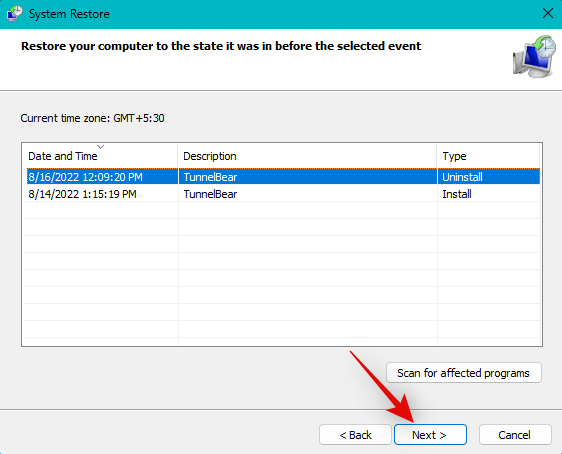
Tips:You can clickScan for affected programsto view the process All programs and applications will be uninstalled or restored.
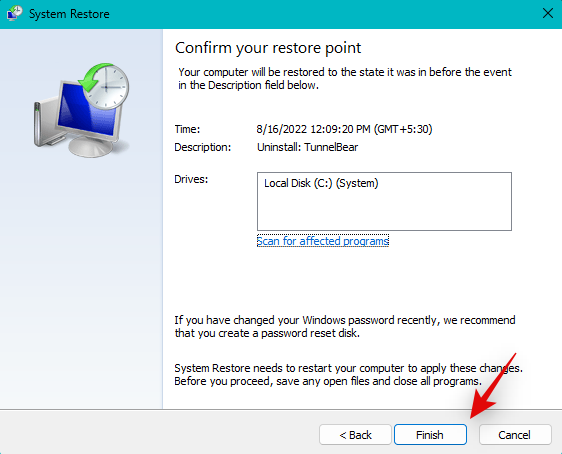
ClickFinish.
Windows Rto startRun.

Ctrl Shift Enter.
cmd
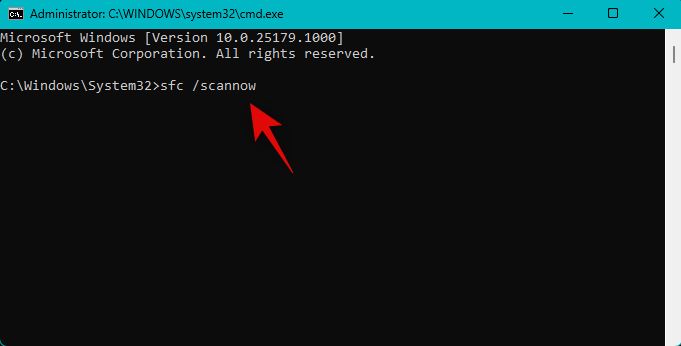
sfc /scannow
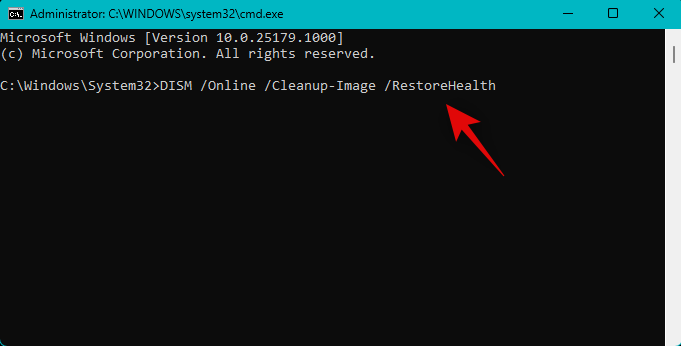
DISM /Online /Cleanup-Image /RestoreHealth
exit

We now recommend you to reboot your system for good results. After restarting, audio should work fine on your system if corrupted system files are the cause of your problem.
We now recommend that you force removal of all audio drivers related to the devices installed on your system. Once removed, you can reinstall the relevant drivers to get everything back up and running on your PC. Please follow the steps below to help you through the process.
PressWindows Xand clickDevice Manager.

Right-click on your audio device and selectUninstall Device.

Select the "Attempt to remove the driver for this device" checkbox.

ClickUninstall.

#Repeat the above steps to remove any other drivers related to the audio devices on your system. Once done, use the link below to download Driver Store Explorer on your PC.
After downloading, extract and start DriverStoreExplorer.
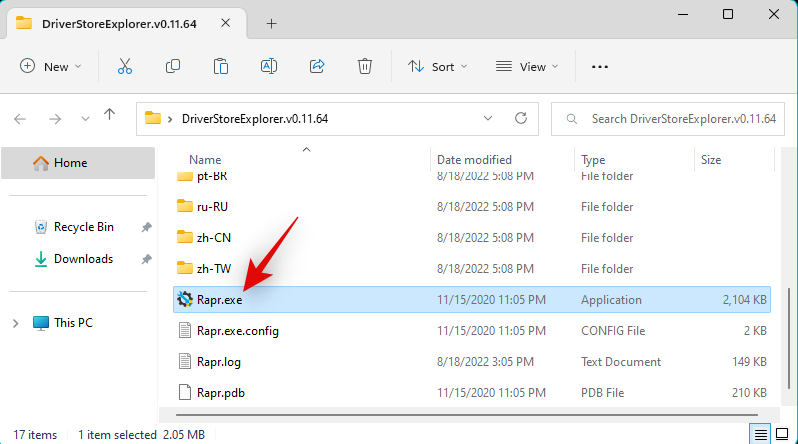
DriverStoreExplorer will now launch and scan your system for all installed drivers. Use the on-screen list to find and check the boxes for any other audio drivers currently installed on your system. You can easily identify your audio driver using theDriver ClassandProvidercolumns.
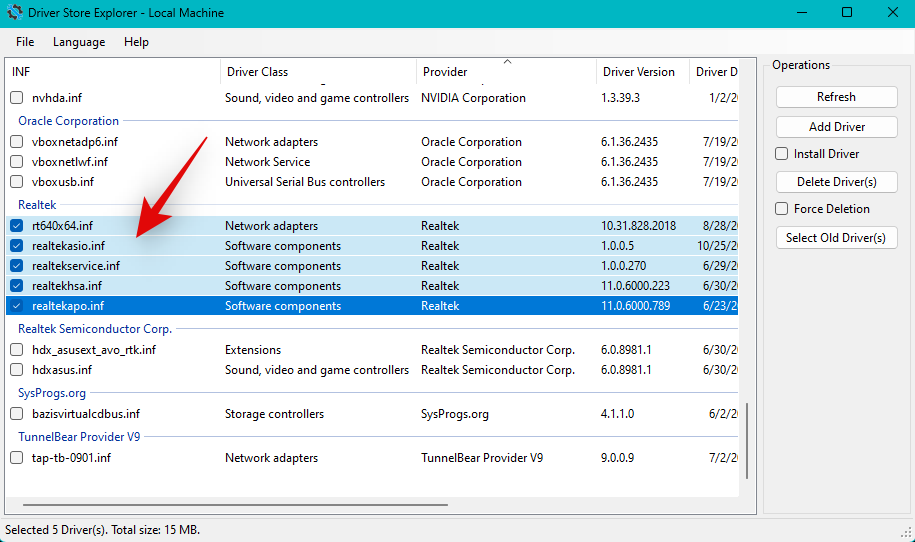
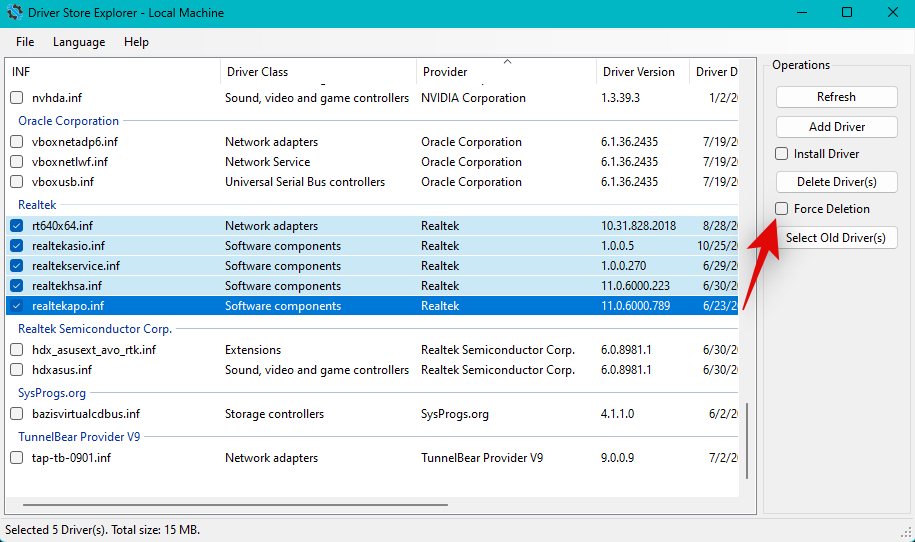
Check theForced deletionbox.
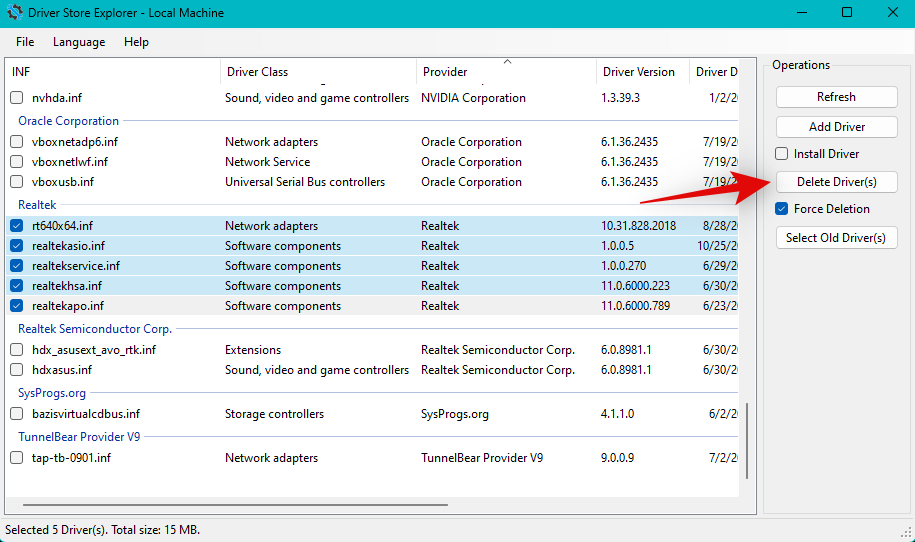
ClickRemove Driver.
Click OKto confirm your choice.
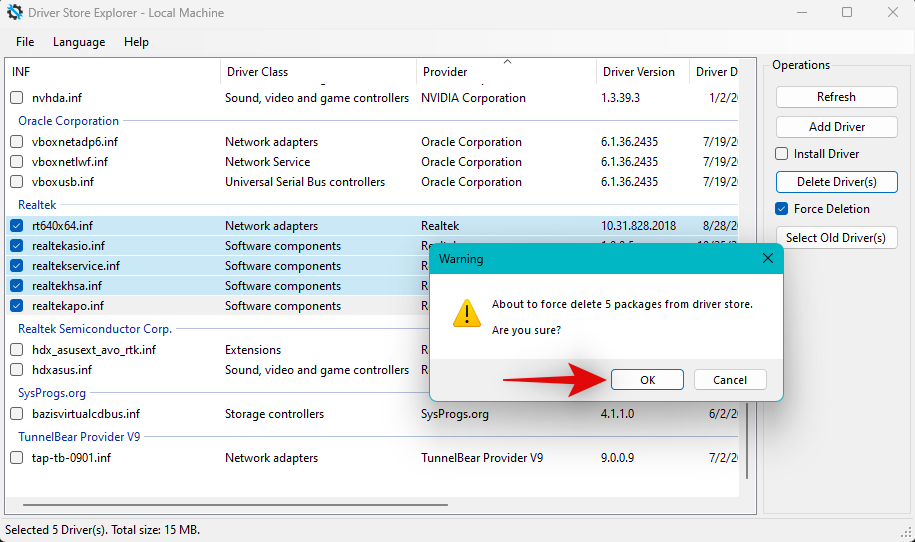
The selected driver should now be forcibly removed from the system. Once done, open the Start menu, search for "Control Panel" and launch it from the search results.
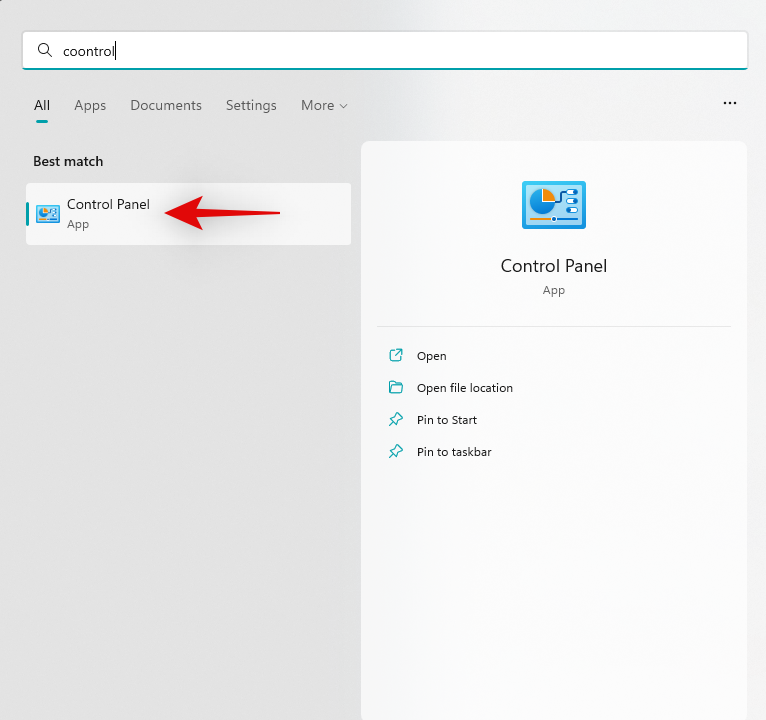
Click the drop-down menu in the upper right corner and selectLarge Icon.
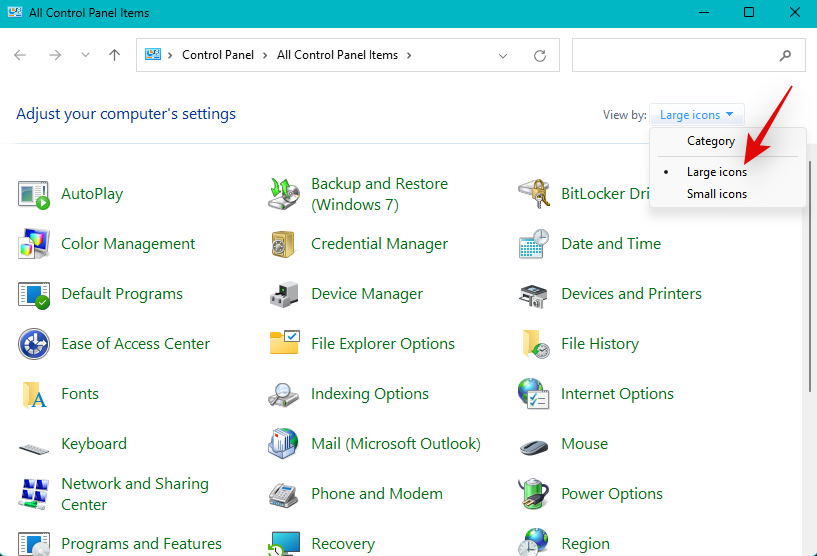
Now click onPrograms and Features.
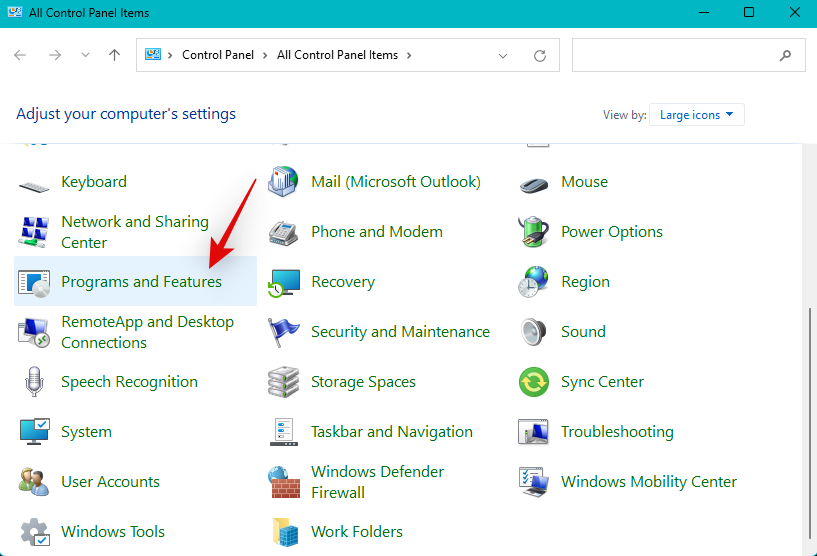
Look for any packages related to your audio driver. These may be issued by your OEM, your audio provider, or even your audio enhancement utility. If you have an Nvidia GPU, you might even have the Nvidia HD audio driver installed on your system. Click and select any one you have installed on your PC.
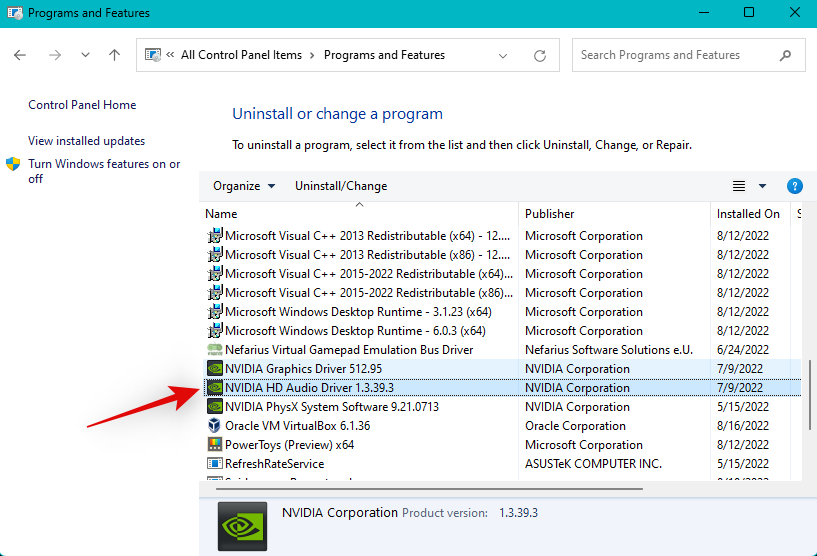
Clickat the top to uninstall.
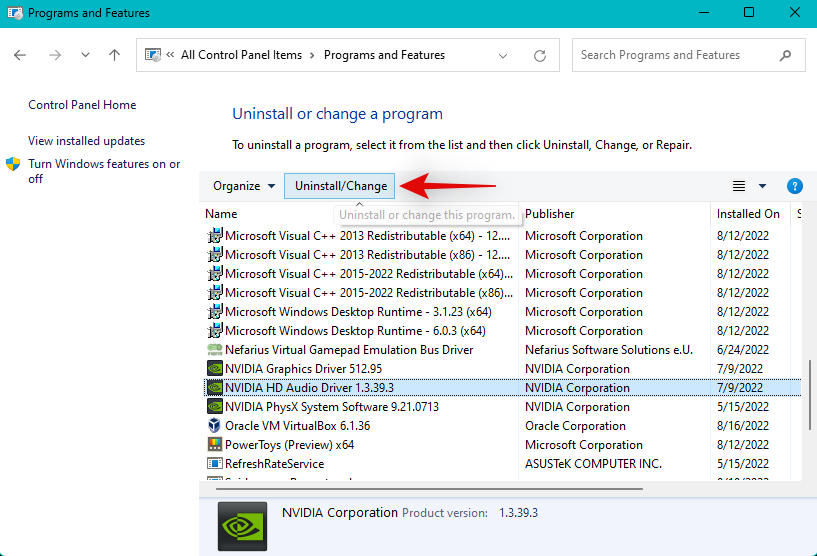
Now follow the on-screen instructions to uninstall the relevant driver from your system.
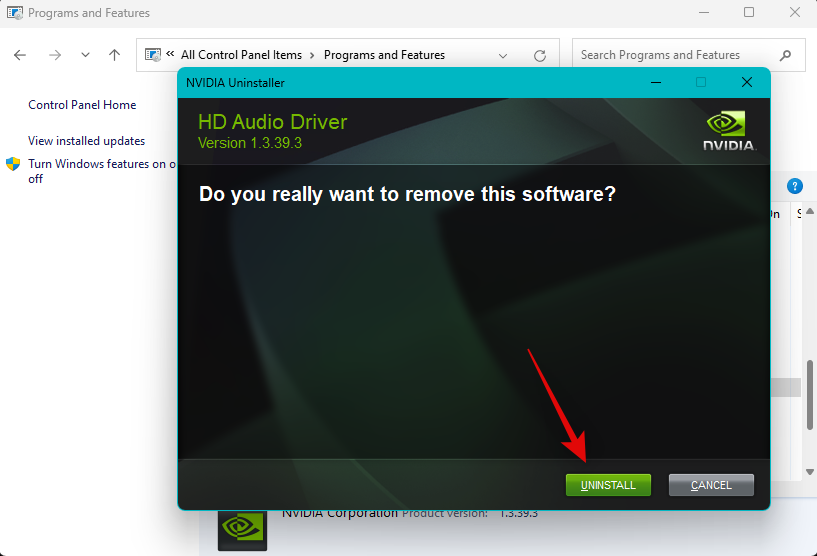
#Repeat the above steps to uninstall any other driver packages you find in Control Panel.
Now it's time to reinstall the driver. For driver .msi and .exe packages, you simply launch the file and follow the on-screen instructions to install the necessary drivers. While alive. INF files, use the following steps to install them manually on your system. If you have multiple files, you can move them all to a folder and install them immediately.
Use keyboard shortcuts to openDevice Manager.Windows X

Now click on theAdd Driver icon at the top.
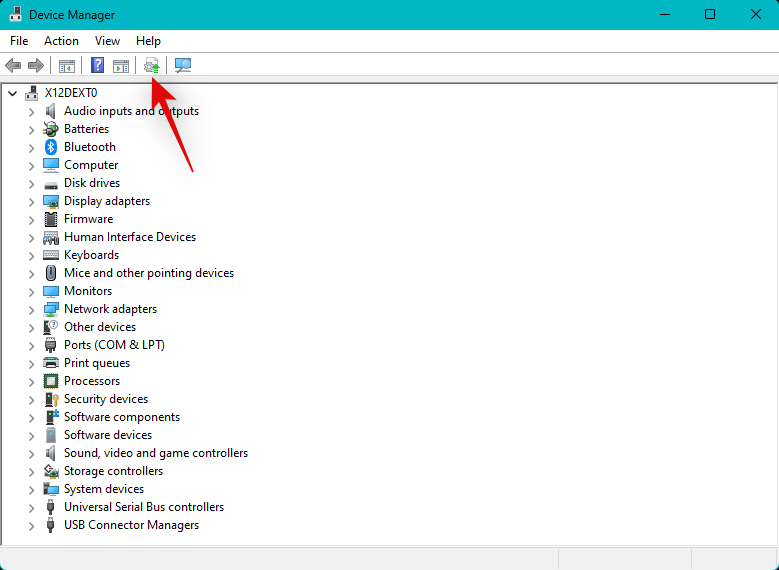
ClickBrowse.
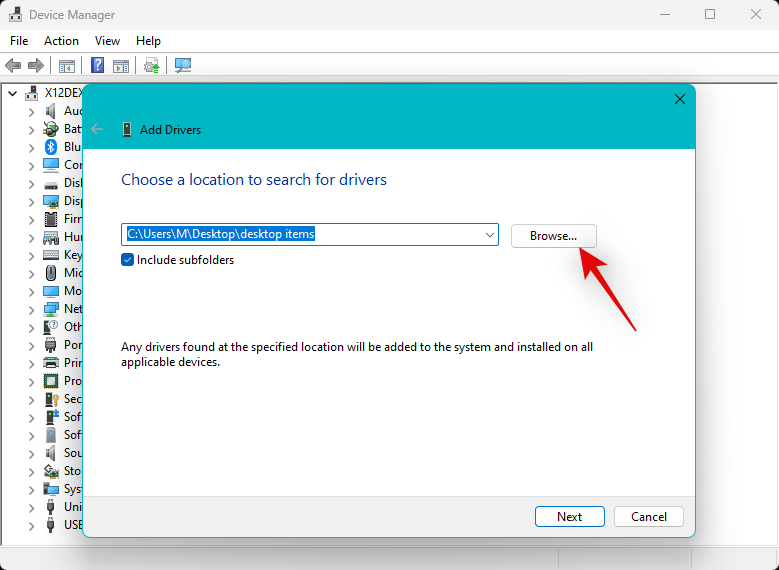
Now navigate to the .INF file you wish to install for your system. Double click and select the same found.
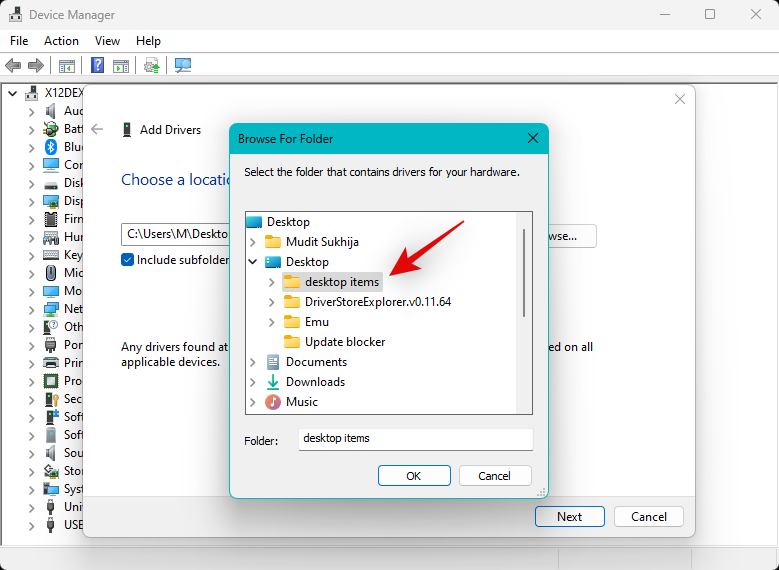
ClickNext.
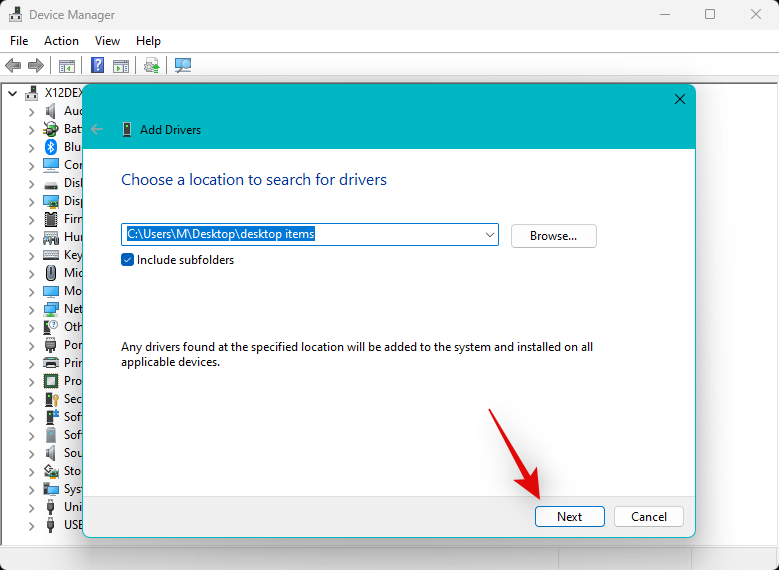
#Windows will now install the .INF files for the relevant audio devices on your system. If there are multiple drivers in the folder, all drivers will be installed on your system. ClickClosewhen finished.
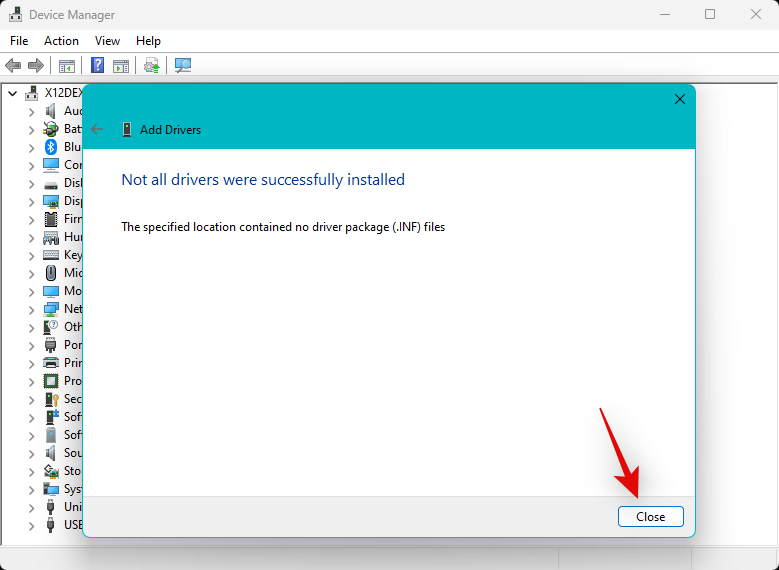
We now recommend that you restart your PC as soon as possible. Once completed, the audio service should work as expected if drivers are the cause of your issues on Windows 11.
Bluetooth audio issues are not uncommon on Windows 11 or Windows as a whole. Windows 11 brings many UI changes and background optimizations to make pairing and using Bluetooth devices easier. However, depending on your operating system, PC, and hardware components, Bluetooth audio devices can end up facing a lot of issues.
Bluetooth incompatible or outdated drivers may prevent you from pairing or using your device on Windows 11. Such errors will cause problems with the audio services on your system and prevent them from responding as expected on your PC. If you are experiencing Bluetooth audio issues on your PC, but system audio is working as expected, you can use ourthistutorialto troubleshoot and fix it.
If the audio service is still not responding and working as expected on your system at this point, it’s time to take some drastic measures. If nothing seems to resolve your issue, we recommend you try the last resort mentioned below before choosing to reset or reinstall Windows 11. let's start.
This is a long shot, but we recommend you try removing and reinstalling in Safe Mode driver and see if that solves your problem. Certain third-party programs on your system may interfere with driver removal and driver installation, causing the audio service on your system to malfunction.
Safe mode blacklists all third-party services and allows you to reinstall drivers with clean settings and only runs Windows system services in the background. Use the following steps to boot into Safe Mode, then use the tutorial above to remove and reinstall audio drivers on your PC. let's start.
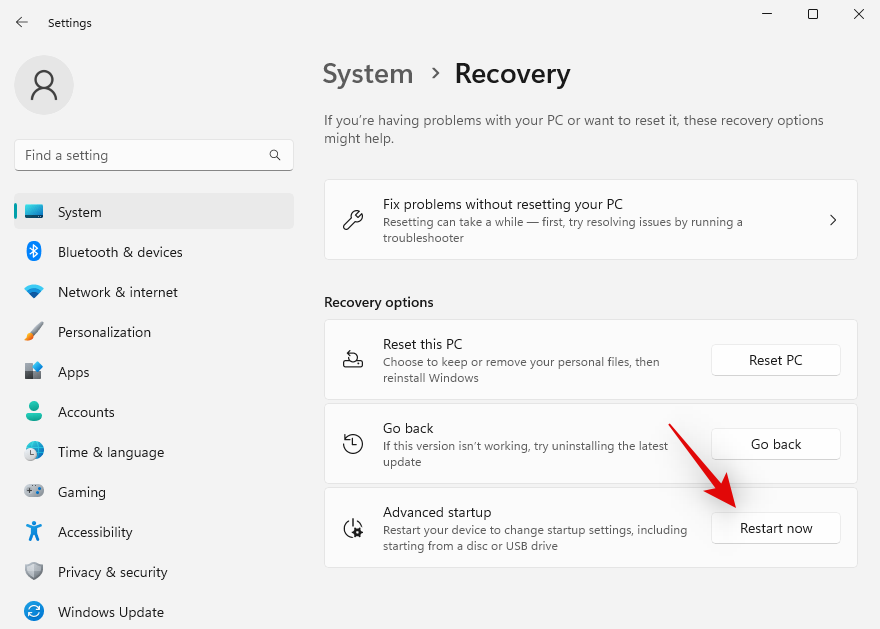
PressWindows ito open theSettings application. ClickRestore.
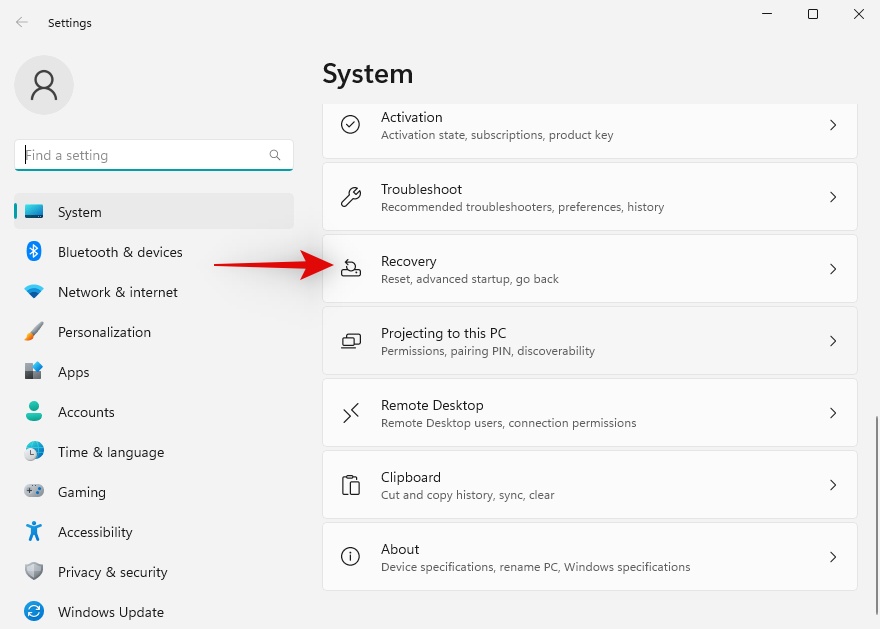
ClickRestart nownext toAdvanced startup.
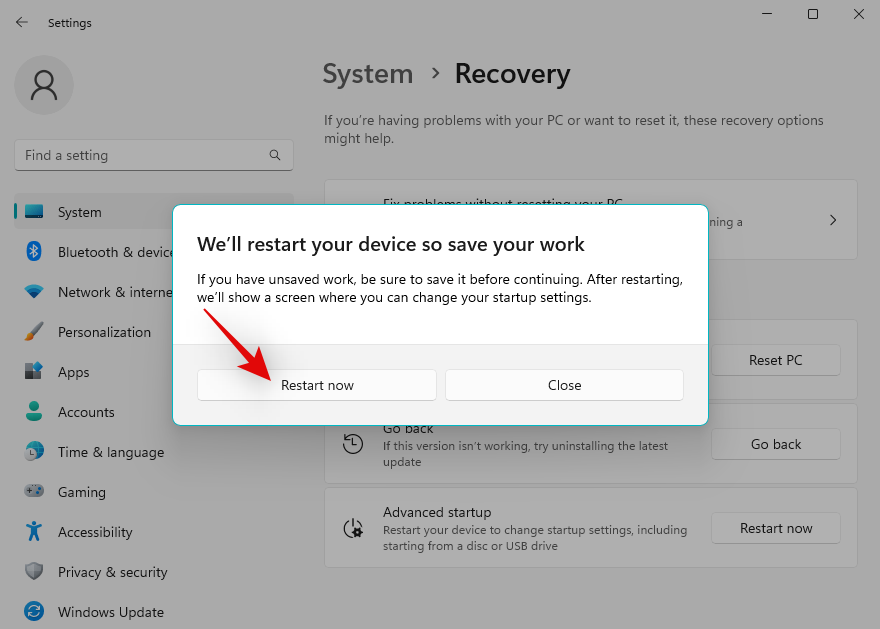
ClickRestart Nowagain to confirm your selection.
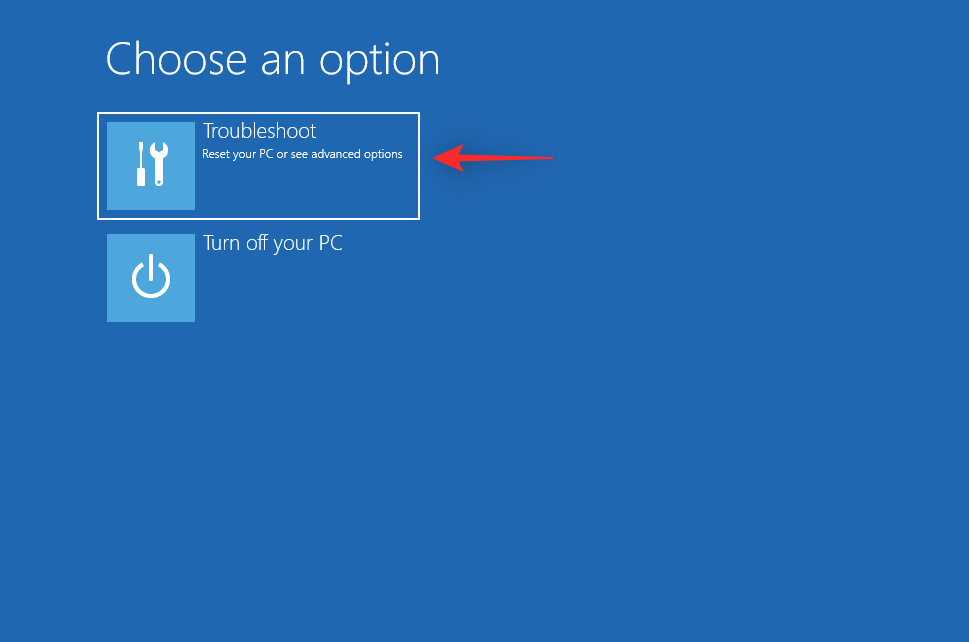
Your computer will now reboot into recovery mode. ClickTroubleshootto get started.
Now click onAdvanced Options.
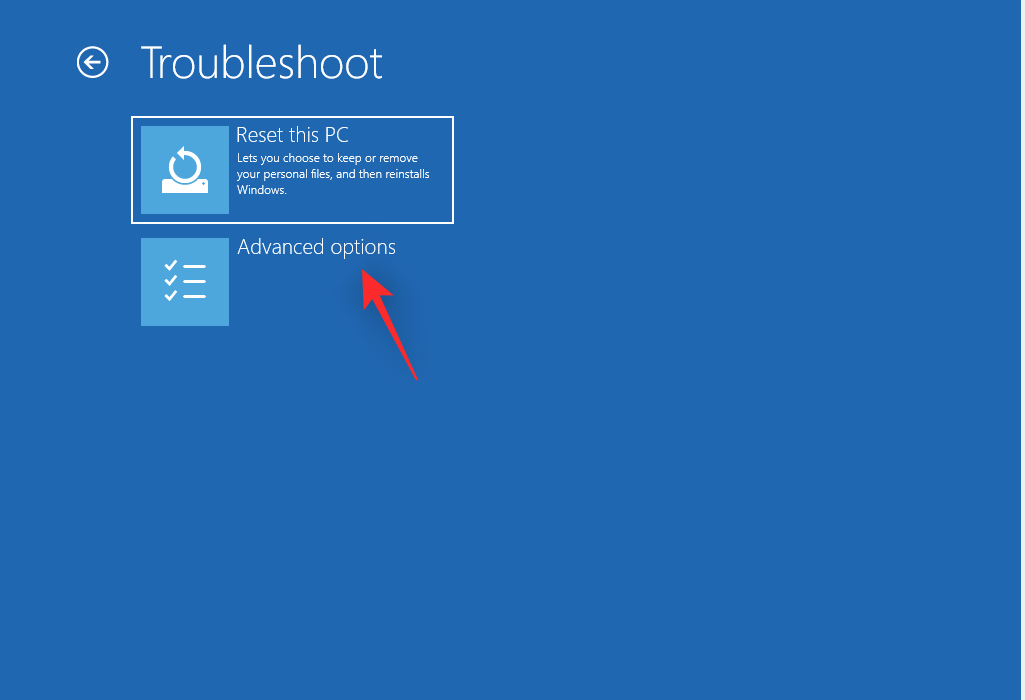
ClickStart Settings.
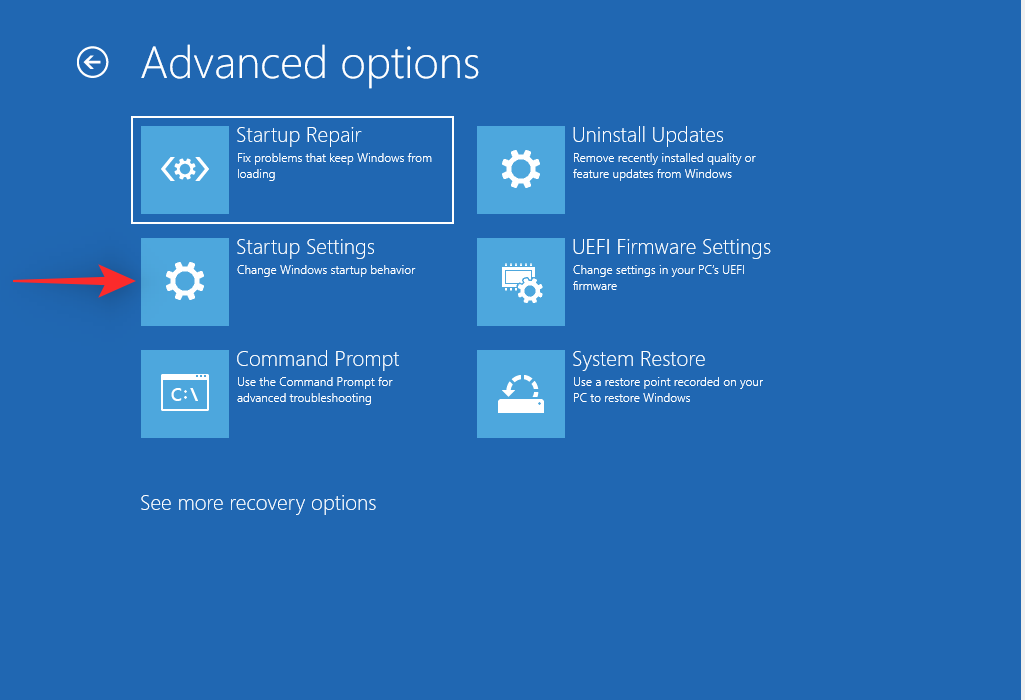
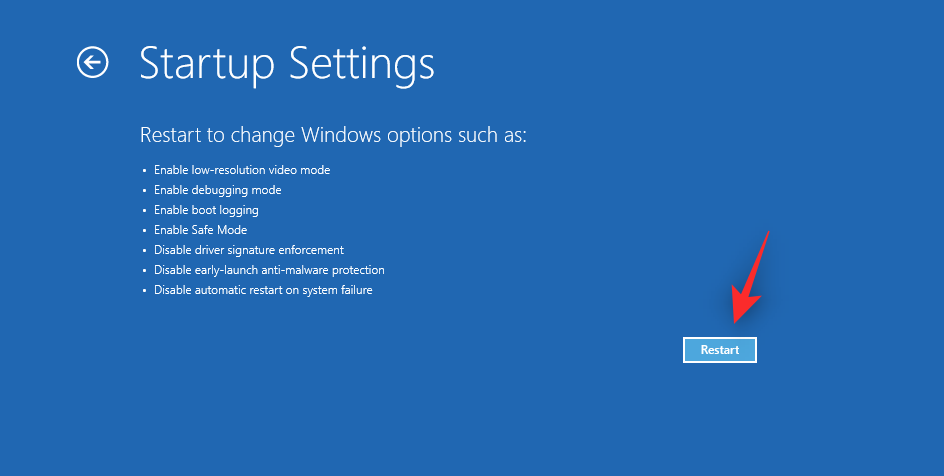
Now clickRestart. Your system will now reboot and provide you with your system's startup settings.
Press4orF4to start Windows in safe mode. If you need an internet connection in safe mode, press5orF5.
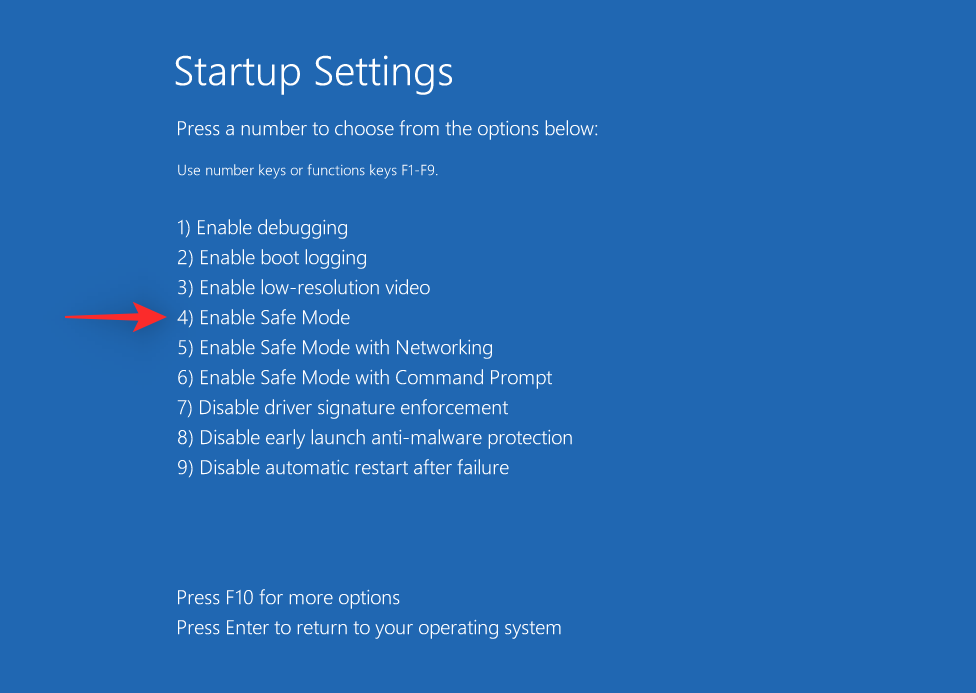
Your PC will now restart and boot into Safe Mode. Use the above tutorial to remove and reinstall the audio driver in safe mode. Once that's done, we recommend testing the audio itself in Safe Mode before trying it in Windows 11's normal startup mode.
If you are unable to repair the audio on your system at this time, you may be experiencing issues with your Windows 11 installation. In this case, we recommend that you try resetting Windows to see if that resolves the issue for you.
Resetting Windows 11 will allow you to keep your data and apps, which is a great way to get started. You can use this comprehensive tutorial from us to reset Windows 11. If you are unable to reset Windows, we recommend using the next section to try a clean installation of Windows 11.
We now recommend that you try formatting your boot drive and doing a clean install of Windows 11. This will help ensure that leftover files, drivers, etc. do not interfere with the newly installed audio service. You can use this article to perform a fresh installation of Windows 11 on your system.
The above is the detailed content of 18 Ways to Fix Audio Service Not Responding Issue on Windows 11. For more information, please follow other related articles on the PHP Chinese website!


