
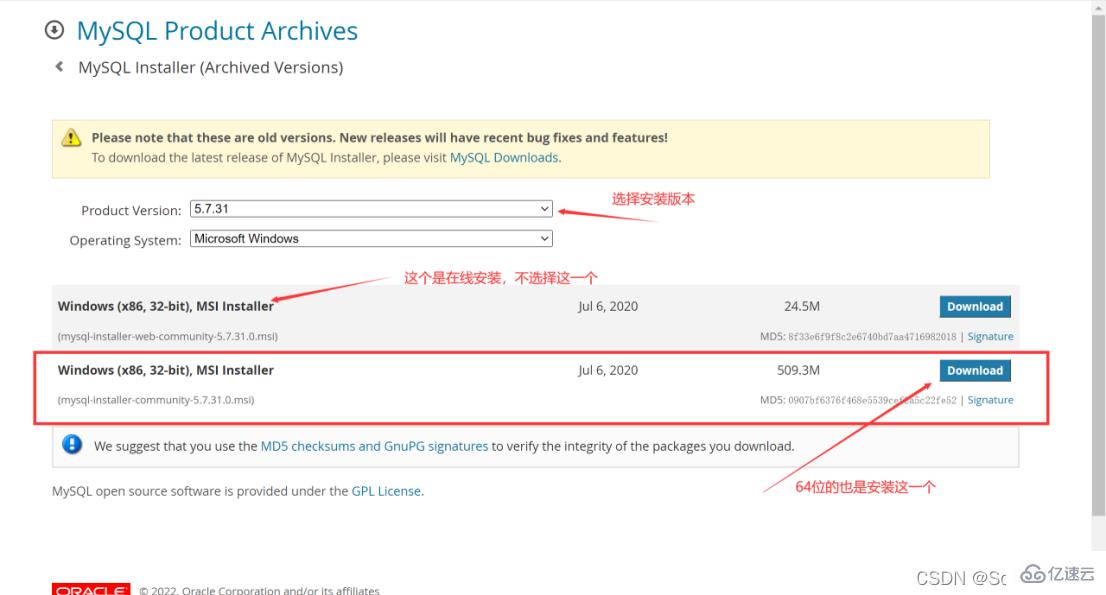
1. Download MySQL
This article chooses version 5.7.31
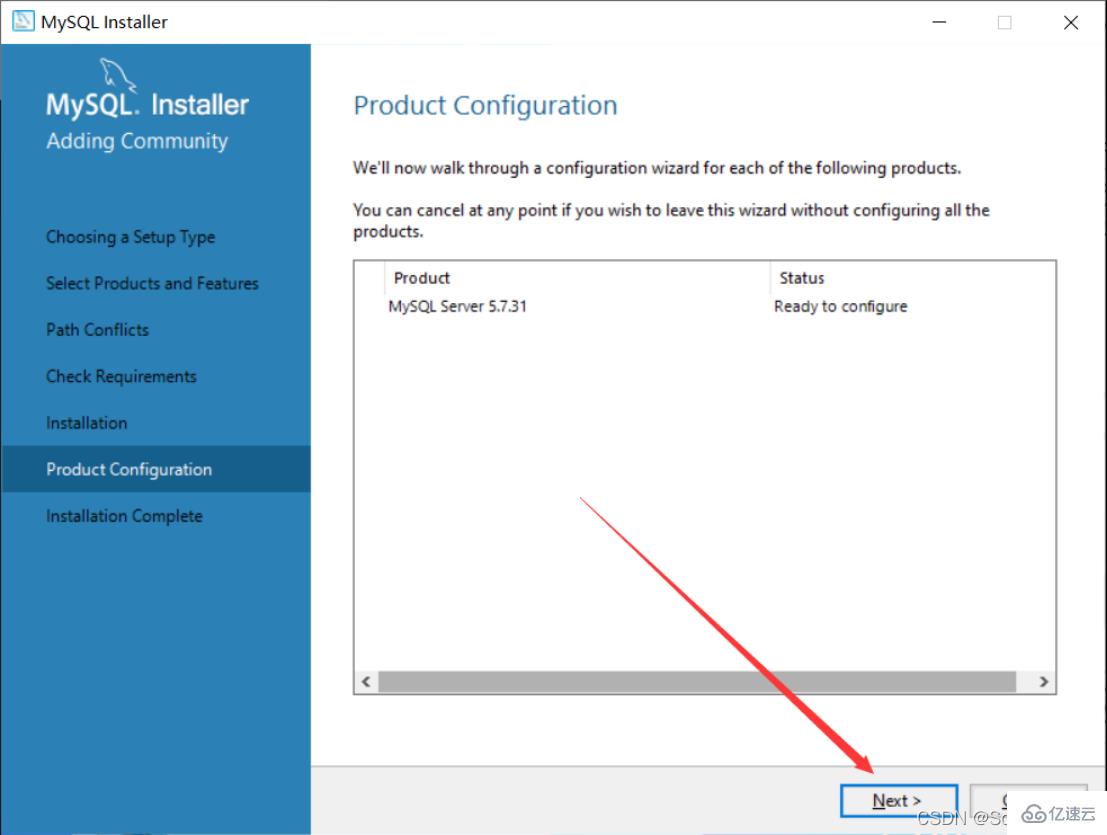
2. Install MySQL
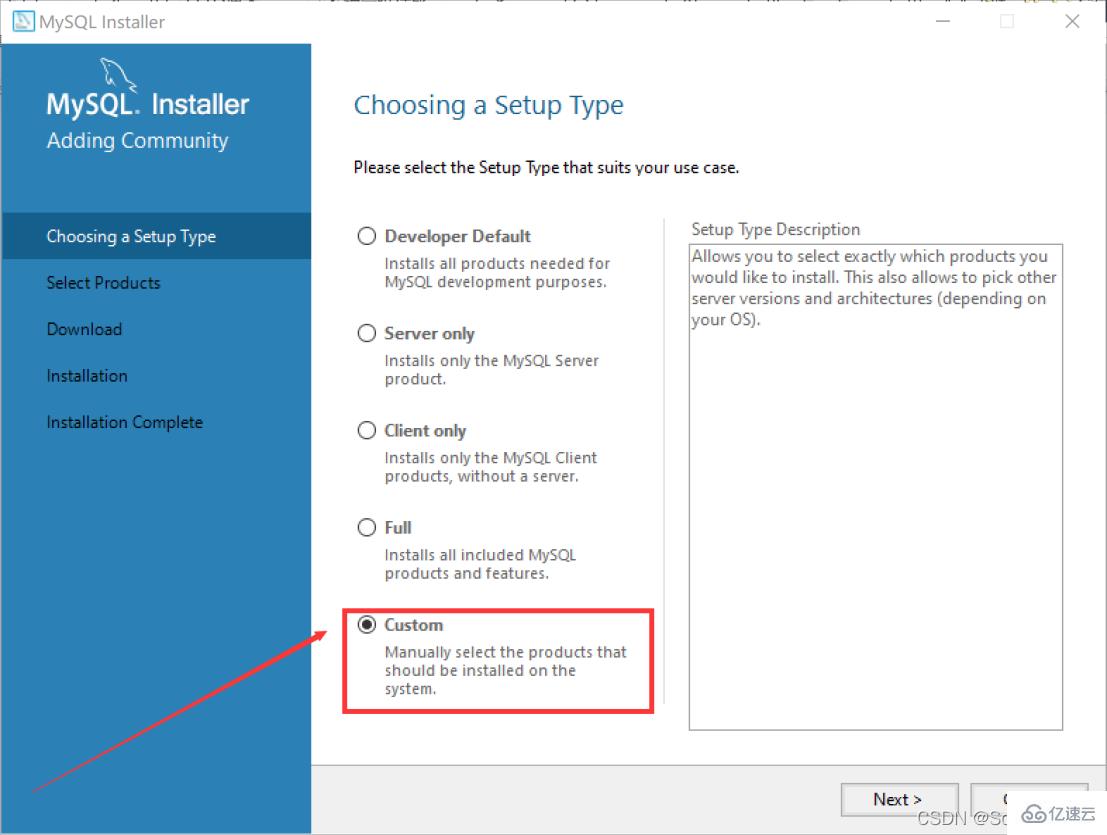
1. Select the setting type
Double-click to run mysql-installer-community-5.7.31.0.msi. The choice here is custom installation, so directly select "Custom" and click "Next" ”
“Developer Default” is the developer default
“Server only” Installed only as a server
“Client only” Installed only as a client
"Full" is a complete installation
"Custom" is a custom installation
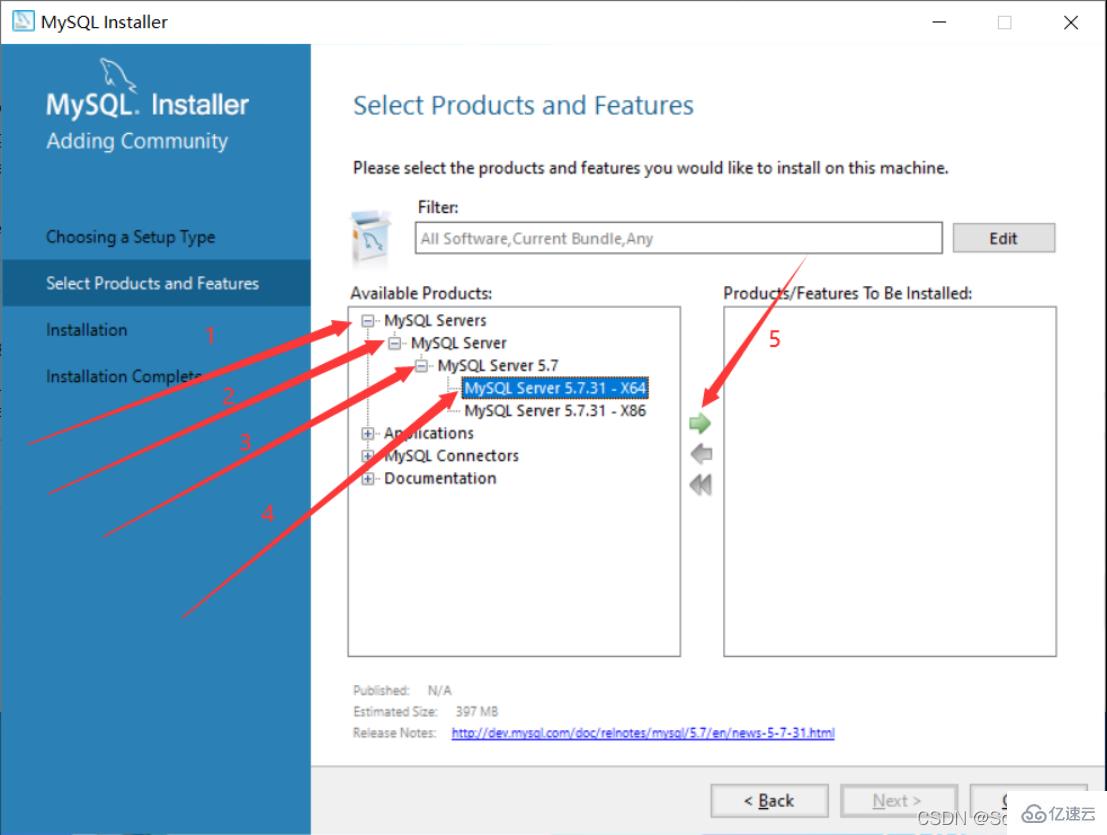
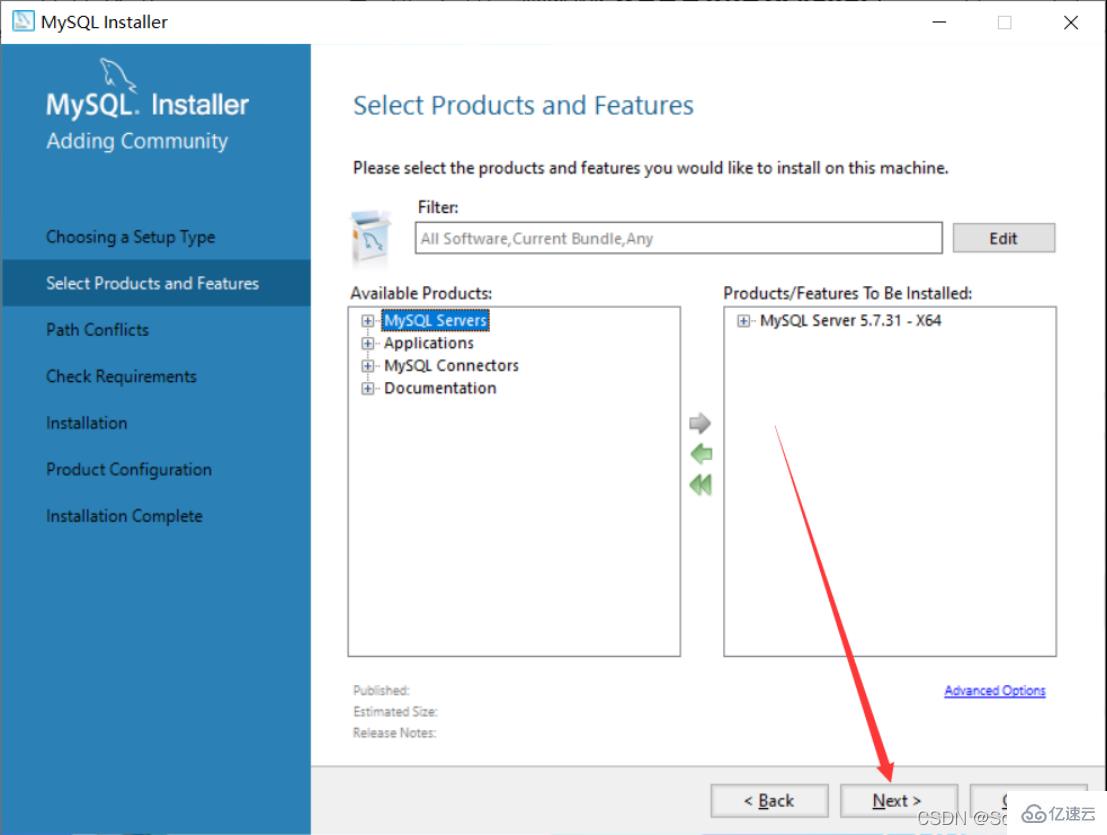
2. Select the products and features to install
Click on "MySQL Servers", "MySQL Servers", "MySQL Servers 5.7", "MySQL Servers 5.7.31 -64", and then click the green arrow to migrate the selected version to the right Select the box
Note: The 64-bit system selected here is
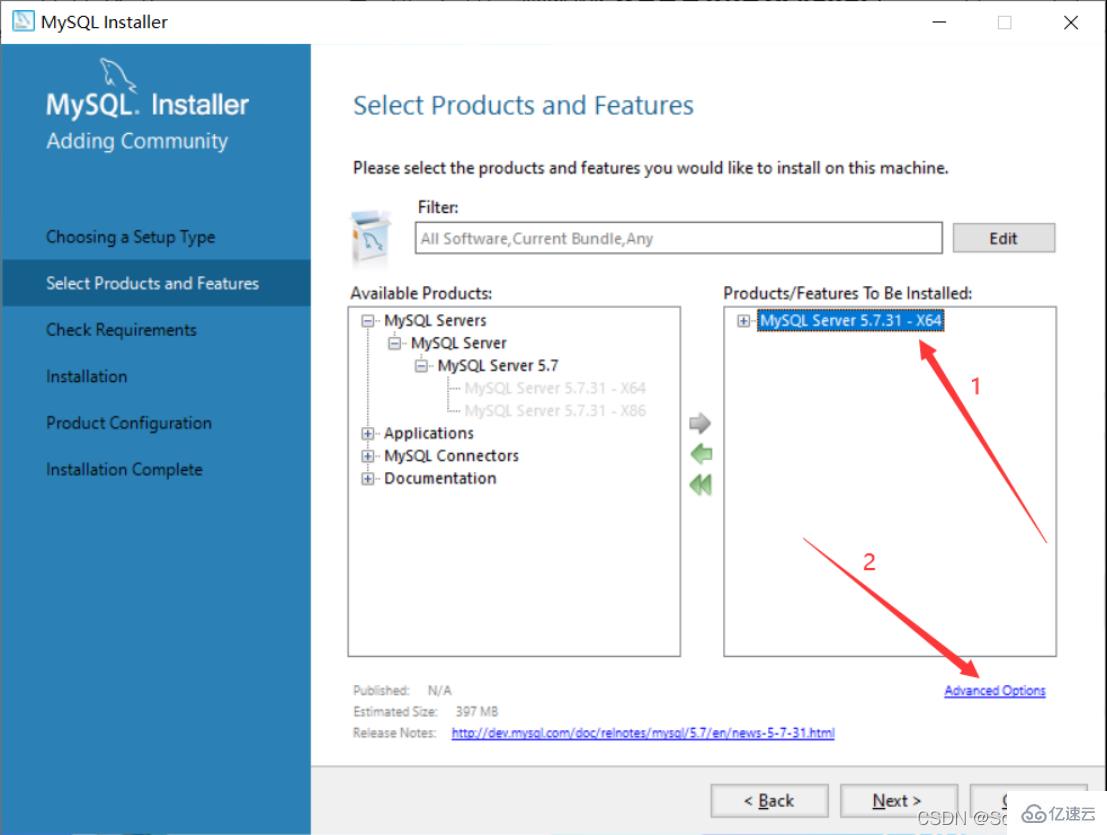
3. First select "MySQL Server 5.7.31" , then click the blue "Advanced Options" below
4. Customize the installation path and data storage path, and click "OK" after the changes are completed
Note: Although there is nothing wrong with installing on the C drive, I personally recommend not to install on the C drive. I installed it on the D drive
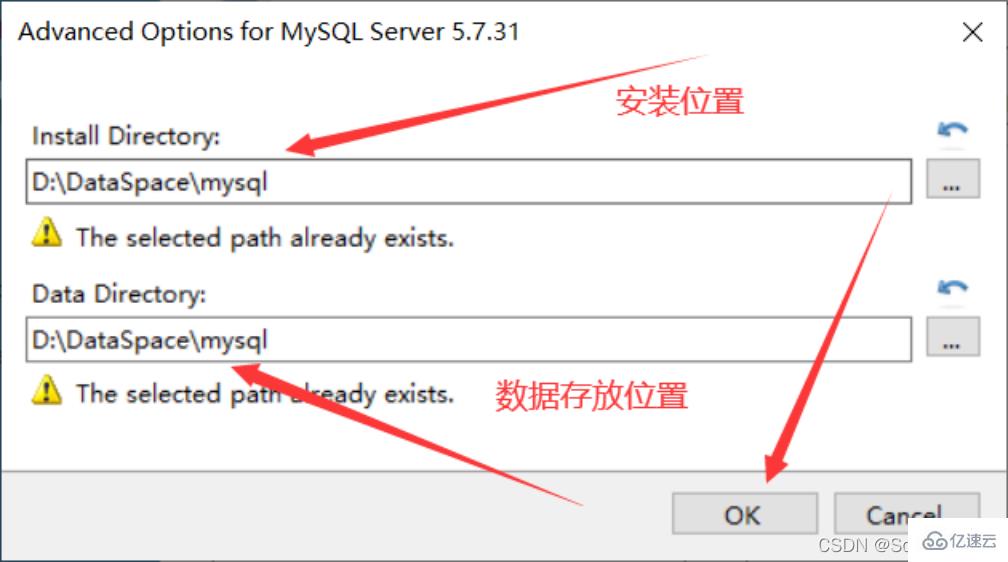
5. Click "OK" directly
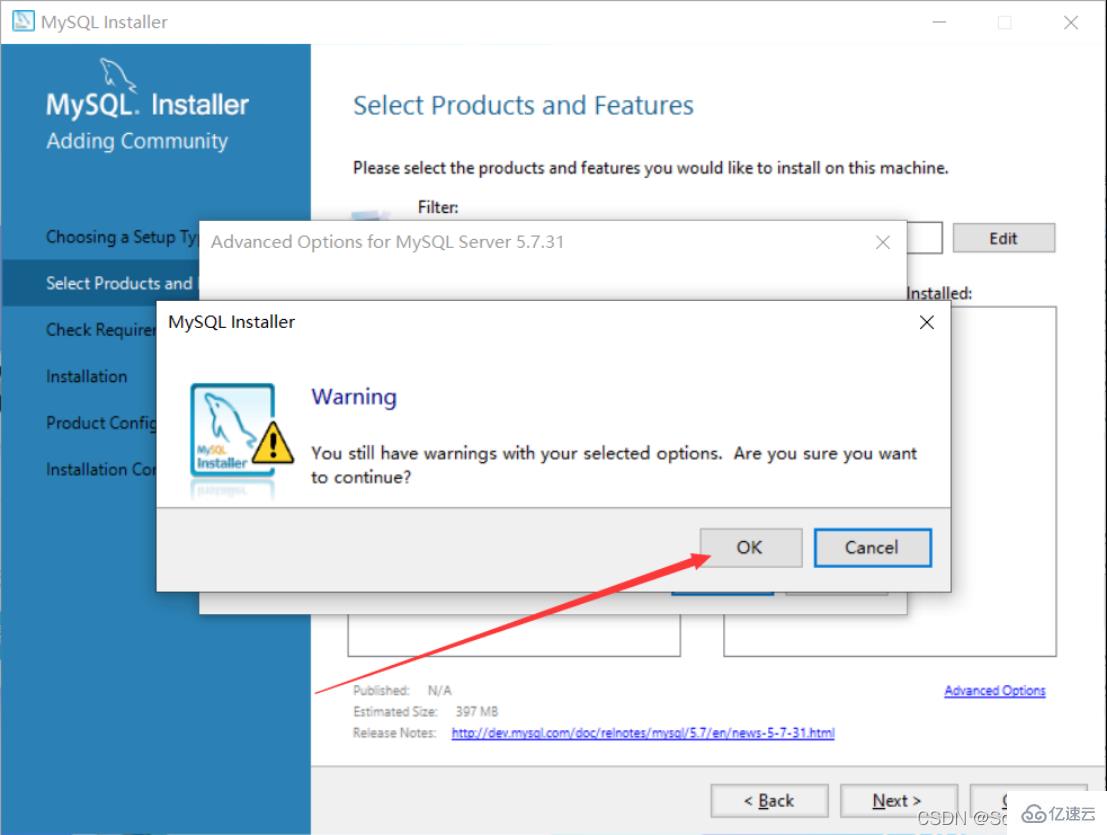
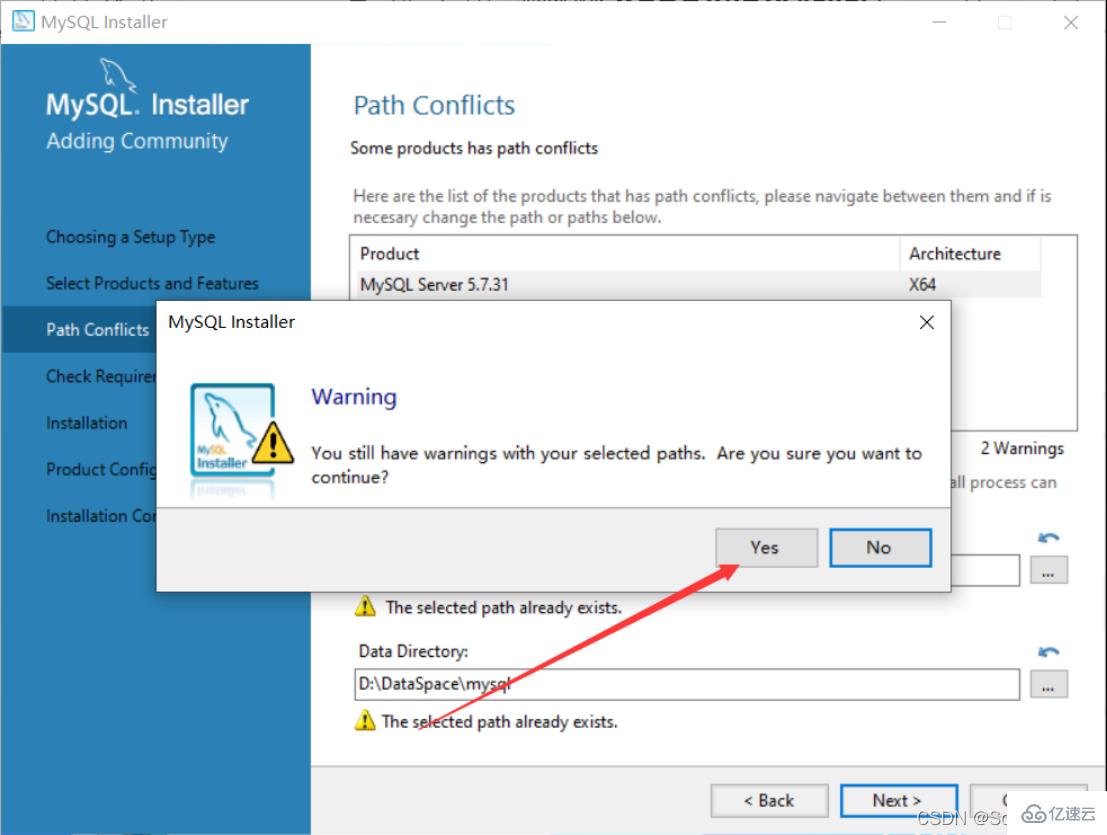
Note: Because I selected the path I created myself, the program prompts that the path already exists. Do you want to continue?
6. After the changes are completed, click "Next"
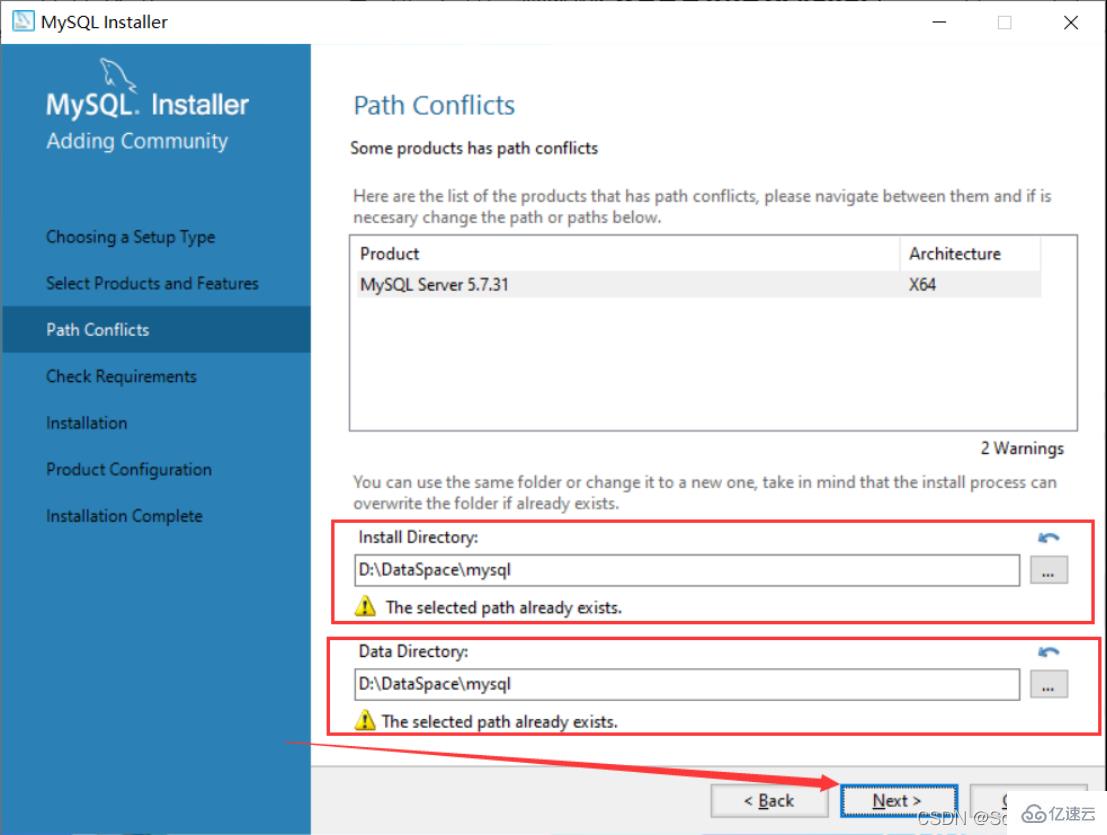
7. Confirm that the installation path and data storage path are correct. , if there is no problem, just click Next
8. Click "Yes" directly
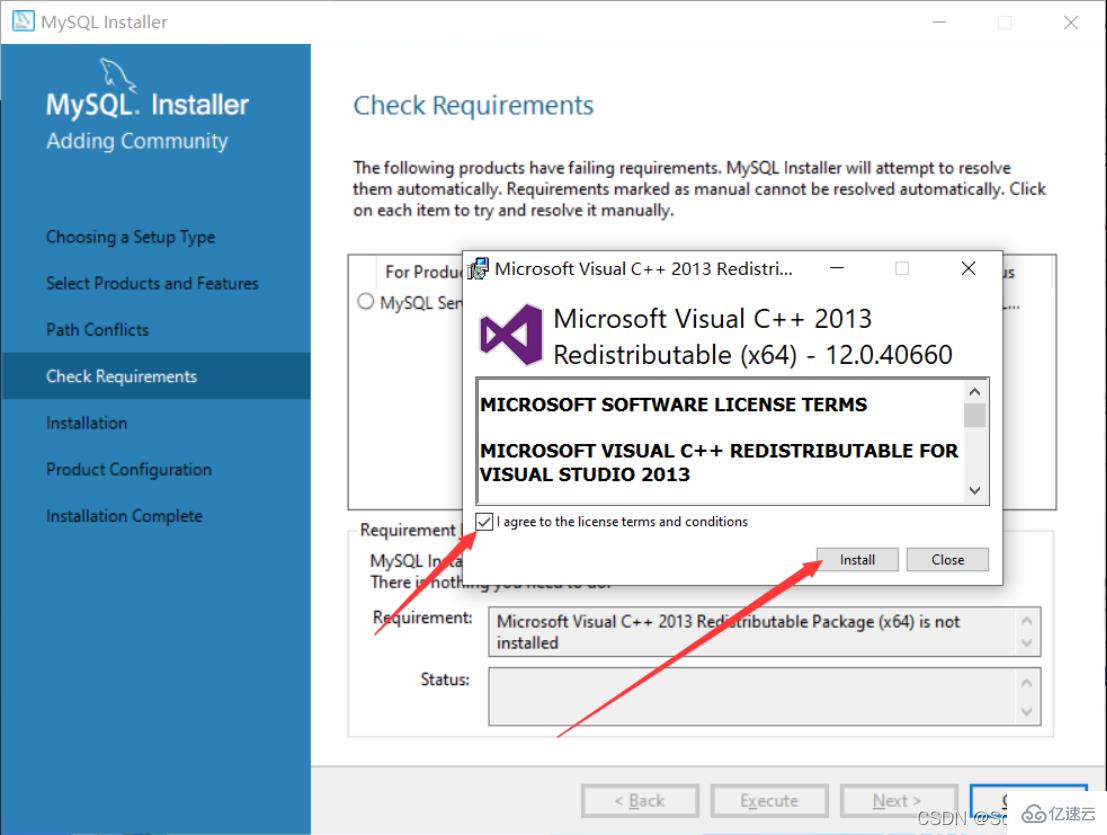
9. First select "MySQL Server5.7.31". If this environment does not exist on your computer, you will be prompted to install the "Microsoft Visual C 2013" environment. Click "Execute"

10. After selecting, click "Install"
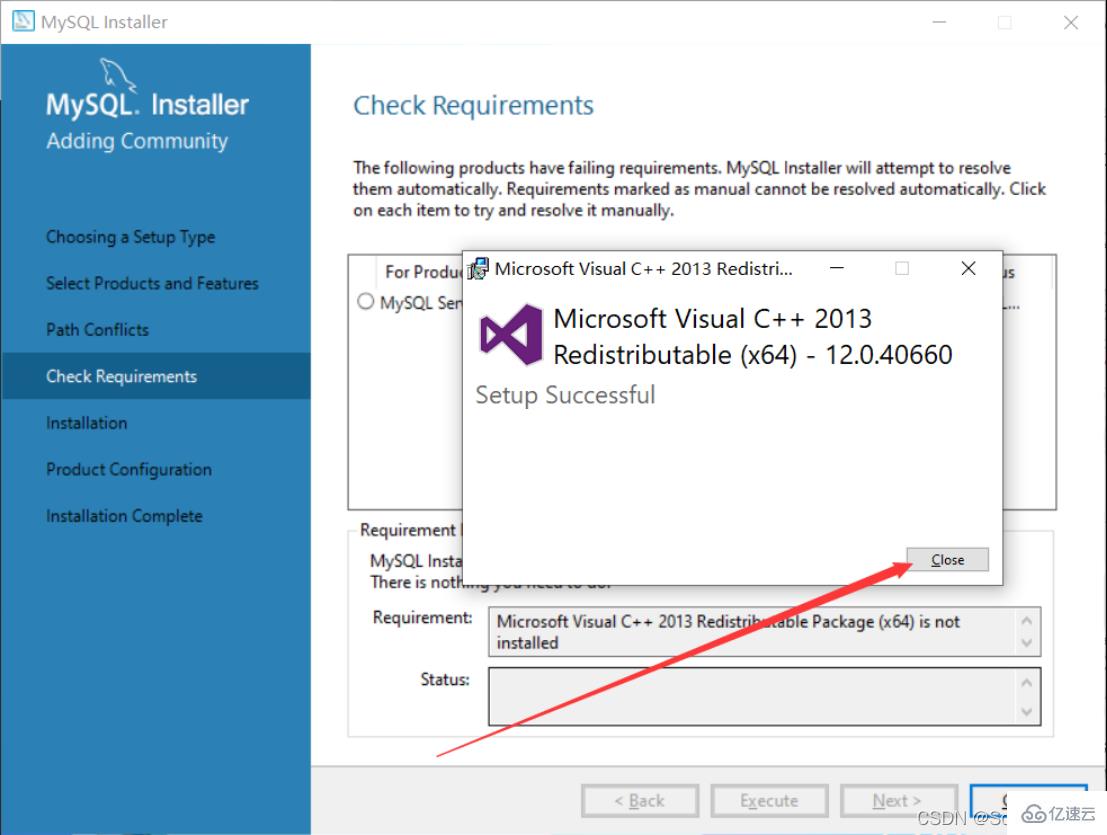
11. When the installation is complete, click "Close"
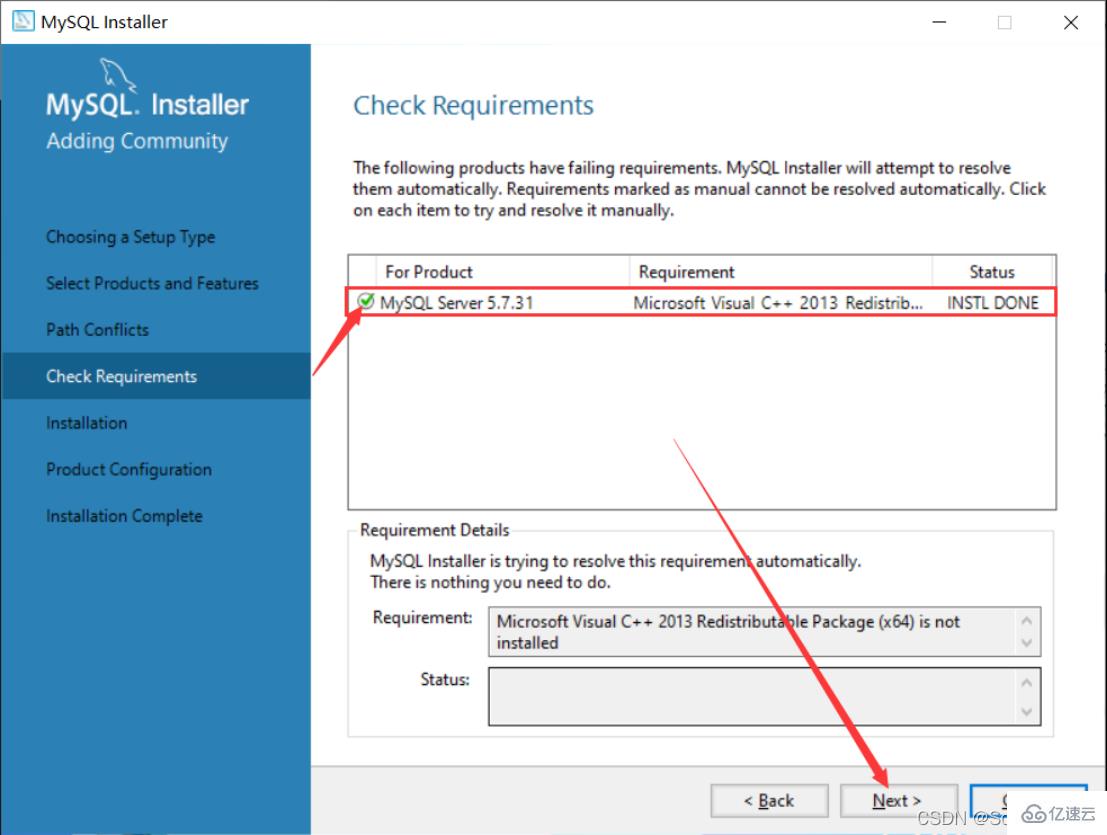
12. When you see this check mark, it means that this environment is installed, just click "Next"
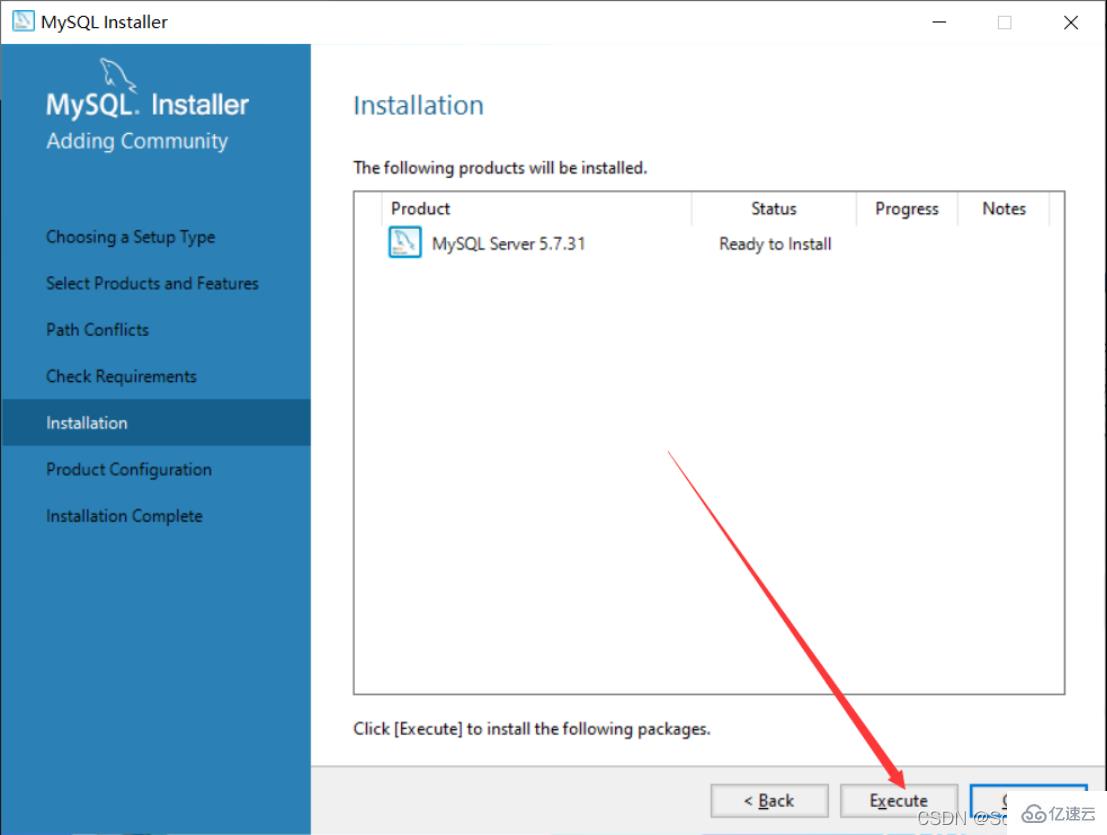
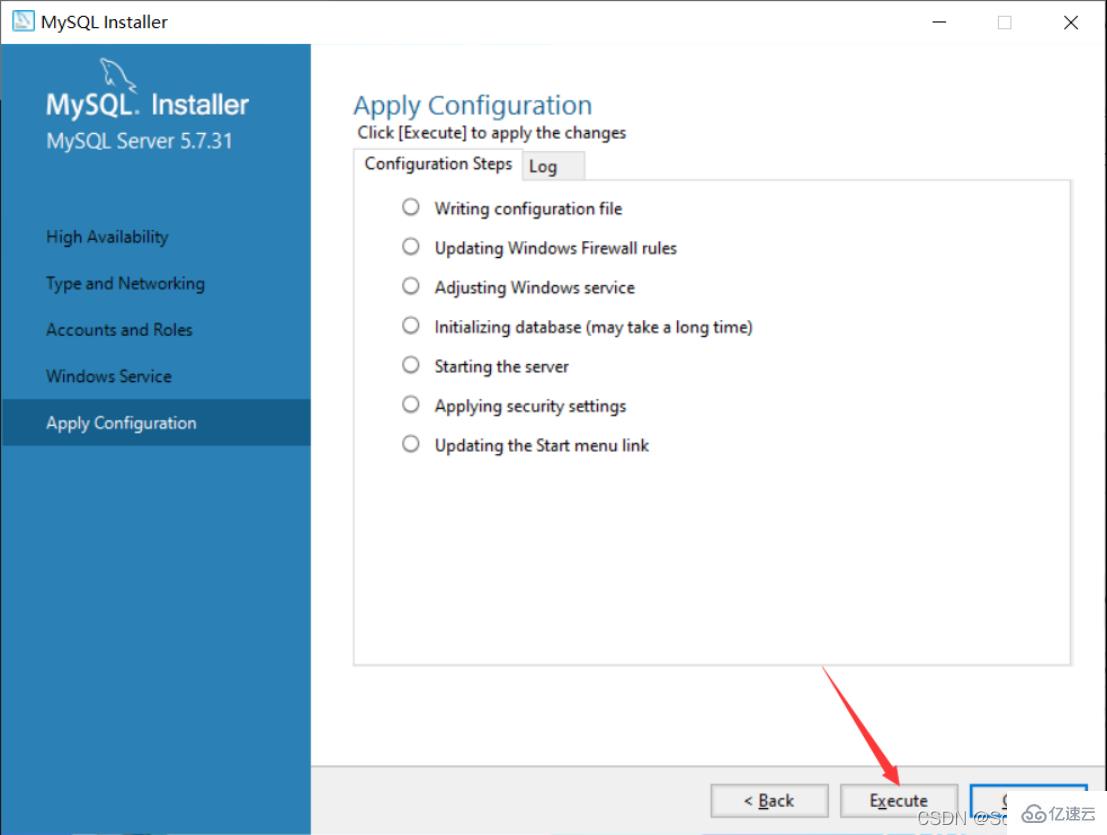
13. Click "Execute" directly
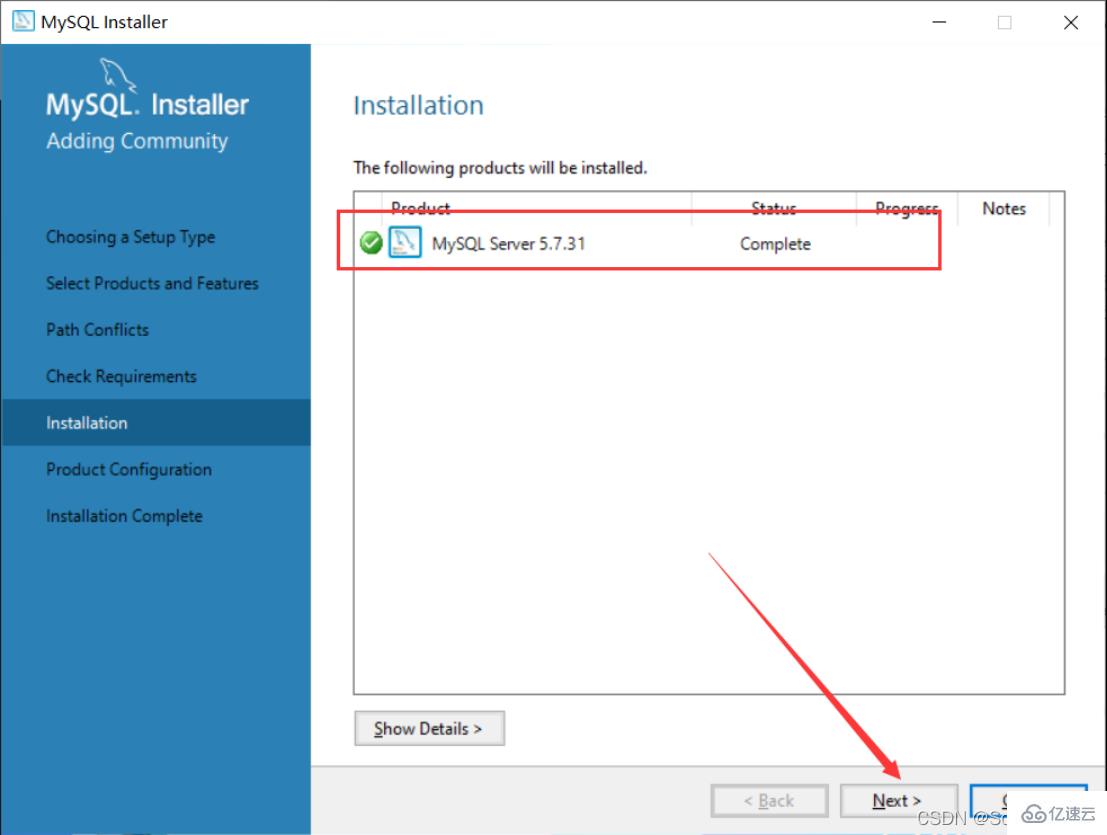
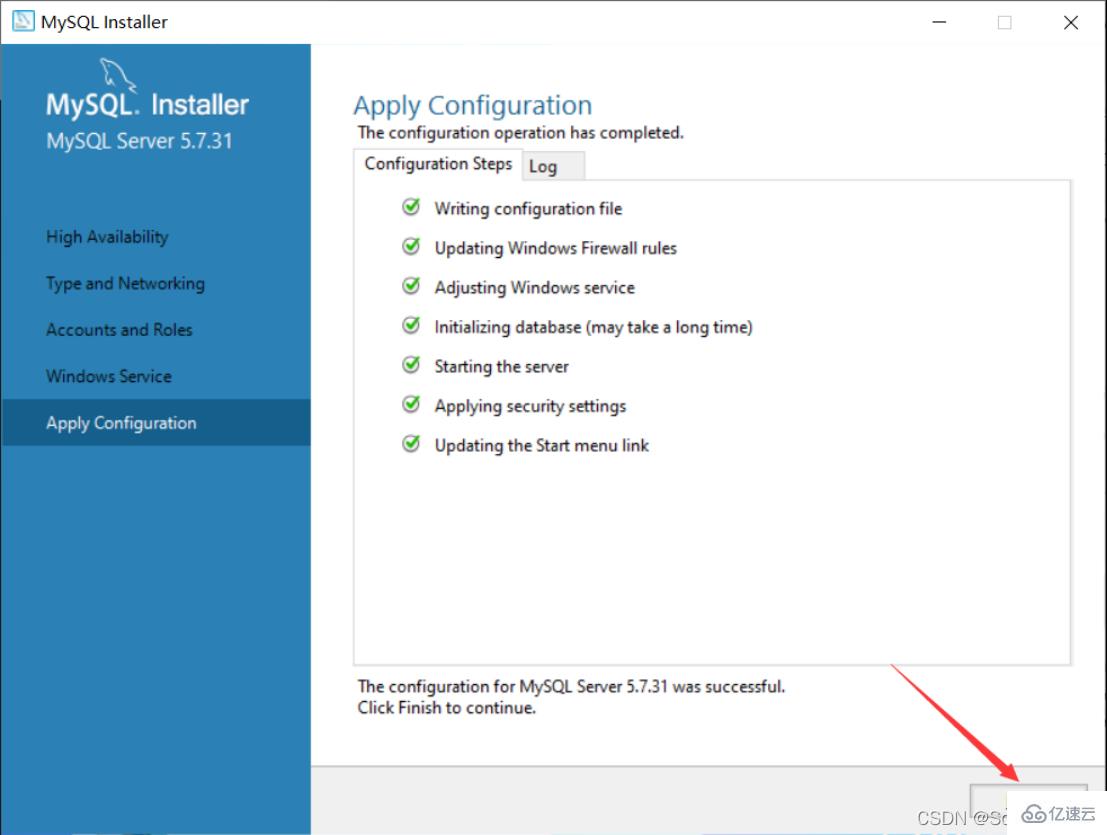
14. When this icon appears, the installation is successful. Click "Next" directly
15. Click "Next" directly
16. Click "Next" directly
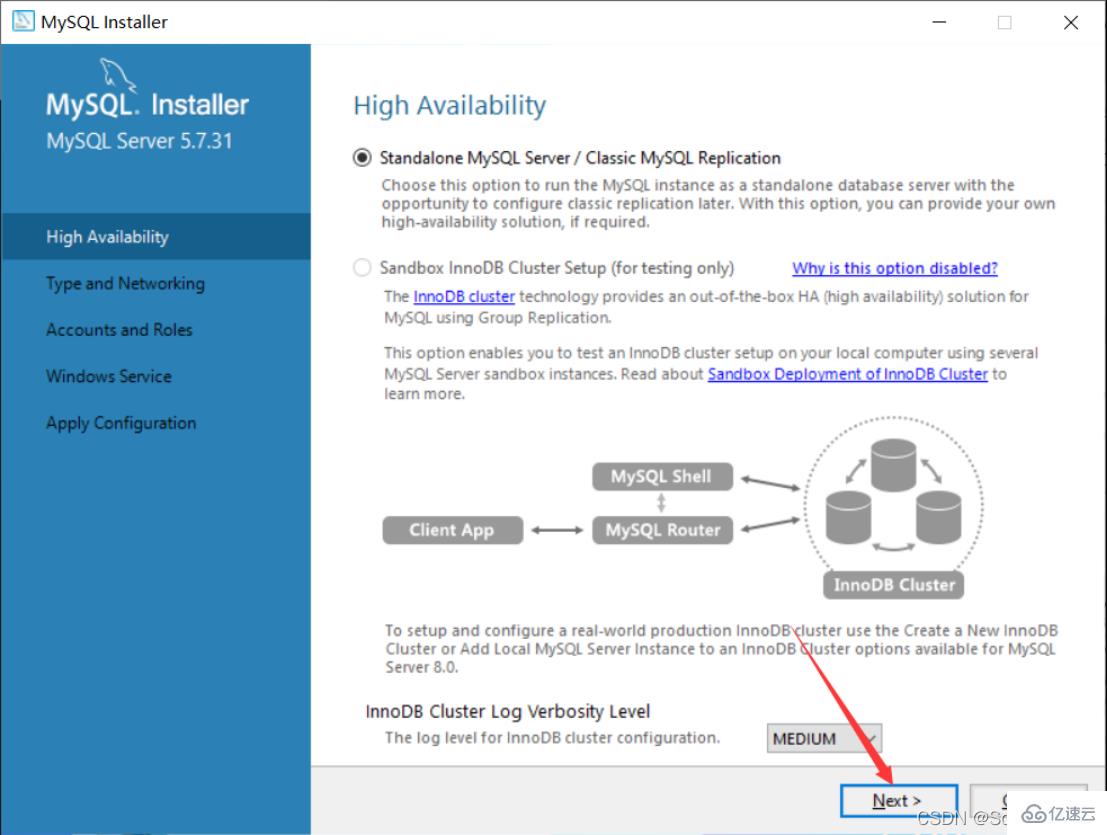
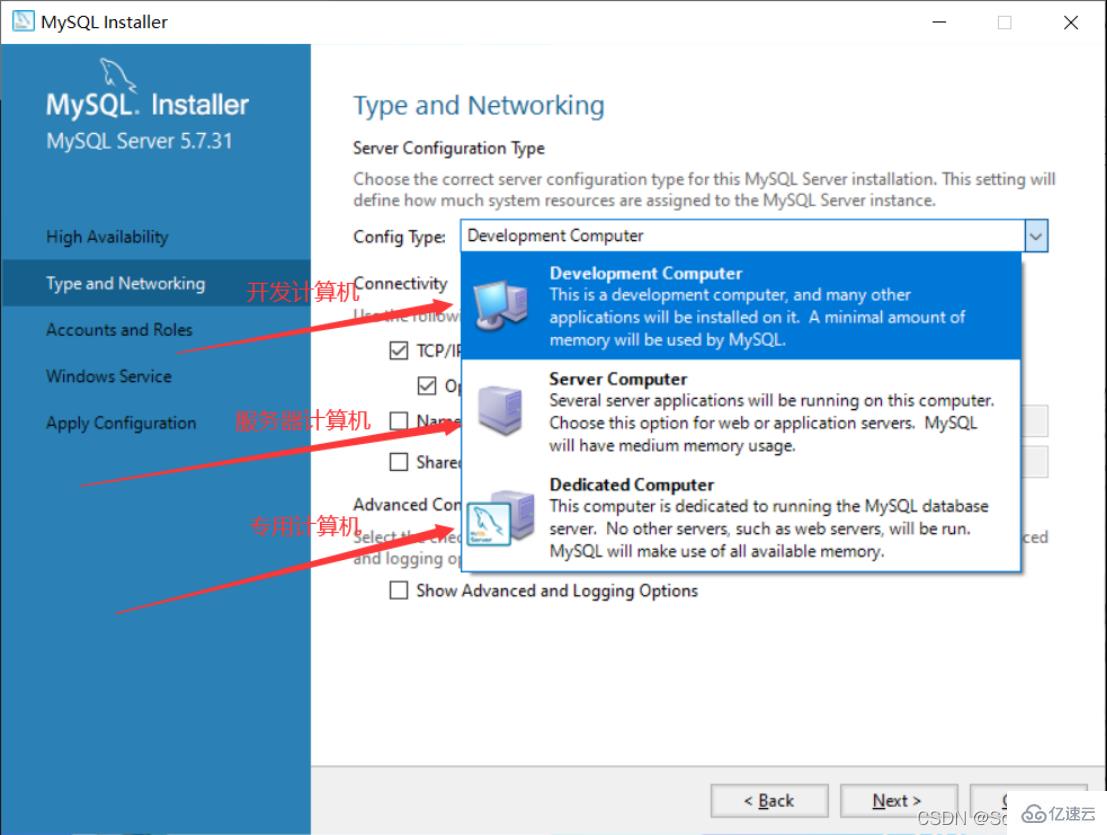
17. Select the installation type
Personal If you want to study and research, you can choose "Development Computer". I choose "Development Computer" here
Development Computer is suitable for personal development and learning
Server Computer is mainly used for things like FTP, email, web server, etc.
Dedicated Computer is only used as a MySQL server
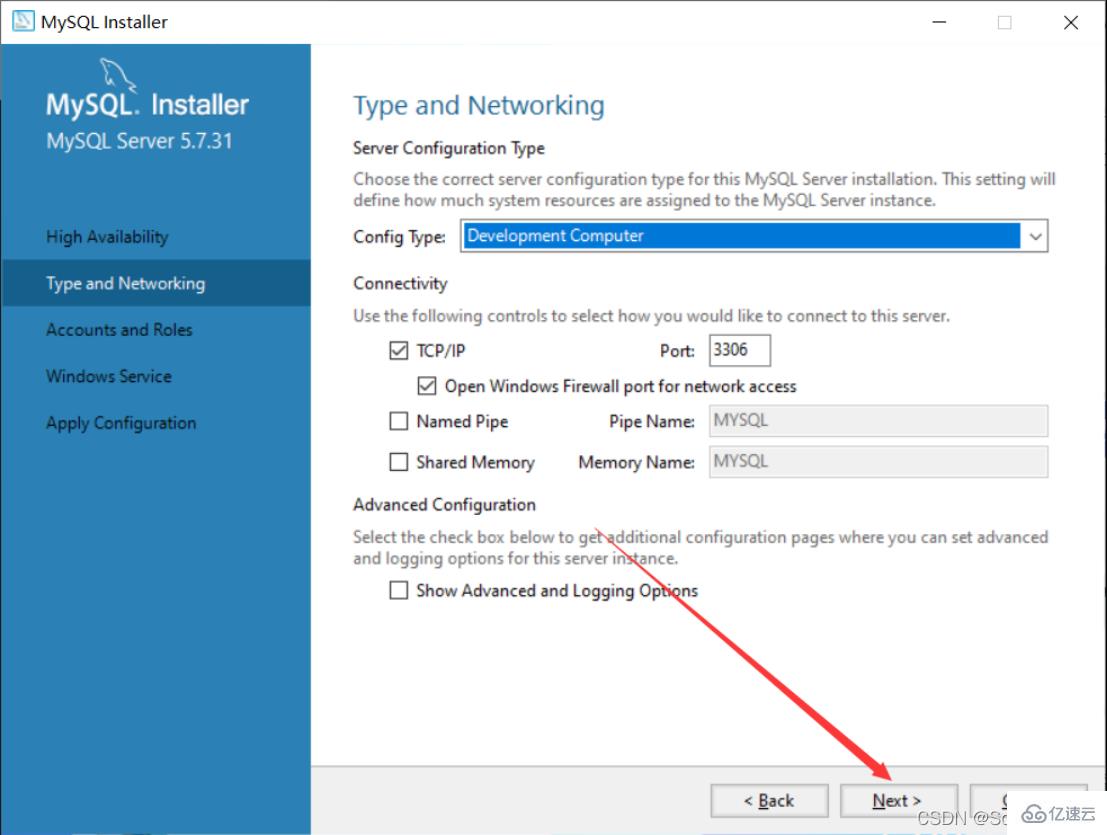
18. The default port of MySQL is 3306, which is not required To make changes, click "Next" directly
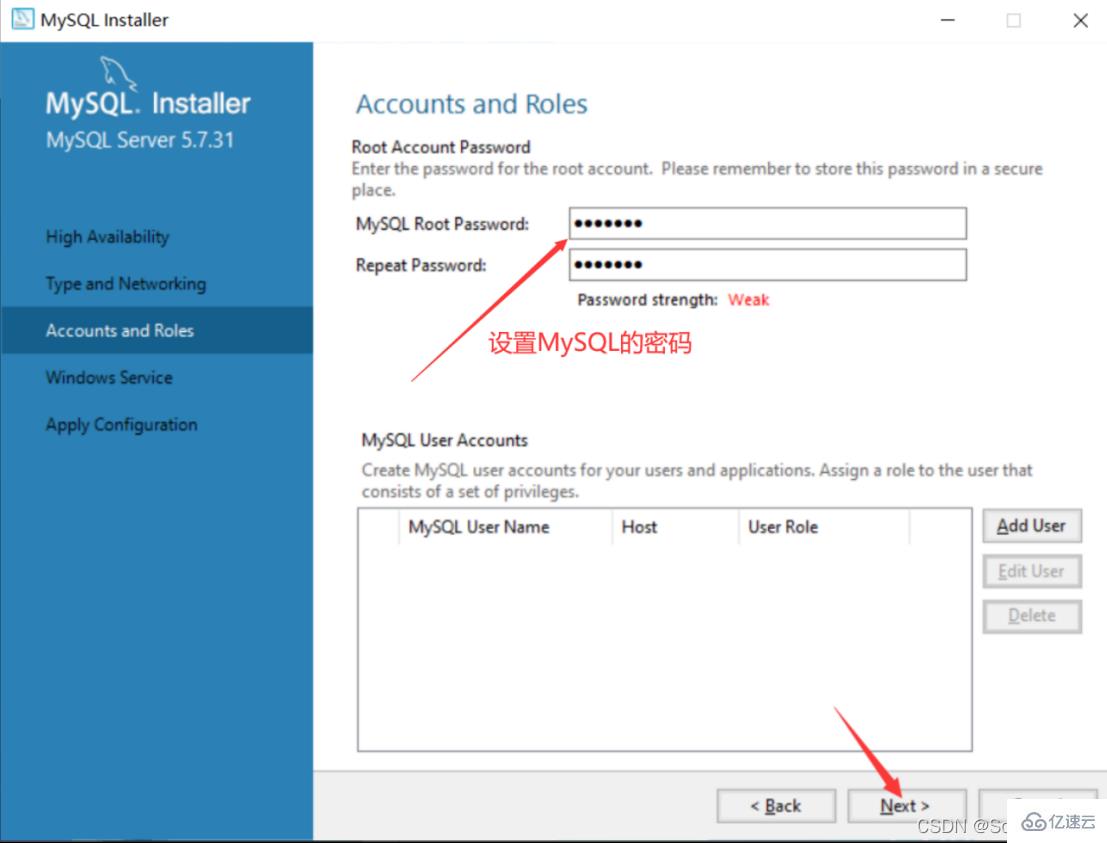
19. Here you need to set the MySQL password, it doesn't need to be too complicated, just click "Next" after setting it
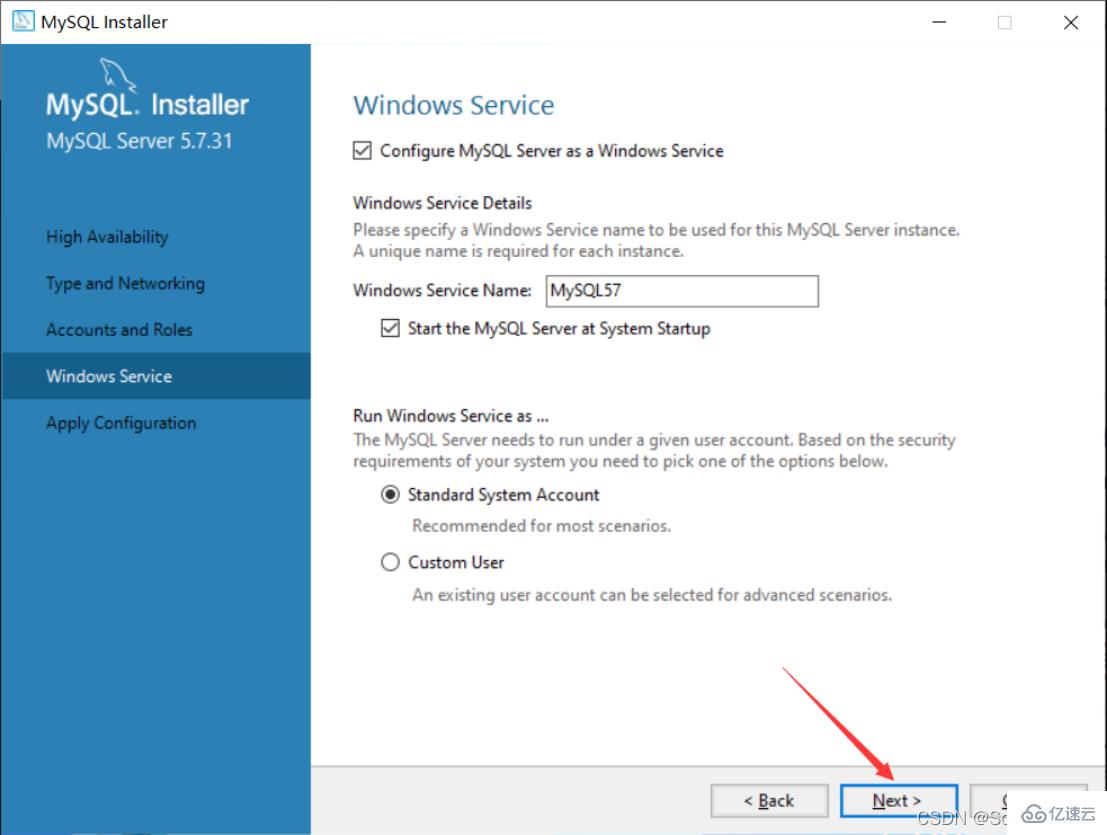
20. Click “Next” directly
##21 . Click "Execute" directly to start the installation. After clicking the installation, you need to wait for a while
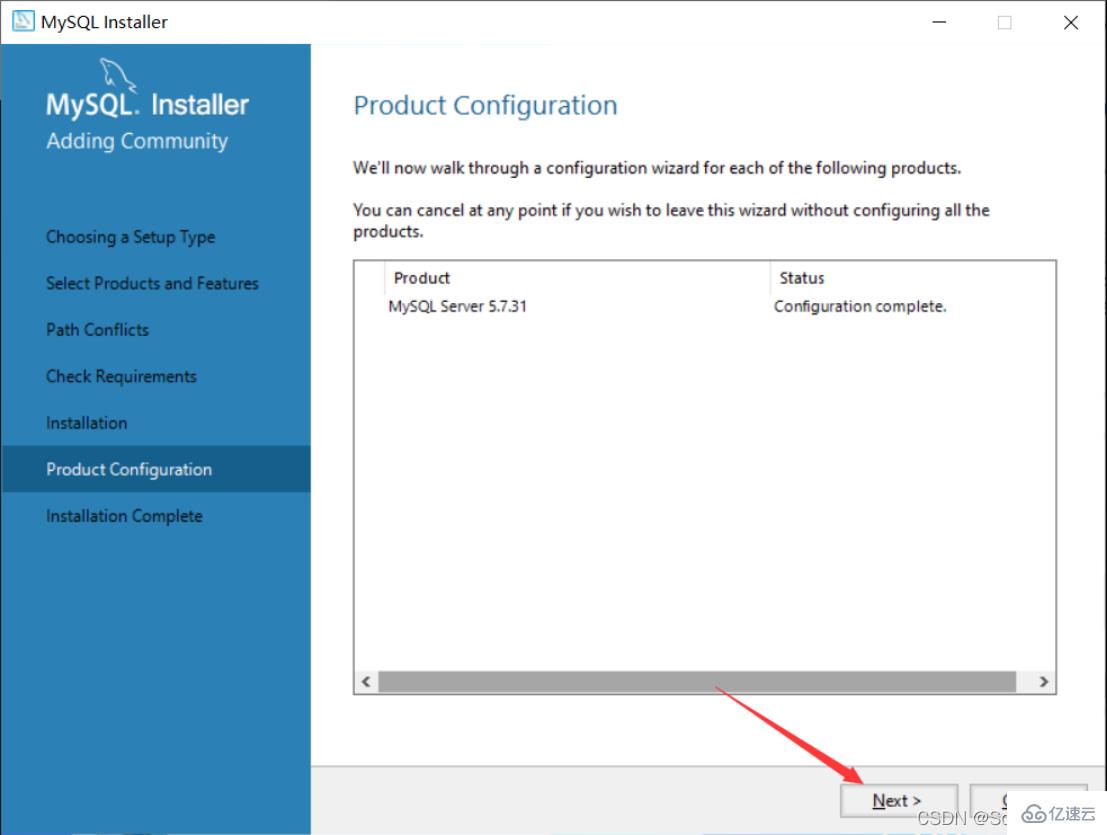
22. Click “Finish”
23. Click “Next”
24. Click "Finish" and the MySQL installation is completed

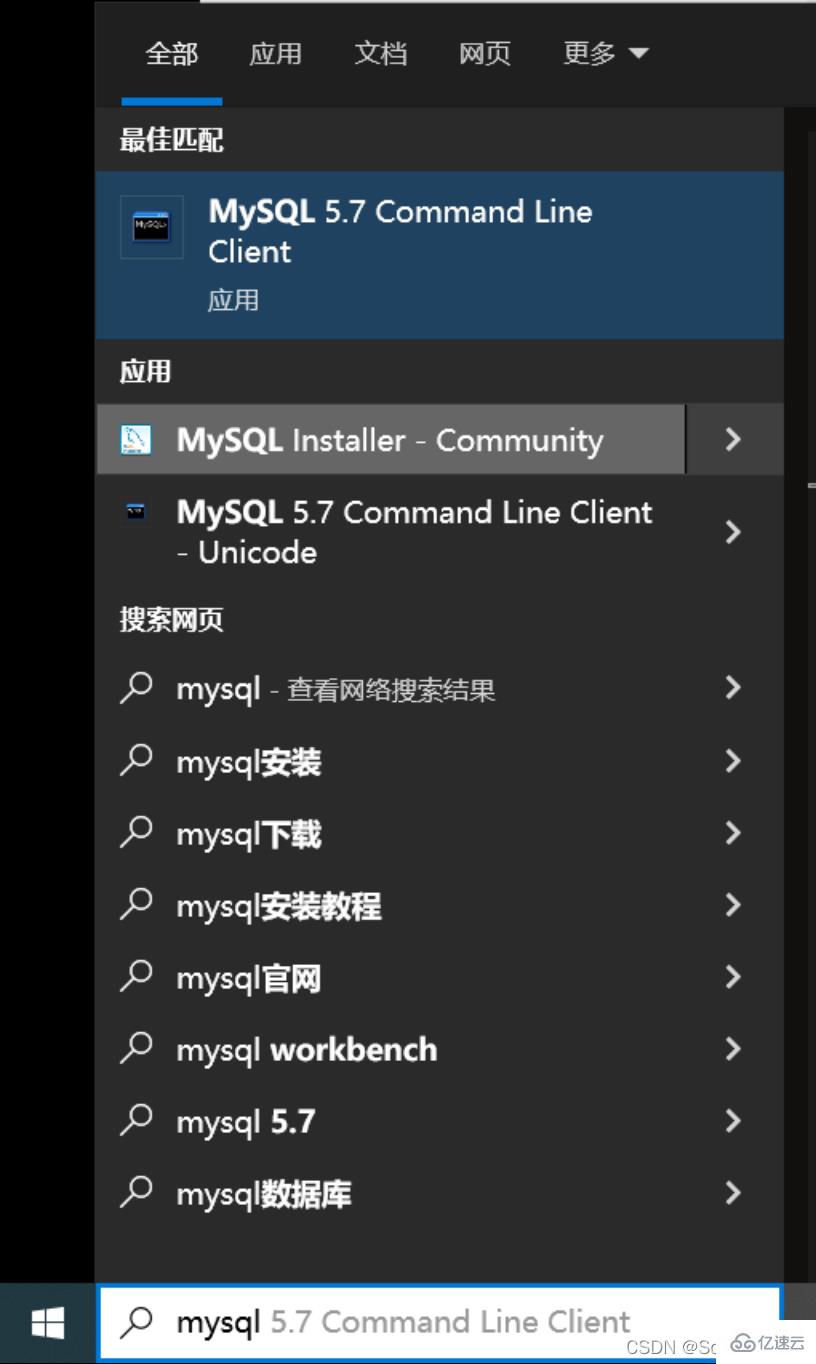
25. Search for mysql on the start interface , click on the first MySQL 5.7 Command Line Client
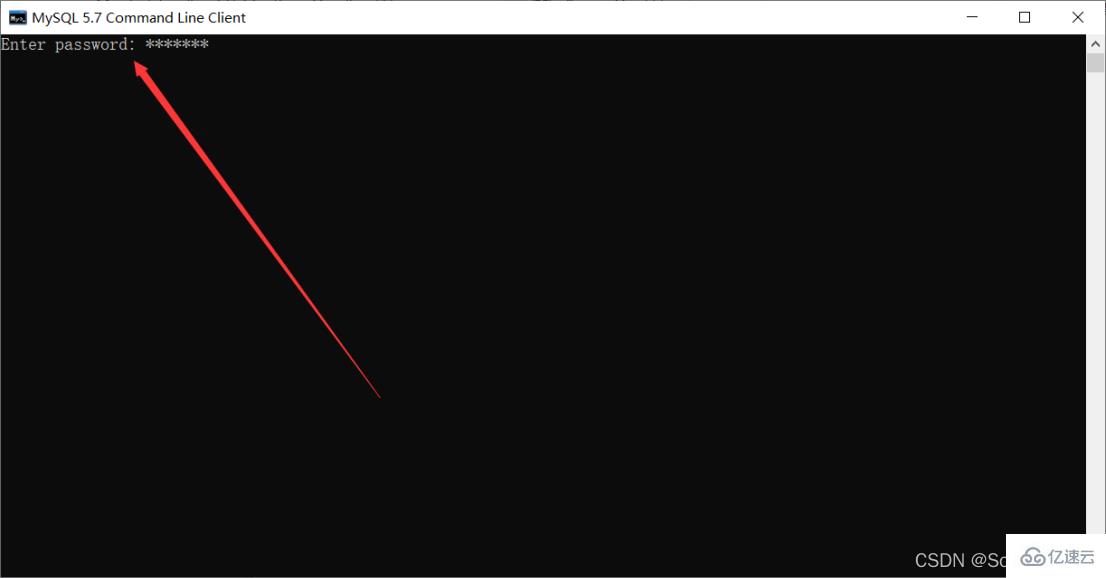
26. Enter the MySQL password you just set and press the Enter key (Enter key)
27. When the following interface appears, it means the installation has been successful
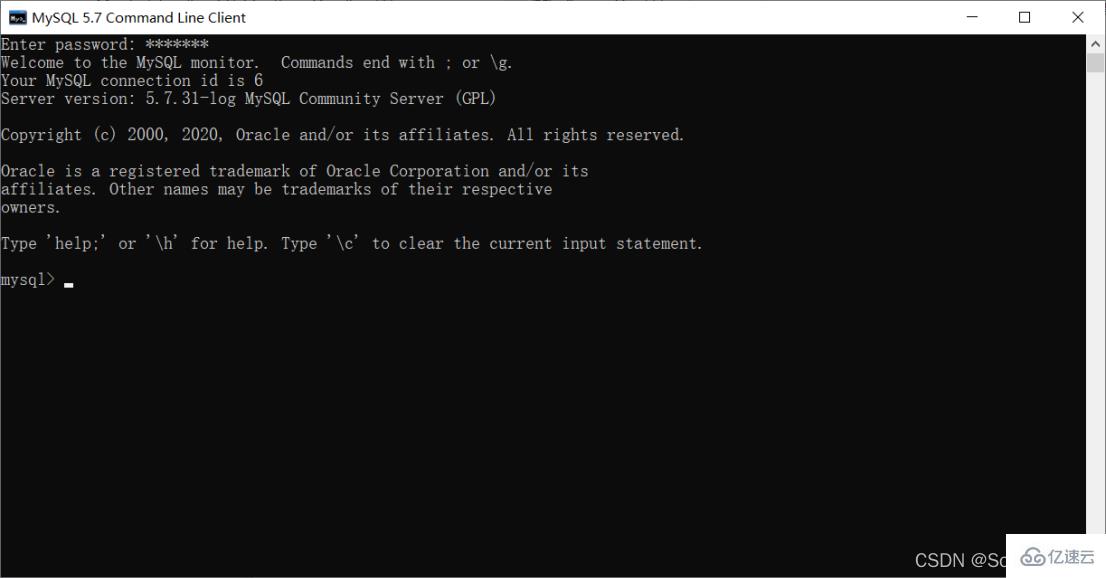
##At this point, the MySQL database is installed successfully
3. Configure environment variables
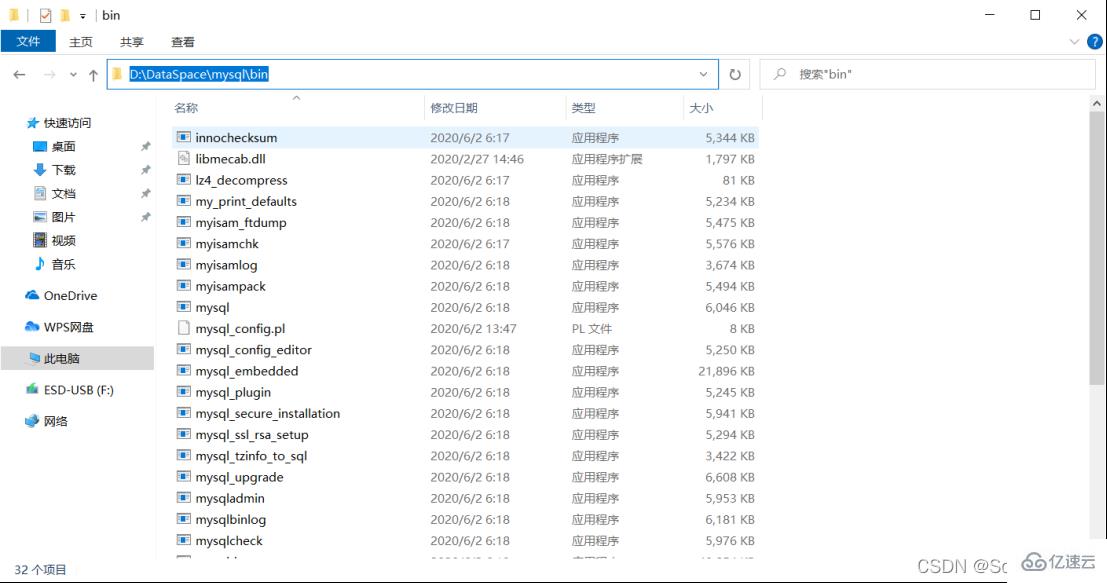
1. Find the installation path of MySQL
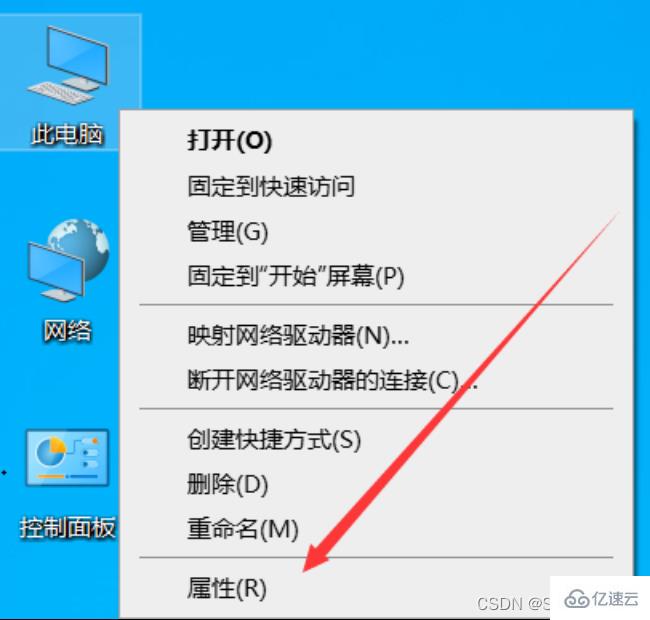
2. Right-click this computer and select "Properties"
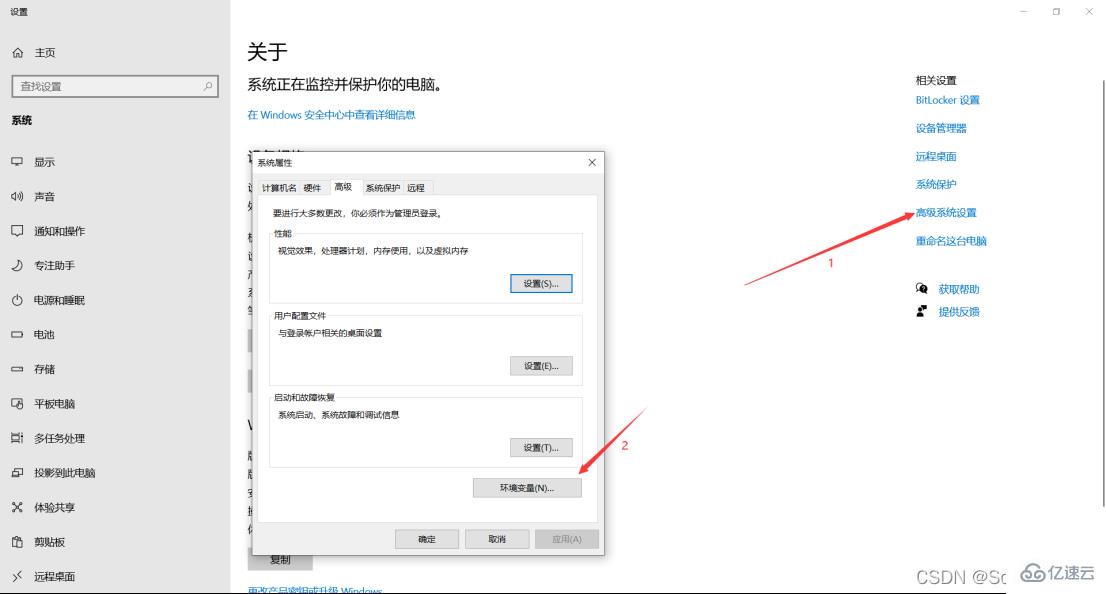
3. Click first "Advanced System Settings", then click "Environment Variables"
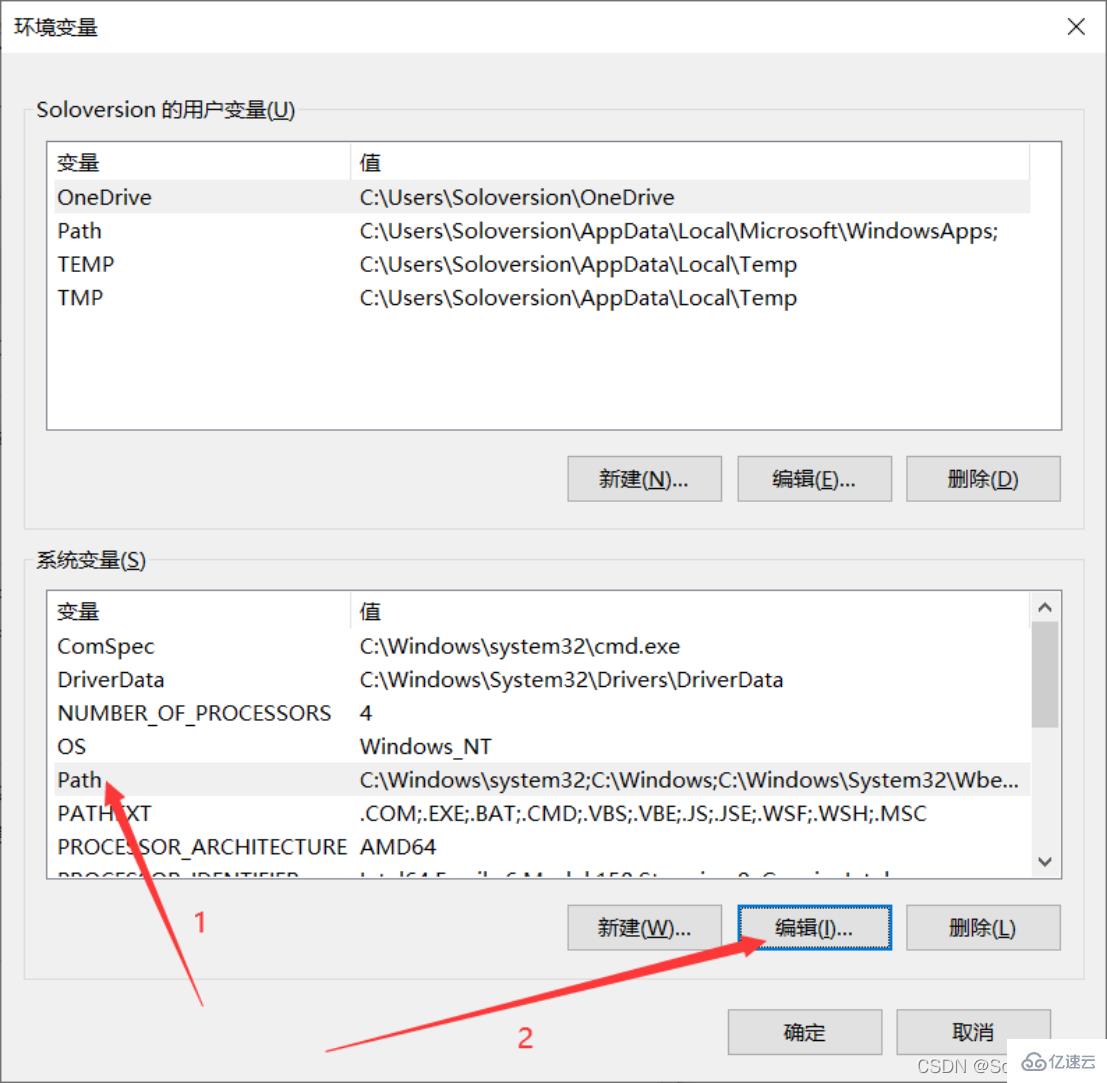
4. Select "Path" in "System Variables" and click "Edit"
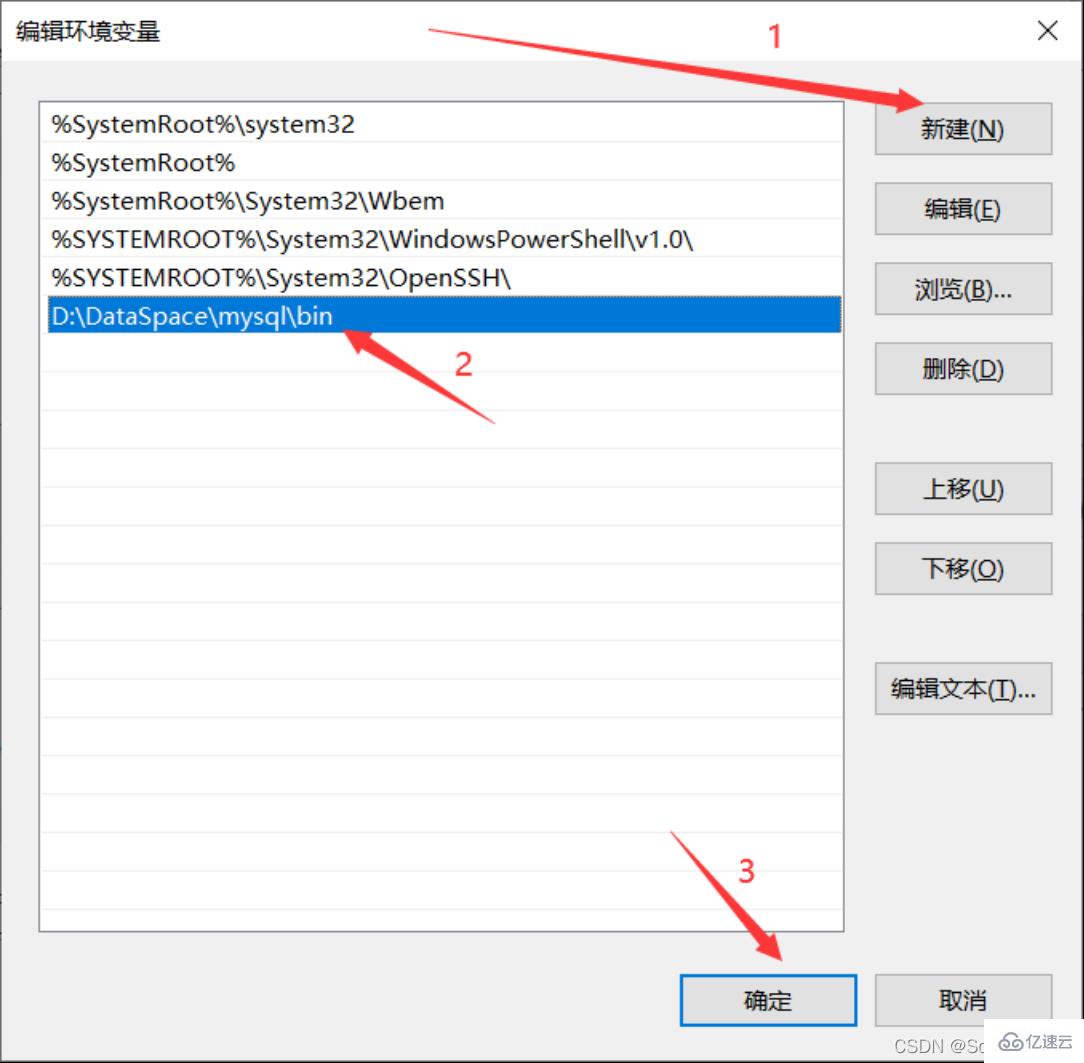
5. Click "New", add the MySQL installation path, and then click "OK"
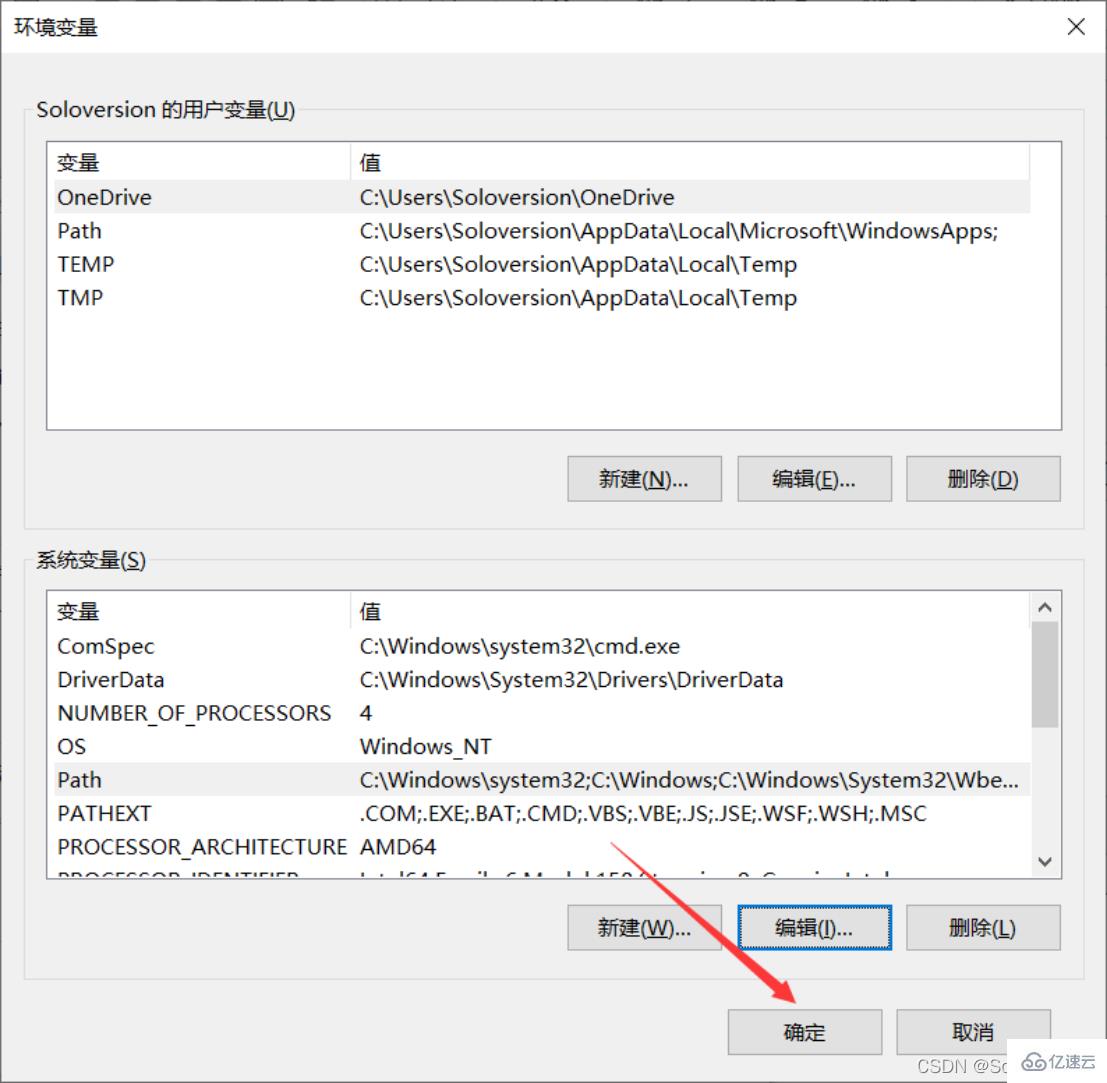
6. Click "OK" directly

##7 . Verify whether the environment variables are configured properly, press the "window R" key to pop up the run box, enter "cmd" to enter the window command line
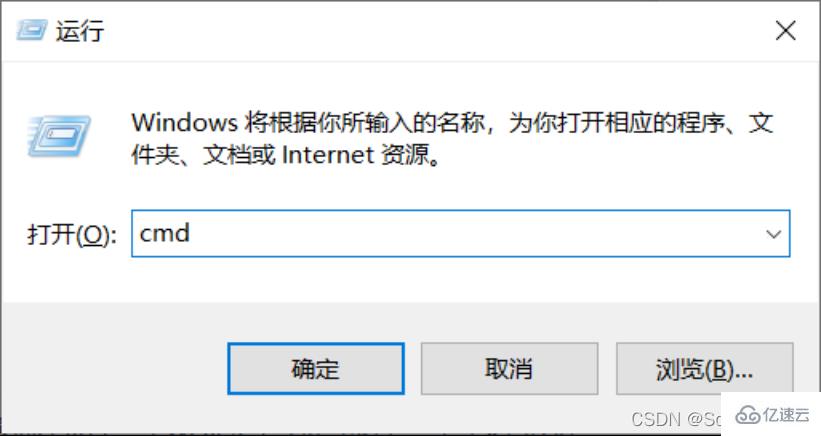
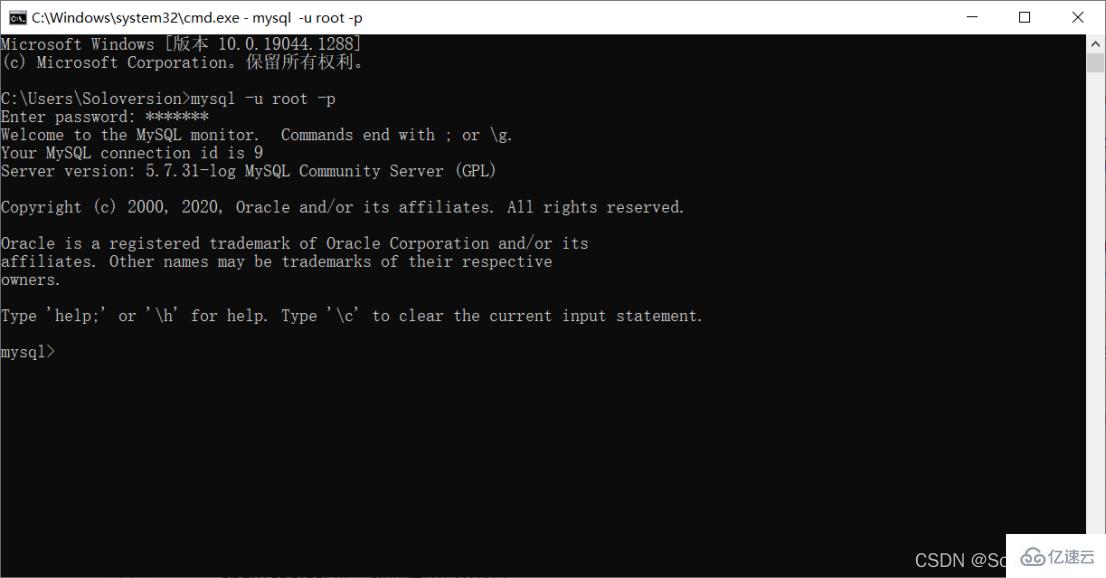
8. Enter "mysql -u root -p" and press Enter
9. Enter the password and press the "Enter key (Enter key)". When the following interface appears, the configuration has been successful
The above is the detailed content of How to install and configure MySQL5.7.31. For more information, please follow other related articles on the PHP Chinese website!


![[Web front-end] Node.js quick start](https://img.php.cn/upload/course/000/000/067/662b5d34ba7c0227.png)


