So you prepare a huge Excel sheet full of numbers and decimals and so on. You're ready to print your documents and finish your work for the day. You press the CTRL P keys to preview your print, when you notice that no gridlines appear in the preview and it's all just numbers. Well, nothing can get your heart racing faster than here.
In this article, we will introduce how to easily print gridlines, row headers, and column headers of an Excel document with some simple steps.
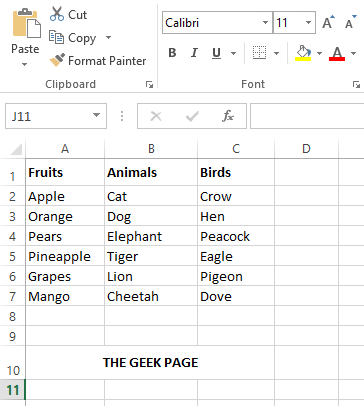
Step 1: Start Microsoft Excel and open the file you want to print.
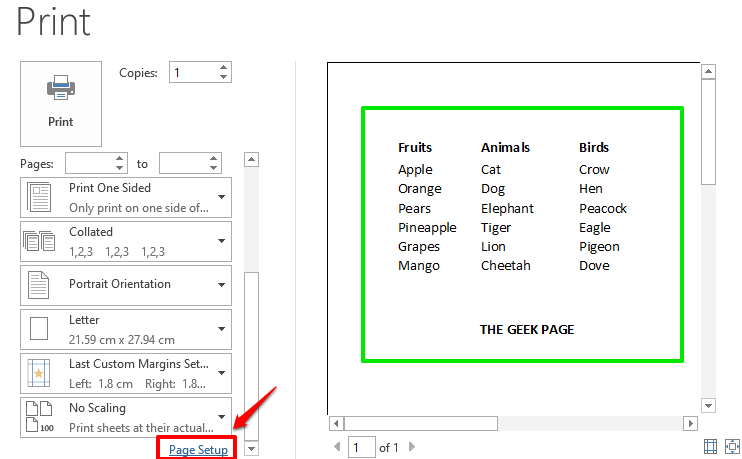
After opening the file, press the CTRL P keys simultaneously to open the print settings.

Step 2: When the print settings open, you will be able to see in the print preview section that the gridlines, row headers, and column headers are not visible. Don't worry, let's change it.
To do this, click the link Page Settings on the left side of the window, as shown in the screenshot below.

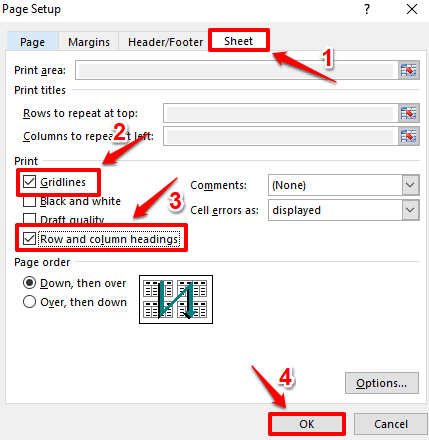
Step 3: In the Page Setup window, click the tab named Sheet.
If you want to print grid lines, select the checkbox corresponding to option Gridlines.
Also, if you want to print row and column headings, select the checkboxcorresponding to Row and column headings. After all is completed, click the
OK button at the bottom.

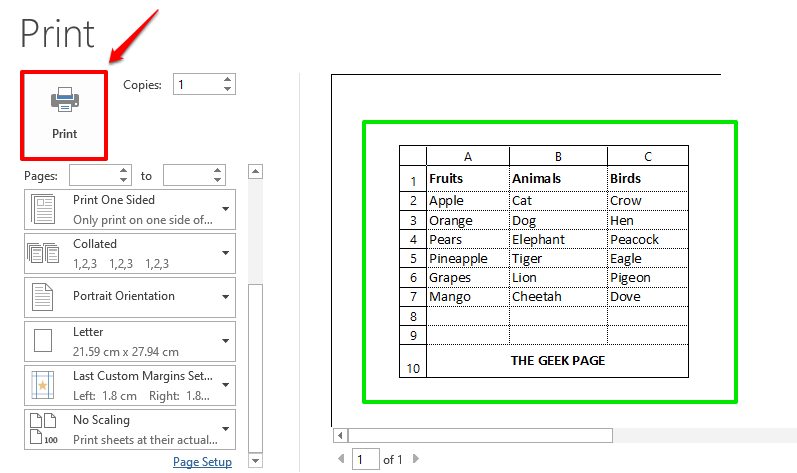
: If you now look at the print preview, you will see that the gridlines, row headers, and column headers are now visible . You can now proceed to print the page by pressing the "Print" button.
 Hope you found this article useful. Come back for more tips, tricks, and how-tos.
The above is the detailed content of How to print gridlines, row headers, and column headers in Microsoft Excel. For more information, please follow other related articles on the PHP Chinese website!
 How to make charts and data analysis charts in PPT
 Android voice playback function implementation method
 AC contactor use
 The difference between vscode and visual studio
 The difference between Java and Java
 Introduction to hard disk interface types
 nagios configuration method
 How to delete a folder in linux


