
GeForce Experience overlays are screens that appear on your screen while you're gaming, providing you with conveniences like screen recording, live streaming, screen capture, direct sharing, and more. Recently some users have pointed out some situations where they are unable to use GeForce Experience in-game overlays in their games. If you are one of these users and facing the same issue, don’t worry. There are some simple and stable fixes that can help resolve your issue.
NVIDIA Shadow play or in-game overlay requires some Visual Studio files to be installed on the system.
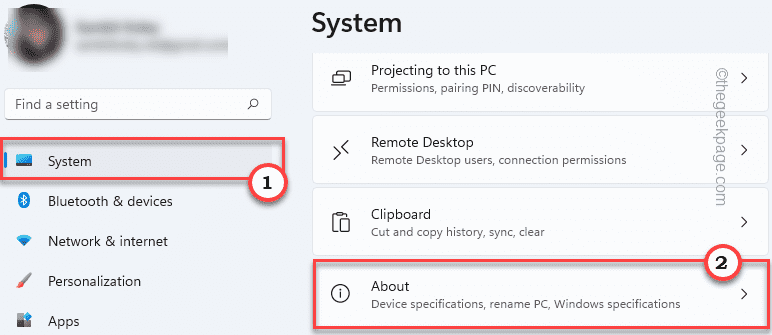
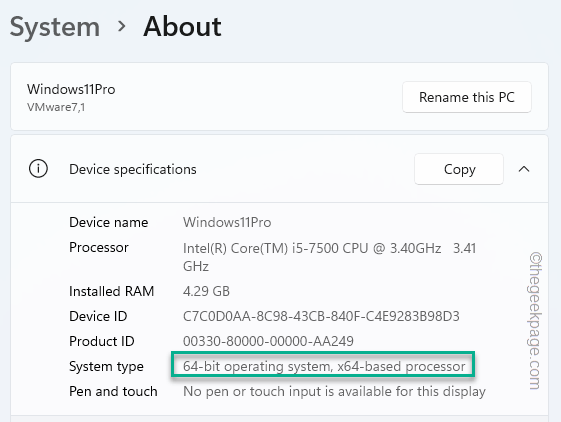
You can check which CPU architecture your system is using.
1. First, press theWindows key and Ikey at the same time. This will open the settings screen.
2. On the settings page, click "System" in the left pane.
3. Now, on the right pane, scroll down and click on "About".
#4. Now, you can notice the processor architecture from here. Just check if it is based on "x64" or "ARM64".
1. First, visit the official website of Visual Studio C Redistributable Package.
2. Now, go to the Visual Studio 2015, 2017, 2019, and 2022 section.
3. Then, click on the application version according to your system specifications. Is your system based on x64 or ARM64 architecture? .
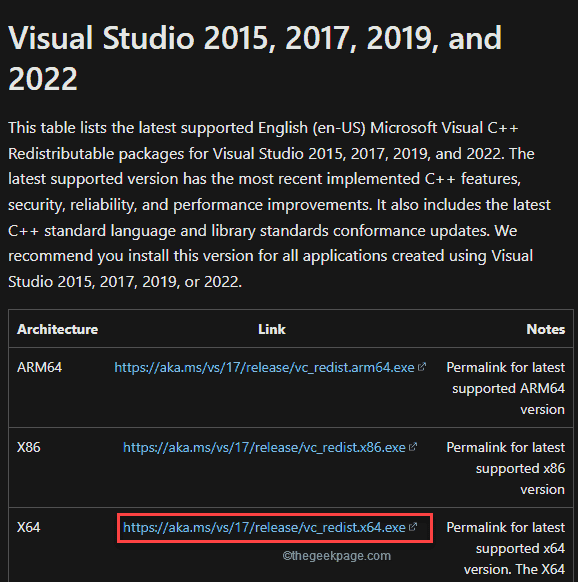
After a few seconds, the download process will be completed.
After downloading, close the browser window.
4. Additionally, justdouble-click"vcredist.exe".
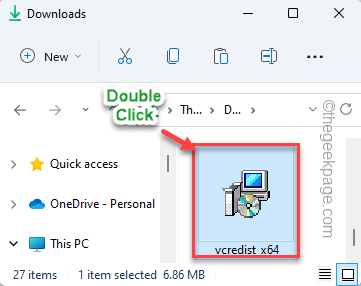
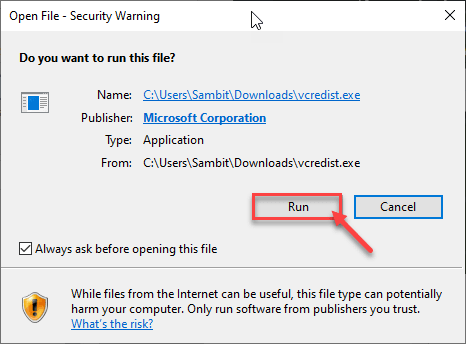
5. Once you see the "Do you want to run this file?" prompt, click "Run".
#6. You must accept the terms and conditions. Justcheck"I agree to the license terms and conditions".
7. To do this, click on “Install” to start the installation process.
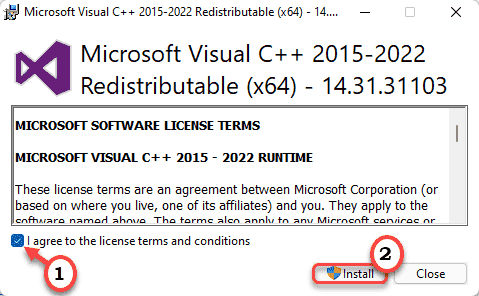
#8. The installation process will be completed in half a minute.
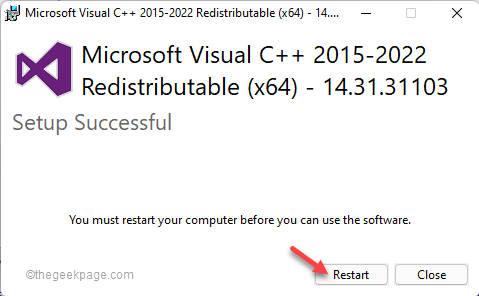
9. After completion, click "Restart" to restart the system.
After the computer boots up, launch the game and test if it works.
Check that you actually have overlay enabled.
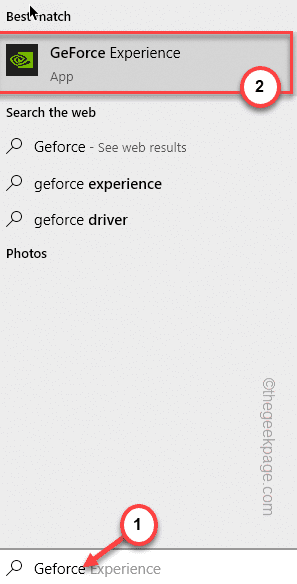
1. Enter "GeForce Experience" in the search box.
2. Then, click "GeForce Experience".
3. When NVIDIA GeForce Experience opens, click thegear-shapedicon.
4. Then, click on the "General" area.
5. Scroll down the right pane and set "IN-GAME OVERLAY" to "On".
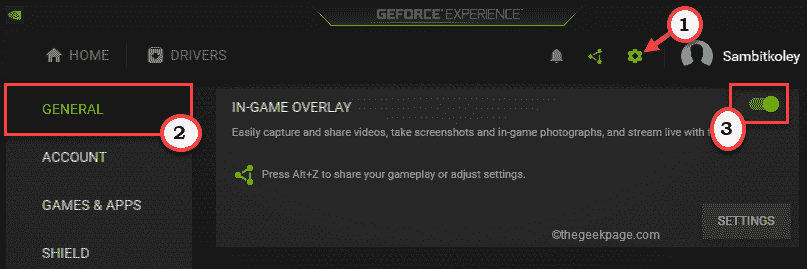
#Try closing the GeForce Experience application and then running the game to use the in-game overlay feature. Check if this works.
Enabling experimental features should resolve the issue.
1. Launch the GeForce Experience application.
2. From there, just click on thegear-shapedicon to access settings.
3. After that, go to the "General" section.

4. Then, in the right pane, go to theAboutsection.
5. There,checkthe "Enable experimental features. A GeForce Experience updatemay be required" option.
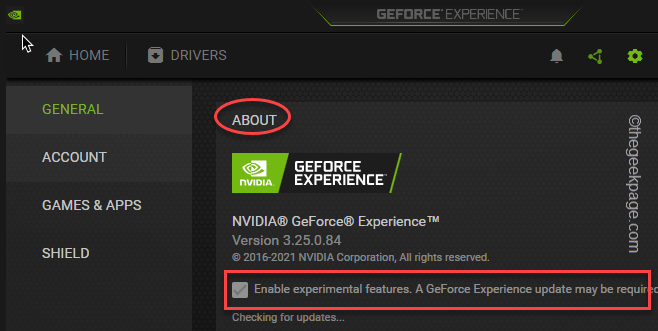
GeForce Experience applications may check for, download, and install necessary updates.
When finished, check if this works.
NVFBC Capture on NVIDIA GPUs in the Steam client may interfere with the in-game overlay feature itself.
1. Launch the Steam client.
2. In the Steam client, click the "Steam " option on the menu bar.
3. Later, click on "Settings" to access it.
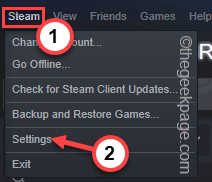
#4. In the Steam Settings panel, go to the "Remote Play" section.
5. Now, on the right side, click on “Advanced Hosting Options”.
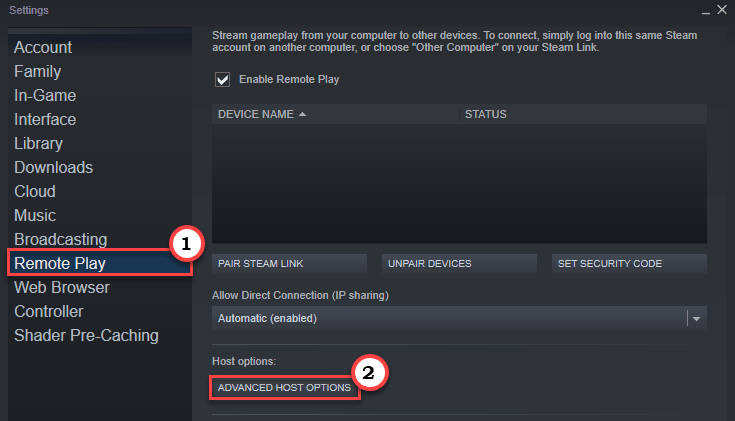
6. In the Advanced Host Options panel,uncheck"Use NVBFC capture on NVIDIA GPU U" options.
7. Finally, click "OK".
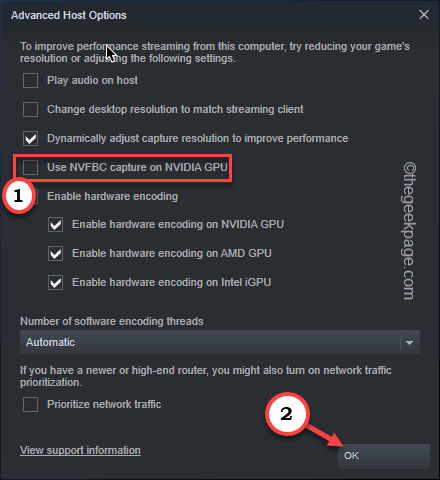
Now, close the GeForce Experience application and test it out by playing the game and using the feature.
Some users have resolved this issue simply by installing the latest Media Feature Pack on their computers.
1. Access the Media Feature Pack for Windows N.
2. Then, click the "Download" icon.

#3. After that, check the specific package against the CPU specifications.
4. Next, click "Download" to download the latest package on your system.
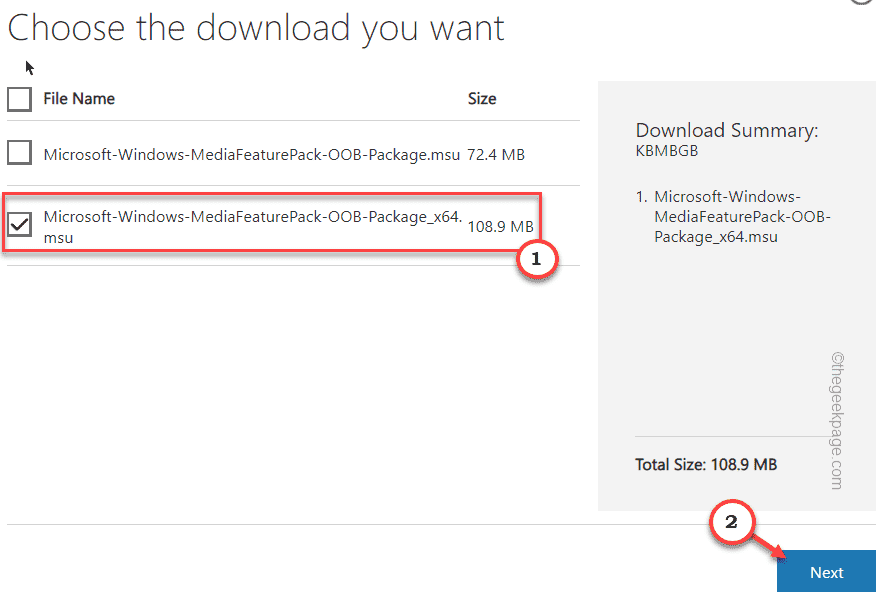
5. After downloading,double-click thedownloaded package.
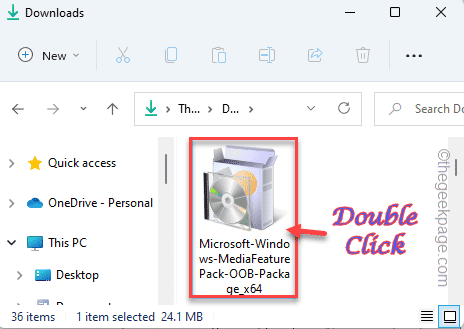
Now just follow the on-screen instructions to complete the installation process.
Sometimes simply updating your graphics card can solve the problem.
1. Start GeForce Experience.
2. After that, click on the “DriverProgram” section.
3. Let it find the latest driver package for your system.

Let it download the latest version of the driver.
4. After completion, click "Quick Installation".

This will quickly install the driver. You just have to wait.
You must uninstall and reinstall GeForce Experience.
1. First, press theWindows key and Xkey at the same time.
2. Then, click "Apps and Features".
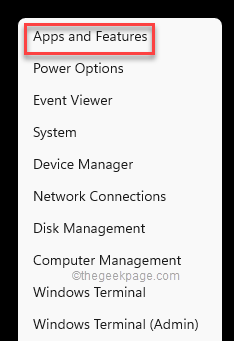
You may see a list of installed applications.
4. Now, right-click on the "GeForce Experience" application and click on "Uninstall".
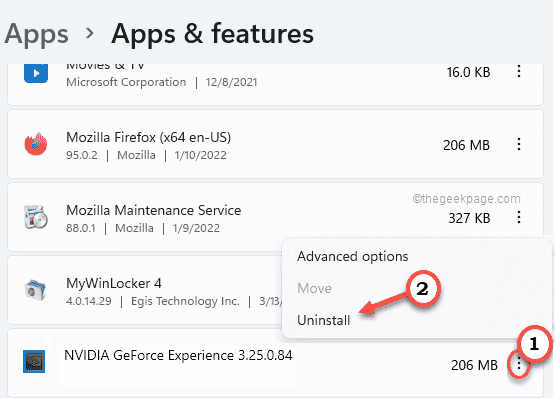
Now, just follow the on-screen instructions to complete the uninstall process.
After that, close the programs and features window.
5. Then, visit the NVIDIA official website.
6. After opening, click "Download" to download the latest version of the application.
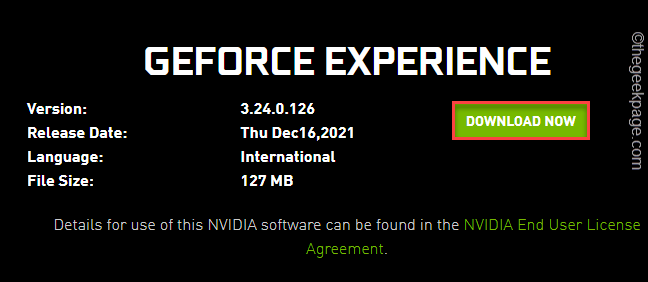
Wait a moment to complete the download process.
7. After downloading the installation file,Double-click"Geforce_Experience" to run.
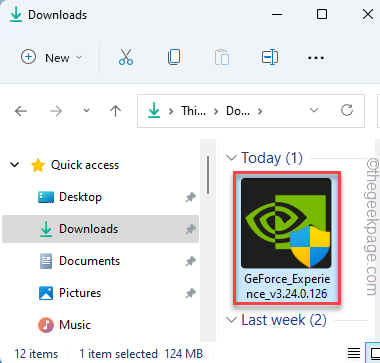
Just follow the on-screen instructions to complete the installation process.
After installing the latest version of the GeForce Experience application, you may need torestartyour system.
The above is the detailed content of Fix: GeForce Experience in-game overlay not working. For more information, please follow other related articles on the PHP Chinese website!


