


For various purposes, you may need to insert horizontal lines in Word documents from time to time. You may need to separate a section, you may need to add a long underline to the title, etc. You may also know that typing3 hyphens(- – -)and pressingEnterinserts a standard horizontal line in the document. However, if you're tired of using the same old horizontal lines all the time in your documents, you might want to try your own custom horizontal lines. Or even simpler, insert the built-in horizontal lines that Excel already has.
No matter what your requirements are, we have them all covered. If you must frequently insert horizontal lines into your documents, we've also detailed how to assign keyword shortcuts to horizontal lines! So, let’s jump right into the article, shall we?
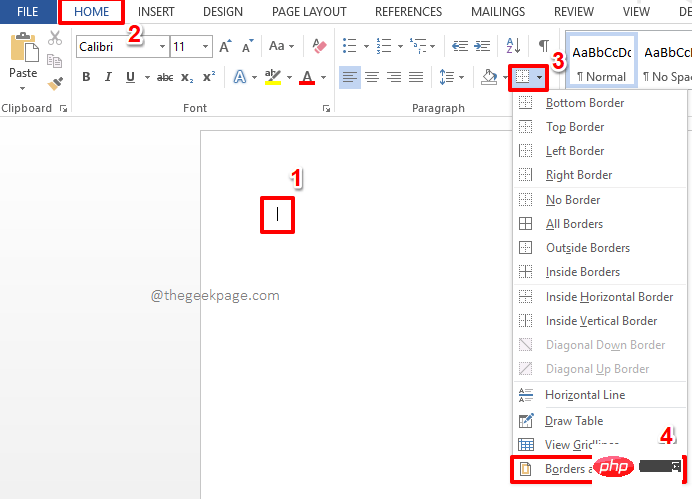
Step 1: First,clickthe point where you want to insert the horizontal line.
Now click on theHOME tab at the top.
Next, under theParagraphsection, click theBordersicon and select theBorders and Shadingoption.
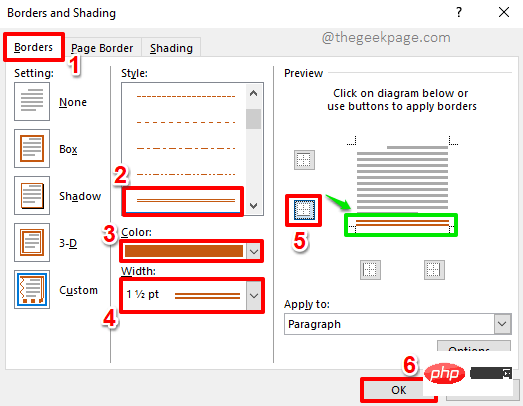
Step 2: In theBorders and Shadingwindow, make sure you are in theBorders" tab.
From theStyleoptions list, select the built-in border of your choice.
You can change the color of the border using theColordrop-down menu.
Now from theWidthdrop-down menu, select the width of your choice.
In the right pane, under the "Preview" section, make sure thebottom bordericon is the only active icon.
After all is completed, click theOK button at the bottom.
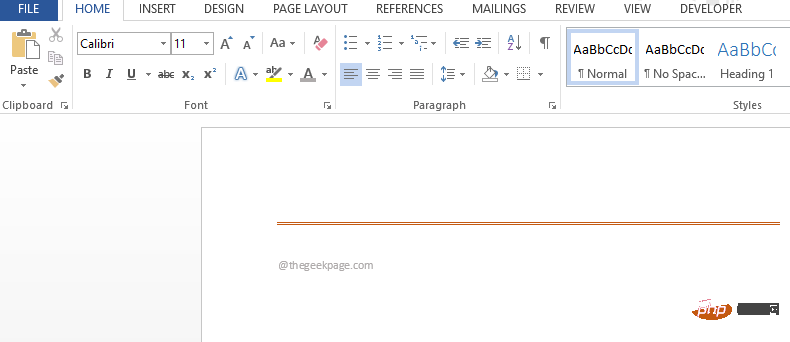
Step 3: That’s it. Your built-in border is now inserted successfully.
Note: Built-in borders are easy to insert, but difficult to delete, because the delete key will not delete borders inserted using this method. If you want to know how to remove borders inserted using this method, you can read our article on the topic How to Insert and Remove Horizontal Lines in Microsoft Word.
In the above section, we detailed how to insert the built-in horizontal lines in Word documents. But if you want to insert your own custom horizontal lines, there is a way. The following steps pave the way to achieving this goal!
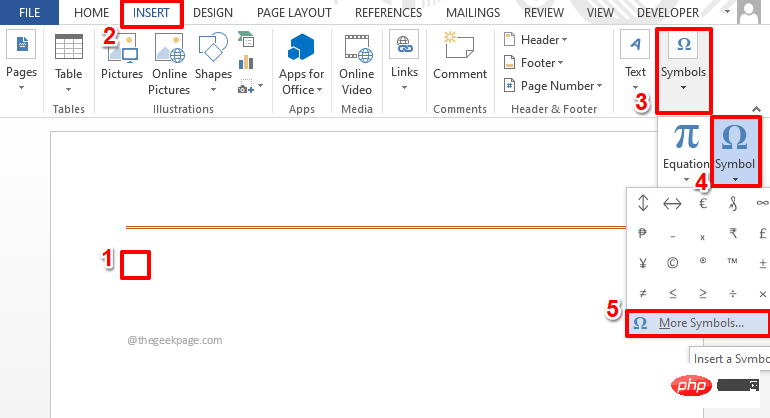
Step 1:Clickanywhere on the Word document where you want to insert a custom horizontal line.
Now, click on theInsert tab on the top ribbon.
Under theINSERTtab options, click the drop-down menu namedSymbols, and then click theSymboldrop-down menu.
At the bottom of the list of available symbols, click the optionMore symbols.
Step 2: From the list of available symbols,click thesymbol you want to create a horizontal line, then click "Insert" button.
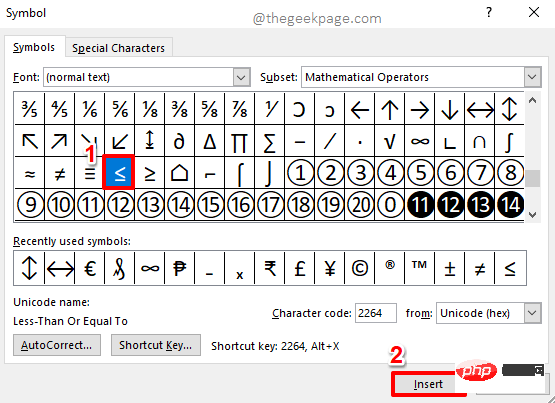
Note: By default, the font type is set to normal text. But you can change theFonttype toWebdingsorWingdingsor any other font to see many other symbols and characters.
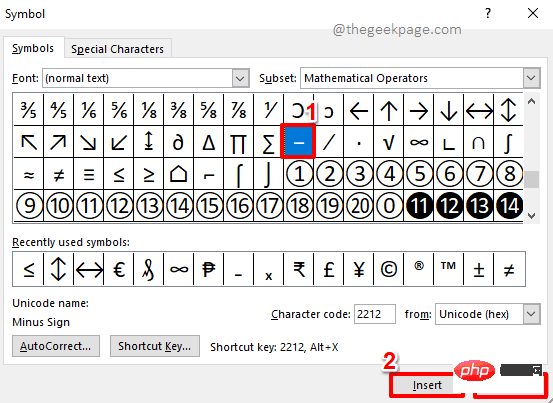
Step 3: You can insert any number of symbols in a similar manner.
Don’t forget to click theInsertbutton every time you select a symbol. Also, once you're done, click theClosebutton.
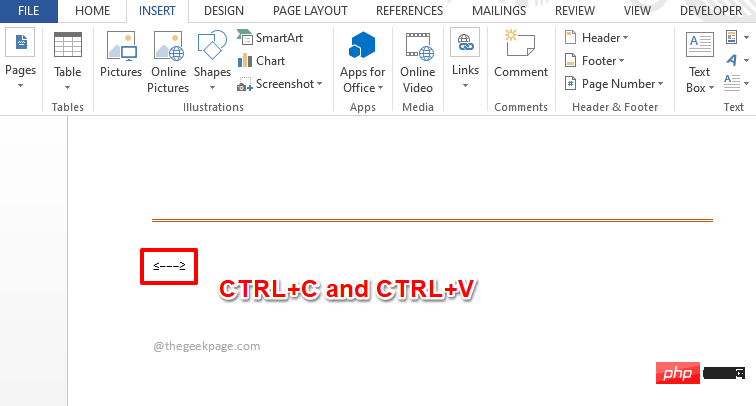
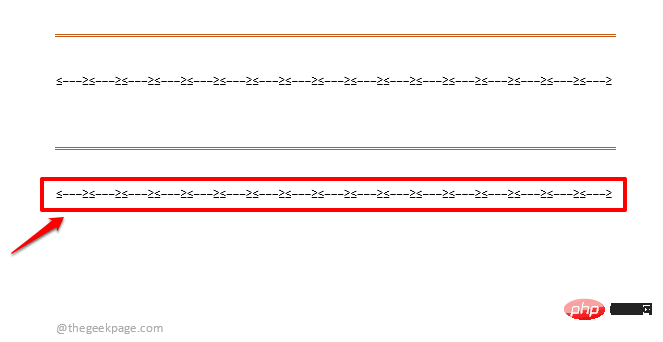
Step 4: In the following example, I created a pattern using the symbols I inserted in the previous step. I will now copy and paste this pattern to form a complete horizontal line. To copy and paste the pattern you create, press theCTRL Ckeys simultaneously, and then theCTRL Vkeys simultaneously.
Note: Remember that you can also enter characters from the keyboard between inserted symbols. Additionally, you can select theFontstyle options available under theHome tab. You can change thewidthof the pattern, you can change thecolor, etc.
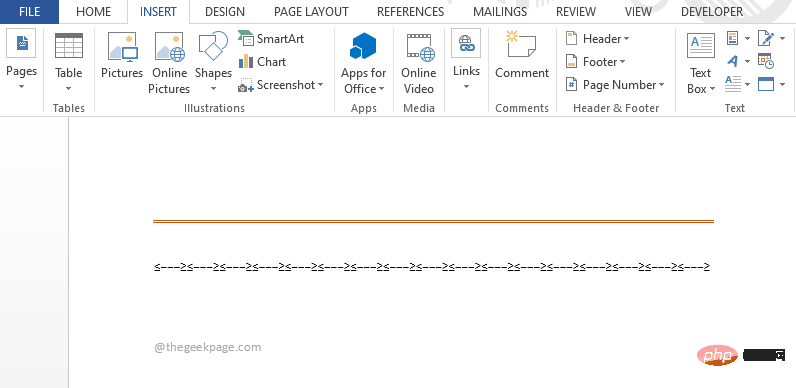
Step 5: Once the pattern repeats, it will be a complete line as shown in the screenshot below.
Of course, if you want to insert multiple lines in a Word document, follow the instructions in Section 2 above With all the steps detailed, inserting one horizontal line at a time would be very time consuming and definitely not the first choice. But what if you could use a keyword and pressEnterto insert a horizontal line, either built-in or custom? Yes, it's more like assigning a shortcut key to each horizontal line. Sound cool? continue reading.
Step 1: Start by inserting the row once using one of the methodsdetailed in the sections above.
If the row you want to assign a shortcut key to is a built-in horizontal line that you inserted using section 1, just click on itsinitial part toselect The lineis shown in the screenshot below. Next click on theFile tab at the top.
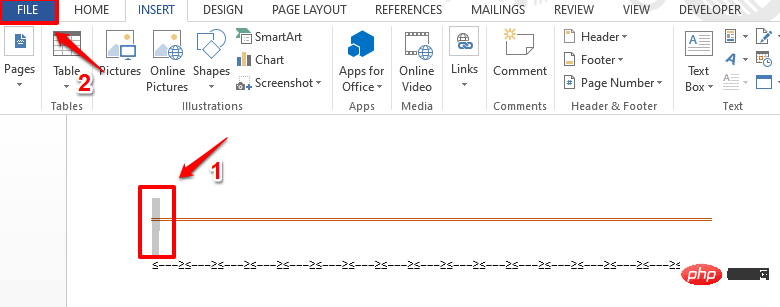
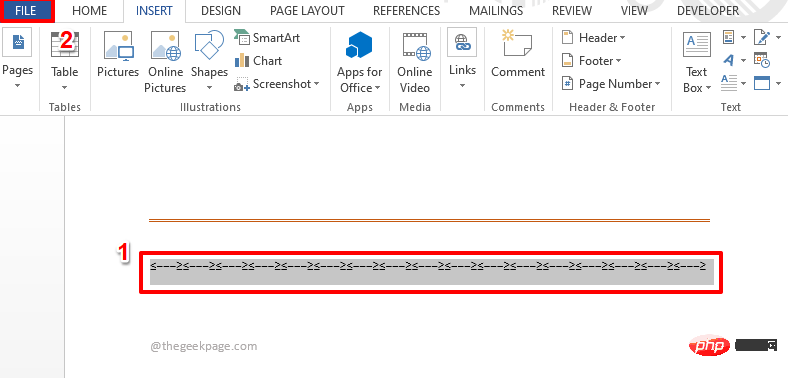
Alternatively, if you followed the steps detailed in Section 2 to insert a custom line,click and drag to Select the entire horizontal lineas shown below.
After selecting the row, click the "File" tab in the top ribbon.
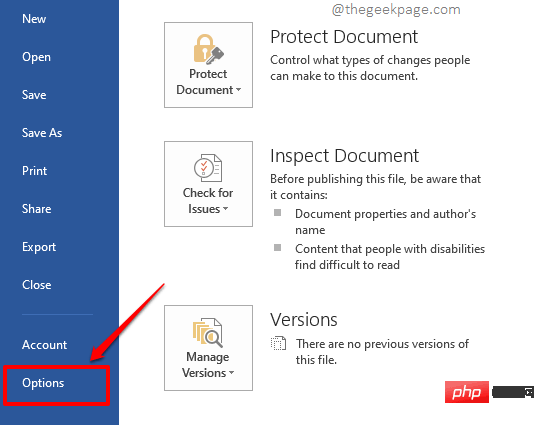
Step 2: Now, in the left pane of the window, click onOptions.
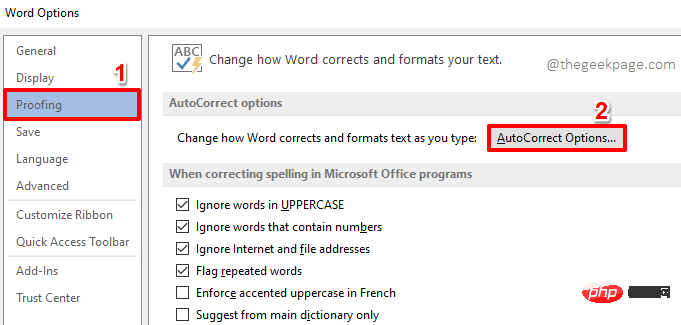
Step 3: In theleftpane of theWord Options window, Click "proof".
In therightpane, click theAutoCorrectOptions button under the section with the same name.
Step 4: Make sure you are on theAutoCorrecttab first.
Now, at the bottom of the "AutoCorrect" option, under the "Replace" section, type your preferred keyword## for the selected horizontal line#, as shown in the screenshot below. In the example below, I specified the shortcut keyword for the horizontal line astheGeekPage1. Once done, click theAddbutton.
Click theOK button at the bottom to continue.
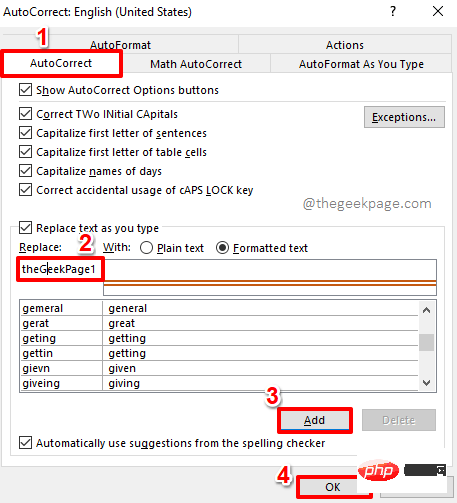
Word Optionswindow, click theOKbutton.
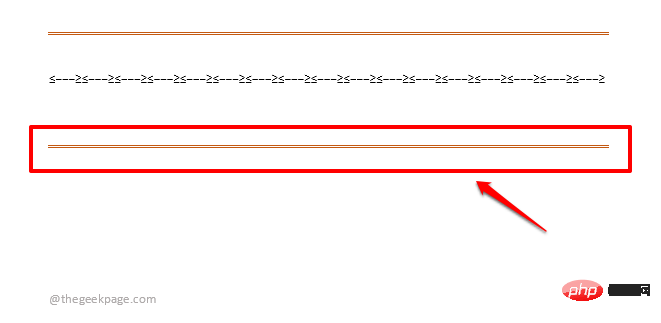
Step 5: Now you will be in your Word document again. Enter the keyword you want to assignto for the horizontal line and pressEnter.
Note: Keywordsare notcase sensitive. This means that Word treatsthegeekpage1andtheGeekPage1the same way.

Step 6: Viola! A horizontal line is now magically inserted, replacing your shortcut keyword.
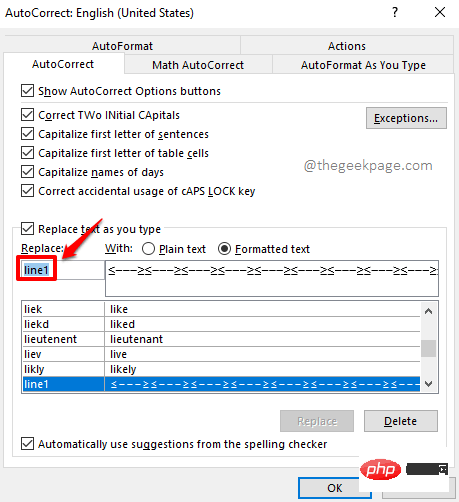
Step 7: Likewise, you can select any horizontal line and assign any keyword as per your choice, except reserved keywords.
In the example screenshot below, I have assigned the keywordline1to another line.
Step 8: Now, try typingLine1and pressEnterkey.
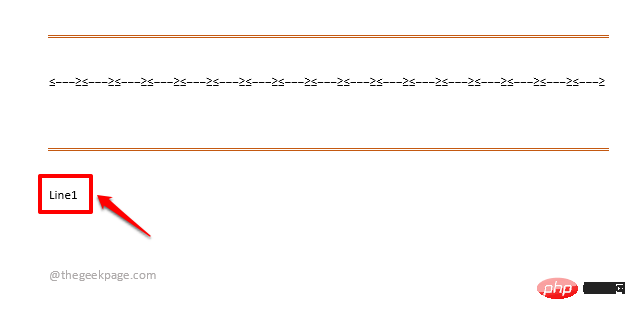
Step 9: Of course, the allocated row is inserted! enjoy!
The above is the detailed content of How to insert built-in and custom horizontal lines in Word documents. For more information, please follow other related articles on the PHP Chinese website!


![[Web front-end] Node.js quick start](https://img.php.cn/upload/course/000/000/067/662b5d34ba7c0227.png)


