
WebDriver drives the browser in a localized manner, just like the user locally Or as done on a remote machine using Selenium server, this marks a leap in browser automation.
Selenium WebDriver refers to the implementation of language binding and each browser control code. This is often called WebDriver.
Selenium WebDriver is a W3C recommendation.
WebDriver is designed to be a simple and concise programming interface.
WebDriver is a simple object-oriented API.
It drives the browser effectively.
The environment used in this article is python3.11 win10 64-bit firefox browser, so the browser driver used in this article is Firefox’s geckodriver. If If you are using another browser, just select your corresponding browser driver.
The easiest way is to install it directly using pip
pip install selenium

Through WebDriver, Selenium supports all major browsers on the market, such as Chrome, Firefox, Internet Explorer, Edge and Safari. WebDriver tries to use the browser's built-in automation support to drive the browser.
Since except Internet All driver implementations outside of Explorer are provided by the browser vendors themselves, so these drivers are not included in the standard Selenium distribution. This section describes the basic requirements for using different browsers.
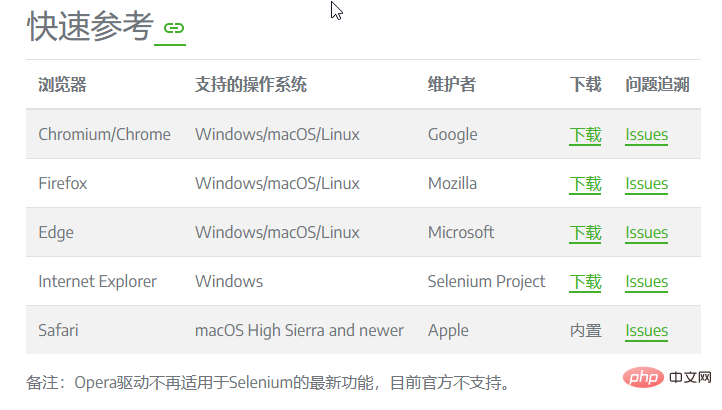
Open The following URL https://www.selenium.dev/zh-cn/documentation/webdriver/getting_started/install_drivers/
finds the link to download the browser driver. Here you can see multiple browser drivers supported by Selenium. , just download the corresponding driver for whatever browser you have installed on your computer. This article uses Firefox, so choose the Firefox driver.
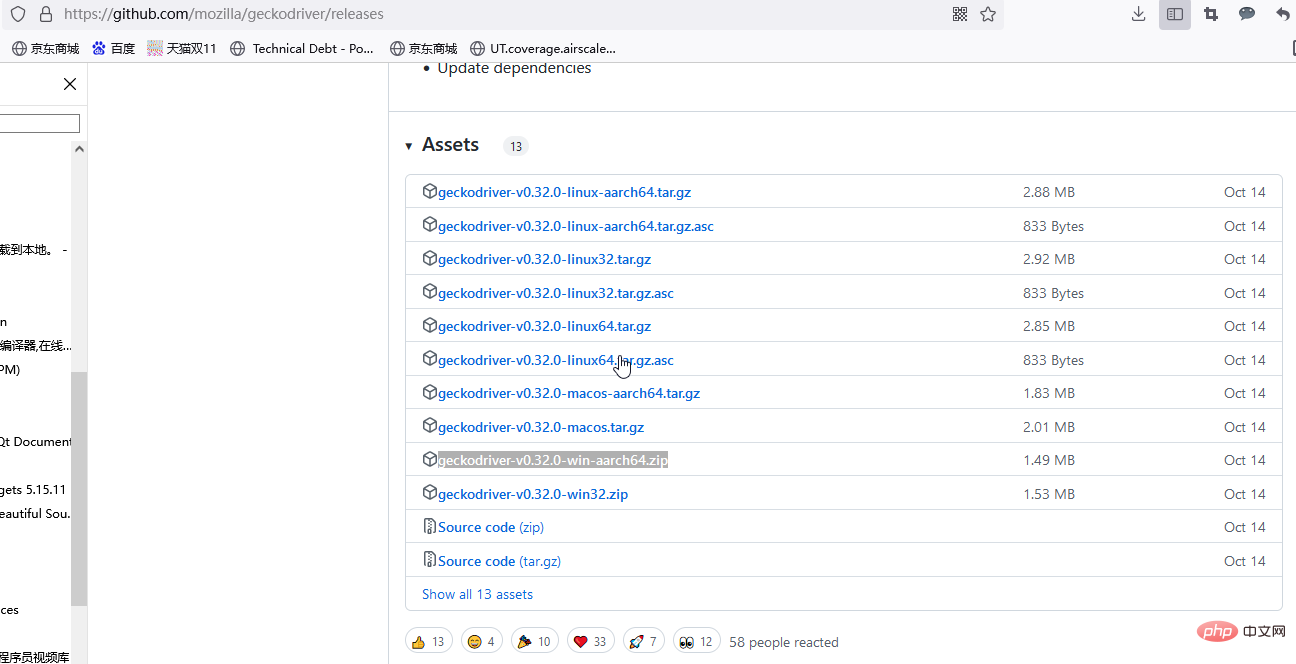
Click the firefox driver download link and go to the releases page of github. You can see the drivers of each version. This article is win10 64-bit, and the selected one is geckodriver-v0. 32.0-win-aarch74.zip, just select the corresponding file according to your system.
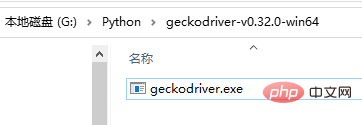
After decompression, it is an executable file, as shown below:
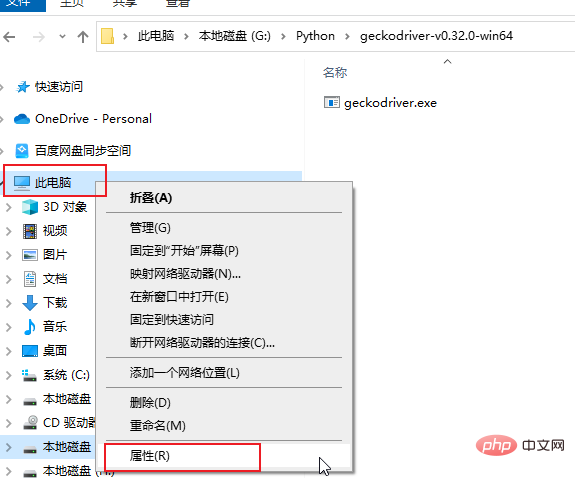
Open My Computer->Properties->Advanced System Settings->Environment Variables, double-click path, click New, enter the directory where the driver geckodriver.exe is located, and then click OK all the way.
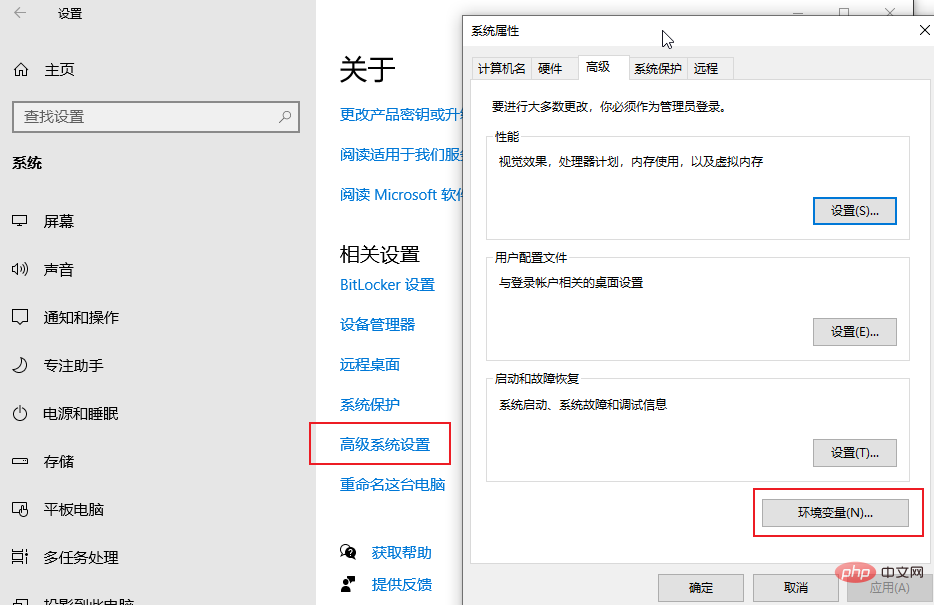
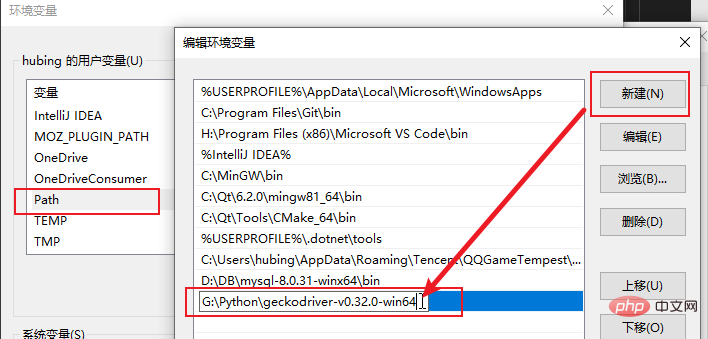
Simply verify, open a new console, enter the driver file name, this It is geckodriver.exe, and it can be opened normally

Of course, there is another way, which is to directly put the driver into the Scripts file in your Python directory folder, you can also open it directly when executing a python script. For example, my directory is D:\Python\Python311\Scripts
After you complete the Selenium installation and driver installation, you can start writing Selenium scripts .
All Selenium does is sends commands to the browser to perform some action or make a request for information. Most of the things you will do with Selenium are a combination of the following basic commands:
1. Open a session using the driver instance
driver = webdriver.Firefox()
2. Perform operations on the browser
In this example, we navigate to a web page.
driver.get("https://www.selenium.dev/selenium/web/web-form.html")3. Request browser information
You can request a series of information about the browser, including window handle, browser size/location, cookies, alerts, etc.
title = driver.title
4. Create a waiting strategy
Connect the code with Synchronizing the current state of the browser is one of the biggest challenges with Selenium, and getting it right is an advanced topic. Basically, you want to make sure that an element is on the page before you try to position it, and that you want to make sure that the element is on the page before you try to interact with it. The element is interactive. Implicit wait is rarely the best solution, but is easiest to demonstrate here
driver.implicitly_wait(0.5)
5.发送命令 查找元素
大多数Selenium会话中的主要命令都与元素相关, 如果不先找到元素, 就无法与之交互
 text_box = driver.find_element(by=By.NAME, value="my-text")
 submit_button = driver.find_element(by=By.CSS_SELECTOR, value="button")
6.操作元素
对于一个元素, 只有少数几个操作可以执行, 但您将经常使用它们
 text_box.send_keys("Selenium")
submit_button.click()7.获取元素信息
value = message.text
8.结束会话
这将结束驱动程序进程, 默认情况下, 该进程也会关闭浏览器. 无法向此驱动程序实例发送更多命令
driver.quit()
让我们将这8个部分组合成一个完整的脚本, 包括需要使用的库
from selenium import webdriver
from selenium.webdriver.common.by import By
def test_eight_components():
    driver = webdriver.Firefox()

    driver.get("https://www.selenium.dev/selenium/web/web-form.html")

    title = driver.title
    assert title == "Web form"

    driver.implicitly_wait(0.5)

    text_box = driver.find_element(by=By.NAME, value="my-text")
    submit_button = driver.find_element(by=By.CSS_SELECTOR, value="button")

    text_box.send_keys("Selenium")
    submit_button.click()

    message = driver.find_element(by=By.ID, value="message")
    value = message.text
    assert value == "Received!"

driver.quit()The above is the detailed content of How to use Selenium WebDriver in Python. For more information, please follow other related articles on the PHP Chinese website!


