

The original intention of deciding to write this article came from a question from a friend, about "How to use Python to automatically generate a pivot table based on the data source". There is a very good idea behind this question. The solution idea is to let the code do the repetitive work for us, thereby reducing the workload and reducing errors.
The gadgets developed by Python actually package Python programs into exe, which can be used after sharing. Even if the computer does not have a Python environment installed, it can also be used. Use code to improve work efficiency and minimize overtime.

Content Outline
will work For repetitive operations, use the three fields of supplier name, month, and warehousing amount to generate the desired pivot table format.
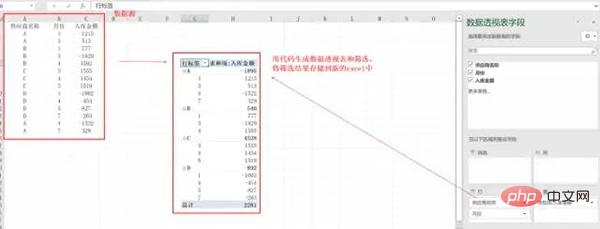
Create a desktop window. Here we use tkinter, which is the GUI library that comes with Python. It is ready to use after installation.
pip install tkinter
Use pyinsatller to package the program into exe. The advantage is that you do not need to deploy the code to the server. You can directly send the packaged exe to the other party and you can use it directly. For this small and light Very functional.
pip install pyinstaller
Excel file to generate pivot table and filter data, file name: excel_to_pivot.py
import pandas as pd import numpy as np class ExcelToPivot(object): def __init__(self, filename, file_path): self.file_name = filename self.file_path = file_path """ excel自动转透视表功能 返回透视结果 """ def excel_Pivot(self): print(self.file_path) data = pd.read_excel(self.file_path) data_pivot_table = pd.pivot_table(data, index=['供应商名称', '月份'], values=["入库金额"], aggfunc=np.sum) return data_pivot_table """ 按条件筛选,并保存 """ def select_data(self, name, month): data_pivot_table = self.excel_Pivot() data_new = data_pivot_table.query('供应商名称 == ["{}"] & 月份 == {}'.format(name, month)) data_new.to_excel('{}.xlsx'.format(str(self.file_name).split('.')[0])) return '筛选完成!' if __name__ == '__main__': filename = input("请输入文件名字:") path = 'C:/Users/cherich/Desktop/' + filename pross = ExcelToPivot(filename, path) print(pross.select_data("C", 4))

Design desktop window function, file name: operation.py
from tkinter import Tk, Entry, Button, mainloop import tkinter.filedialog import excel_to_pivot from tkinter import messagebox from tkinter import ttk def Upload(): global filename, data_pivot_table try: filename = tkinter.filedialog.askopenfilename(title='选择文件') pross = excel_to_pivot.ExcelToPivot(str(filename).split('/')[-1], filename) data_pivot_table = pross.excel_Pivot() messagebox.showinfo('Info', '转换成功!') except Exception as e: print(e) messagebox.showinfo('Info', '转换失败!') def select(name, month): try: print('供应商名称 == ["{}"] & 月份 == {}'.format(name, month)) data_new = data_pivot_table.query('供应商名称 == ["{}"] & 月份 == {}'.format(name, month)) data_new.to_excel('{}.xlsx'.format(str(filename).split('.')[0])) messagebox.showinfo('Info', '筛选完成并生成文件!') root.destroy() except Exception as e: print(e) messagebox.showinfo('Info', '筛选失败!') root = Tk() root.config(background="#6fb765") root.title('自动转透视表小工具') root.geometry('500x250') e1 = Entry(root, width=30) e1.grid(row=2, column=0) btn1 = Button(root, text=' 上传文件 ', command=Upload).grid(row=2, column=10, pady=5) box1 = ttk.Combobox(root) # 使用 grid() 来控制控件的位置 box1.grid(row=5, sticky="NW") # 设置下拉菜单中的值 box1['value'] = ('A', 'B', 'C', 'D', '供应商') # 通过 current() 设置下拉菜单选项的默认值 box1.current(4) box2 = ttk.Combobox(root) box2.grid(row=5, column=1, sticky="NW") box2['value'] = (1, 2, 3, 4, 5, 6, 7, 8, 9, 10, 11, 12, '月份') box2.current(12) # 编写回调函数,绑定执行事件 def func(event): global b1, b2 b1 = box1.get() b2 = box2.get() # 绑定下拉菜单事件 box1.bind("<>", func) box2.bind("<>", func) btn2 = Button(root, text=' 筛选数据 ', command=lambda: select(b1, b2)).grid(row=30, column=10, pady=5) mainloop()
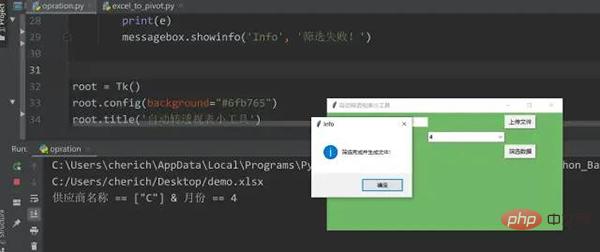
If the running result is as above, it means there is no problem with the code, and you can proceed to the next step.
Open the DOS window and switch to the directory where the two py files are located. Be careful not to have Chinese characters in the path.
pyinsatller -F -w opration.py
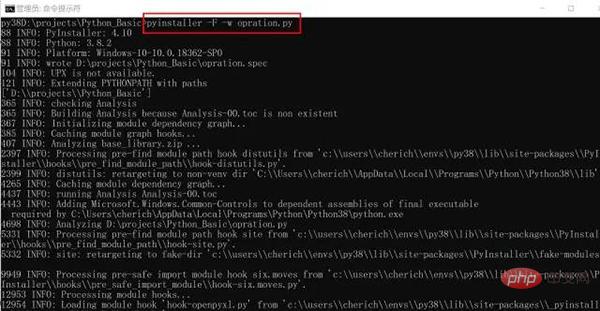
Common optional parameters of the pyinstaller command:
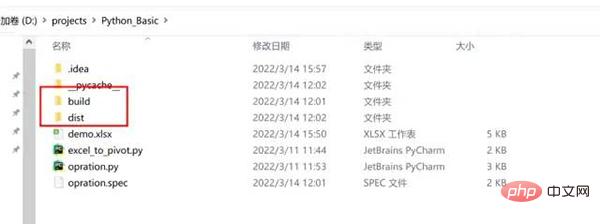

In the current directory, two folders will be generated: build and dist. Dist contains all executable exe files. Send the shortcut to the desktop and click opration.exe to run it. You can send its shortcut to the desktop and double-click it.
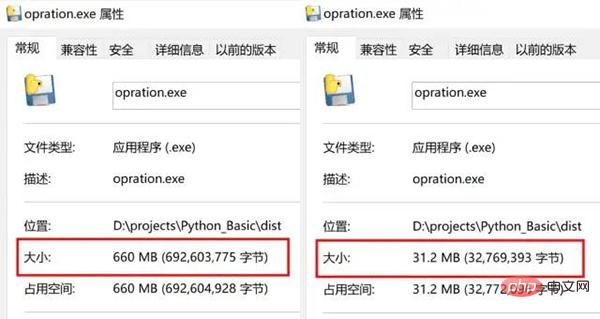
Some partners have just installed the Python environment not long ago, so the problem of the file being too large may not exist. For example, I have a lot of Python dependency packages and anaconda installed on my computer. The packaged file is actually 660M. It takes a long time to package and is stuck during execution. Later, it was reduced to 31M after rectification. The package is fast and can be executed in seconds. The solution is to install a Python virtual environment under Windows system. The following operations can only be performed if Python has been installed on the computer.
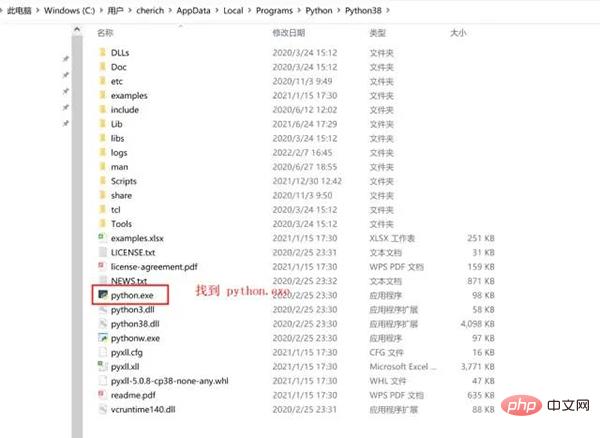
找到 Python 所在路径,如果忘记了,可以在电脑左下角搜索【编辑系统环境变量】——【用户变量】——【PATH】中找到
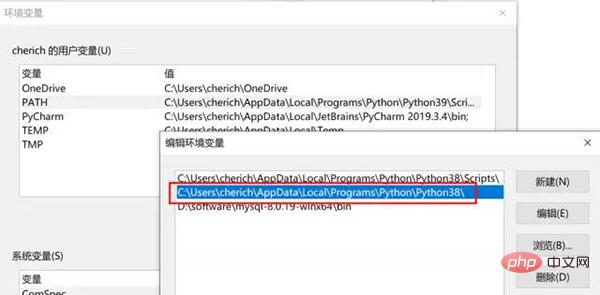
虚拟环境可以理解为是 Python 解释器的一个副本,在这个环境你可以安装私有包,而且不会影响系统中安装的全局 Python 解释器。虚拟环境非常有用,可以在系统的 Python 解释器中避免包的混乱和版本的冲突。
重要是不同虚拟环境可以搭建不同的 Python 版本,创建时候选择,我们这里需要一个相对 "干净" 的 Python 环境,没有安装过多依赖包,避免 exe 打包文件过大,所以用到虚拟环境。
pip install virtualenv pip install virtualenvwrapper-win
mkvirtualenv -p="C:UserscherichAppDataLocalProgramsPythonPython38python.exe" py38
进入虚拟环境,可以看到只有几个默认的 Python 库
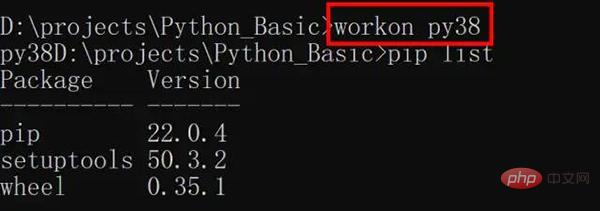
这时可以测试一下代码,是否缺少相关依赖,比如我这个缺少 Pandas,openpyxl,依次按照 pip install 包名安装即可,非常重要的点:pyinstaller 必须重新安装,文件才会缩小。
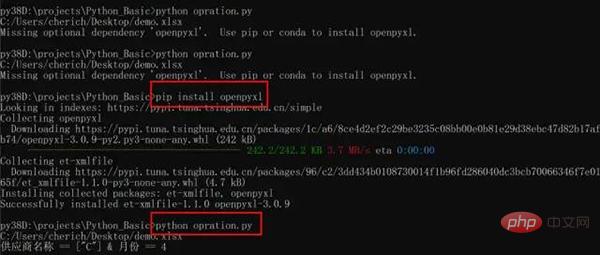
上述操作完成后,打包就可以了,最后退出虚拟环境即可。
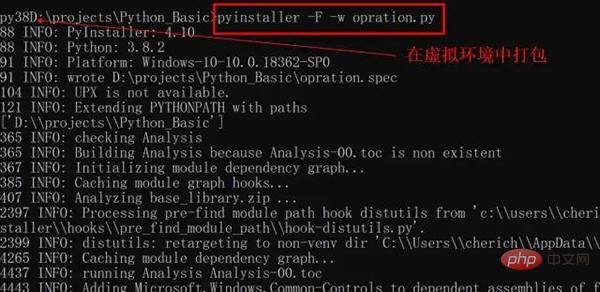
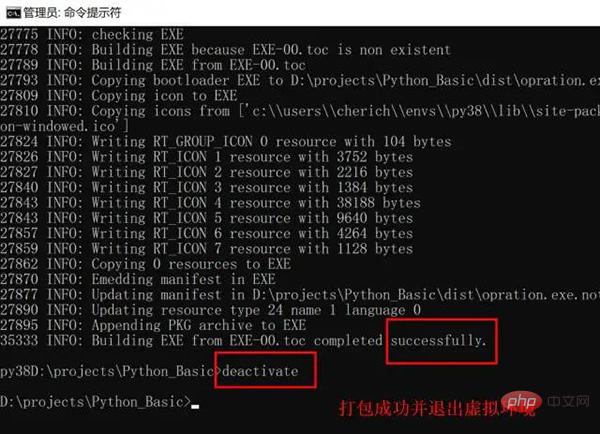
退出虚拟环境
deactivate
The above is the detailed content of too strong! Python develops desktop gadgets and lets the code do the repetitive work for us!. For more information, please follow other related articles on the PHP Chinese website!


