
Apple iPhone is great for recording videos in Full HD and 4K resolution. However, reality hits hard when you want to share these videos because they are so big. Popular messaging apps and email services like Gmail and Outlook are limited to just a few megabytes. You have to compress the video before sending it to your loved ones. Here are the best ways to reduce iPhone video size.
There are several ways to compress video files on iPhone. First, we'll show you how to check the video file size in your default Photos app and use the best way to compress it for seamless sharing.
With iOS15, you can now view photo and video sizes from within the Photos app. Here's what you need to do.
Step 1:Open the Photos app on your iPhone.
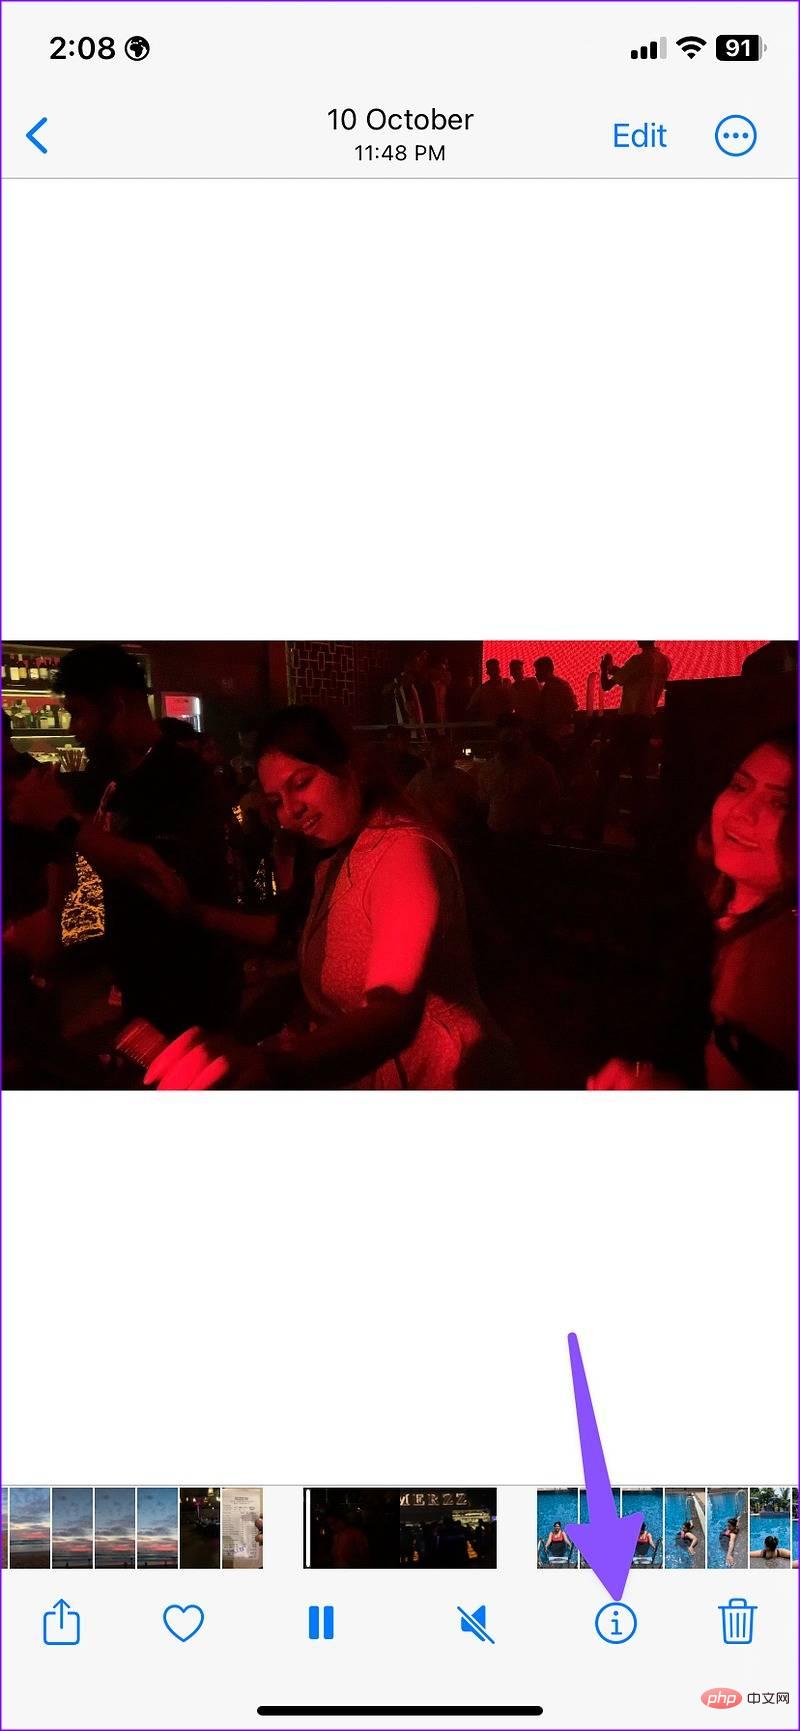
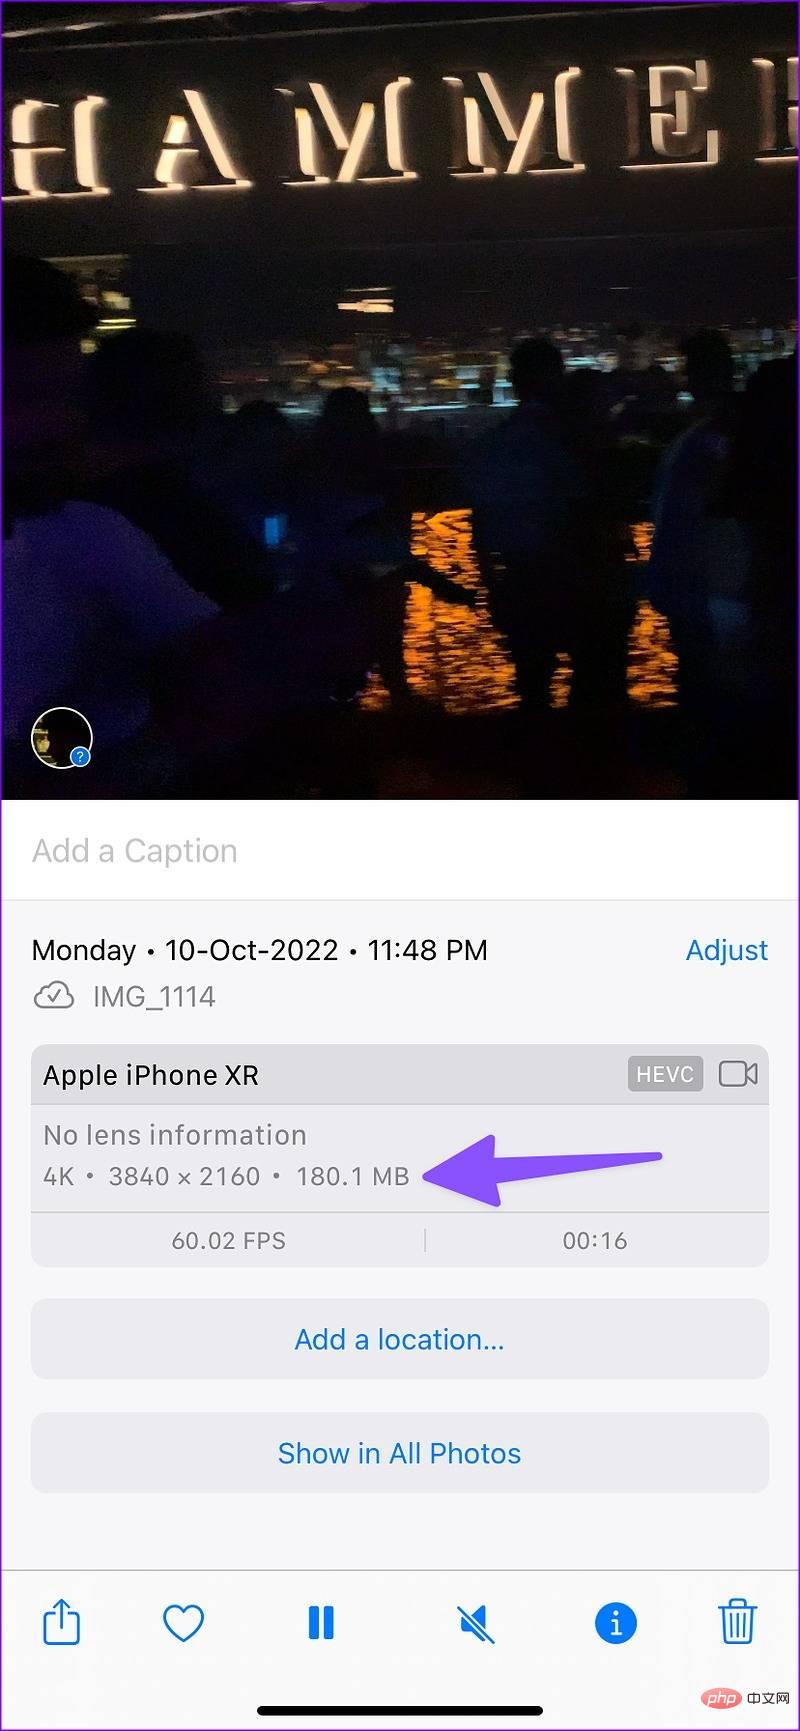
Step 2:Select any video. Click the "Info" (i) button at the bottom to view the video size.
Step 3:You can see a 75MB video file in the screenshot below.
Let’s use the following tips to compress it on iPhone.
If you don’t want to use Google Photos to compress a single video file, you can use a third-party dedicated video compression program in the appstore. While there are several video compressors in the AppStore, we found an app called Video Compressor that's pretty slick and works just as advertised.
Step One:Get the "Video Compressor" app from the app store.
Step 2:Open the video compression app and allow access to all photos on iPhone.
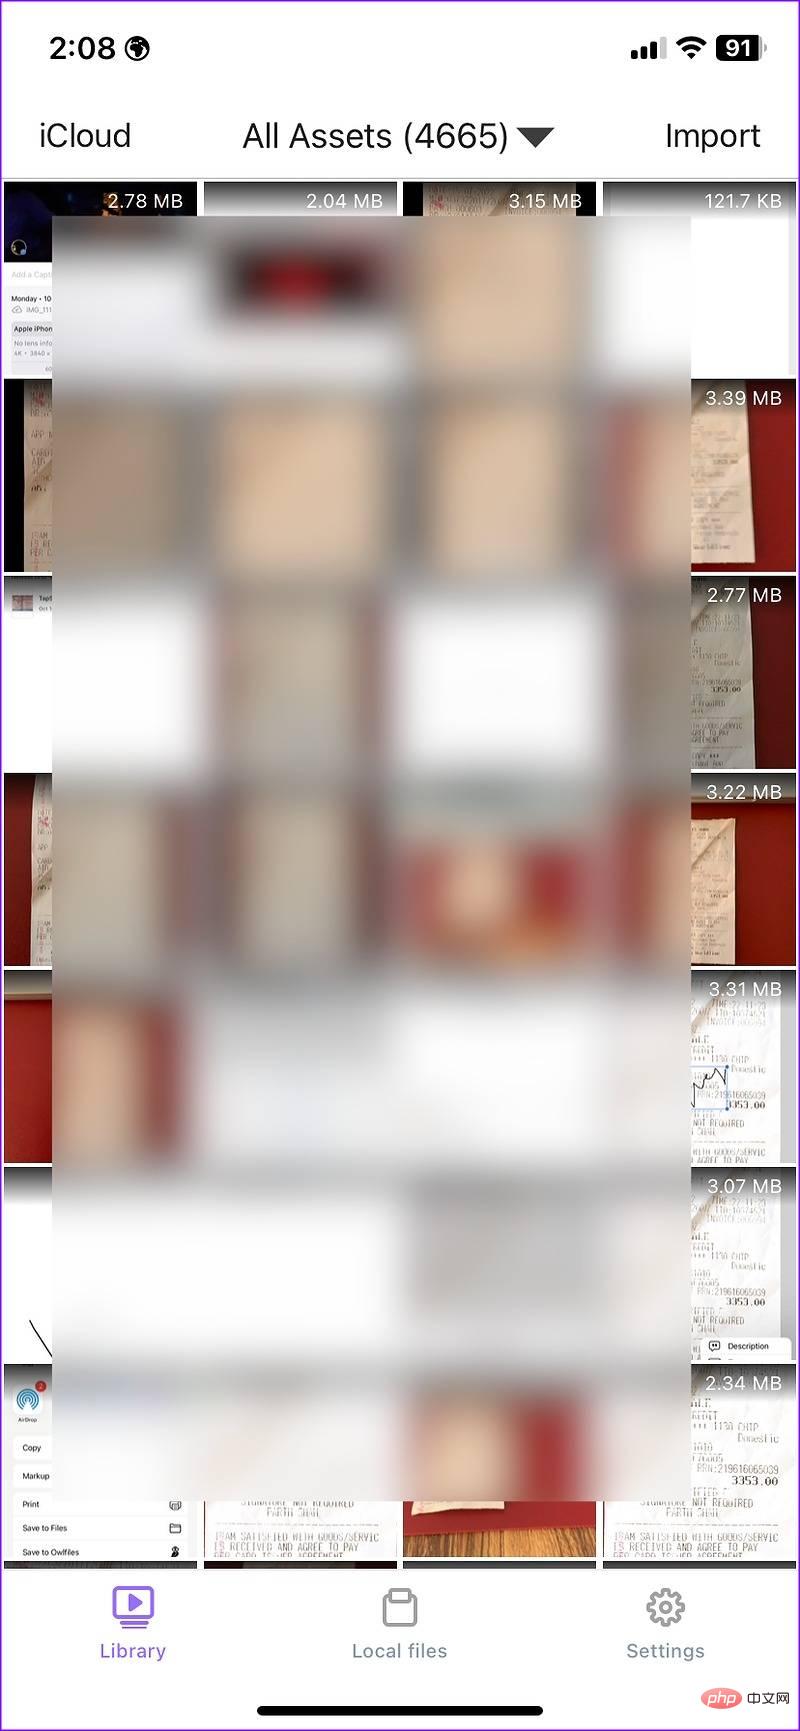
#Step 3:Check the file size of all your photos and videos. Select the video to compress. We selected a video file with a size of 71MB.
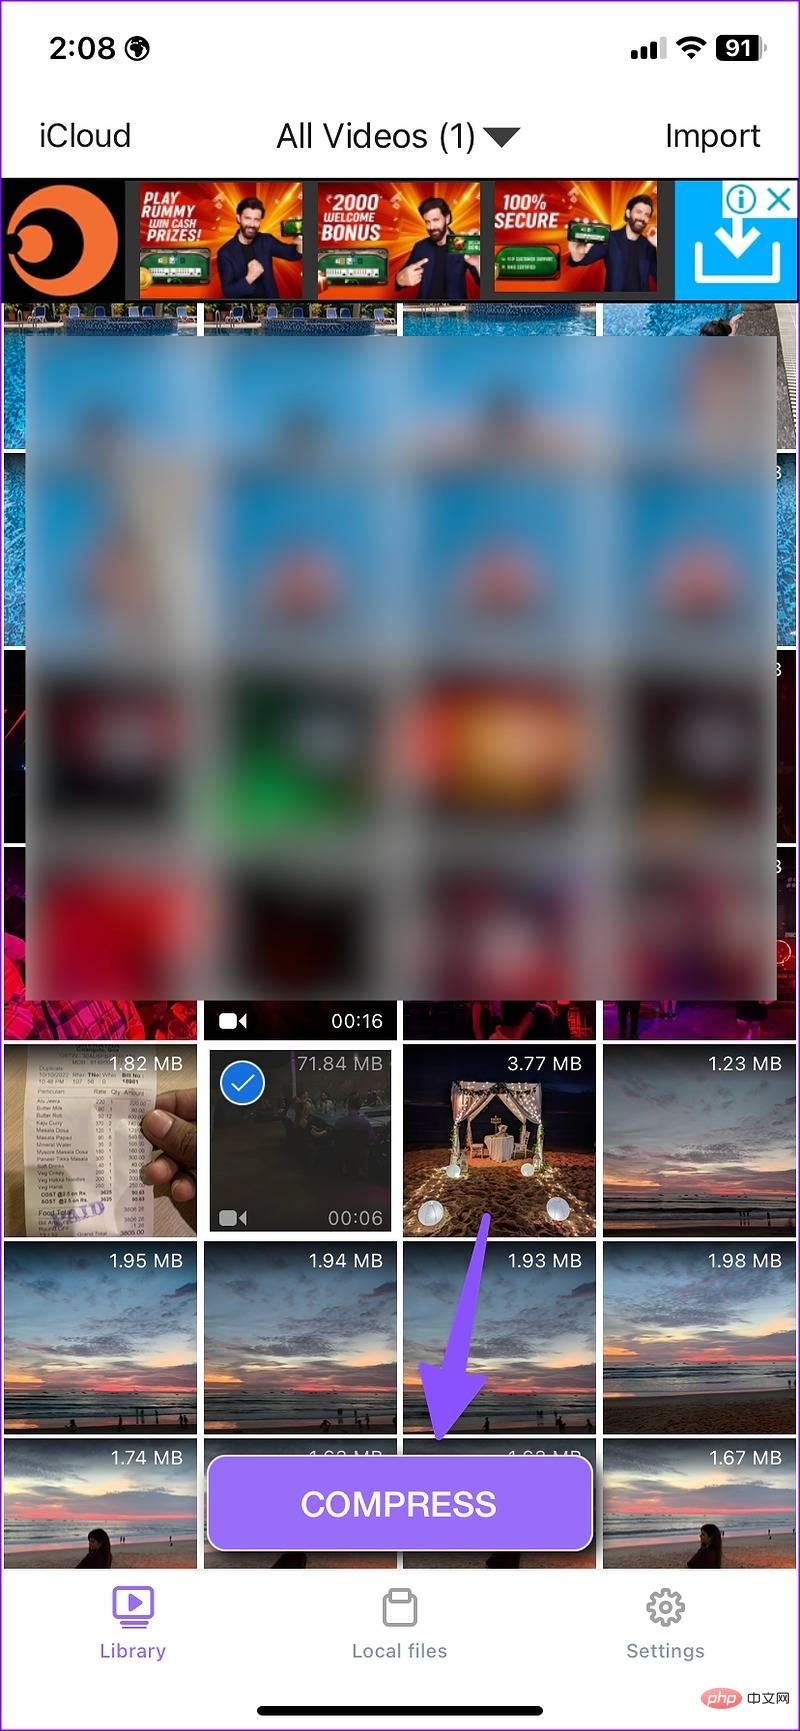
Step 4:Click "Compress" at the bottom. You have three options.
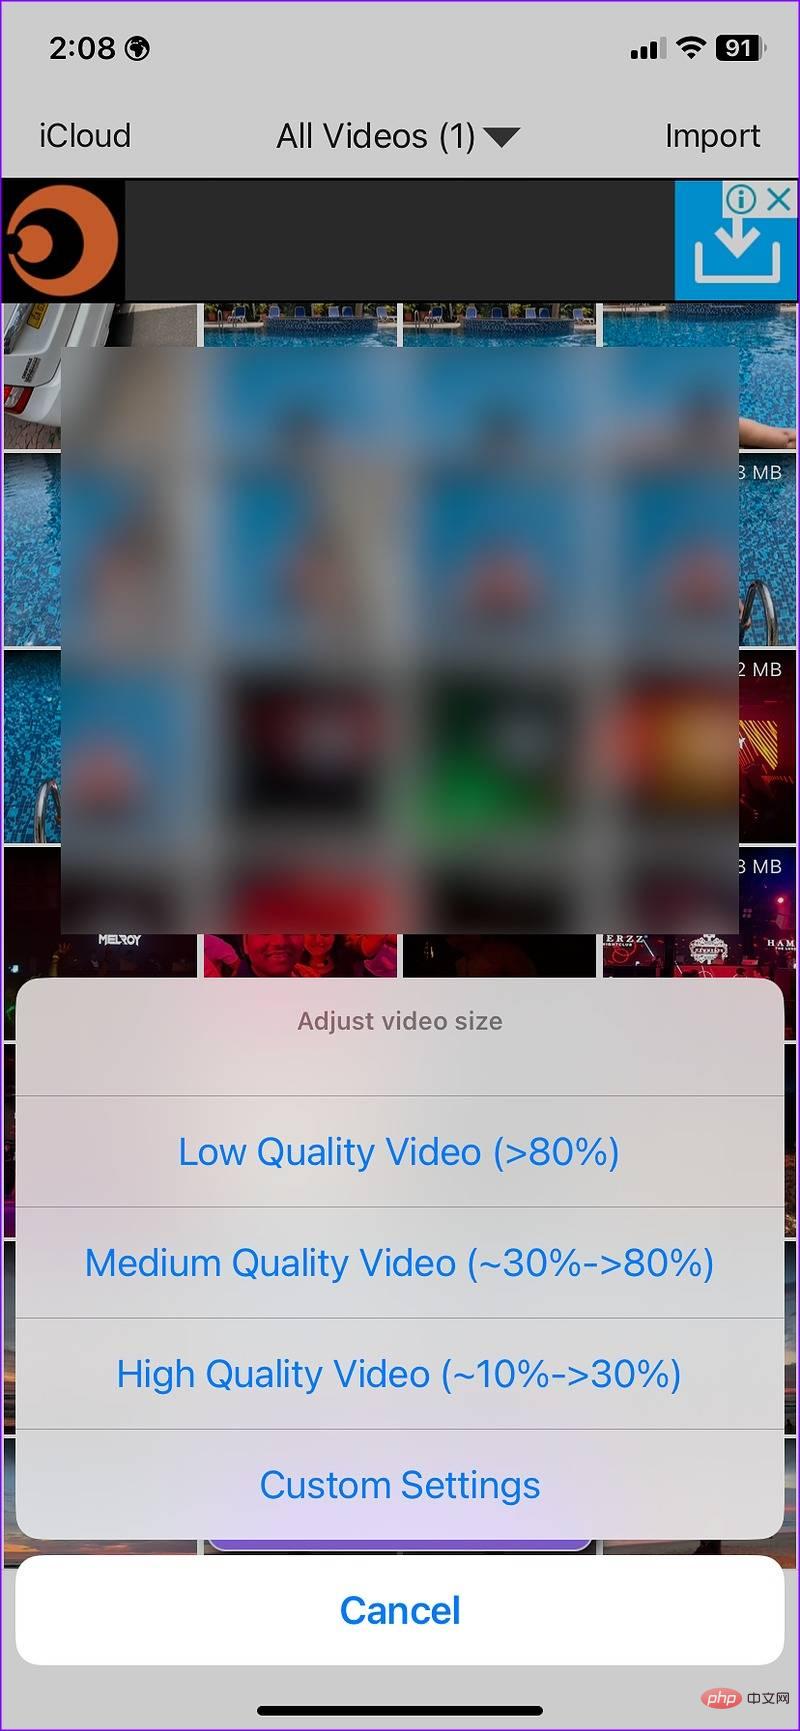
Low quality video:This option can reduce the video size by more than 80%. For example, selecting a 100MB video file will bring the video size down to around 20MB.
Medium quality video:Compress video size from 30% to 80%.
High Quality Video:Video size is reduced by only 10% to 30%.
You can select custom settings and type in a specific percentage to reduce video size.
Step 5:Select relevant options. We selected the "High Quality Video" option.
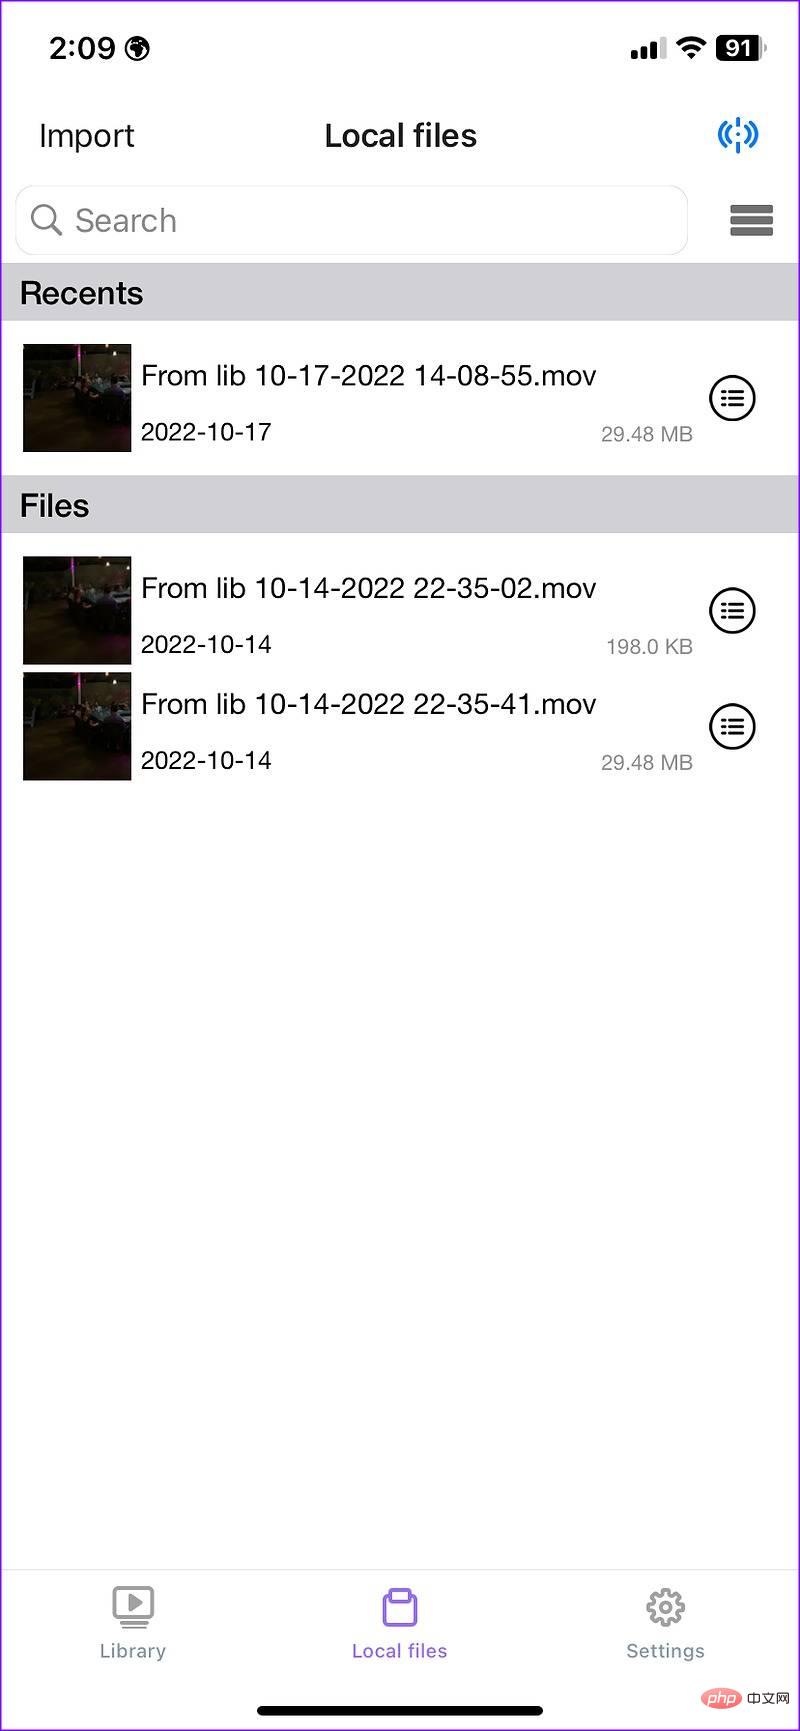
This app compresses 71MB video to 30MB in seconds. Open a video and you can add music, audio, text, stickers and play other effects. Tap Exporter and save the compressed video file to your iPhone.
If you use Google Photos to upload photos and videos, you can easily adjust upload quality settings and save compressed videos online. Follow the steps below.
Step 1:Download Google Photos from the App Store.
Step 2:Open Google Photos and log in with your Google account.
Step 3:Click on the profile picture in the upper right corner and select the "Backup is off" option.
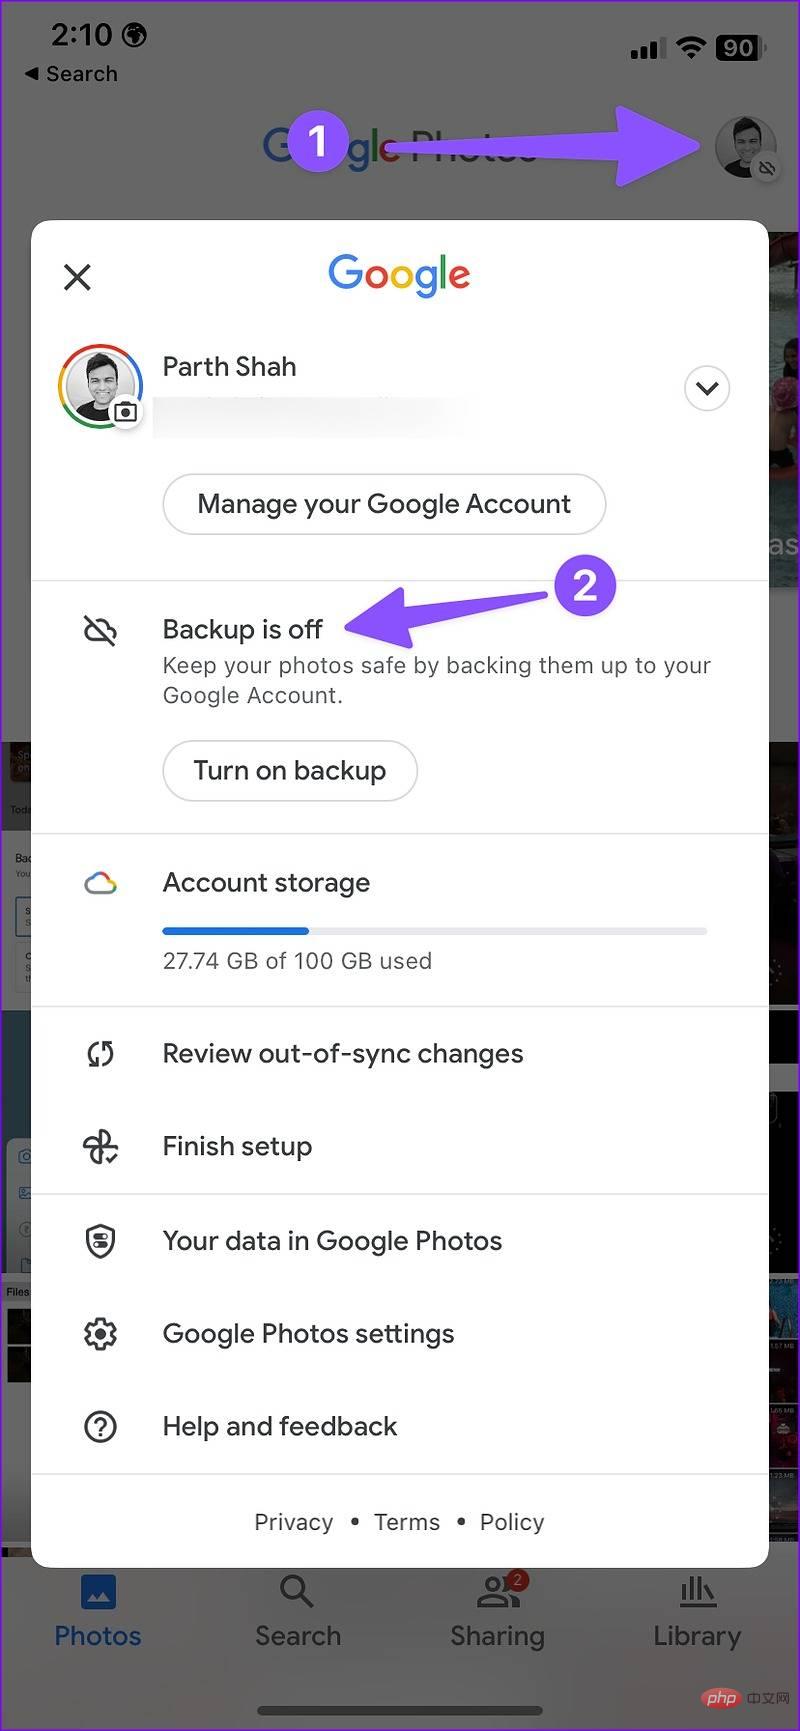
#Step 4:It will open the backup and sync settings menu. Tap Storage saver and click Confirm
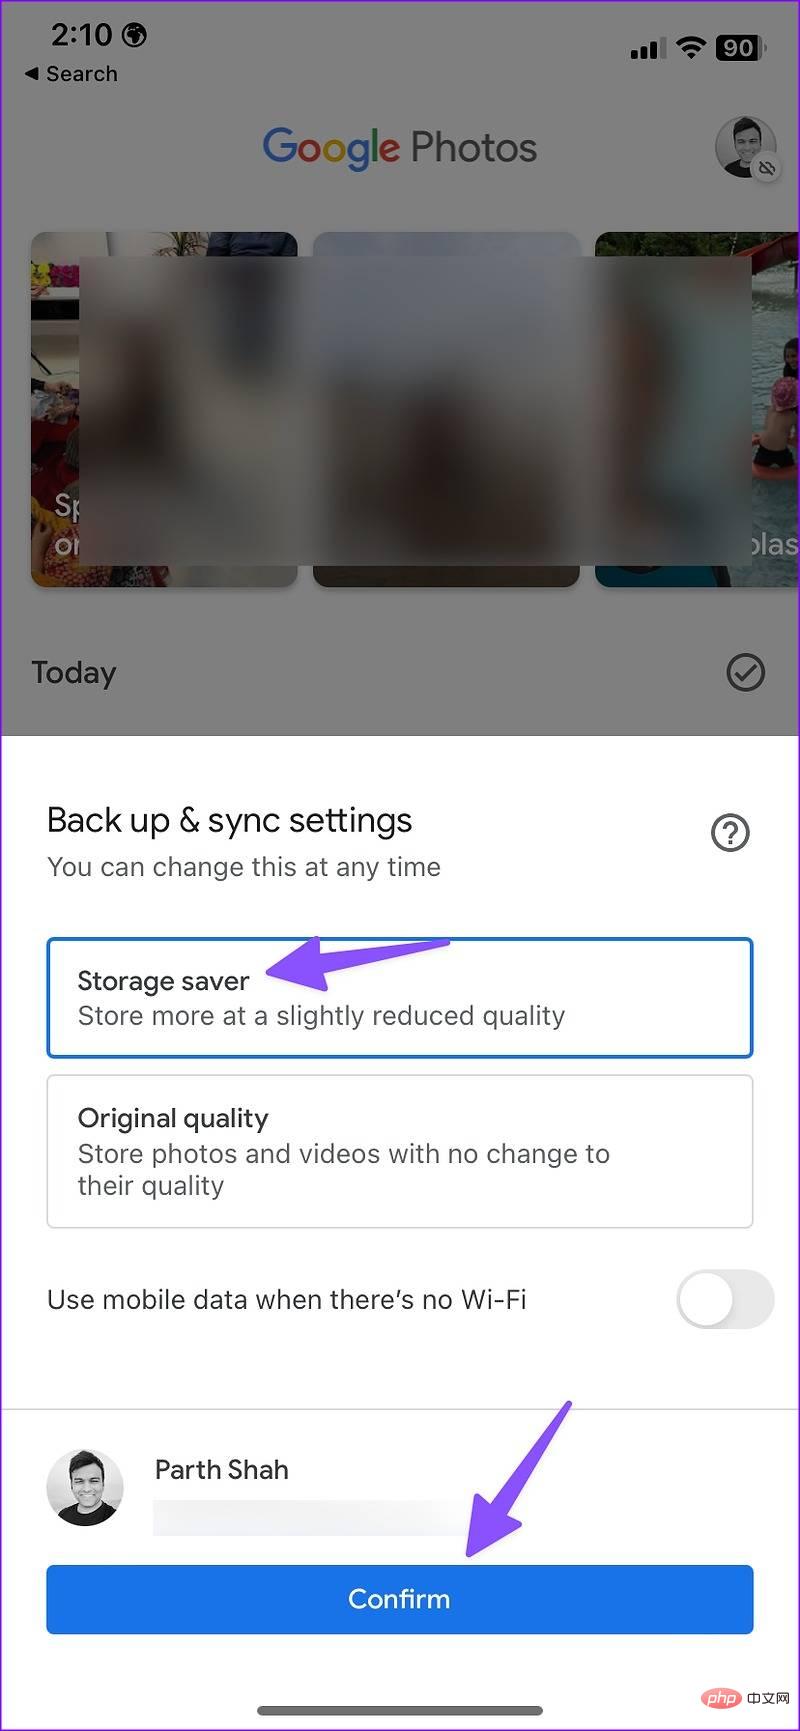
Google Photos will be sent over Wi-Fi (or mobile data, if you have enabled permissions) Start the media upload process.
Step 5:Once the upload process is complete, you can access the compressed video file from all your devices (via Google Photos).
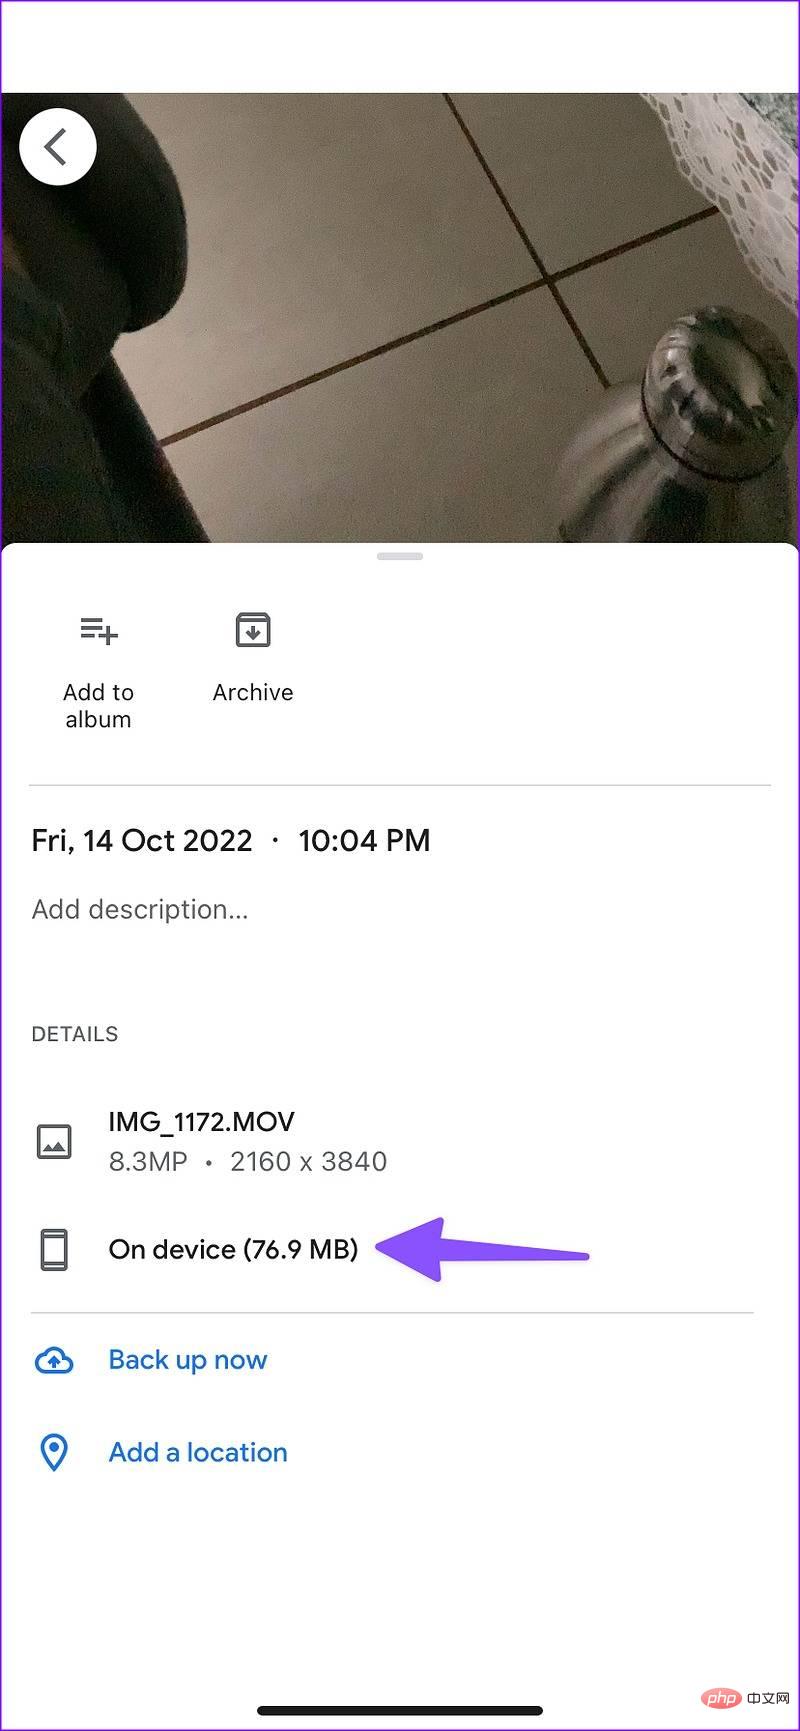
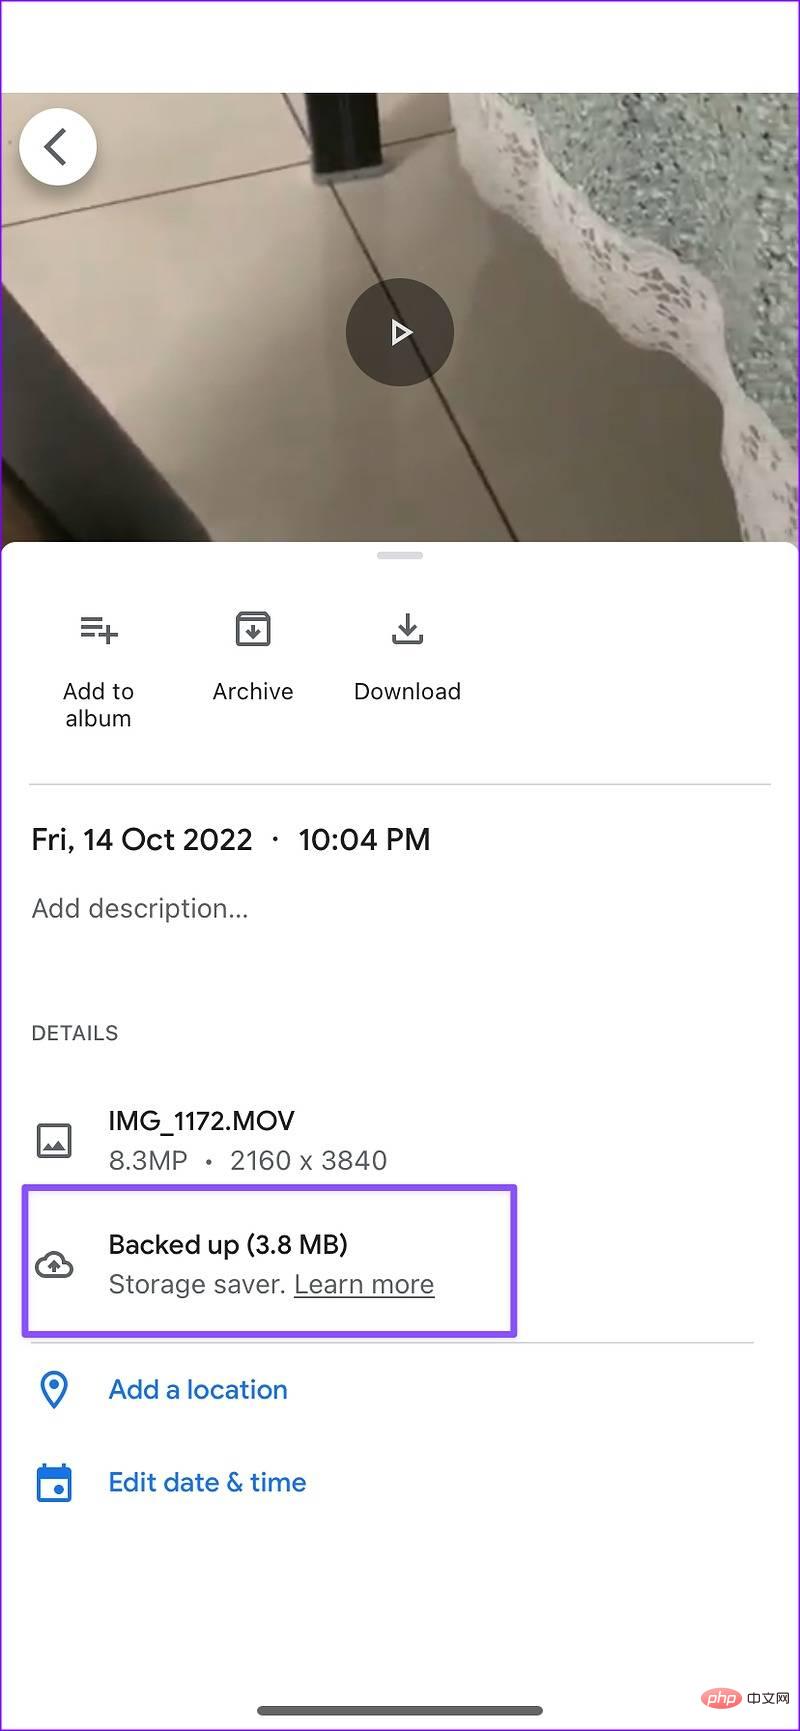
In our tests, we used Google Photos to compress a 75MB video file to 3.8MB. Your compressed video file is ready to be shared on social media.
When you share a large video on WhatsApp, the service will compress it before sharing it with the recipient. You can create a WhatsApp group yourself and share videos in the same group to reduce video size.
Step 1:Open WhatsApp on iPhone.
Step 2:Select your personal group.
Step 3:Tap the icon in the lower left corner.
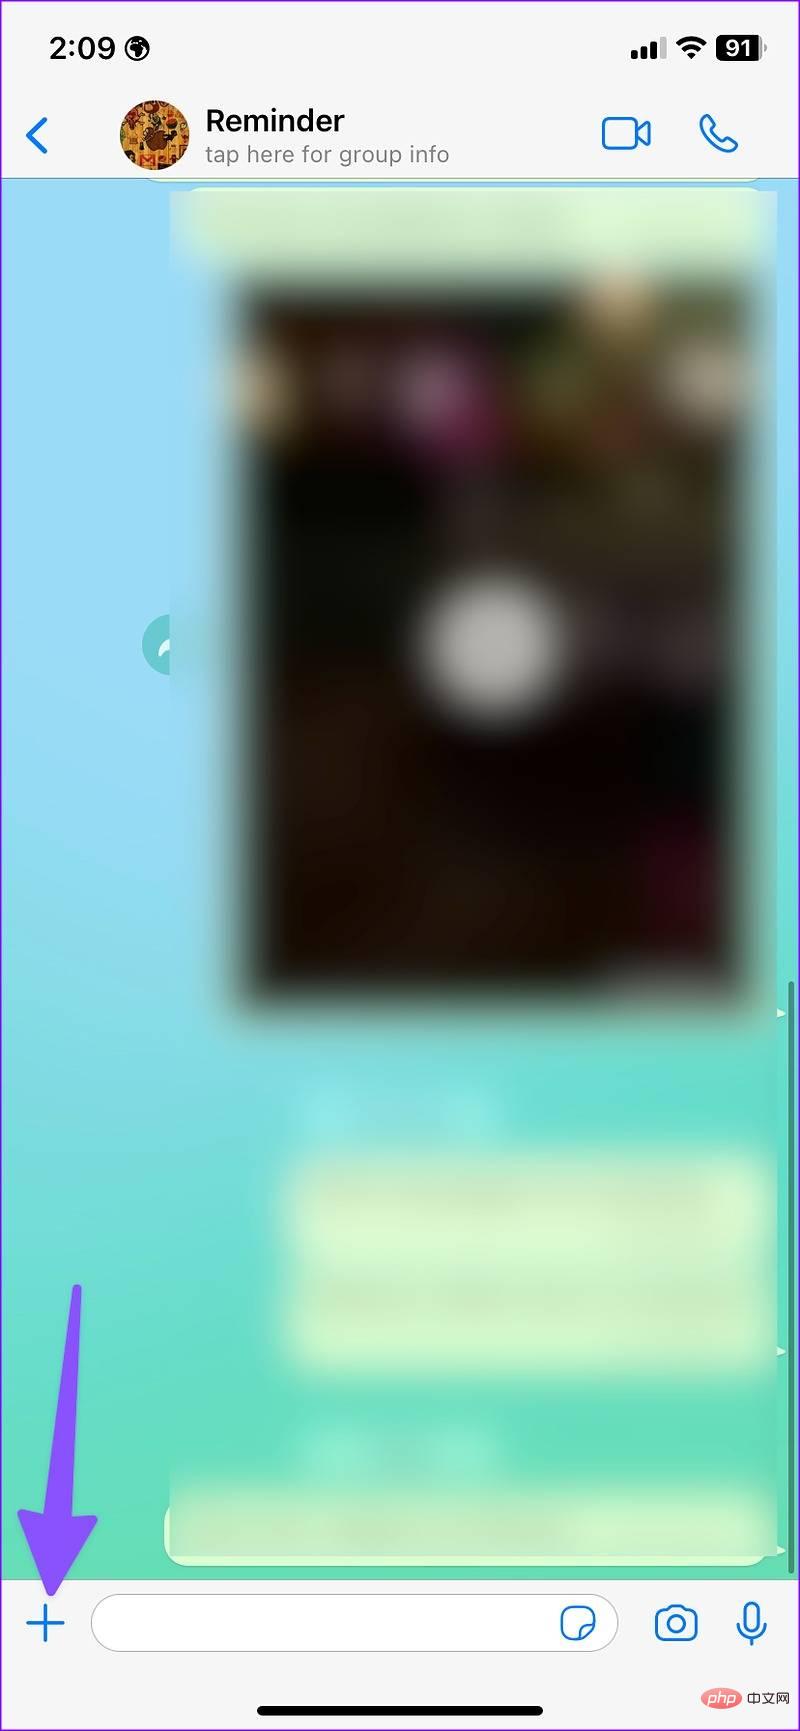
Step 4:Select the photo and video library.
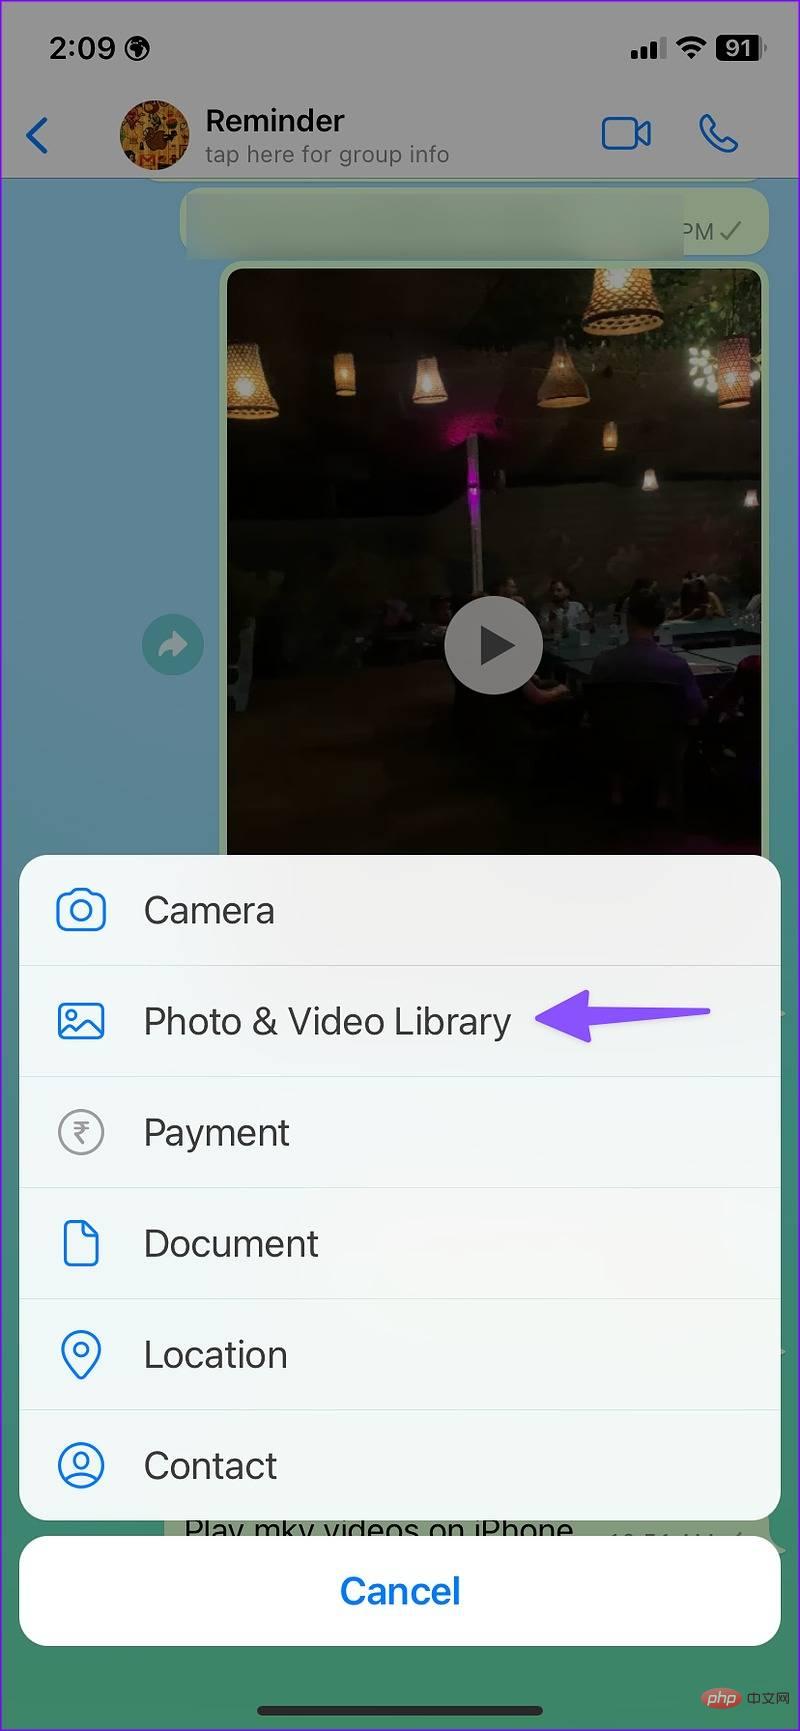
Step 5:Click on the video you want to compress. Click the Send button.
Step 6:Open the video in the WhatsApp conversation. Click the "Share" button.
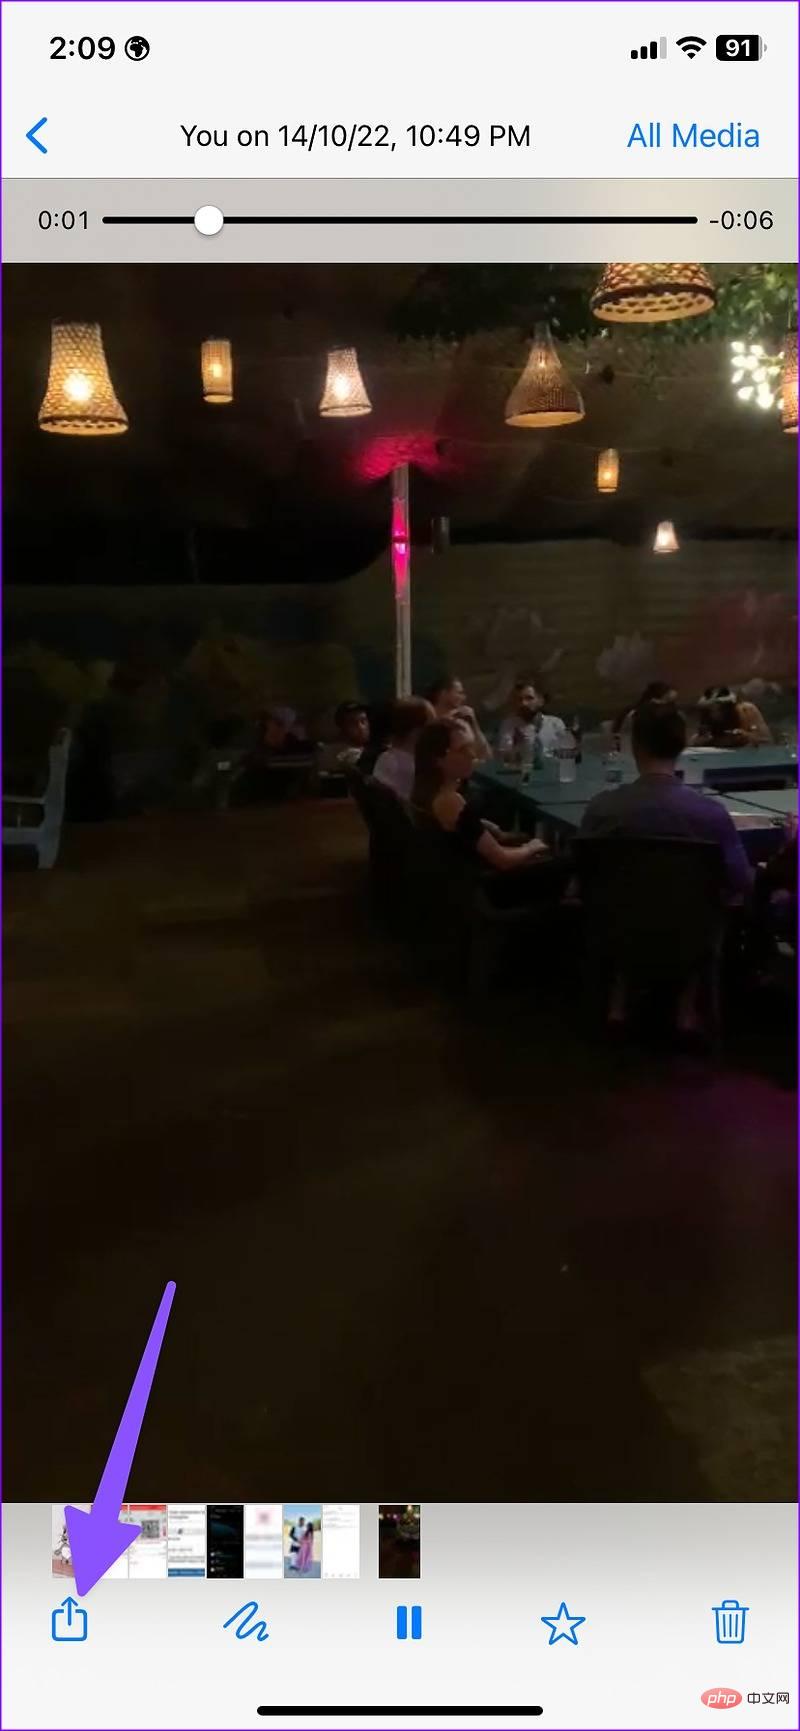
Step 7:Click "Save" to download the compressed video on your iPhone.
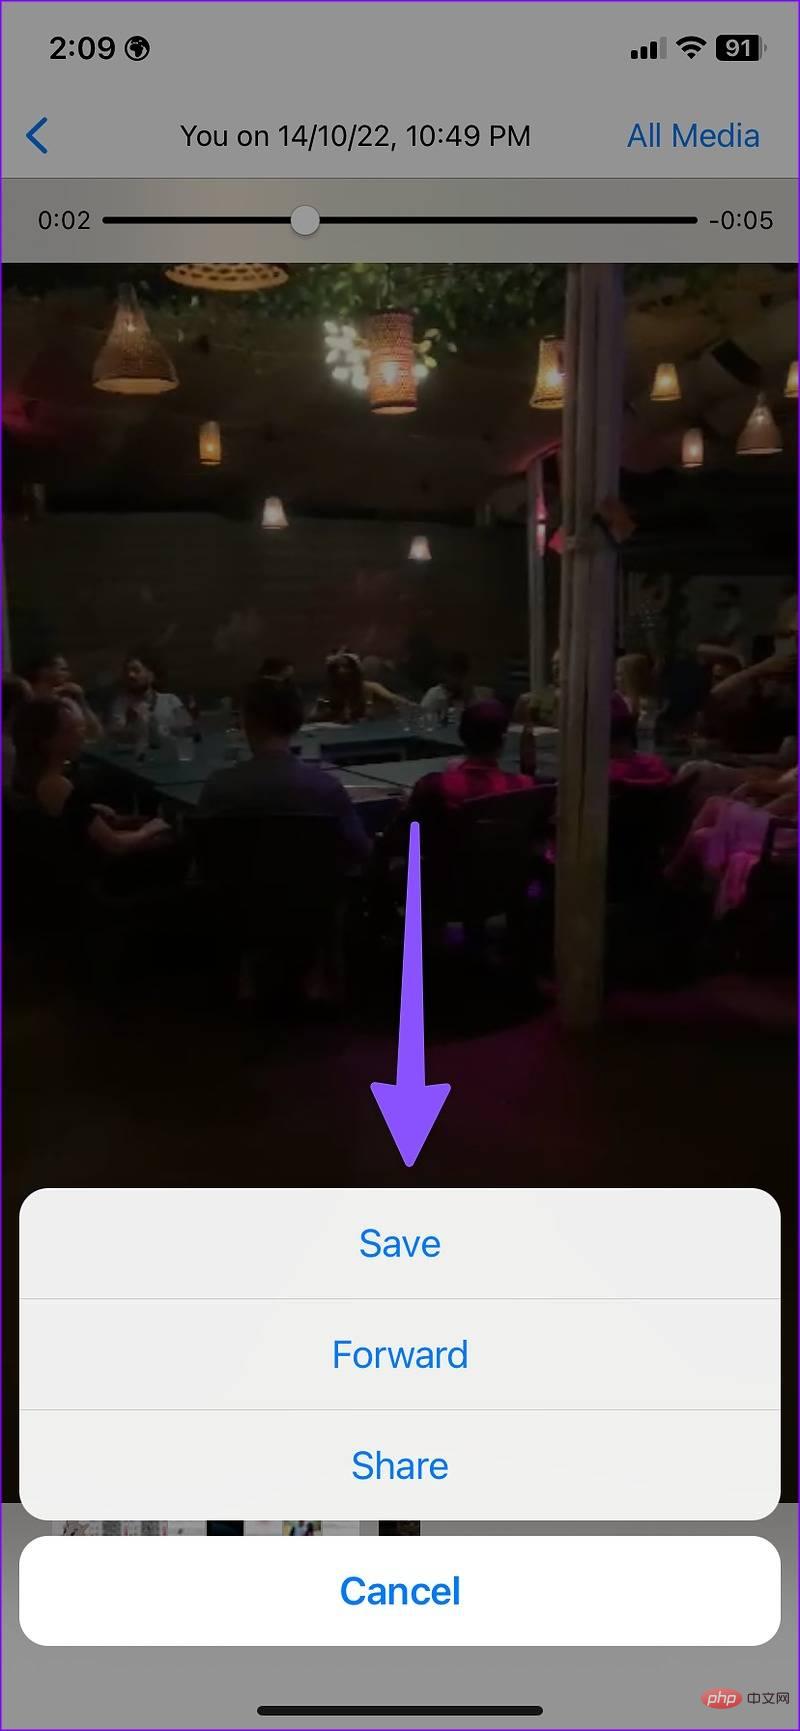
In our tests, WhatsApp reduced a 70MB video to 1.5MB. This also shows the huge compression WhatsApp applies when transferring videos. It's very efficient and doesn't require downloading third-party apps from the app store to get the job done.
The above is the detailed content of Top 3 Ways to Reduce iPhone Video Size. For more information, please follow other related articles on the PHP Chinese website!


