Home> Common Problem> body text

How to install MX Linux on VirtualBox VM

WBOY
Release: 2023-04-14 12:52:07
forward
1680 people have browsed it

MX Linux system requirements:

MX Linux’s minimum system requirementsare not very high. As a middle-weight Linux operating system, old PCs can also run easily.

  • At least AMD or intel 1486 or better.
  • At least 512 MB RAM
  • 5GB hard drive or more space to install it.
  • CD./DVD drive support (if you want to use a CD to install MX Linux)
  • USB boot support in the BIOS if you plan to install it using a USB drive.
  • AC97 or HDA compatible sound card

Recommended MX Linux system requirements

  • Modern i686 Intel or AMD processor
  • 2 GB RAM or more
  • At least 20 GB of available hard drive space
  • 3D capable video card for 3D desktop
  • SoundBlaster, AC97 or HDA compatible Sound Card
  • For use as LiveUSB, 8 GB is free if using persistence.

Step 1: Download the latest ISO image of MX Linux

To install MX Linux on VirtualBox, the first thing we need is its bootable ISO image. At the time of writing, the latest version of the operating system is MX Linux 19, so we downloaded the same version. It's available in both 32-bit and 64-bit formats, so here's theofficial link to get system-compatible images.However, our system is 64-bit, so what we download is the same.

Step 2: Install VirtualBox on your system

If you already have VirtualBox installed on your system, then just move on to the next step. For those looking for an installation method, they can visitwww.virtualbox.orgto get a compatible VBox setup for their system.
Step 3: Run VirtualBox and create MX Linux VM

  1. Open VirtualBox.
  2. Click the "New" button.
  3. Type MX Linux and click the Next button.
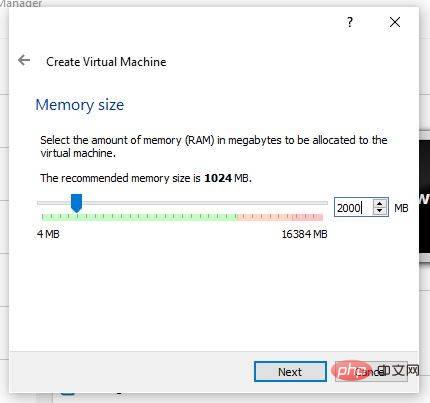
  4. Use the memory size slider and set RAM to 2 GB or more for better performance.
    How to install MX Linux on VirtualBox VM
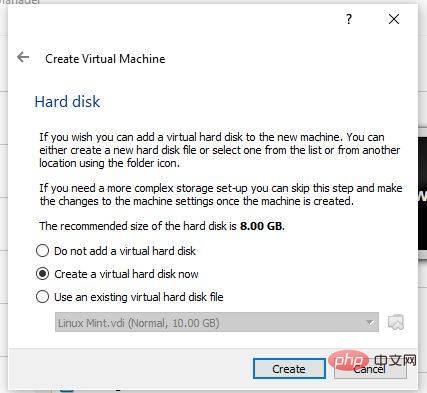
  5. Create a virtual disk.
    How to install MX Linux on VirtualBox VM
  6. Select VHD in case you want to use MX Linux virtual machines with Hyper-V in the future.
  7. Leave Default Dynamic allocation selected and click the Next button.
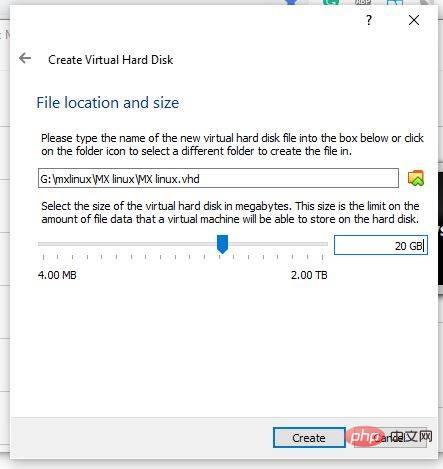
  8. Set the virtual disk size for the MX Linux installation, the minimum is 5 GB, but if you plan to install various software on it, set it to at least 20GB.
    How to install MX Linux on VirtualBox VM
  9. Finally, click the Create button.

Step 4: Insert the MX Linux ISO image as boot source in the created VM

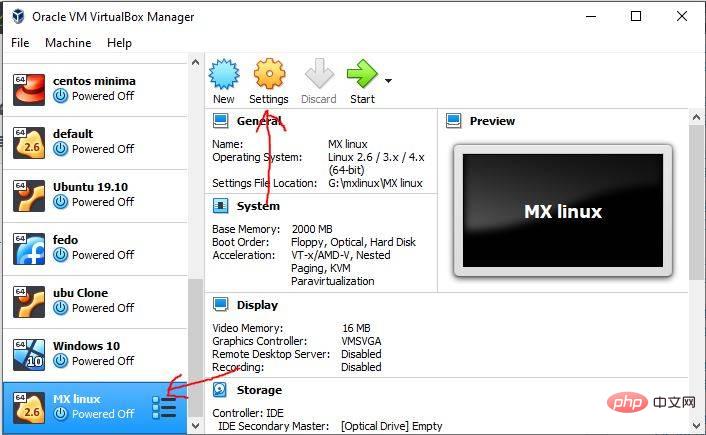
Now, on the left side of VirtualBox, you will see the recently created virtual machine, Select it and click on the settings option given in the menu.
How to install MX Linux on VirtualBox VM

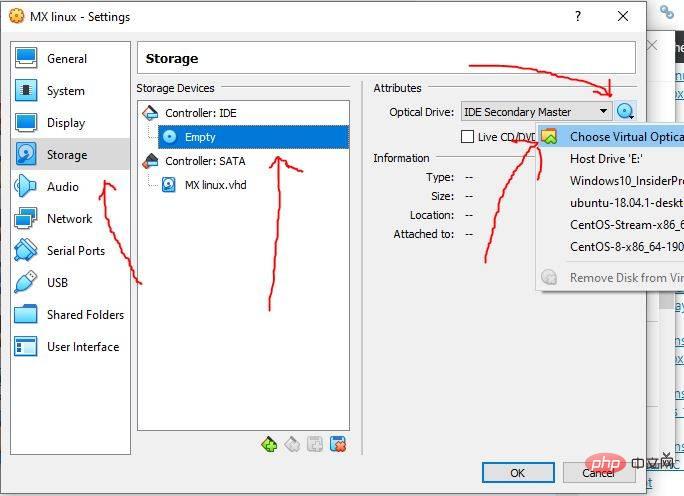
Under Settings, select theStorage option from the left menu and clickEmpty Driveicon. After that again select the givenCD iconand thenselect the virtual disc file.
How to install MX Linux on VirtualBox VM

File Explorer will open, select the MX Linux ISO image you downloaded and click on the OK button.

Step 5: Start the MX Linux VM

To start it, first, select its VM from the left and click theStart button on the VirtualBox menu.

On the boot menu we will have several options:
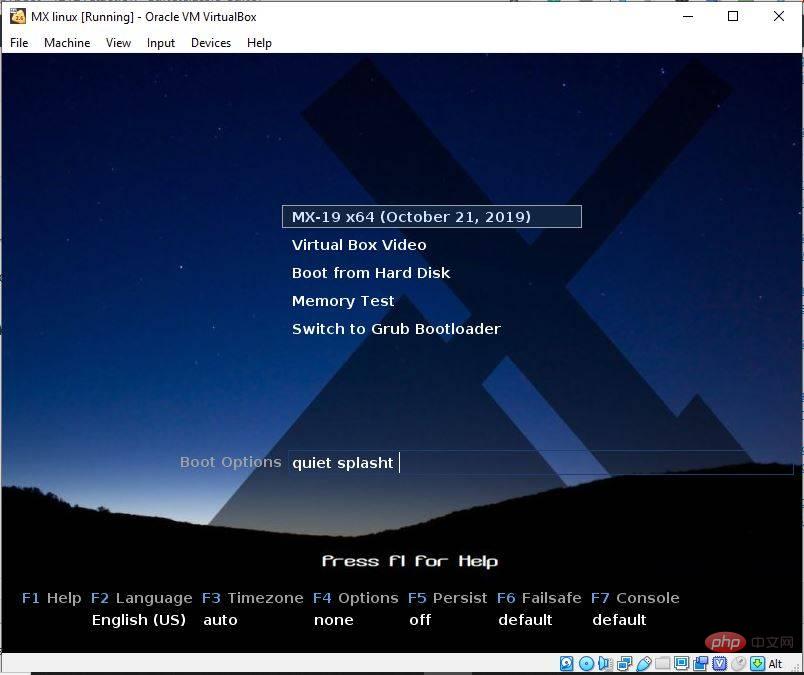
  • MX-19 X64
  • Virtual Box Video
  • From Hard drive boot
  • Memory test
  • Switch to Grub bootloader
How to install MX Linux on VirtualBox VM

If you want to run MX Linux in a Live environment and To install, please select the first one. Virtual Box Video One doesn't just launch it at its supported resolutions.

Step 6: Follow the steps to install MX Linux on VirtualBox

After getting the live screen of the operating system, click on the installer icon provided on its desktop.
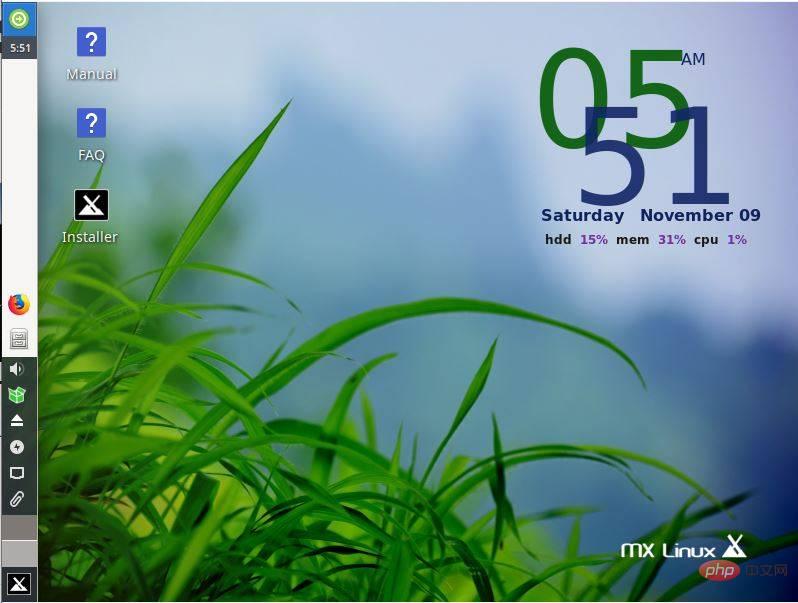
How to install MX Linux on VirtualBox VM

The installer will automatically set the keyboard layout, just click the"Next"button for further processing.
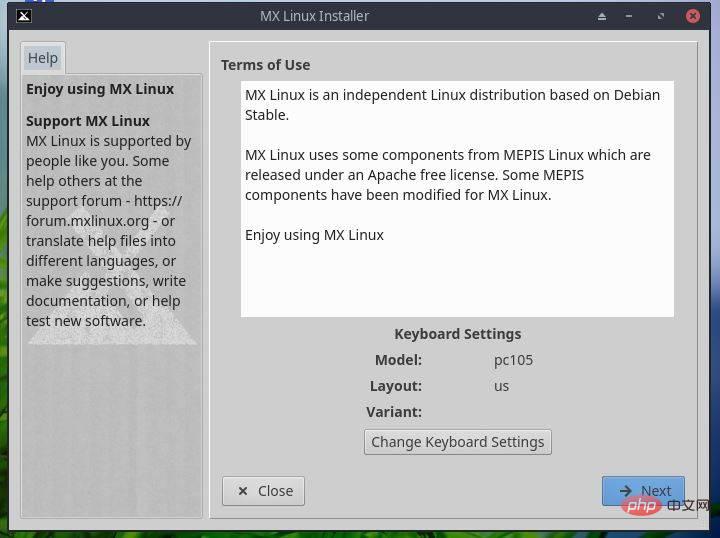
How to install MX Linux on VirtualBox VM

Since we are on a virtual machine, there is no need to perform any manual partitioning and let the system handle it. All you need to do is click the"Next"button and accept the formatting of the virtual drive.
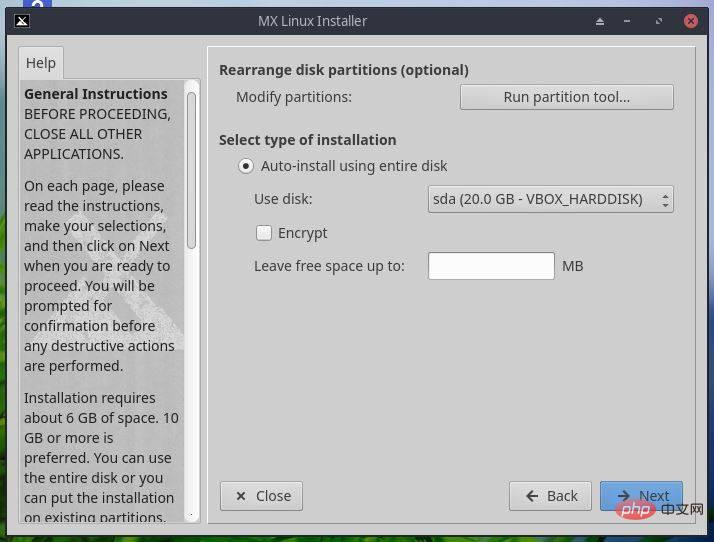
How to install MX Linux on VirtualBox VM

Wait for some time and click the Next button to set more things while the system files are copied to the virtual drive.
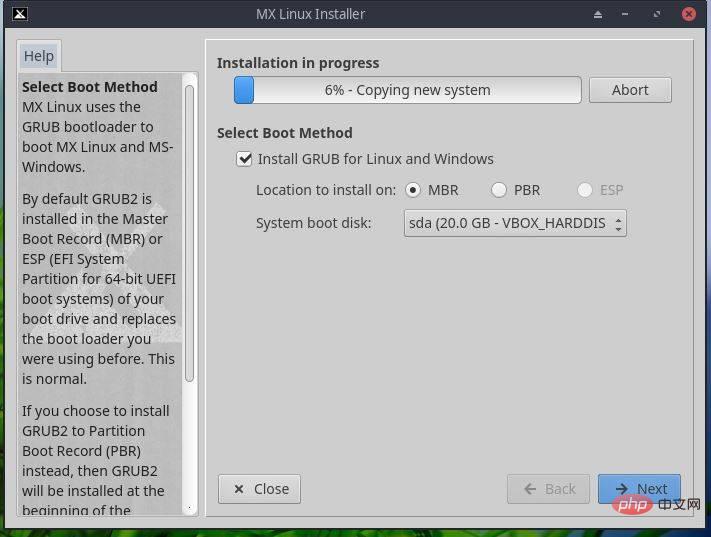
How to install MX Linux on VirtualBox VM

Name your computer so you can easily identify it on the web. Leave the rest as is.
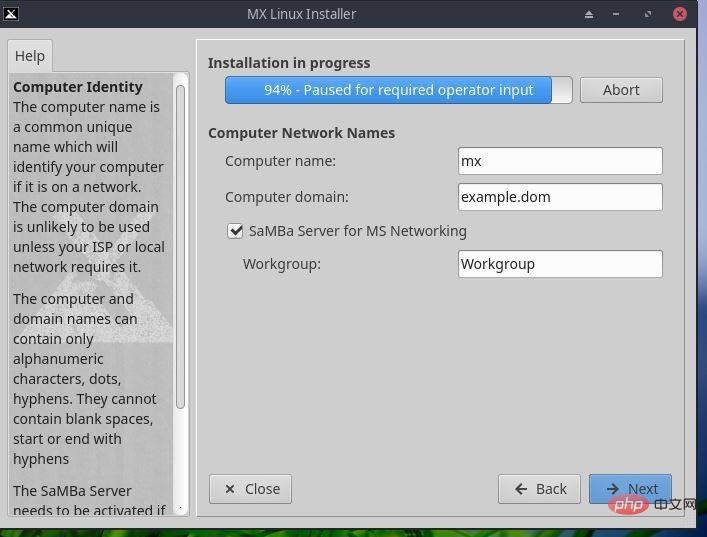
How to install MX Linux on VirtualBox VM

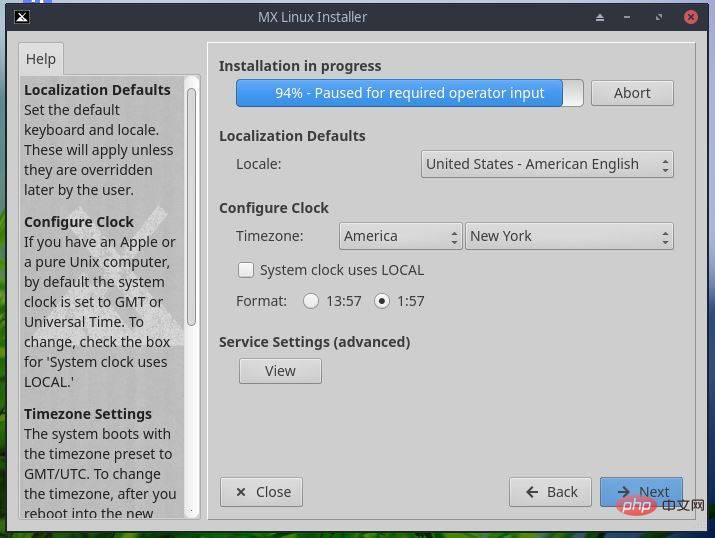
Set the time based on your location.

How to install MX Linux on VirtualBox VM

#Set the default username, password, and root password for your MX Linux.
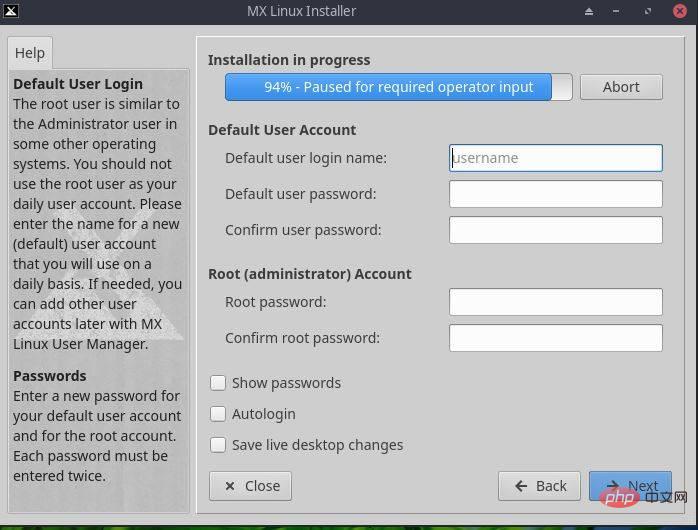
How to install MX Linux on VirtualBox VM

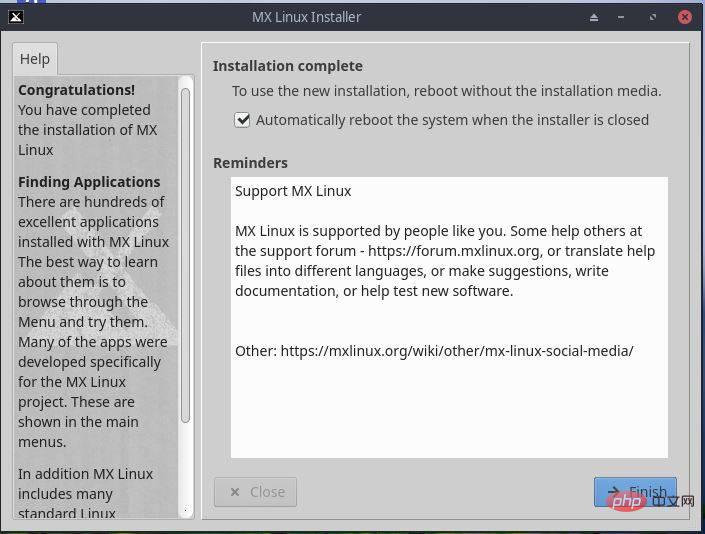
Finally, click the "Finish" button.

How to install MX Linux on VirtualBox VM

Now click onDevices->Optical Driveand deselectMX Linux ISO image,This is Required to prevent VirtualBox from booting from the ISO image again and again.

How to install MX Linux on VirtualBox VM

Step 7: Log in to MX Linux

Enter your default user password to log in and start using this lightweight and beautiful Linux distribution.
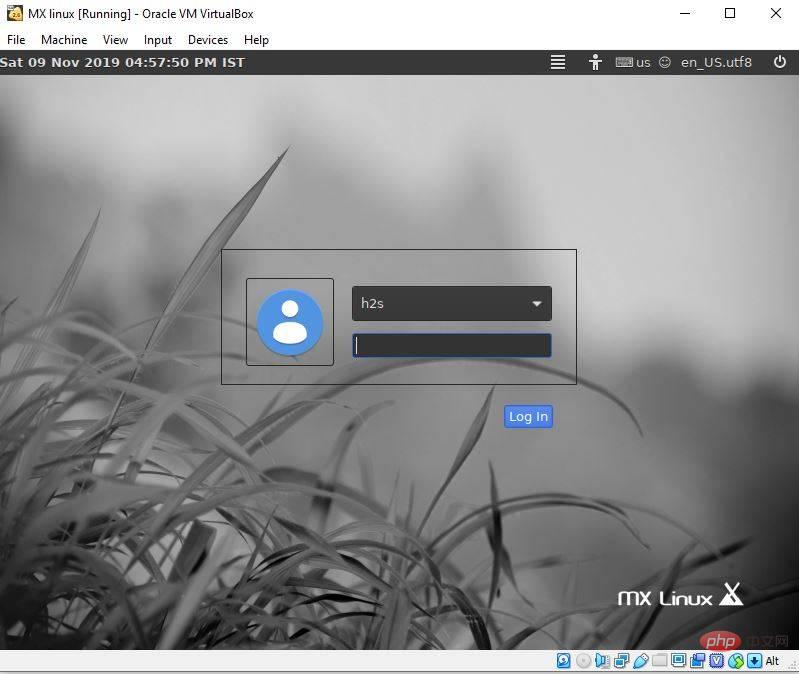
How to install MX Linux on VirtualBox VM

The above is the detailed content of How to install MX Linux on VirtualBox VM. For more information, please follow other related articles on the PHP Chinese website!

source:yundongfang.com
Statement of this Website
The content of this article is voluntarily contributed by netizens, and the copyright belongs to the original author. This site does not assume corresponding legal responsibility. If you find any content suspected of plagiarism or infringement, please contact admin@php.cn
Latest Downloads
More>
Web Effects
Website Source Code
Website Materials
Front End Template
About us Disclaimer Sitemap
php.cn:Public welfare online PHP training,Help PHP learners grow quickly!