
Preface
I have been playing Princess Connect recently. I have also played games like Onmyoji before. Such games will have an initial number like this. Something, or something that can be eaten.
Of course, as a programmer, things like liver can be completed automatically for us by writing code. The game script is actually not advanced. The easiest way to experience it is to download an Airtest, just take a few pictures, write a few layers of code, and then you can play the game according to your own logic.
Of course, this article is not about how to use Airtest, but about using the original python opencv to implement the above operations.
In the past two days, I wrote a program for Princess Link to get the initial account. I can’t be considered a veteran in writing game scripts. This article is mainly to share some basic techniques and experience in using it.
Preparation work
First, we need to complete the following preparations.
One Android device: emulator or real device can be used.
Install ADB and add it to the system's PATH: adb is used to
Install tesseract-ocr and add it to the system's PATH: Help us achieve simple character recognition
Install versions of python3.7 or above
I have put adb and tesseract in Baidu network disk, and there is a recorded effect video in it.
Link: pan.baidu.com/s/1edTPu2o7… Extraction code: 33aw
python library installation
##pipinstall pillow pytesseract opencv-python copy codeIn addition, you can install uiautomator2 if necessary. This article will not cover this knowledge.Use adb to obtain an Android device
Here we mainly involve the ADB connection operation of a single Android device. First, we open the emulator. Then we call adb devices to get the current Android device. Here is an emulator.
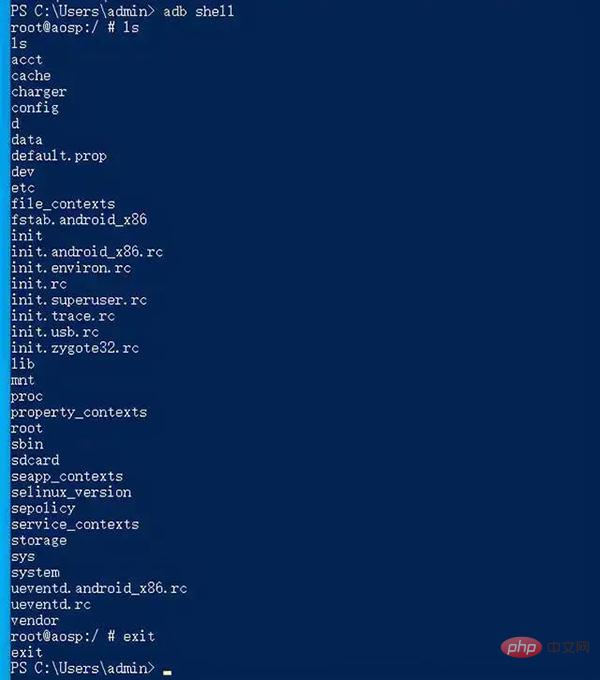
Possibly commonly used ADB Shell commands
The following are some ADB command operations. Through the adb command, we can use python to operate Android devices.Screenshot
The most common operation is to take a screenshot. First call screencap to take the screenshot and put it into the Android device, and then pull the screenshot down to computer.def take_screenshot():
os.system("adb shell screencap -p /data/screenshot.png")
os.system("adb pull /data/screenshot.png ./tmp.png")Drop-down file
The drop-down file is the adb pull just now. Taking Princess Link as an example, the following code can export the xml of account information , you can log in through xml in the future.os.system(f"adb pull /data/data/tw.sonet.princessconnect/shared_prefs/tw.sonet.princessconnect.v2.playerprefs.xml ./user_info.xml")
Upload files
With the drop-down, uploading will naturally occur, which can be completed through adb push. Taking Princess Link as an example, the following code can complete account switching.# 切换账号1
os.system("adb push ./user_info1.xml /data/data/tw.sonet.princessconnect/shared_prefs/tw.sonet.princessconnect.v2.playerprefs.xml")
# 切换账号2
os.system("adb push ./user_info2.xml /data/data/tw.sonet.princessconnect/shared_prefs/tw.sonet.princessconnect.v2.playerprefs.xml")Click somewhere on the screen
def adb_click(center, offset=(0, 0)):
(x, y) = center
x += offset[0]
y += offset[1]
os.system(f"adb shell input tap {x} {y}")Enter text
text = "YourPassword"
os.system(f"adb shell input text {text}")Delete characters
Sometimes the input box will have input cache, and we need to delete characters.# 删除10个字符
for i in range(10):
os.system("adb shell input keyevent 67")Query the currently running package name and Activity
Through the following code, you can query the Activity of the currently running program, and you can also check the package by the way. name.
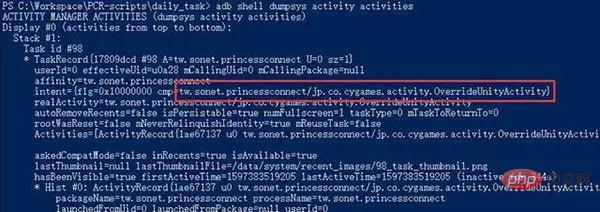
##Stop an application Sometimes you need to stop an application and you need to provide the application's package name.
adb shell am force-stop tw.sonet.princessconnect
Opening an applicationTo open an application, you need to provide the package name and Activity.
adb shell am start -W -n tw.sonet.princessconnect/jp.co.cygames.activity.OverrideUnityActivity
图像操作
对于图像的操作第一就是图像查找了,比如说像Airtest提供的这种,无非就是判断某个图像在不在截屏中,在的话在什么位置。
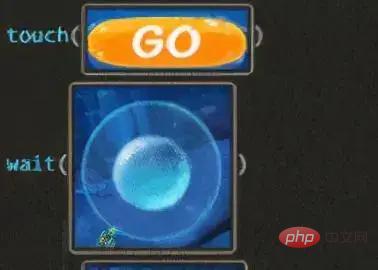
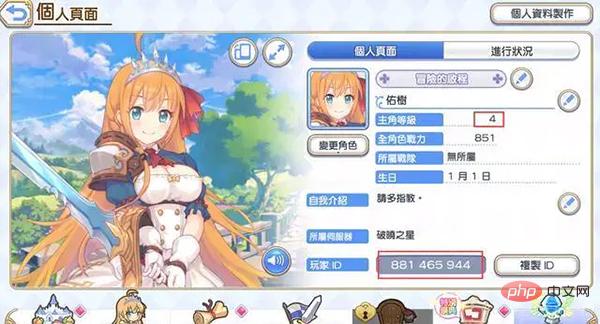
除此之外还需要一些抠图,比如说我们想获取账号的id,账号的等级,需要截取出一部分图片然后进行OCR操作。
图像查找
图像查找其实就是先拿到两张图片,然后调用cv2.matchTemplate方法来查找是否存在以及位置,这里匹配是一个相对模糊的匹配,会有一个相似度的概率,最高是1。我们设定一个阈值来判断模板是否在截屏里即可。
这里截屏如下,文件名为tmp.png:
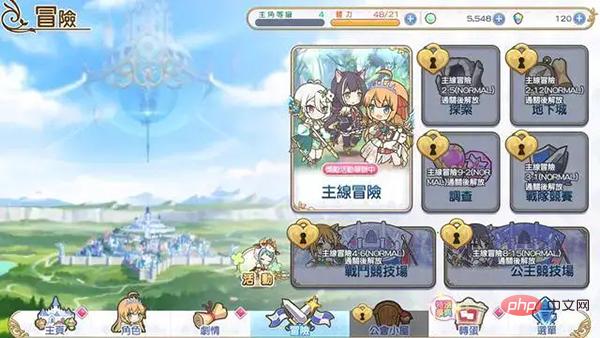
模板如下:
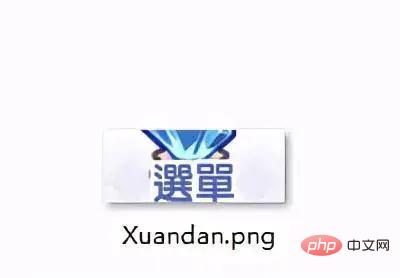
代码如下:
import cv2
def image_to_position(screen, template):
image_x, image_y = template.shape[:2]
result = cv2.matchTemplate(screen, template, cv2.TM_CCOEFF_NORMED)
min_val, max_val, min_loc, max_loc = cv2.minMaxLoc(result)
print("prob:", max_val)
if max_val > 0.98:
global center
center = (max_loc[0] + image_y / 2, max_loc[1] + image_x / 2)
return center
else:
return False
if __name__ == "__main__":
screen = cv2.imread('tmp.png')
template =cv2.imread('Xuandan.png')
print(image_to_position(screen, template))
运行上述代码后,可以看到模板匹配出来的概率为0.9977,位置为(1165, 693),对于一张图片,左上角为原点,因为我的分辨率是1280 * 720,那么右下角的坐标就是(1280, 720)。可以看到我们这个选单其实就是刚好在右下角的位置。

如何快速裁剪模板?(win10)
游戏脚本其实并不是代码很难写,而是需要截很多的图,这些图要保证分辨率和原始一样。我发现在win10如果用画图打开图片
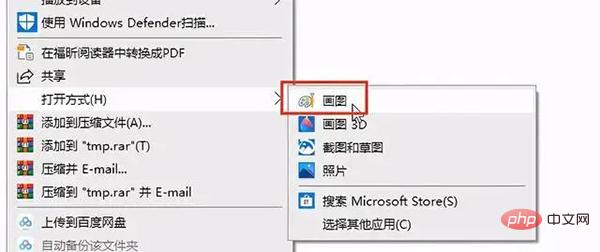
可以保证使用QQ截屏出来的分辨率,和图片本身的分辨率一样。
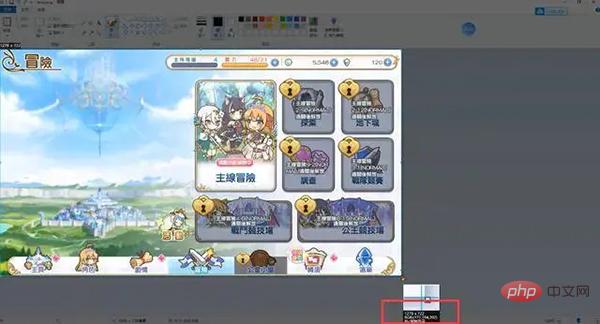
这个时候直接用qq截屏出来的模板即可直接用于识别。
图像裁剪
接下来就是有时候需要裁剪一些图像了,当然我们的模板图片也可以通过裁剪图片的方式得到,这样的模板图片是最准的。
裁剪其实就是需要裁剪的位置,以及需要的高度和宽度,说白了就是一篇长方形的区域,下面的代码使用PIL库实现。
from PIL import Image
def crop_screenshot(img_file, pos_x, pos_y, width, height, out_file):
img = Image.open(img_file)
region = (pos_x, pos_y, pos_x + width, pos_y + height)
cropImg = img.crop(region)
cropImg.save(out_file)
print("exported:", out_file)
if __name__ == "__main__":
crop_screenshot("tmp.png", 817,556, 190, 24, "test_id.png")
上面的代码以截取玩家的id为例。
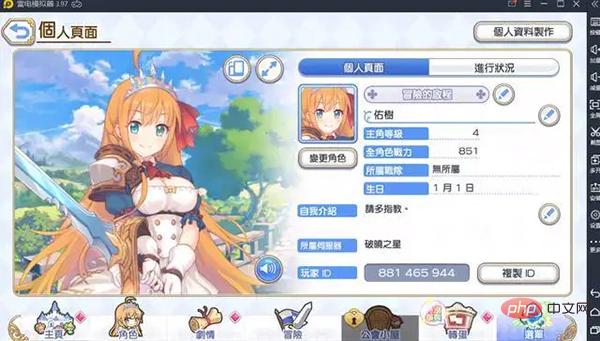
运行代码后,得到截图如下:
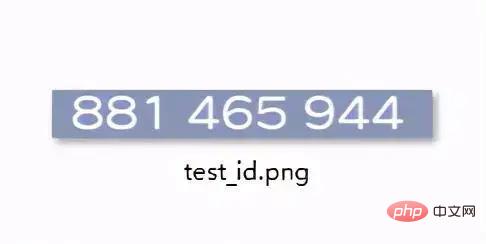
简单的OCR
得到了以上的图片信息后就是进行OCR了,也就是光学字符识别。这里代码非常简单,只要调用API即可。
from PIL import Image
import pytesseract
image = Image.open('test_id.png')
content = pytesseract.image_to_string(image) # 识别图片
print(content)

不过需要注意的一点就是pytesseract识别出来的结果会有空格符,换行符这样的符号,真正要用的时候进行一些字符的过滤即可。
The End
这篇文章到这里就结束了,主要还是介绍一些ADB以及图像相关的基础操作。谢谢大家的观看。
The above is the detailed content of Writing game scripts in Python turns out to be so easy. For more information, please follow other related articles on the PHP Chinese website!


