 Backend Development
 PHP Tutorial
 Teach you to create a virtual host and run php projects (phpstudy + wamp)
Teach you to create a virtual host and run php projects (phpstudy + wamp)
Creation of PHP environment and virtual host (phpstudy wamp)
This article involves two PHP Integrated environment
- phpstudy
- wampserver
Both of these two include mysql apache php, phpstudy is more powerful than wamp, and is very Simple and easy to use.
phpstudy is easy to use because it helps us encapsulate many tedious and error-prone operations. However, if we use it directly, we do not understand the implementation behind it, so learning wamp first can familiarize us with the principles.
1. Create a website with wamp
1.1 Understand the default website program
After the installation is completed, the tray icon is normal green. 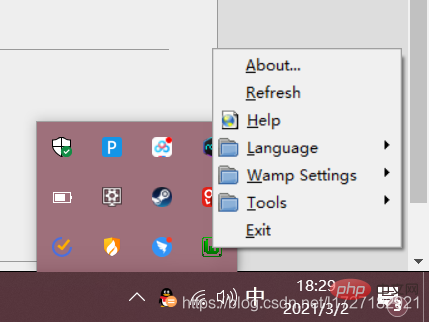
My program is installed in D:\wamp64. After finding it normal, directly access the page localhost. The default port is 80. You can ignore
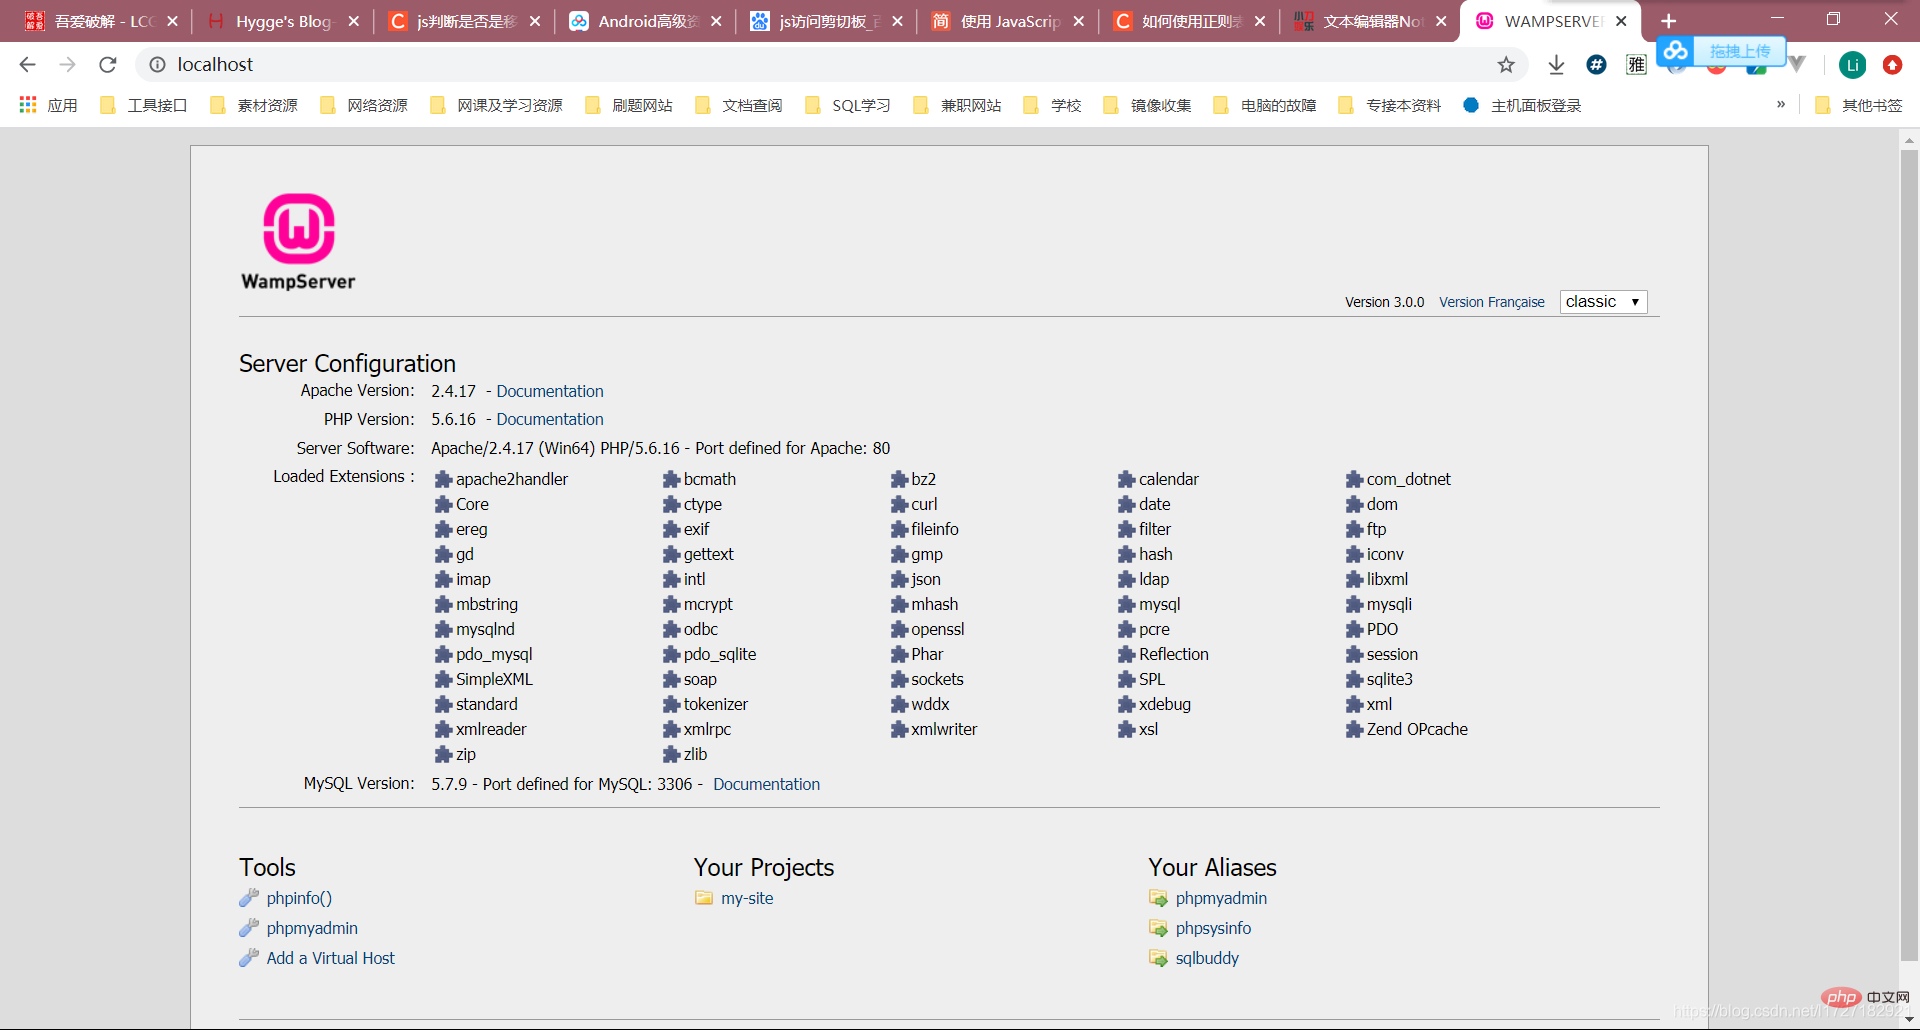
to get a normal response. This page comes from D:\wamp64\www\index.php, which is under the wamp installation directory. The www folder stores the default website programs.
1.2 Create a new virtual host
At this point we need to understand a few files first.
- hosts, file location:
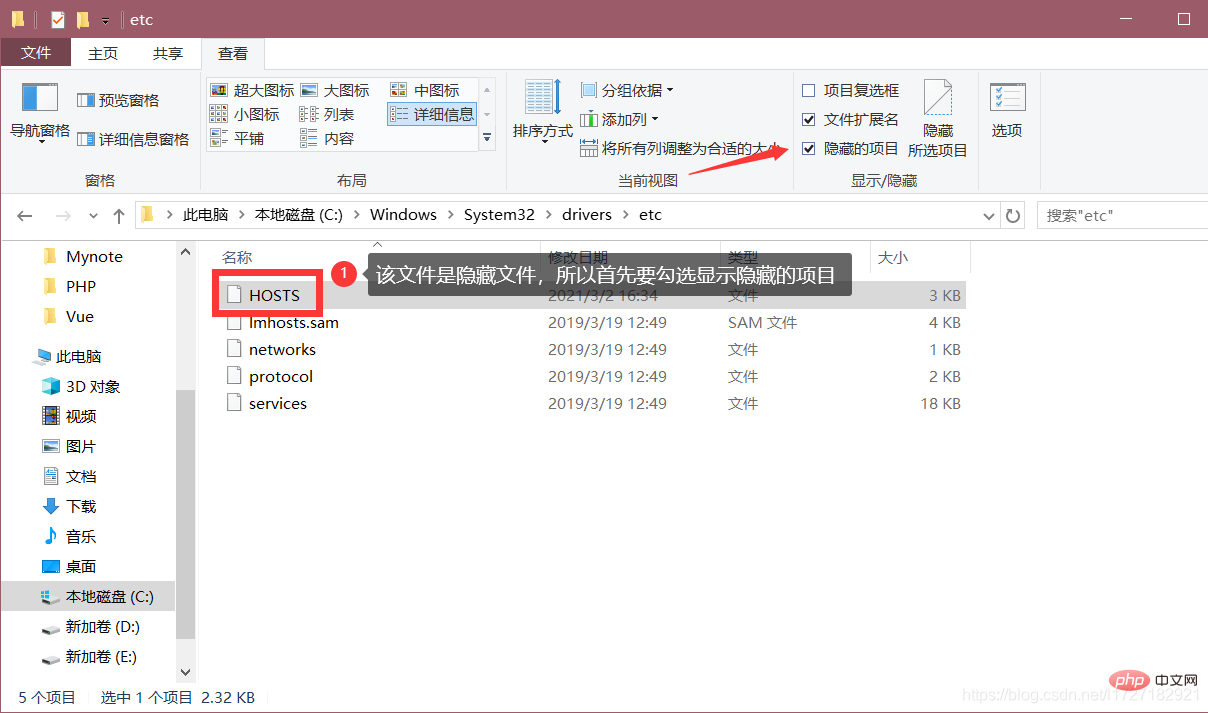
C:\Windows\System32\drivers\etc
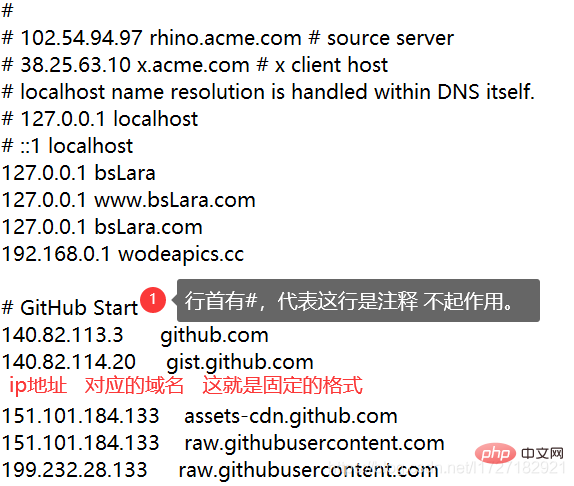
The function is to establish an associated "database" between some commonly used URL domain names and their corresponding IP addresses. When the user enters a URL that needs to be logged in in the browser, the system will first automatically start from Hosts file looks for the corresponding IP address. Once found, the system will immediately open the corresponding web page. If not found, the system will submit the URL to the DNS domain name resolution server for IP address resolution.
-
httpd.conf, file location:D:\wamp64\bin\apache\apache2.4.17\conf
This file is the configuration file of apache and generally does not need to be changed.
-
httpd-vhosts.conf, file location:D:\wamp64\bin\apache\apache2.4.17\conf\extra
This file is a virtual host file. When creating a new website, it needs to be configured in this file to take effect.
The following I have a requirement:
I think it is too wasteful to run only one program on one computer, and port 80 of my local machine is occupied. I want to open a website for ittest.com:81 to access
1) According to the function of the hosts file, when I visit test.com:81, I need it to jump directly without going. Perform dns domain name resolution
So, add a line in the hosts file according to the fixed format
# 当访问www.test.com时 , 我们告诉电脑直接解析到本机127.0.0.1 不用去dns域名解析。# :81属于端口号 不需要添加到这里127.0.0.1 www.test.com
2). The previous step only tells the computer to resolve to the local, but we haven’t done that yet. The corresponding virtual host is
, so a new virtual host needs to be configured in httpd-vhosts.conf.
<virtualhost>
    DocumentRoot "网站程序目录"
    ServerName 绑定的域名
    ServerAlias 绑定的域名别名
  <directory>
      Options FollowSymLinks ExecCGI
      AllowOverride All
      Order allow,deny
      Allow from all
      Require all granted
  </directory>
</virtualhost>
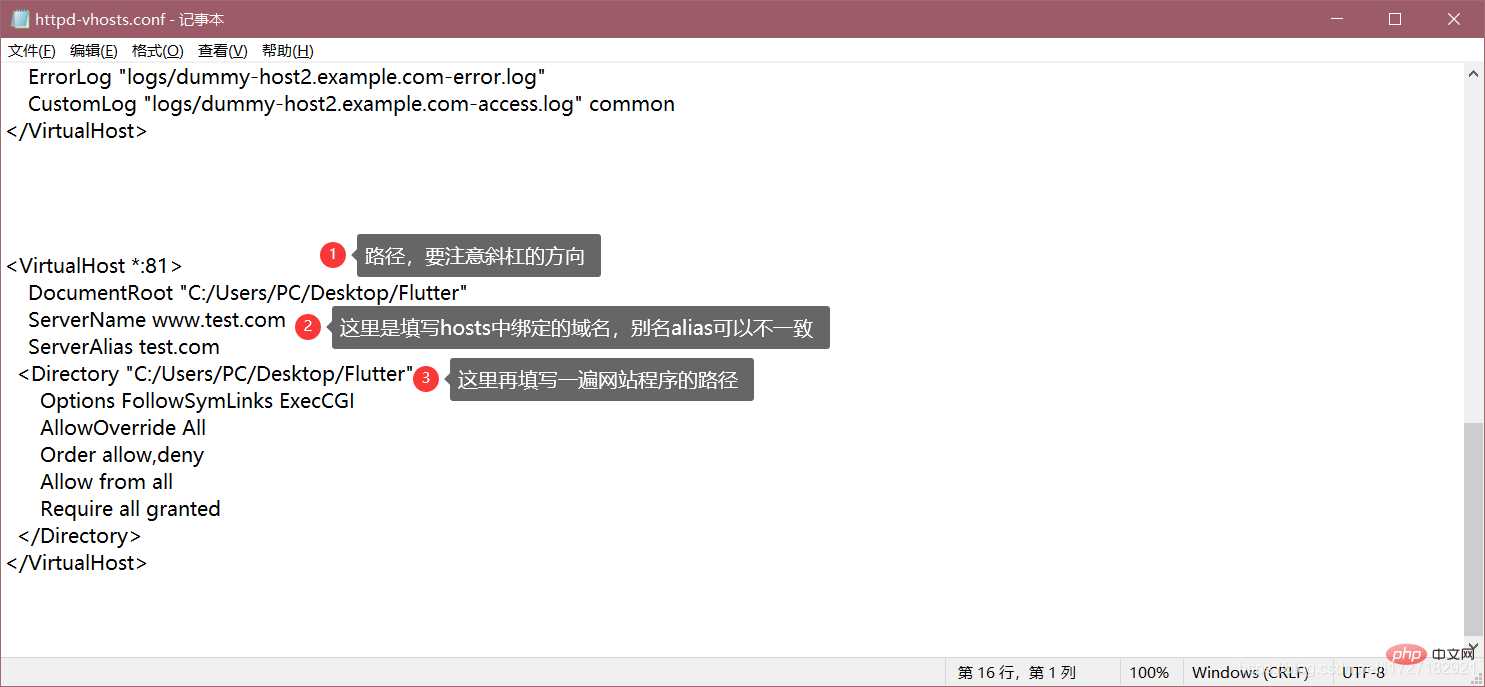
In additionVirtuaHost *:Port number
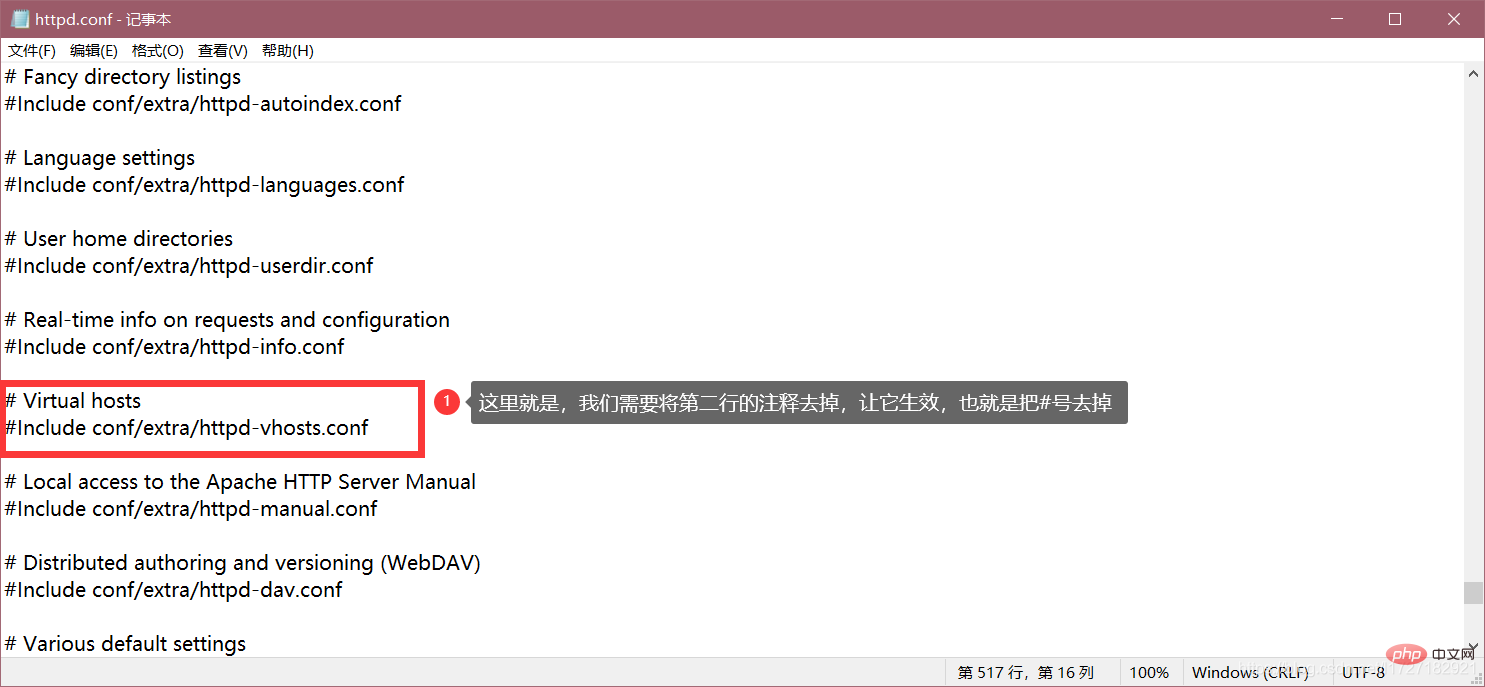
After filling in here, it will not take effect because we have not allowed apache to be enabled. Virtual host, now enable it, in the httpd.conf file
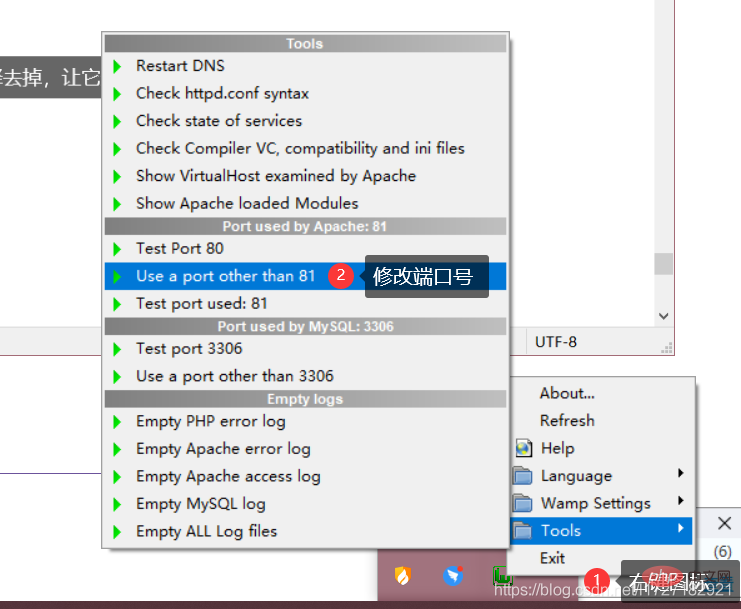
Finally set the default port of wamp's apache service:

Successfully obtained response.
2. Creating a website with Phpstudy
After reading wamp, it feels very cumbersome. Next, try using phpstudy.
The demand remains unchanged, let’s create a websitewww.test.com:81,
1.1 Effect demonstration
1), directly Start apache
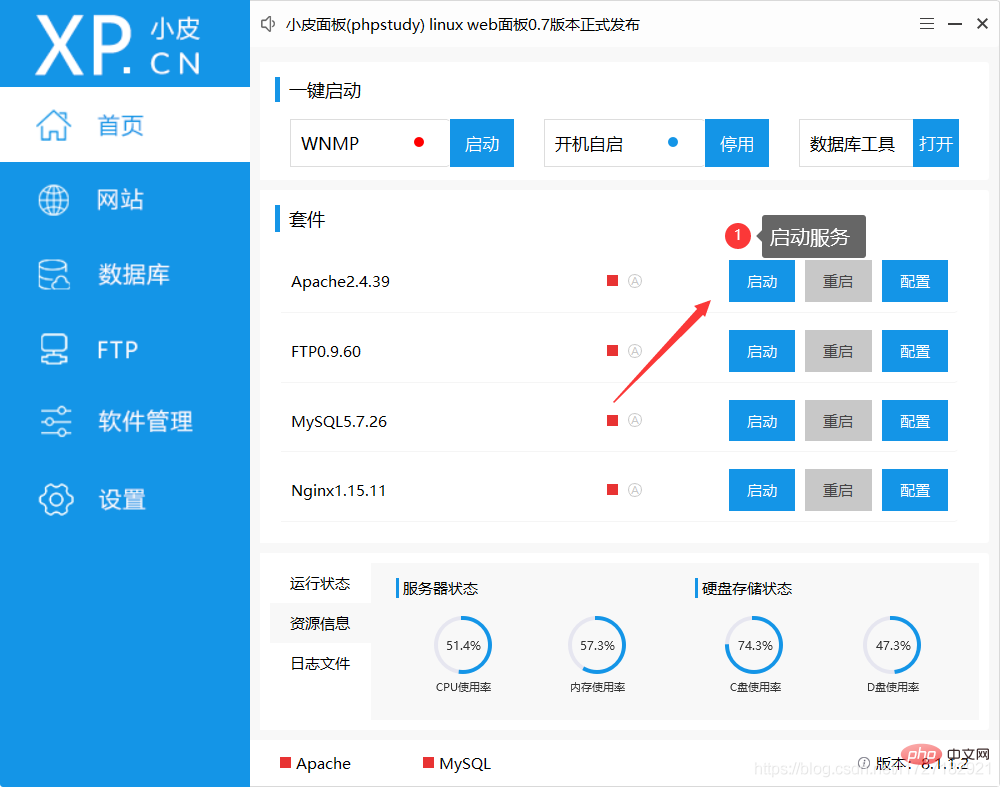
2) Create website
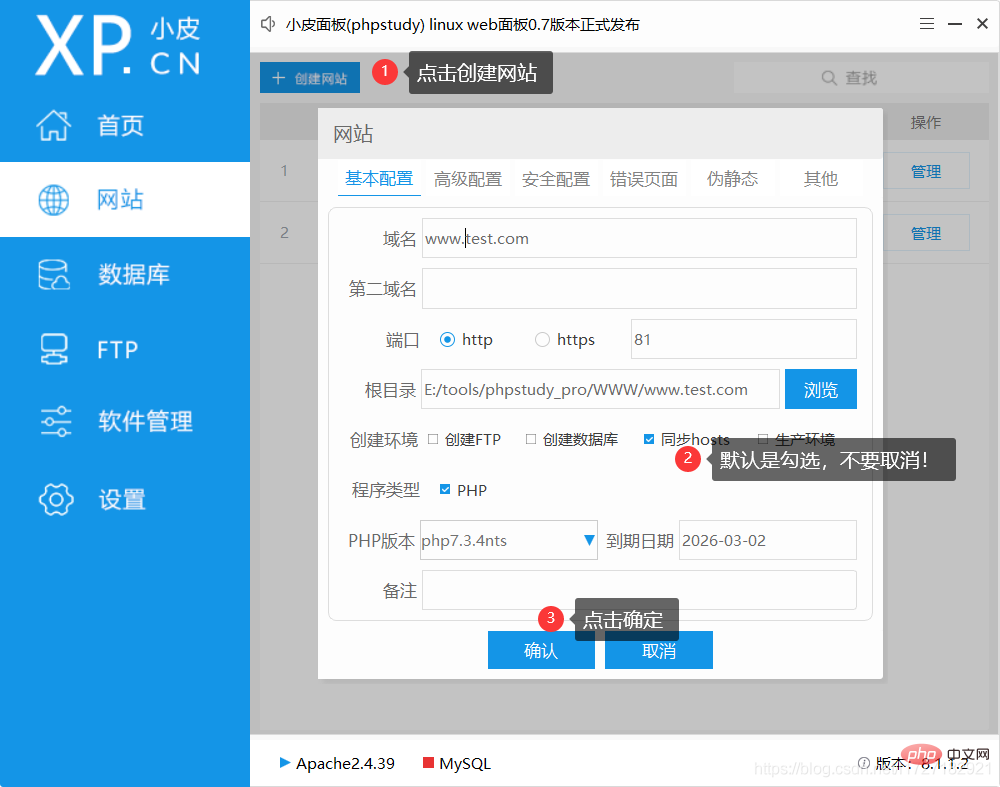
根目录选择项目的根目录
三)、查看效果

这就完成了…
1.2 配置文件查看
使用过wamp后我们知道,配置一个虚拟主机需要改三个文件,下面看一下phpstudy的操作。
一)、hosts
由于做wamp的时候已经手动添加过了,所以这个文件看不出来两者的差异。
二)、httpd.conf和vhost.conf
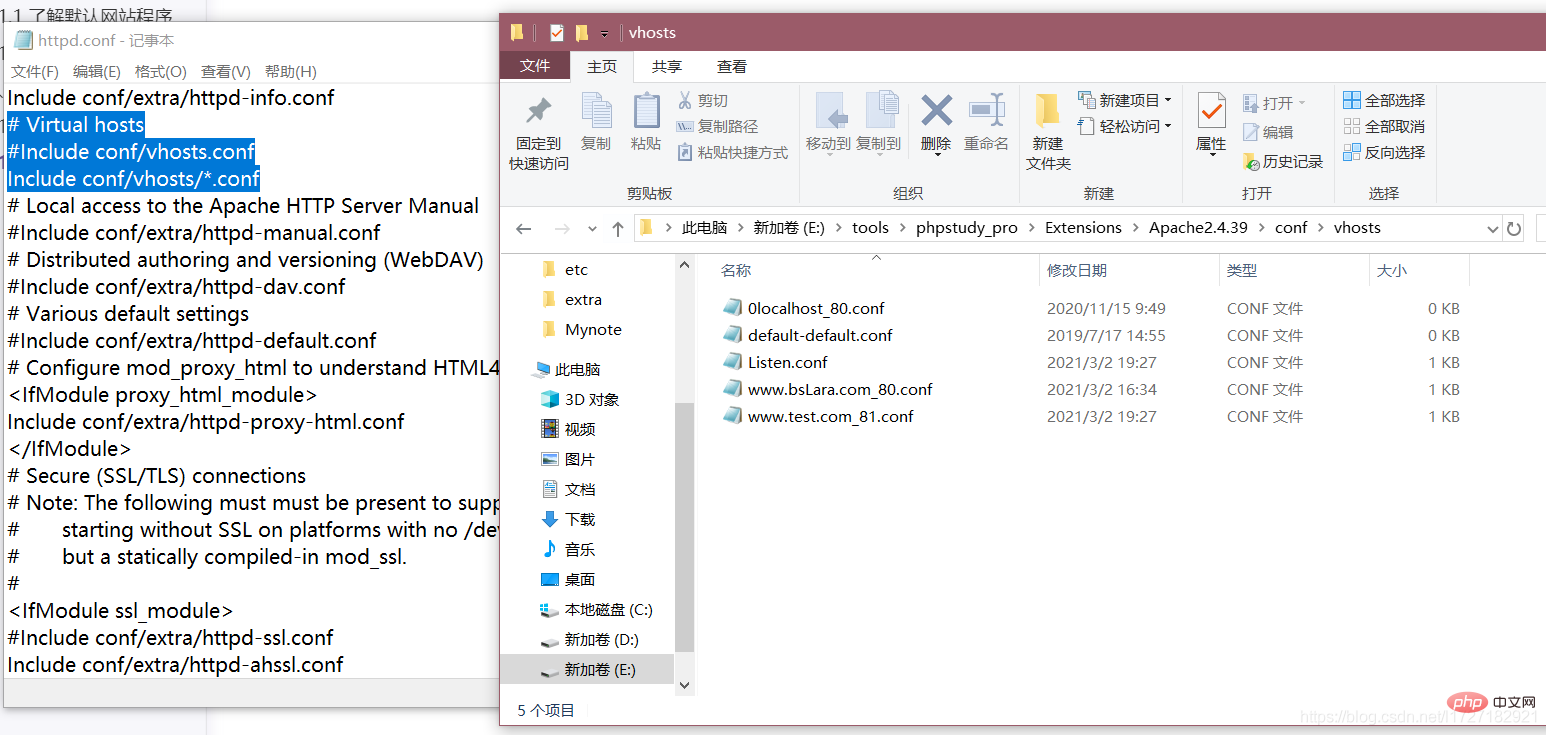
在wamp中,我们将多个虚拟主机的配置项都放在了一个文件中。
在phpstudy里,将每个网站的配置项单独抽离出个自己的文件并放到了一个文件夹中。
httpd-vhosts.conf详解
首先看下面的配置:
<virtualhost>
    ServerAdmin webmaster@dummy-host.example.com
    DocumentRoot "D:/xampp/htdocs/wherein"
    ServerName www.shop_dev.com
    ErrorLog "logs/wherein.com-error.log"
    CustomLog "logs/wherein.com-access.log" common
    <directory>
    Options FollowSymLinks IncludesNOEXEC Indexes
    DirectoryIndex index.html index.htm index.php
    AllowOverride all
    Order Deny,Allow
    Allow from all
    Require all granted
    </directory>
</virtualhost>
ServerAdmin指令:
语法: ServerAdmin email-address|URL
用来设置服务器返回给客户端的错误信息中包含的管理员邮件地址。便于用户在收到错误信息后能及时与管理员取得联系。
ServerName指令:
语法:ServerName [scheme://] FQDN [:port]
用来设置服务器用于辨识自己的主机名和端口号。主要用于创建重定向URL。
DocumentRoot指令:
语法:DocumentRoot directory-path
用来设置httpd提供服务的目录。即你所在项目入口处的文件夹。
ErrorLog指令:
语法: ErrorLog file-path
来设置当服务器遇到错误时记录错误日志的文件。如果file-path不是以/开头的绝对路径,那么将会被认为是一个相对于ServerRoot的相对路径。
CustomLog指令:
语法: ErrorLog file-path common
设置日志文件,并指明日志文件所用的格式(通常通过格式的名字)。
为主目录或虚拟目录设置权限。
特性:
Options FollowSymLinks IncludesNOEXEC Indexes
| 命 令 | 说 明 |
|---|---|
| Indexes | 允许目录浏览当客户仅指定要访问的目录,但没有指定要访问目录下的哪个文件,而且目录下不存在默认文档时,Apache以超文本形式返回目录中的文件和子目录列表(虚拟目录不会出现在目录列表中) |
| MultiViews | 允许内容协商的多重视图MultiViews其实是Apache的一个智能特性。当客户访问目录 中一个不存在的对象时,如访问“http://192.168.66.6/data/a”,则Apache会查找这个目录下所有a.*文件。由于 data目录下存在a.gif文件,因此Apache会将a.gif文件返回给客户,而不是返回出错信息 |
| All | All包含了除MultiViews之外的所有特性,如果没有Options语句,默认为All |
| ExecCGI | 允许在该目录下执行CGI脚本 |
| FollowSymLinks | 可以在该目录中使用符号连接 |
| Includes | 允许服务器端包含功能 |
| IncludesNoExec | 允许服务器端包含功能,但禁用执行CGI脚本 |
一旦定义允许目录浏览,就会将Web站点的文件夹和文件名结构暴露给黑客。目录浏览还会允许黑客浏览文件并掌握服务器配置信息,所以指定该权限往往带来安全性上的隐患。除非有充足的理由要使用目录浏览,否则应该禁用它。
DirectoryIndex index.html index.htm index.php
设置访问目录后进入的默认文件
AllowOverride all
定义位于每个目录下.htaccess(访问控制)文件中的指令类型。none为禁止使用.htaccess文件
Order Deny,Allow
Allow from all
设置缺省的访问权限与Allow和Deny语句的处理顺序
allow, deny:缺省禁止所有客户机的访问,且Allow语句在Deny语句之前被匹配。如果某条件既匹配Deny语句又匹配Allow语句,则Deny语句会起作用(因为Deny语句覆盖了Allow语句)。
deny, allow:缺省允许所有客户机的访问,且Deny语句在Allow语句之前被匹配。如果某条件既匹配Deny语句又匹配Allow语句,则Allow语句会起作用(因为Allow语句覆盖了Deny语句)。
eg.
Order deny ,allow
Deny from baidu.com
Deny from 192.168.66.6除了来自baidu.com域和ip地址为192.168.66.6的客户机外,允许所有客户机访问
Order deny ,allow
Allow from 192.168.66.6
Deny from 192.168.66.1既匹配Deny语句又匹配Allow语句,由于allow语句覆盖了deny语句,所以是允许所有客户机访问
Order allow ,deny
Allow from 192.168.66.6
Deny from 192.168.66.1既匹配Deny语句又匹配Allow语句,由于deny语句覆盖了allow语句,所以是禁止所有客户机访问
推荐学习:《PHP视频教程》
The above is the detailed content of Teach you to create a virtual host and run php projects (phpstudy + wamp). For more information, please follow other related articles on the PHP Chinese website!

Hot AI Tools

Undresser.AI Undress
AI-powered app for creating realistic nude photos

AI Clothes Remover
Online AI tool for removing clothes from photos.

Undress AI Tool
Undress images for free

Clothoff.io
AI clothes remover

Video Face Swap
Swap faces in any video effortlessly with our completely free AI face swap tool!

Hot Article

Hot Tools

Notepad++7.3.1
Easy-to-use and free code editor

SublimeText3 Chinese version
Chinese version, very easy to use

Zend Studio 13.0.1
Powerful PHP integrated development environment

Dreamweaver CS6
Visual web development tools

SublimeText3 Mac version
God-level code editing software (SublimeText3)

Hot Topics
 1386
1386
 52
52
 PHP 8.4 Installation and Upgrade guide for Ubuntu and Debian
Dec 24, 2024 pm 04:42 PM
PHP 8.4 brings several new features, security improvements, and performance improvements with healthy amounts of feature deprecations and removals. This guide explains how to install PHP 8.4 or upgrade to PHP 8.4 on Ubuntu, Debian, or their derivati
 How To Set Up Visual Studio Code (VS Code) for PHP Development
Dec 20, 2024 am 11:31 AM
Visual Studio Code, also known as VS Code, is a free source code editor — or integrated development environment (IDE) — available for all major operating systems. With a large collection of extensions for many programming languages, VS Code can be c
 7 PHP Functions I Regret I Didn't Know Before
Nov 13, 2024 am 09:42 AM
If you are an experienced PHP developer, you might have the feeling that you’ve been there and done that already.You have developed a significant number of applications, debugged millions of lines of code, and tweaked a bunch of scripts to achieve op
 Explain JSON Web Tokens (JWT) and their use case in PHP APIs.
Apr 05, 2025 am 12:04 AM
JWT is an open standard based on JSON, used to securely transmit information between parties, mainly for identity authentication and information exchange. 1. JWT consists of three parts: Header, Payload and Signature. 2. The working principle of JWT includes three steps: generating JWT, verifying JWT and parsing Payload. 3. When using JWT for authentication in PHP, JWT can be generated and verified, and user role and permission information can be included in advanced usage. 4. Common errors include signature verification failure, token expiration, and payload oversized. Debugging skills include using debugging tools and logging. 5. Performance optimization and best practices include using appropriate signature algorithms, setting validity periods reasonably,
 How do you parse and process HTML/XML in PHP?
Feb 07, 2025 am 11:57 AM
This tutorial demonstrates how to efficiently process XML documents using PHP. XML (eXtensible Markup Language) is a versatile text-based markup language designed for both human readability and machine parsing. It's commonly used for data storage an
 PHP Program to Count Vowels in a String
Feb 07, 2025 pm 12:12 PM
A string is a sequence of characters, including letters, numbers, and symbols. This tutorial will learn how to calculate the number of vowels in a given string in PHP using different methods. The vowels in English are a, e, i, o, u, and they can be uppercase or lowercase. What is a vowel? Vowels are alphabetic characters that represent a specific pronunciation. There are five vowels in English, including uppercase and lowercase: a, e, i, o, u Example 1 Input: String = "Tutorialspoint" Output: 6 explain The vowels in the string "Tutorialspoint" are u, o, i, a, o, i. There are 6 yuan in total
 Explain late static binding in PHP (static::).
Apr 03, 2025 am 12:04 AM
Static binding (static::) implements late static binding (LSB) in PHP, allowing calling classes to be referenced in static contexts rather than defining classes. 1) The parsing process is performed at runtime, 2) Look up the call class in the inheritance relationship, 3) It may bring performance overhead.
 What are PHP magic methods (__construct, __destruct, __call, __get, __set, etc.) and provide use cases?
Apr 03, 2025 am 12:03 AM
What are the magic methods of PHP? PHP's magic methods include: 1.\_\_construct, used to initialize objects; 2.\_\_destruct, used to clean up resources; 3.\_\_call, handle non-existent method calls; 4.\_\_get, implement dynamic attribute access; 5.\_\_set, implement dynamic attribute settings. These methods are automatically called in certain situations, improving code flexibility and efficiency.


