

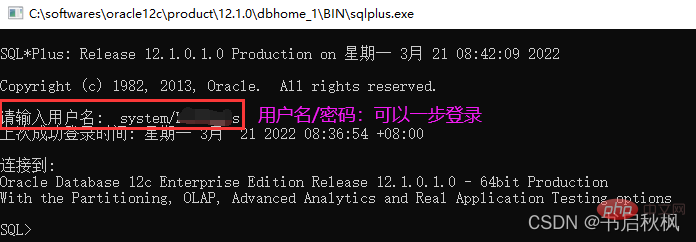
This article brings you relevant knowledge about Oracle, which mainly sorts out the related issues related to the operation and use of SQLPlus in 12c, as well as the difference between SYS and SYSTEM users in Oracle, etc., as follows Let's take a look, I hope it will be helpful to everyone.

Recommended tutorial: "Oracle Video Tutorial"
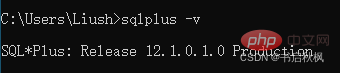
(1) cmd to view in dos command, enter: sqlplus -v
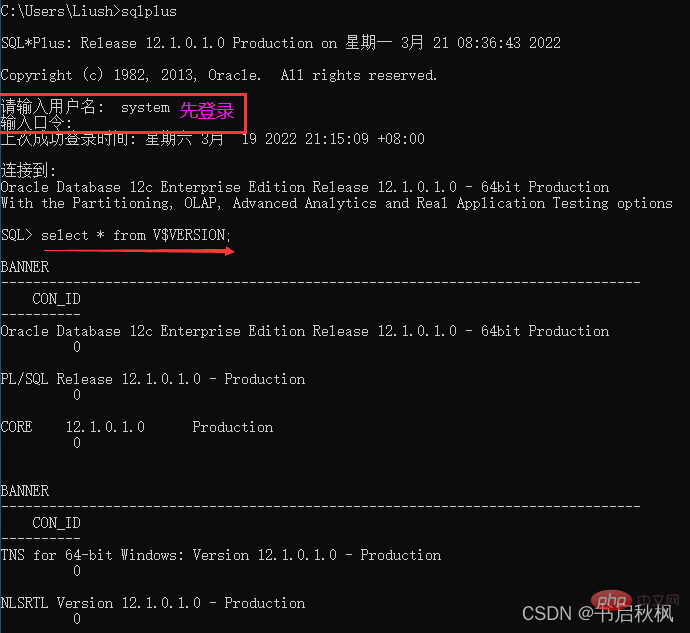
(2) After enabling sqlplus, enter: select * from V$VERSION;
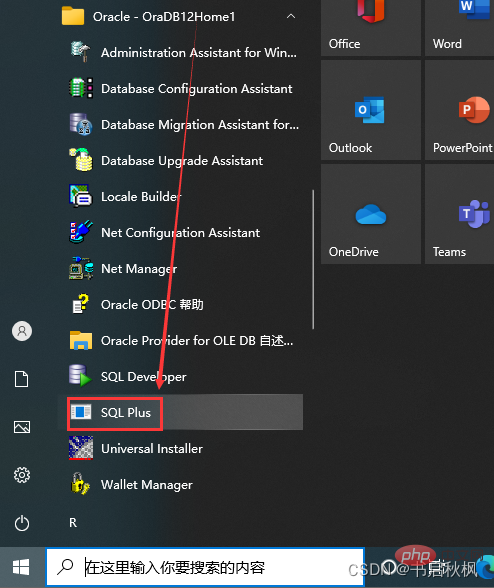
(1) In Windows 10 environment, in the start menu, find SQLPLUS and click to open it
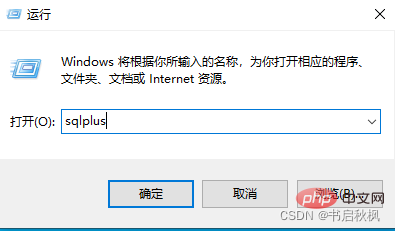
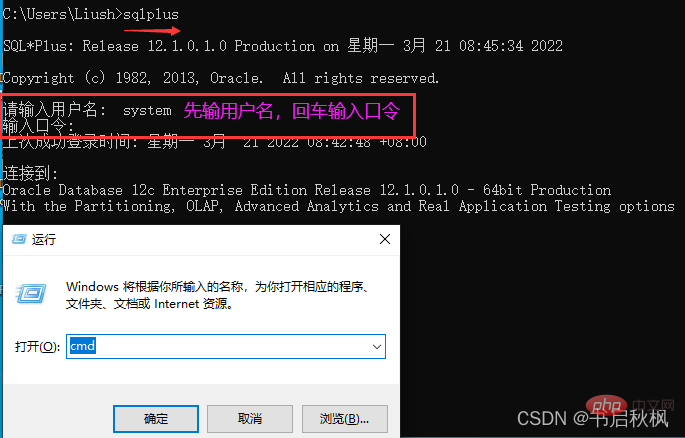
(2) Win key R key to open the run window and enter sqlplus
(3) Win key and R key to open the run window and enter cmd, then enable sqlplus
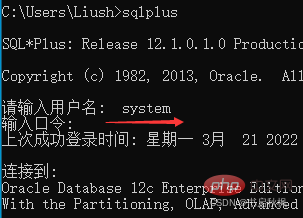
##sys, system, sysman The passwords of these three users are the passwords you set during installation.
sys as sysdba is with sysdbaLogin
There are three Oracle login identities: normal normal identity ,sysdba system administrator identity,sysoper system operator identity, each identity corresponds to different permissions.
SYS user is the super user , with the highest Permissions , with SYSDBA role, database administrator permissions, and can create a database - with create database permissions.
SYSTEM user is the management operator , has the SYSOPE role, has database operator permissions, and cannot be created Database - does not have create database permission.
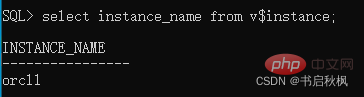
4. View the Oracle database global database name and SIDView the global database name: select name from v$database;

View SID:select instance_name from v$instance;
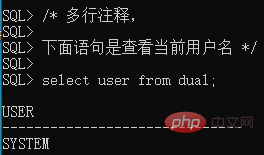
Single-line comments start with --, for example:
##--This sentence checks the current user name select user from dual; Multi-line comments start with /* followed by a space and end with */ followed by a space, for example: /* Multi-line comments, The following statement is to view the current user name*/ select user from dual; Syntax ##CONN[ECT] [{登录| / | Agent }[AS {SYSOPER |SYSDBA |SYSASM}] [Version=Value]] Login has the following syntax: username[/password] [@connect_identifier]##where has the following syntax: ##Agent user Username] [/Password] [@connect_identifier]Note: The brackets around username agent are required syntax, not an indication of optional terms. For example, use a password to connect to a user through a proxy. scotthrwelcome1Connect hr[scott]/welcome1 This simple example connects to a local database as a user. SQL* Plus will prompt for the user password. SYSTEMSYSTEM This example connects to a local database as a privileged user. SQL* Plus will prompt for the user password. SYSSYSDBASYS This example uses operating system authenticated privileges to connect locally. SYSDBA ##This example uses simple connection syntax to connect as a user to a remote database running on the host machine. The Oracle Net listener (listener) is listening on the default port (1521). The database service is . SQL* Plus will prompt for the user password. salesadmindbhost.example.comsales.example.comsalesadmin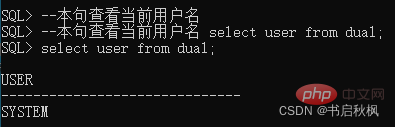
Connect to database
##Example 1connect system
Copy after loginExample 2connect sys as sysdba
Copy after loginMust connect when connecting as user. SYSAS SYSDBAExample 3connect / as sysdba
Copy after loginExample 4connect salesadmin@"dbhost.example.com/sales.example.com"
Copy after login##Example 5
This example is the same as Example 4, except that the service handler type is indicated. connect salesadmin@"dbhost.example.com/sales.example.com:dedicated"
Copy after login
Example 6
This example is the same as Example 4 Same, except the listener is listening on the non-default port number 1522. connect salesadmin@"dbhost.example.com:1522/sales.example.com"
Copy after login
Example 7
This example is the same as Example 4 Same, except the host IP address is replaced by the host name. connect salesadmin@"192.0.2.5/sales.example.com"
Copy after login
Example 8
This example uses IPv6 addresses Make a connection. Note the surrounding square brackets. connect salesadmin@"[2001:0DB8:0:0::200C:417A]/sales.example.com"
Copy after login
Example 9
This example specifies to connect to the instance and omit the database service name. The default database service must be specified, otherwise an error will be generated. Note that the service handler type cannot be specified when specifying only the instance. connect salesadmin@"dbhost.example.com//orcl"
Copy after login
Example 10
此示例以用户身份远程连接到由网络服务名称 指定的数据库服务。SQL*加会提示输入用户密码。salesadminsales1salesadmin
connect salesadmin@sales1
例子 11
本示例使用外部身份验证远程连接到由网络服务名称 指定的数据库服务。sales1
connect /@sales1
例子 12
此示例使用权限和外部身份验证远程连接到由网络服务名称 指定的数据库服务。SYSDBAsales1
connect /@sales1 as sysdb
例子 13
此示例以用户身份远程连接到由网络服务名称 指定的数据库服务。数据库会话在版本中启动。SQL*加会提示输入用户密码。salesadminsales1rev21salesadmin
connect salesadmin@sales1 edition=rev21
例子 14
要使用用户名 HR 跨 Oracle Net 连接到 Oracle Net 别名称为 FLEETDB 的数据库,请输入
CONNECT HR@FLEETDB
例子 15
要以名为 HR 的特权用户身份连接到当前节点上的实例,请输入
CONNECT HR AS SYSDBA
例子 16
要以特权默认用户身份连接到当前节点上的实例,请输入
CONNECT / AS SYSDBA
在最后两个示例中,默认架构变为 SYS。
exit 退出即可

(1)创建表空间
create tablespace 表空间的名 datafile '数据文件' size xxxm;
数据文件:全名如d:\data.dbf,表空间的存储位置
xxx:表空间的大小,m单位为兆(M)
【为用户指定表空间】
alter user 用户名 default tablespace 表空间名;
为用户指定临时表空间:
alter user 用户名 temporary tablespace 表空间名;
【删除空的表空间,但是不包含物理文件】
drop tablespace 表空间名;
删除空表空间,包含物理文件(数据文件):
drop tablespace 表空间名 including datafiles;
如果其他表空间中的表有外键等约束关联到了本表空间中的表的列,就要加上CASCADE CONSTRAINTS,如:drop tablespace 表空间名 including datafiles cascade constraint
注意:如果多个用户使用相同的表空间,删除用户时不要删除表空间
(2)创建用户
create user 用户名 identified by 密码;
【创建用户同时可以指定表空间】
create user username identified by password ##default tablespace tablespace name;
【Delete users and cascade relationships】
##drop user username cascade;
Specifying cascade will delete all objects under the user (including tables, views, primary keys, foreign keys, indexes, etc.; but it will not delete stored procedures, functions, packages). If not specified, only the user will be deleted. It is generally recommended to specify
[Query user information]
oracle View the current user name:
##show user or select user from dual;
oracle View all usernames:##select * from all_users;
View all user-related information in the database (provided you have an account with DBA authority, such as sys, system):
select * from dba_users;
##Note that the asterisk * in the SELECT query statement represents all columns
View all users you can manage:
##select * from all_users;
View current user information:
##select * from user_users;
Query the table space corresponding to the user:
select username,default_tablespace from dba_users;
Use restrictive conditions to query the table space corresponding to the user:
select username, default_tablespace from dba_users where username='uppercase username';
(3) Change the space Assigned to user
alert user username default tablespace tablespace name;
(4) Authorize the user
Grant permission to user name;
The created user does not have any permissions by default and needs to be assigned permissions.
Different users who log in to the same database may see different numbers of tables and have different permissions. Oracle's permissions are divided into system permissions and data object permissions. There are more than 100 types in total. It is very troublesome to authorize users individually. Some users need the same permissions, so these users are classified into the same category - a certain role. Simplify and clearly authorize operations by setting up some roles with predetermined permissions. The motivation for roles is to simplify permission management. It is a collection of permissions. The general approach is: the system assigns permissions to roles, and then assigns the roles to users. Of course, it can also directly assign certain permissions to users. Oracle provides fine-grained permissions. Permissions can be set individually for a certain column of the table, and where restrictions can be automatically added to a user's query of a certain table.
[Permission Classification]
System permissions: The system stipulates the user's permissions to use the database . (System permissions are for users).
#Entity permissions: The access rights of a certain permission user to other users’ tables or views. (For tables or views).
【System Permission Classification】
DBA: Has all privileges and is the highest in the system Permissions, only the DBA can create database structures.
RESOURCE: Users with Resource permissions can only create entities, not database structures.
CONNECT: Users with Connect permissions can only log in to Oracle and cannot create entities or database structures.
【Entity permission classification】
##select, update, insert, alter, index , delete, all (all includes all permissions), execute (permission to execute stored procedures).
[role]
A role is a set of permissions, which assign Given to a user, this user has all the permissions in this role.
#Predefined roles are some commonly used roles that are automatically created by the system after the database is installed. The following is a brief introduction to these scheduled roles.
View all roles:
##select * from dba_roles;
To view the permissions contained in a role, you can use the following statement to query:
select * from role_sys_privs where role='role name';
View all roles and system permissions owned by the currently logged in user:
select * from session_privs;
(5) Then create with The user logs in and creates the table after logging in
conn username/password; 9.
Create a table space for SQLLog in with the system administrator account
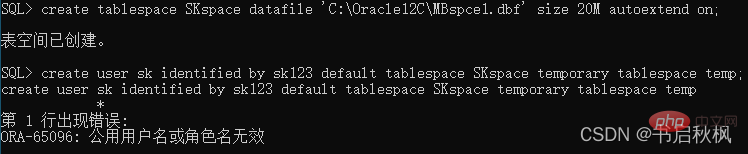
(1) Create table space SKspace:
##Format: create tablespace inter-table name datafile 'data file name' size table space size table space data file automatic expansioncreate tablespace SKspace datafile 'C:\Oracle12C\MBspce1.dbf' size 20M autoextend on;
 ##(2) Create user
C##sukeThe password is suke123, set the default table space to SKspace, temporary table The space is temp:Format: create user username identified by password default tablespace tablespace table;
create user C
##suke identified by suke123 default tablespace SKspace temporary tablespace temp; Error: The public username or role name is invalid
Because it was created in CDB at this time, and in CDB To create a user, you must add C# or C
 # in front of the user name ( 3) The created user does not have any permissions by default and needs to be assigned permissions.
For convenience, the administrator role (dba) permissions are granted to the
C##suke user:grant dba to C
#suke;
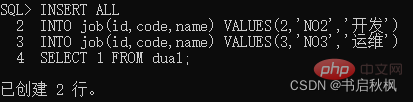
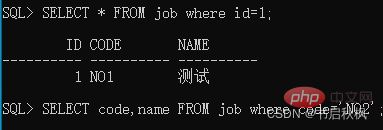
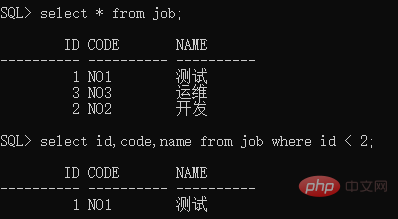
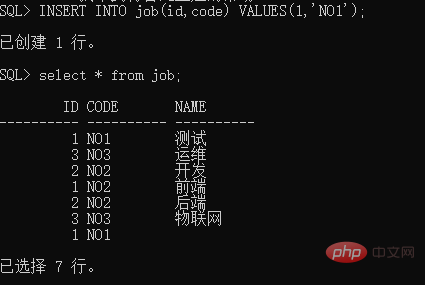
--Indicates that connect and resource permissions are granted to the study user grant connect,resource to study; grant dba to study; (4) Now you can use the created user (use the previously created userC##sukePassword is suke123) Login: ##connect C##suke/suke123; (5) Create a table after logging in: CREATE TABLE job( id NUMBER(6),code VARCHAR2(10), name VARCHAR2(10)); (6) Insert table data into a created (existing) table and insert a single record: INSERT INTO job(id ,code,name) VALUES(1,'NO1','Test'); (7) is already Insert table data into a created (existing) table and insert multiple records: INSERT ALL INTO job(id,code,name) VALUES(2,'NO2','Development') INTO job(id,code,name ) VALUES(3,'NO3','Operation and Maintenance') ##SELECT 1 FROM dual; (8) Query table data:
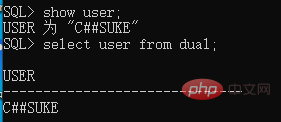
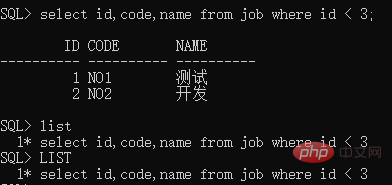
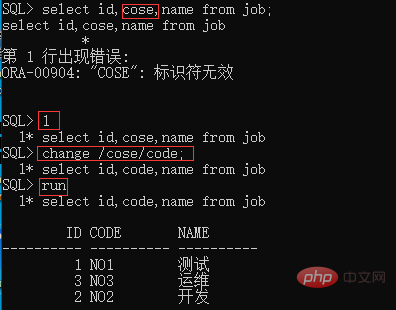
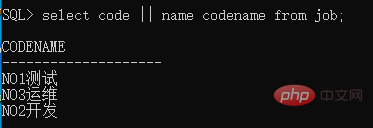
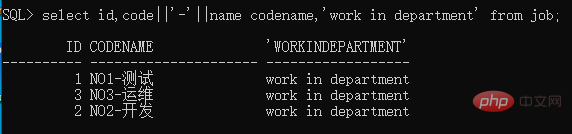
##SELECT table_name FROM ALL_TABLES WHERE OWNER=' C ##suke'; #At first I thought the query statement was written incorrectly, but after changing it left and right, the result was still the same. #After I checked online, it turned out that the "row not selected" was not an error because there was no result matching the query statement in the database. select count(table_name) from all_tables where owner='C##suke'; It seems that you should not be preconceived when encountering a problem. At first, I thought it was a statement error, and I always wanted to find out what was wrong with this statement. In fact, this is not an error, just a problem with the data in the database. (10) Query the table structure created by the user: desc job; 10. Oracle delete table space statement 注1:如果你想使用如此图的EMP表可查询 实验二 Oracle SQL*PLUS环境与查询 注2:你找不到此图的EMP:Oracle设置和修改system和scott的口令,并且如何连接到system和scott模式下 使用scott内置账户登录:conn scott/口令 可以查找到此图的EMP表 注3:你发现你内置账户scott不存在 / 连接不上 此链接可以解决你的问题:Oracle数据库中scott用户不存在的解决方法 注4:你发现 注3 还是无法连接scott账户,你也不想麻烦操作了 此链接可以粗暴解决问题:重建用户scott以及内容表 (1)SQL*Plus的启动 继续上述实例 9 的步骤操作 进入sqlplus环境:sqlplus 输入用户名:C##suke 输入口令:suke123 (2)断开数据库连接与重新连接数据库 断开数据库连接:DISCONECT 重新连接数据库:conn 用户名/口令:conn C##suke/suke123 (3)退出SQL*Plus:exit (4)查看当前用户名 show user; select user from dual; (5)查询表job表结构:desc job; (6) Query the data in the job table select * from job; ##select id,code,name from job where id < 2; (7) List the contents of the buffer: LIST (8)change Fix errors When querying the command, the code was mistakenly typed into cose: select id, cose, name from job; ##Supplement: No.How many lines have errors, and the error line code can be displayed individually by entering and exiting the number of the error line. Use change to correct the error code: change /cose/code; run Query information: Suddenly want to sort, but don’t want to re-enter all the commands, use input to add the sorting condition based on the id column: SQL> input 2 order by id; ##(11)append Add query conditions to the end of the previous line After reading the main sequence in step (10), due to obsessive-compulsive disorder What if you want to see flashbacks? Firstlist the contents of the buffer: Add query conditions to the end of the previous line: append desc Note: append desc is in the middle Two spaces
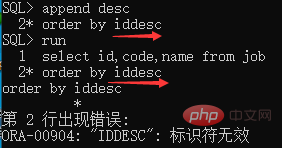
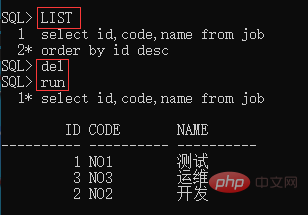
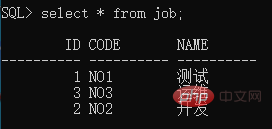
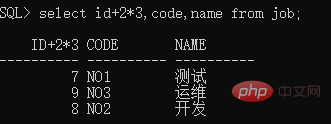
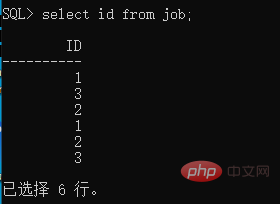
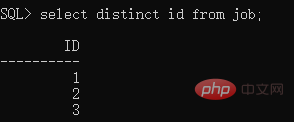
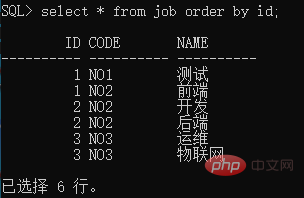
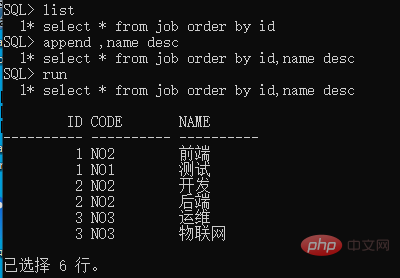
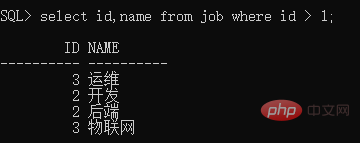
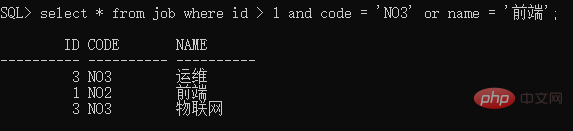
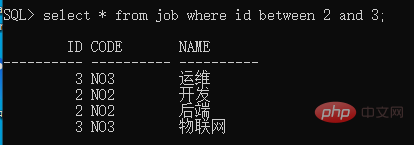
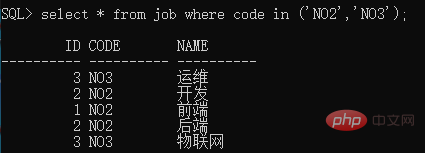
Rerun: ## (12) del deletes the last row of query conditions Following step (11), after watching the flashback, what should I do if I want to see the original data because my brain is sick? First list the contents of the buffer: list Delete the previous row of query conditions: del Rerun: run (13) Display all the information in the job table: select * from job; (14) Use of arithmetic operators causes id 2*3 to be displayed :select id 2*3,code,name from job; ##(15) The use of characters connects the unit number and the unit name: select code || name codename from job; Connect the unit number and unit name with '-' and output 'WORKS IN DEPARTMENT': select id,code||'-'||name codename,'work in department' from job; (16) The DISTINCT clause eliminates duplication INSERT ALL INTO job(id,code,name) VALUES(1,'NO2','Front-end') INTO job(id,code,name) VALUES(2,'NO2','Backend') INTO job(id,code,name) VALUES(3,'NO3','Internet of Things') SELECT 1 FROM dual; If you list the ID numbers of all units in the job table: select id from job; It can be seen from the above table that there are duplications between unit id serial numbers, you can use DISTINCT clause to eliminate duplicates: select distinct id from job; (17) Sorting (default positive order) Sort by single field id: select * from job order by id; ## Sort by multiple fields: such as unit serial number id In ascending order, sort by unit name in descending order: Method 1: Review knowledge pointslist and append Usage Method Two:select * from job order by id,name desc; (19) Conditional query ##SQL> select * from job where id = 2; Query the names of units with unit serial numbers greater than 1 from the job table: SQL> select id,name from job where id > 1; Composite condition query: Query all unit information whose unit serial number is greater than 1 and the unit number is 'NO3', or the unit name is 'Front End': SQL> select * from job where id > 1 and code = 'NO3' or name = 'front-end'; ##( 20) Application of operator Application of BETWEEN: Query unit serial number id is between 2 and 3 All unit information: ##SQL> select * from job where id between 2 and 3; Query unit number Code has 'NO2', 'NO3' All unit information of one of the two:
Query the information of all units whose names start with the word 'Yun': SQL> select * from job where name like 'Yun%' ';
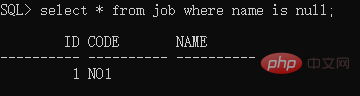
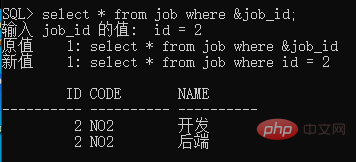
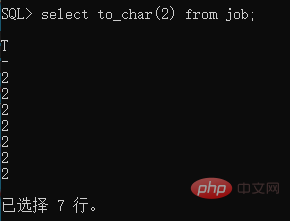
# Application of #IS NULL: Add no unit first Name information: SQL> INSERT INTO job(id,code) VALUES(1,'NO1'); Query all unit information without unit name name: (21) Single ampersand substitution variable Numeric variable input: SQL> select * from job where &job_id; Enter the value of job_id: String variable input: ##SQL> select id*10 ,code,name from job where code = '&job_code'; Enter the value of job_code: TO_NUMBER Convert string data to number: SQL> select to_number('33') from dual; SQL> select to_char(2) from job; ##SQL> select to_char(sysdate,'yy-mm-dd hh24:mi:ss') from dual;
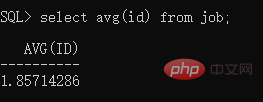
##SQL> select to_date('2005-12-25,13:25:59' ,'yyyy-mm-dd,hh24:mi:ss') from dual; ##(23 )Application of grouping function Find the average value:SQL> select avg(id) from job;
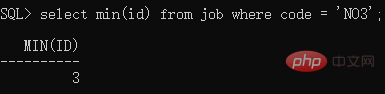
Find the minimum value: SQL> select min(id) from job where code = 'NO3';
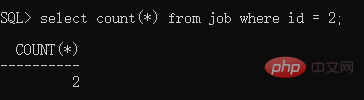
##Find the number: SQL> select count(*) from job where id = 2; ##Note: Since my job unit table is not suitable for the following query, I use other people’s pictures to show it
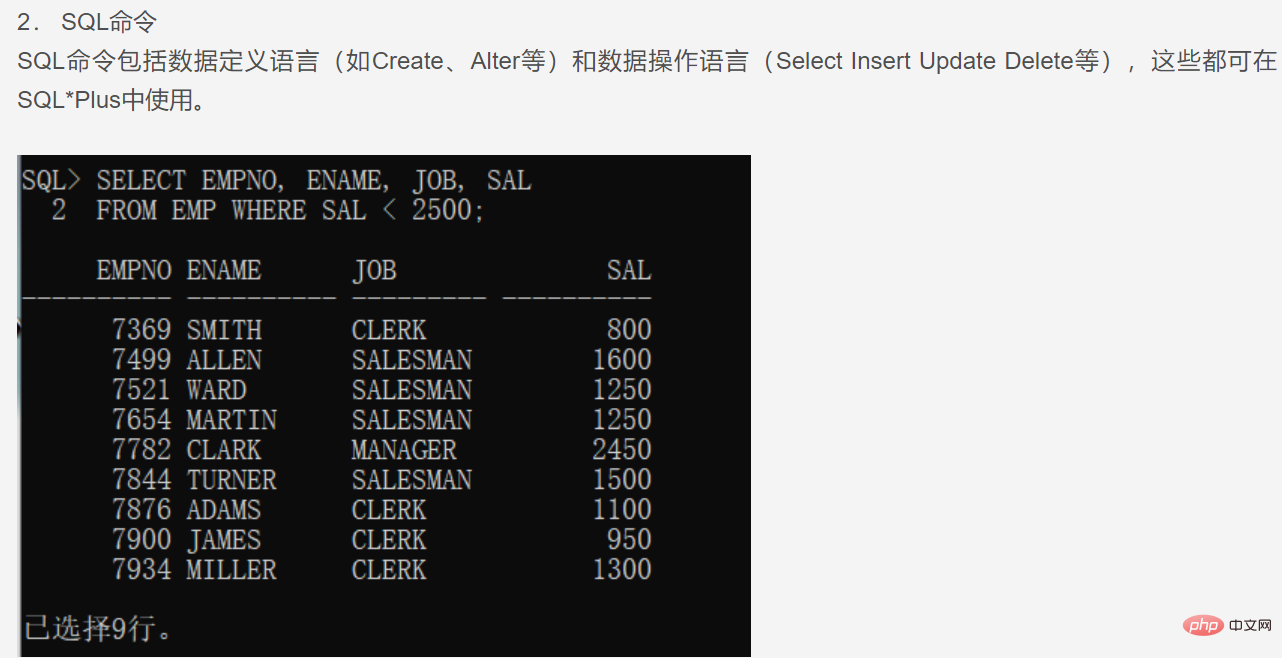
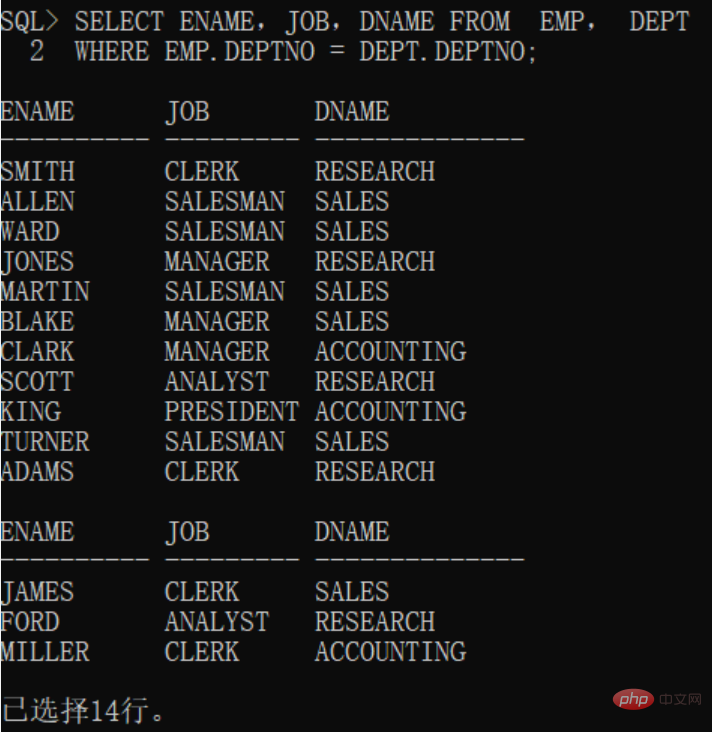
##HAVING clause: Query the departments with more than 3 people Average salary: (24) Connect Note again: My job unit table is also not suitable for the following query. I will show it again with someone else’s picture Query employees from EMP and DEPT Name, job and department name:
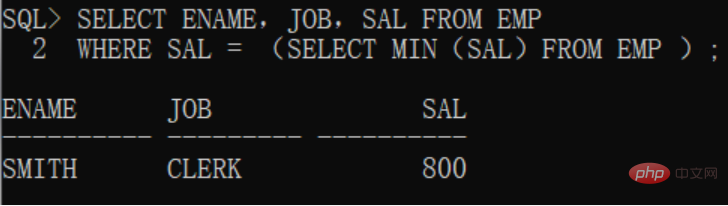
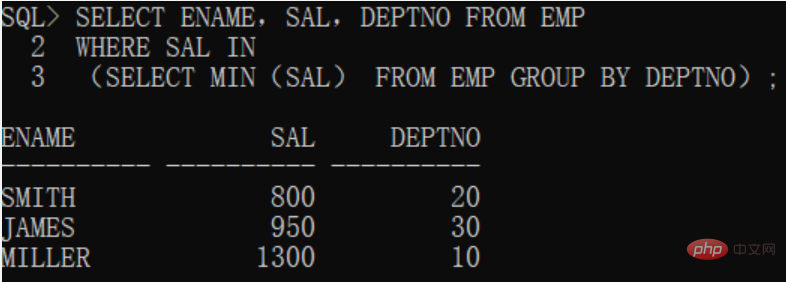
(25) Application of subquery Note again: My job unit table is also not suitable for the following query. I will show it again with someone else’s picture Query the employee with the lowest salary from EMP: Query from EMP Find the employees with the lowest salary in each department: Recommended tutorial: "Oracle Video Tutorial"
--Indicates granting dba authority to study


 ##SELECT code,name FROM job where code='NO2';
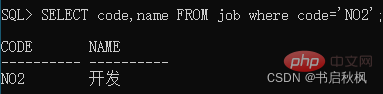 (9) Query the table created by the user:

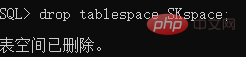
 (1) Delete the empty table space, but not Contains physical files
(2)删除非空表空间,但是不包含物理文件
drop tablespace tablespace_name including contents;
(3)删除空表空间,包含物理文件
drop tablespace tablespace_name including datafiles;
(4)删除非空表空间,包含物理文件
drop tablespace tablespace_name including contents and datafiles;
(5)如果其他表空间中的表有外键等约束关联到了本表空间中的表的字段,就要加上 CASCADE CONSTRAINTS
drop tablespace tablespace_name including contents and datafiles CASCADE CONSTRAINTS;11. 实验二ORACLE SQL*PLUS环境与查询
-- 创建数据表
CREATE TABLE dept (
 deptno NUMBER(2) CONSTRAINT PK_DEPT PRIMARY KEY,
 dname VARCHAR2(14) ,
 loc VARCHAR2(13) ) ;
CREATE TABLE emp (
 empno NUMBER(4) CONSTRAINT PK_EMP PRIMARY KEY,
 ename VARCHAR2(10),
 job VARCHAR2(9),
 mgr NUMBER(4),
 hiredate DATE,
 sal NUMBER(7,2),
 comm NUMBER(7,2),
 deptno NUMBER(2) CONSTRAINT FK_DEPTNO REFERENCES DEPT );
CREATE TABLE bonus (
 enamE VARCHAR2(10) ,
 job VARCHAR2(9)  ,
 sal NUMBER,
 comm NUMBER ) ;
CREATE TABLE salgrade (
 grade NUMBER,
 losal NUMBER,
 hisal NUMBER );

-- 插入测试数据 —— dept
INSERT INTO dept VALUES (10,'ACCOUNTING','NEW YORK');
INSERT INTO dept VALUES (20,'RESEARCH','DALLAS');
INSERT INTO dept VALUES (30,'SALES','CHICAGO');
INSERT INTO dept VALUES (40,'OPERATIONS','BOSTON');
-- 插入测试数据 —— emp
INSERT INTO emp VALUES (7369,'SMITH','CLERK',7902,to_date('17-12-1980','dd-mm-yyyy'),800,NULL,20);
INSERT INTO emp VALUES (7499,'ALLEN','SALESMAN',7698,to_date('20-2-1981','dd-mm-yyyy'),1600,300,30);
INSERT INTO emp VALUES (7521,'WARD','SALESMAN',7698,to_date('22-2-1981','dd-mm-yyyy'),1250,500,30);
INSERT INTO emp VALUES (7566,'JONES','MANAGER',7839,to_date('2-4-1981','dd-mm-yyyy'),2975,NULL,20);
INSERT INTO emp VALUES (7654,'MARTIN','SALESMAN',7698,to_date('28-9-1981','dd-mm-yyyy'),1250,1400,30);
INSERT INTO emp VALUES (7698,'BLAKE','MANAGER',7839,to_date('1-5-1981','dd-mm-yyyy'),2850,NULL,30);
INSERT INTO emp VALUES (7782,'CLARK','MANAGER',7839,to_date('9-6-1981','dd-mm-yyyy'),2450,NULL,10);
INSERT INTO emp VALUES (7788,'SCOTT','ANALYST',7566,to_date('19-04-1987','dd-mm-yyyy')-85,3000,NULL,20);
INSERT INTO emp VALUES (7839,'KING','PRESIDENT',NULL,to_date('17-11-1981','dd-mm-yyyy'),5000,NULL,10);
INSERT INTO emp VALUES (7844,'TURNER','SALESMAN',7698,to_date('8-9-1981','dd-mm-yyyy'),1500,0,30);
INSERT INTO emp VALUES (7876,'ADAMS','CLERK',7788,to_date('23-05-1987','dd-mm-yyyy')-51,1100,NULL,20);
INSERT INTO emp VALUES (7900,'JAMES','CLERK',7698,to_date('3-12-1981','dd-mm-yyyy'),950,NULL,30);
INSERT INTO emp VALUES (7902,'FORD','ANALYST',7566,to_date('3-12-1981','dd-mm-yyyy'),3000,NULL,20);
INSERT INTO emp VALUES (7934,'MILLER','CLERK',7782,to_date('23-1-1982','dd-mm-yyyy'),1300,NULL,10);
-- 插入测试数据 —— salgrade
INSERT INTO salgrade VALUES (1,700,1200);
INSERT INTO salgrade VALUES (2,1201,1400);
INSERT INTO salgrade VALUES (3,1401,2000);
INSERT INTO salgrade VALUES (4,2001,3000);
INSERT INTO salgrade VALUES (5,3001,9999);
Copy after login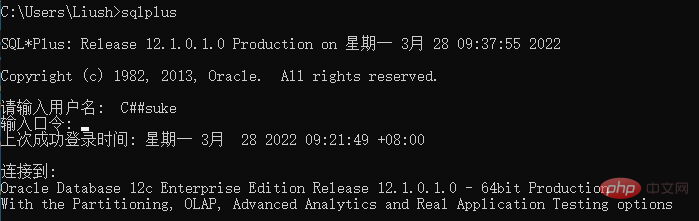


 ##(10) input to add a row of query conditions
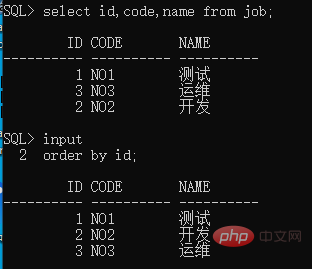
 run
run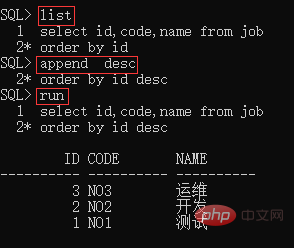
Since we have The data itself has no duplicate values, so we need to add some more duplicate data: 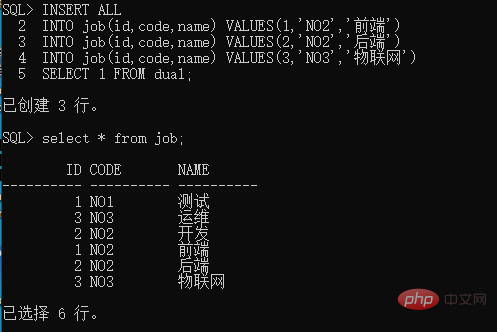
Query all unit serial numbers, unit numbers, and unit name information whose unit serial number id is 2: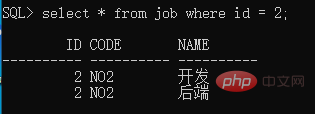
 # Application of LIKE:
 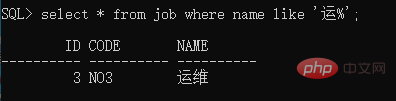 #The query name has only three characters All unit information: SQL> select * from job where name like '___';
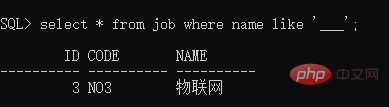
NO3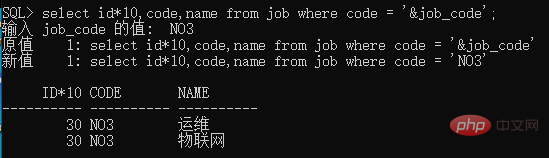
##(22) Data type conversion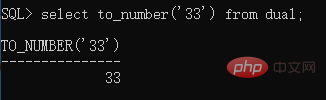
 ##TO_CHAR Convert string data to date data:
 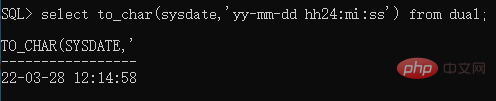 ##TO_DATE Convert string data to date data:
 GROUP BY Sentence: Find the average salary in each department:
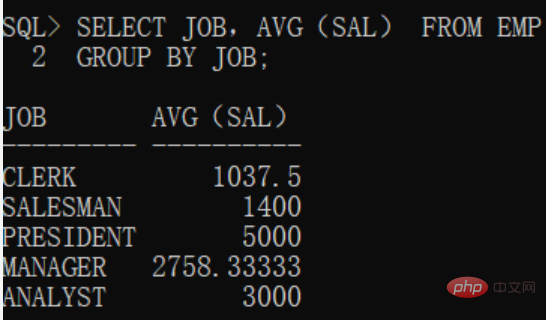

The above is the detailed content of Summary of SQLPlus operation usage in Oracle 12c. For more information, please follow other related articles on the PHP Chinese website!


![[Web front-end] Node.js quick start](https://img.php.cn/upload/course/000/000/067/662b5d34ba7c0227.png)


