

 Web Front-end
uni-app
Take you step by step to develop a uni-app calendar plug-in (and publish it)
Web Front-end
uni-app
Take you step by step to develop a uni-app calendar plug-in (and publish it)
Take you step by step to develop a uni-app calendar plug-in (and publish it)

This article will guide you step by step in developing a uni-app calendar plug-in, and introduce how the next calendar plug-in is developed from development to release. I hope it will be helpful to everyone!

I believe that when we develop various small programs or H5, or even APP, we will consider uni-app as a technology selection. Its advantage is that it can be packaged and run on multiple terminals with one click. Relatively powerful cross-platform performance. However, as long as you develop, you cannot avoid using plug-ins, so Dcloud has opened uni's plug-in market in order to facilitate developers and inject vitality into it. From now on, we can easily use some of these third-party plug-ins to meet some of the business needs we want to develop. But do you know how to make a uni plug-in? How is it published to the plug-in store?
Introduction
Friends who have developed WeChat mini programs may know that its main package is limited to 2M. When we choose plug-ins in the plug-in mall, we still need to consider them. , try to use lighter weight ones that are more convenient to use. Recently, there was a demand. A calendar appeared on the page. The function of the calendar is very simple, which is to switch the month. Some special date data on the back end can be marked with color. However, the calendar of the introduced UI library is a bit large. Taking this opportunity, in this issue, a lightweight calendar plug-in is specially designed according to the needs to share and see how it is developed and released to the plug-in mall.
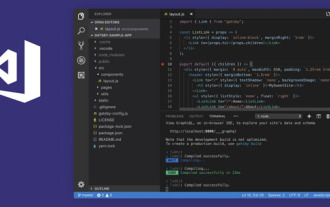
Let us first take a look at the effect after publishing and using it:
")
Development
Create file
We first open HBuilder X, create a project uni-app, and create a project named uni_modules inside folder.
Then right-click on uni_modules and select New uni_modules plug-in. Then a pop-up box will appear asking you to name the plug-in. .
The name can be arbitrary. It is best to be more semantic and have some own characteristics. For example, I named this calendar plug-in ml-calendar, ahem, it roughly means jsmask-light-calendar, which is jsmask's lightweight calendar, it's funny. Just like this, click Create and a plug-in structure will be generated, in which we will write all the logic about this plug-in.
It’s not over yet, we have to create an index.js file in it, and write in it:
import mlCalendar from "./components/ml-calendar/ml-calendar"
export default mlCalendar
Because we only involve one ui component, so export default can be pointed directly to this component. This step is critical, because if you don't write it, the plug-in will not be found by default when you reference it, and an error will be reported and the search failed.
Dependency introduction
Because we need to quickly develop a calendar this time, we cannot avoid a lot of judgments and time forms. Verification, for example, if the calendar is for the current day, it will not display Arabic numerals, but will directly display Chinese characters for today, so when generating, it is necessary to determine whether the current system time and date are on the same day. Therefore, for the convenience of using dayjs, I believe that as a front-end developer, there is no one who does not know its name. It is an extremely lightweight time library. Of course, you can also write it out by yourself. This will make the volume smaller, but it may be introduced here for convenience and more expansion.
The dayjs file here, to save trouble, I copied it from the package after node installation:
Now It can be introduced and used in the vue file. Of course, I also created a libs folder here specifically to store third-party library files.
import dayjs from '../../libs/dayjs.js'
Incoming parameters
Let’s first take a look at the interface diagram to be implemented:
export default {
    name: "ml-calendar",
    props: {
        value: {
            type: [Number, String, Date],
            default: ""
        },
        range: {
            type: Array,
            default: () => ["2021-01", ""]
        },
        rows: {
            type: Array,
            default: () => []
        },
        // ...
    },
    // ...
}We You need to think in advance what values may be transmitted, which will affect the generation of this calendar. First of all, you must know which year and month data is needed. value Here you can pass in multiple types and then let dayjs process it. Come out and get a unified date format. By default, an empty string is passed, which means the current month. After all, only by knowing the year and month can we get the number of days in the month and generate the day corresponding to the week.
range 代表时间范围,可以选择上图的左右箭头对应的上一个月和下一个月,月份不能超出范围。
而 rows 代表着你传入日期对应的标识色,如 :
let rows = [{
    date: "2022-5-21",
    color: "#5F8BFB"
}, {
    date: "2022-5-24",
    color: "#FBA75F"
}, {
    date: "2022-5-26",
    color: "#FBA75F"
}]接下来,我们就围绕着这些参数去完成这个日历编写。
遍历日期
export default {
    name: "ml-calendar",
    data() {
        return {
            year: "",
            month: "",
            date: [],
            now: "",
            first: dayjs(this.value).format("YYYY-MM")
        }
    },
    methods: {
        render() {
            this.date.length = 0;
            this.year = dayjs(this.first).year();
            this.month = dayjs(this.first).month() + 1;
            this.now = dayjs().format("YYYY-MM-DD");

            let days = [...new Array(dayjs(this.first).daysInMonth()).keys()].map(i => {
                let n = i + 1;
                let text = n  dayjs(date).diff(item.date, 'day') === 0);
                if (obj) {
                    color = obj.color
                }
                return {
                    text,
                    date,
                    color,
                    now,
                }
            })
            let week = dayjs(`${this.year}-${this.month}-1`).day();
            this.date = [...new Array(week ? (week - 1) : 6).fill(null), ...days]
        },
        // ...
    }
}首先,我们定义一个 first 变量,表示需要展示的年月,因为要变成日历,肯定日期要对应周几,这样我们通过 dayjs(this.first).daysInMonth() 方法获取当前传入月份的天数,然后进行遍历,把 rows 传入的标记色都给填充上。再通过得知算出这个月的第一天是周几,然后在前面就空出多少个数据来生成出 date 。
<template>
	<view>
        <!-- more -->
		<view>
			<view :class="{'active':item&&item.color}">
				<view></view>
				<text>{{item.now?'今日':item.text}}</text>
			</view>
		</view>
	</view>
</template>当然,通过观察,每行始终是7个等大的格子,所以样式方面我们大可以使用 grid布局 ,可以十分快速的实现效果 。
.m-calendar-month__days {
    display: grid;
    grid-template-columns: repeat(7, 1fr);
}监听更新
当修改当前日期时,或者标记数据时都要求重新渲染日历,此时用 watch 就可以轻松实现。
watch: {
    first(v) {
        this.render()
        this.$emit("change", {
            year: this.year,
            month: this.month,
        })
    },
    rows(v) {
       this.render()
    }
}别忘了,我们还要定义两个事件给开发者使用,在 first 改变是会发出来一个 change事件 ,表示当前日历的年月,发生了改变发出通知。此时接受到通知,你可以从后端走接口重新获取新值或者完成其他的业务逻辑。而另一个是 select事件 来完成点击某个日期,发出的响应,在上个步骤的遍历阶段可以看出。
使用测试
<template>
    <view>
        <ml-calendar></ml-calendar>
    </view>
</template>
<script>
export default {
    data() {
        return {
            value:"2022-05",  // 初始化显示的月份
            range: ["2021-05", ""], // 时间范围
            rows: [{   // 特殊日期标注数据,当前日期和标注颜色
                date: "2022-5-21",
                color: "#5F8BFB"
            }, {
                date: "2022-5-24",
                color: "#FBA75F"
            }, {
                date: "2022-5-26",
                color: "#FBA75F"
            }],
            // ...
        }
    },
    methods: {
        // 切换日历时触发
        changeDate(e){
            console.log(e)
        },
        // 点击日期返回当前日期对象
        selectDate(e){
            console.log(e)
        }
    }
    //...
}
</script>日历的大小可能受外界容器的影响,所以,给他加一个100%的宽,此时,我们可以看到,他浏览器和微信小程序的表现是基本一致的。
发布
编辑readme
发布之前我们当然需要在里面的 readme.md 文件写写你开发这款软件是什么?怎么用?这些至少说明白,不然别人过段时间自己都忘了怎么用了,方便别人也方便自己吧。
")
执行发布
最后我们在 uni_modules 的文件夹中,找的我们刚刚写的 ml-calendar ,在这个文件夹上点击右键选择 发布到插件市场 (此前,必须要在Dcloud注册为开发者并且实名认证)。
此时,会填写一些关于这款插件的信息:
当然,里面会涉及到这款插件的兼容情况的填写,至于到底兼不兼容各端,收不收费根据情况去选择吧。
当点击提交后,就会执行发布指令了。
此时,如果控制台会有发布后的返回信息:
如果成功则会返回一个插件地址链接,点开链接:
到这里属于你自己的一款插件就开发并发布完成了,是不是非常的容易啊。以后在开发uni-app时遇到可以抽离的,我们都可以制成插件发布出来,成就感和便利性都是满满当当~
推荐:《uniapp教程》
The above is the detailed content of Take you step by step to develop a uni-app calendar plug-in (and publish it). For more information, please follow other related articles on the PHP Chinese website!

Hot AI Tools

Undresser.AI Undress
AI-powered app for creating realistic nude photos

AI Clothes Remover
Online AI tool for removing clothes from photos.

Undress AI Tool
Undress images for free

Clothoff.io
AI clothes remover

AI Hentai Generator
Generate AI Hentai for free.

Hot Article
Hot Tools

Notepad++7.3.1
Easy-to-use and free code editor

SublimeText3 Chinese version
Chinese version, very easy to use

Zend Studio 13.0.1
Powerful PHP integrated development environment

Dreamweaver CS6
Visual web development tools

SublimeText3 Mac version
God-level code editing software (SublimeText3)
Hot Topics
 1378
1378
 52
52

 How to develop uni-app in VSCode? (Tutorial sharing)
May 13, 2022 pm 08:11 PM
How to develop uni-app in VSCode? (Tutorial sharing)
May 13, 2022 pm 08:11 PM
How to develop uni-app in VSCode? The following article will share with you a tutorial on developing uni-app in VSCode. This may be the best and most detailed tutorial. Come and take a look!
 Use uniapp to develop a simple map navigation
Jun 09, 2022 pm 07:46 PM
Use uniapp to develop a simple map navigation
Jun 09, 2022 pm 07:46 PM
How to use uniapp to develop a simple map navigation? This article will provide you with an idea for making a simple map. I hope it will be helpful to you!
 Let's talk about how to use uniapp to develop a snake game!
May 20, 2022 pm 07:56 PM
Let's talk about how to use uniapp to develop a snake game!
May 20, 2022 pm 07:56 PM
How to use uniapp to develop a snake game? The following article will take you step by step to implement the Snake game in uniapp. I hope it will be helpful to you!
 How to encapsulate uni-app vue3 interface request
May 11, 2023 pm 07:28 PM
How to encapsulate uni-app vue3 interface request
May 11, 2023 pm 07:28 PM
uni-app interface, global method encapsulation 1. Create an api file in the root directory, create api.js, baseUrl.js and http.js files in the api folder 2.baseUrl.js file code exportdefault"https://XXXX .test03.qcw800.com/api/"3.http.js file code exportfunctionhttps(opts,data){lethttpDefaultOpts={url:opts.url,data:data,method:opts.method
 Examples to explain how uniapp implements the all-select function of multi-select boxes
Jun 22, 2022 am 11:57 AM
Examples to explain how uniapp implements the all-select function of multi-select boxes
Jun 22, 2022 am 11:57 AM
This article brings you relevant knowledge about uniapp, which mainly organizes the related issues of implementing the select-all function of the multi-select box. The reason why the select-all function cannot be implemented is that when the checked field of the checkbox is dynamically modified, the status on the interface can Real-time changes, but the change event of checkbox-group cannot be triggered. Let's take a look at it. I hope it will be helpful to everyone.
 Take you step by step to develop a uni-app calendar plug-in (and publish it)
Jun 30, 2022 pm 08:13 PM
Take you step by step to develop a uni-app calendar plug-in (and publish it)
Jun 30, 2022 pm 08:13 PM
This article will guide you step by step in developing a uni-app calendar plug-in, and introduce how the next calendar plug-in is developed from development to release. I hope it will be helpful to you!
 Let's talk about uniapp's scroll-view drop-down loading
Jul 14, 2022 pm 09:07 PM
Let's talk about uniapp's scroll-view drop-down loading
Jul 14, 2022 pm 09:07 PM
How does uniapp implement scroll-view drop-down loading? The following article talks about the drop-down loading of the uniapp WeChat applet scroll-view. I hope it will be helpful to everyone!
 Detailed example of how uniapp implements phone recording function (with code)
Jan 05, 2023 pm 04:41 PM
Detailed example of how uniapp implements phone recording function (with code)
Jan 05, 2023 pm 04:41 PM
This article brings you relevant knowledge about uniapp. It mainly introduces how to use uniapp to make calls and synchronize recording. Friends who are interested should take a look at it. I hope it will be helpful to everyone.
