In the first few days, I did the development of WeChat Mini Program. For projects that separated front and back -end, if there are more sensitive data involved, we generally use the front and back end to interface encryption processing. The encryption algorithm library crypto-js is used for data encryption, and the backend uses PHP openssl_decrypt() to decrypt data for secure transmission~
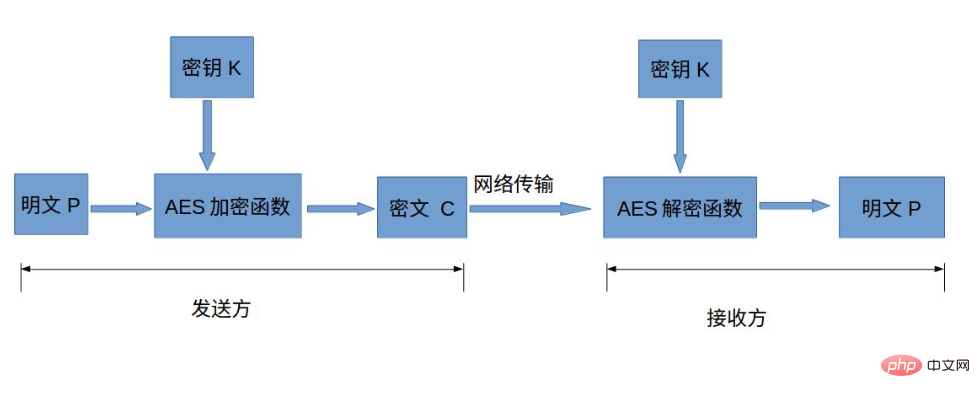
Advanced Encryption Standard (AES, Advanced Encryption Standard) is the most common symmetric encryption algorithm (WeChat The encrypted transmission of the mini program uses this encryption algorithm). The symmetric encryption algorithm means that the same key is used for encryption and decryption. The specific encryption process is as follows: The encryption algorithm class library makes it very convenient to perform the encryption and decryption operations it supports on the front end. The algorithms currently supported by crypto-js are: MD5, SHA-1, SHA-256, AES, Rabbit, MARC4, HMAC, HMAC-MD5, HMAC-SHA1, HMAC-SHA256, PBKDF2. Commonly used encryption methods include MD5 and AES.
 Crypto-JS installation method
# After the installation is successful, directly find the Crypto-JS.JS file, and introduce it to const cryptojs = reques ('. /crypto-js.js');uniapp app development front-end and back-end separation api interface security policy
npm install crypto-js
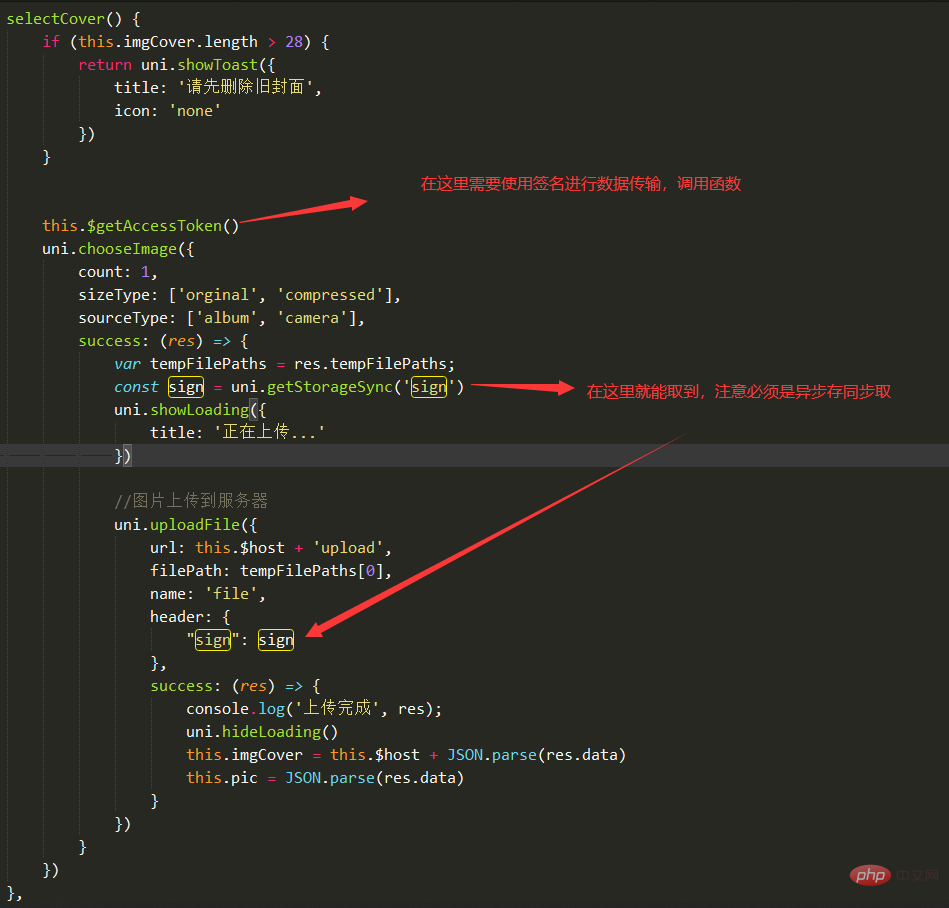
Then just call the method directly in the method you need to use, as shown in the figure:

Backend tp6 creates an intermediate controller Common.php, allowing all controllers except generating tokens to integrate this intermediate controller and detect the validity of the signature in real time
 common.php code is as follows:
const CryptoJS = require('./crypto-js.js'); //引用AES源码js const BASE_URL = "http://love.ouyangke.net/" const key = CryptoJS.enc.Utf8.parse("chloefuckityoall"); //十六位十六进制数作为密钥 const iv = CryptoJS.enc.Utf8.parse('9311019310287172'); //十六位十六进制数作为非空的初始化向量 export const getAccessToken = ()=> { uni.request({ url: BASE_URL + 'getAccessToken', method: 'GET', success: (res) => { // console.log(res); const { data } = res if (data.code == 0) { return } // console.log(data.token); var encrypted = CryptoJS.AES.encrypt(JSON.stringify({ token: data.token, create_time: data.create_time }), key, { mode: CryptoJS.mode.CBC, padding: CryptoJS.pad.Pkcs7, iv: iv }).toString() // console.log('签名完成',encrypted ); // 记录在本地 uni.setStorage({ key:"sign", data:encrypted }); }, fail: (err) => { console.log(JSON.stringify(err)); } }) }
ApiAuth.php
checkRequestAuth(); } //验证方法 /** * 检验sign的真实性 * @return bool 校验通过返回true,失败返回false * * 检查app每一次提交的数据是否合法 */ public function checkRequestAuth() { //获取header头的某个信息sign $sign = request()->header('sign'); $res = ApiAuth::checkSign($sign); if(!$res) { echo json_encode(['status'=>0,'msg'=>self::ILLEGAL_SIGN]); exit; } } }
Aes.php:
encrypt($sign_str); } // 校验sign public static function checkSign($sign) { // 解密sign 获取到的明文信息 $str = (new Aes())->decrypt($sign); if(!$str) { return false; } $arr = json_decode($str,true); $res = Cache::get($arr['token']); if(!is_array($arr) || count($arr)!=2 || !$res) { return false; } if($res) { if($arr['create_time'] != $res) { return false; }else{ //校验sign有效期 $cliff = time()-$arr['create_time']; if ( $cliff > config('app.aes.api_sign_expire_time')) { return false; } //验证通过,删除token Cache::delete($arr['token']); return true; } } } }
[Recommended learning:
javascript advanced tutorial】
The above is the detailed content of Front-end Crypto.jsAES encryption, PHP openssl_decrypt() decryption for secure data transmission. For more information, please follow other related articles on the PHP Chinese website!
 How to use rank function
 How to solve 500error
 How to turn off ics network sharing
 Introduction to virtualization software
 NTSD command usage
 The difference between Javac and Java
 The difference between JD.com's self-operated and official flagship stores
 How to remove other people's TikTok watermarks from TikTok videos


