#centostutorial column will give you a detailed introduction to CentOS installation JDK and XFTP tool usage. I hope it will help you if you need Friends help!

1. Download the corresponding version of JDK
Directly to the URL: https://www. oracle.com/technetwork/java/javase/archive-139210.html
You can choose the corresponding version to download, take jdk-8u231-linux-x64.tar.gz as an example, generally Generally speaking, Linux is a remote server, connected through SSH. However, the JDK download is on the local Windows operating system. At this time, I would like to introduce you to a useful tool - XFTP
2. XFTP download
XShell is a tool for connecting to the server [some people may be used to Putty]. XFTP is another software from NetSarang, used to transfer files graphically between two machines.

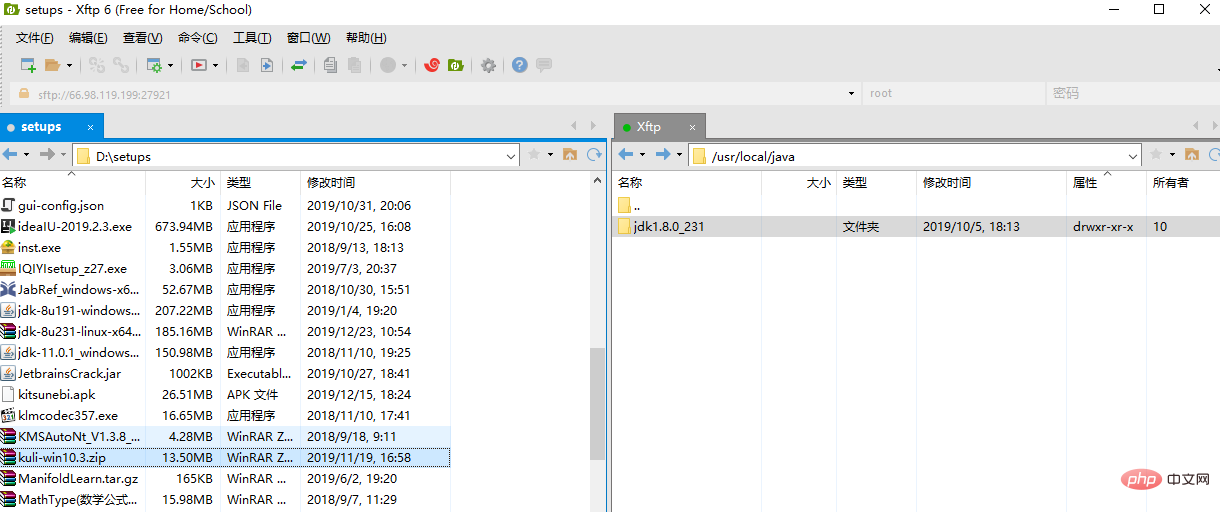
The left half of the figure represents the local file, while the right half represents the host connected by SSH. By directly double-clicking the corresponding file on one computer, you can transfer the file to the corresponding directory on another computer, and you can also remotely and visually perform operations such as creating, deleting, and even decompressing. In fact, it replaces commands such as mkdir, rm, and tar, and to a certain extent Simplifies command line operations on XShell. As for downloading, NetSarang's XShell and Xftp are free for home and school users. Just enter the corresponding email address and they will send you an email with the download address of the software. For those who can’t find it, see here: https://www.netsarang.com/zh/free-for-home-school/
3. Transfer the locally downloaded JDK through Xftp
Simple, open XFTP, go to the directory where you downloaded the JDK compressed package on the left, and go to the directory where you want to place the JDK on the right. In my case, they are D:\setups and /usr/local. /java, double-click the compressed package on the left to start the transfer.
[The screenshot was lost]
4. Unzip and configure environment variables
First enter the directory of the compressed package
cd /usr/local/java
Unzip
tar -zxvf jdk-8u231-linux-x64.tar.gz
You can choose to delete the compressed package
rm -f jdk-8u231-linux-x64.tar.gz
Open the global variable file to configure environment variables
vim /etc/profile
##Copy the following paragraph into it
#java environment
export JAVA_HOME=/usr/local/java/jdk1.8.0_201
export CLASSPATH=.:$JAVA_HOME/jre/lib/rt.jar:$JAVA_HOME/lib/dt.jar:$JAVA_HOME/lib/tools.jar
export PATH=$PATH:$JAVA_HOME/bin
Remember to modify JAVA_HOME accordingly.
5. Check
Enter
source /etc/profile
to make the environment variable configuration take effect.
java -version
If you can view it, the JDK has been installed successfully.

6. What should I do without vim?
This question is not worth opening a new article. If vim command not found appears when using the vim command, it means that the vim editor is not installed in the Linux environment. Vim requires three packages, namely:
vim-enhanced,vim-common,vim-minimal
Enter the command rpm -qa|grep vim to check how many packages are installed. If vim-enhanced is missing, install this package
yum -y install vim-enhanced
If there is no package. Install all directly
yum -y install vim*
Finally check again

##You can use the vim editor at this time.
The above is the detailed content of Detailed explanation of CentOS installation JDK and introduction to XFTP tool usage. For more information, please follow other related articles on the PHP Chinese website!