
How to set win7 files as read-only: first select the file, right-click and select the "Properties" button; then check read-only in the property setting options; then click the OK button; and finally save it .

#The operating environment of this article: Windows 7 system, Dell G3 computer.
How to set win7 files as read-only:
1. Find the file on the computer that needs to be set as read-only, either a file or a folder. . For example, the editor chose this text format file at this time.

#2. After selecting the file, you need to select the file, right-click the mouse, and click the "Properties" button in the pop-up drop-down list.

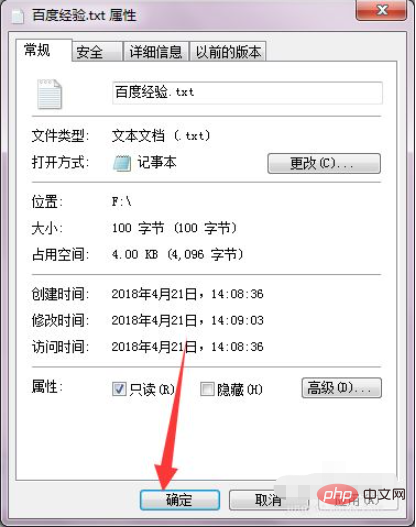
#3. After clicking Finish, you will see a file property panel pop up in the interface.

4. Observe this property panel carefully. Careful friends can observe that there is a property setting option below, including read-only and hidden, and read-only. Check later.

#5. After the check is completed, don’t forget to click the OK button below so that it will take effect. Modify the file that has been changed to read-only form.
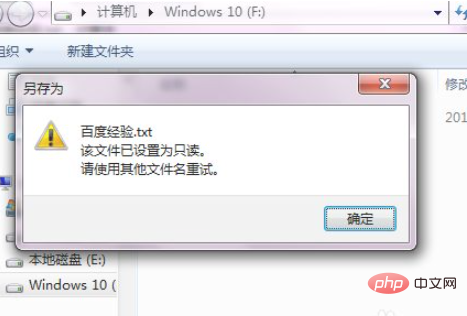
#6. After editing is completed and the file is saved, you can see that a prompt dialog box pops up on the computer, indicating that the file has been set to read-only and cannot be save.
Related free learning recommendations: php programming(Video)
The above is the detailed content of How to set win7 files to read-only. For more information, please follow other related articles on the PHP Chinese website!


