
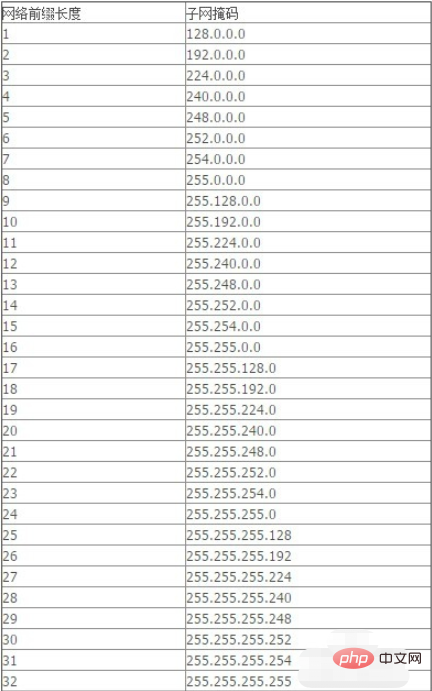
Set the subnet prefix length: 1. The network prefix length is 24, corresponding to the subnet mask [255.255.255.0]; 2. The network prefix length is 18, corresponding to the subnet mask [255.255.240.0]; 3. The network prefix length is 16, corresponding to the subnet mask [255.255.0.0].

#The operating environment of this article: Windows 7 system, Dell G3 computer.
How to set the subnet prefix length:
1. The subnet prefix length
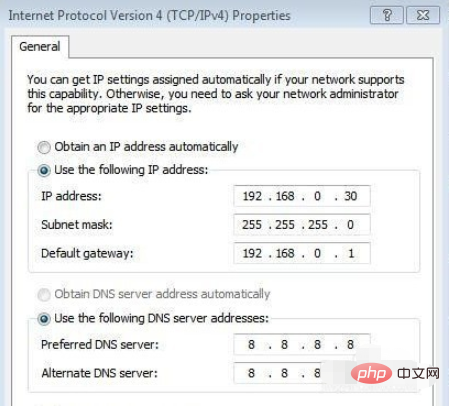
is another subnet mask you often see. One way of writing is the most common example: IP address: 192.168.1.1 Subnet mask: 255.255.255.0 If the subnet prefix length is used, it can be written as 192.168.1.1/24, which can also be said to be the "1" contained in the subnet mask. 255.255.255.0 in binary is 11111111.11111111.11111111.00000000 = a total of 24 "1"
Related video recommendations:
The above is the detailed content of How to fill in the subnet prefix length. For more information, please follow other related articles on the PHP Chinese website!
 float usage in css
 okx exchange
 How to completely delete mongodb if the installation fails
 What should I do if the ps temporary disk is full?
 What are the new features of es6
 Cost-effectiveness analysis of learning python, java and c++
 Implementation method of js barrage function
 What is the difference between mysql and mssql


