


How layui implements data binding: first introduce layui's css file and js file; then create a view to present the rendering results; then write the template and use a script tag to store the template; finally render the template .

The operating environment of this tutorial: Windows 7 system, layui version 2.5.6. This article is applicable to all brands of computers.
Recommended: "layUI Tutorial"
Laytpl based on layui implements data binding
It took me a long time to remember the login password for my garden. You can imagine how long it has been since I logged in
Text
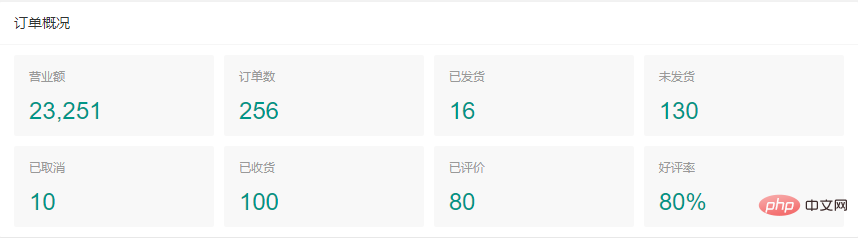
I used layui to make several management systems at the beginning, so it feels really comfortable to use. It’s easy to get started. The most commonly used ones in the management backend are form, table and pop-up window classes. The form table layer provided by layui is already very simple and easy to use. Regardless of the underlying encapsulation, I think the usage method shown to us is very simplified.In addition to the form table layer used in management, there are often some statistical data displays or content displays such as details pages. Then some used statistical data (except charts), such as text statistical data display. At this time, it is actually excellent to use layui based on laytpl to display this function.
##Write a simple data binding first
The first step: Introduce layui’s css file and js file (introduced by yourself)The second step: Create a view to present the rendering results. The code is as follows:
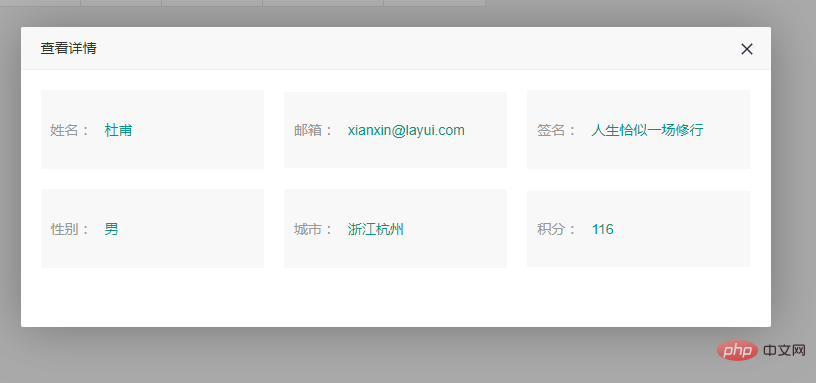
Detailed data display
If it is a table, click to view the details, you can also display the data in this way Step 1: Import The css files and js files of layui (introduced by yourself), and the css styles used in the page are written by yourself. The second step: table data display, here is the assignment of known data, replace it with your own data during development, and define a click event for the tabletable.render({ elem: '#demoTable' , cols: [[ //标题栏 { field: 'id', title: 'ID', width: 100 } , { field: 'username', title: '用户名', width: 80 } , { field: 'email', title: '邮箱', width: 180 } , { field: 'sign', title: '签名', width: 180 } , { field: 'sex', title: '性别', width: 80 } , { field: 'city', title: '城市', width: 100 } , { field: 'experience', title: '积分', minWidth: 80 } , { width: 100, align: 'center', toolbar: '#barDemo' } ]] , data: [{ "id": "10001" , "username": "杜甫" , "email": "xianxin@layui.com" , "sex": "男" , "city": "浙江杭州" , "sign": "人生恰似一场修行" , "experience": "116" , "ip": "192.168.0.8" , "logins": "108" , "joinTime": "2016-10-14" },{ "id": "10002" , "username": "李白" , "email": "xianxin@layui.com" , "sex": "男" , "city": "浙江杭州" , "sign": "人生恰似一场修行" , "experience": "12" , "ip": "192.168.0.8" , "logins": "106" , "joinTime": "2016-10-14" , "LAY_CHECKED": true }] });

table.on('tool(demoTableFilter)', function (obj) { var data = obj.data; if (obj.event === 'detail') { index = layer.open({ title: '查看详情', type: 1, move: false, content: $('.demoDetailDiv'), area: ['750px', '300px'], resize: false, scrollbar: false }); var demoDetailTpl = demoDetail.innerHTML //获取模板, , detailDiv = document.getElementById('detailDiv'); //视图 laytpl(demoDetailTpl).render(obj.data, function (html) { //渲染视图 detailDiv.innerHTML = html; }); } });
The above is the detailed content of How to implement data binding in layui. For more information, please follow other related articles on the PHP Chinese website!


![[Web front-end] Node.js quick start](https://img.php.cn/upload/course/000/000/067/662b5d34ba7c0227.png)


