
PS text bolding method: 1. You can choose thick and smooth bolding; 2. To imitate bold, click "Switch Character and Paragraph Panel" and click the first T; 3. Use [Picture Layer Style - Stroke] to complete the effect; 4. Use filters to adjust; 5. Use the edit stroke method to adjust.

How to bold ps text:
Method 1:
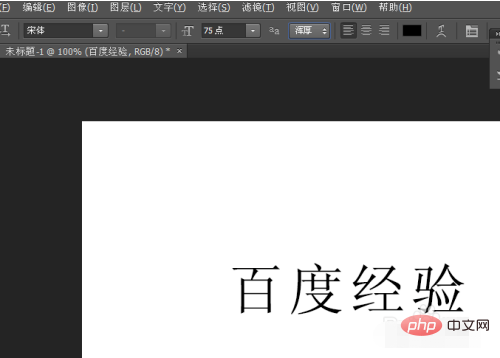
In the font settings Here, you can choose between thick and smooth. You can bold text here, but the effect is not obvious.
Method 2:
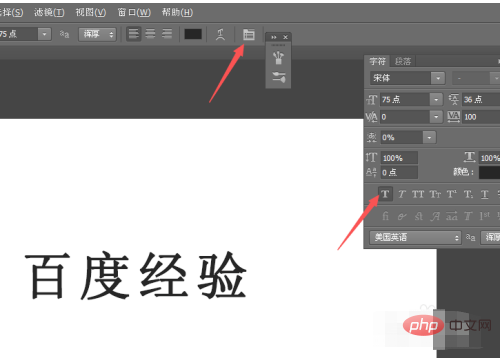
Fake bold, click "Switch Character and Paragraph Panel", and then click the first T, which is fake bold, font Just make it bold.
Method 3:
How to copy a layer. Just copy the text layer. Every time you copy it, the font will be bolder, but after a certain point, it will have no effect. The principle of this method is this: each font will have some unclear pixels at the edge. Through the overlay of multiple layers. The opacity of these unclear pixels will become higher and higher, and they will become more and more obvious. But this has an upper limit. When the opacity of all unobvious pixels is full, there is no use in overlaying.

Method 4:
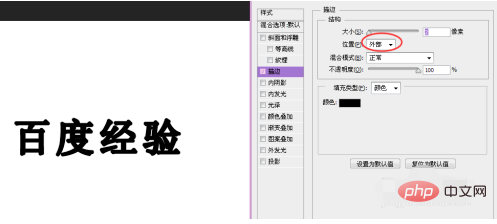
Use Layer Style - Stroke to complete the effect. Double-click the text layer and click Stroke. The size can be customized and can be made much bolder. Both the inside and outside can be used, but the outside is twice as thick as the inside and can be adjusted according to the effect.
Method 5:
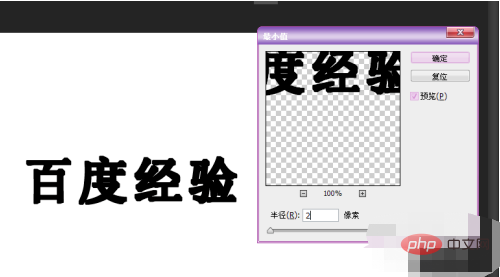
Use filters to adjust. In this method, you first need to rasterize the text layer, and then click Filter-Others-Minimum. The radius parameter is customized according to the desired text thickness, as shown in the figure
Method 6:
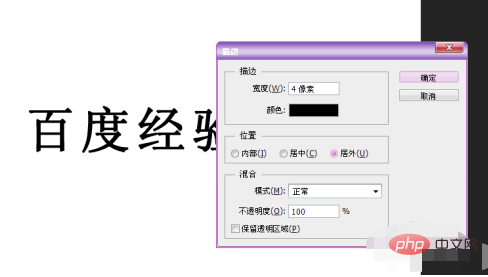
Use the edit stroke method to adjust. Also rasterize the text layer, then execute Edit-Stroke, and customize the parameters. The effect is as shown below
Related learning recommendations:PS video Tutorial
The above is the detailed content of Where is the bold text in PS?. For more information, please follow other related articles on the PHP Chinese website!