


Share a complete list of CentOS basic commands

The following is the centos introductory tutorial column to share with you a complete list of CentOS basic commands. I hope it will be helpful to friends in need!

1. Shutdown (system shutdown, restart and logout) commands
shutdown -h now Shut down the system(1)
init 0 Shut down the system(2)
telinit 0 Shut down the system(3)
shutdown -h hours:minutes & Shut down the system according to the scheduled time
shutdown -c Cancel shut down the system according to the scheduled time
shutdown -r now Restart(1)
reboot Restart(2)
logout Logout
2. Command to view system information
arch Display the processor architecture of the machine (1)
uname -m displays the processor architecture of the machine (2)
uname -r displays the kernel version being used
dmidecode - q Display hardware system components - (SMBIOS/DMI)
hdparm -i /dev/hda List the architectural characteristics of a disk
hdparm - tT /dev/sda Perform a test read operation on the disk
cat /proc/cpuinfo Display CPU info information
cat / proc/interrupts Display interrupts
cat /proc/meminfo Verify memory usage
cat /proc/swaps Display which swaps are used
cat /proc/version displays the kernel version
cat /proc/net/dev displays network adapter and statistics
cat /proc/mounts Display mounted file systems
lspci -tv List PCI devices
lsusb -tv display USB device
date Display the system date
cal 2007 Display the calendar for 2007
date 041217002007.00 Set date and time - month, day, hour, minute, year.second
clock -w Save time modification to BIOS
3 .File and directory operation commands
cd /home Enter the '/ home' directory'
cd .. Return to the previous level Directory
cd ../.. Return to the upper two-level directory
cd Enter the personal home directory
cd ~user1 Enter the personal home directory
cd - Return to the last directory
pwd Display working path
ls View the files in the directory
ls -F View the files in the directory
ls - l Display details of files and directories
ls -a Display hidden files
mkdir dir1 Create a directory called 'dir1''
mkdir dir1 dir2 Create two directories at the same time
mkdir -p /tmp/dir1/dir2 Create a directory tree
rm -f file1 Delete a file called 'file1'
rmdir dir1 Delete a directory called 'dir1'
rm -rf dir1 Delete a directory called 'dir1' and delete its contents at the same time
rm -rf dir1 dir2 Delete two directories and their contents at the same time
mv dir1 new_dir Rename/move a directory
cp file1 file2 Copy a file
cp dir /* . Copy all files in a directory to the current working directory
cp -a /tmp/dir1 . Copy a directory to the current working directory
cp -a dir1 dir2 Copy a directory
ln -s file1 lnk1 Create a soft link pointing to a file or directory
ln file1 lnk1 Create a physical link to a file or directory
touch file1 Create a file
4. File search command
find / -name file1 Enter the root file system starting from '/' to search for files and directories
find / -user user1 Search for files and directories belonging to user 'user1'
find /home/user1 -name \*.bin Search for files and directories with Files ending with '.bin'
find /usr/bin -type f -atime 100 Search for executable files that have not been used in the past 100 days
find /usr/bin -type f -mtime -10 Search for files that were created or modified within 10 days
locate \*.ps Find files ending with '.ps' file at the end - run the 'updatedb' command first
whereis file displays the location of a binary file, source code or man
which file displays a Full path to binary or executable file
5. View file contents
cat file1 from the first Bytes start to view the contents of the file in the forward direction
tac file1 View the contents of a file in the reverse direction starting from the last line
more file1 View one Contents of long files
less file1 Similar to the 'more' command, but it allows reverse operations on the file as well as forward operations
head -2 file1 View the first two lines of a file
tail -2 file1 View the last two lines of a file 5. Mount command
mount /dev/hda2 /mnt/hda2 Mount a disk called hda2 (Note: Make sure the directory '/mnt/hda2' already exists)
umount /dev/hda2 Uninstall A disk called hda2 (exit from the mount point '/mnt/hda2' first)
fuser -km /mnt/hda2 Forced unmount when the device is busy
umount -n /mnt/hda2 Runs the unmount operation without writing the /etc/mtab file (very useful when the file is read-only or when the disk is full)
mount /dev/fd0 /mnt/floppy Mount a floppy disk
mount /dev/cdrom /mnt/cdrom Mount a CD
mount /dev/hdc /mnt/cdrecorder Mount a cdrw or dvdrom
mount /dev/hdb /mnt/cdrecorder Mount a cdrw or dvdrom
mount -o loop file.iso /mnt/cdrom Mount a file or ISO image file
mount -t vfat /dev/hda5 /mnt/hda5 mount Mount a Windows FAT32 file system
mount /dev/sda1 /mnt/usbdisk Mount a USB disk or flash device
mount - t smbfs -o username=user,password=pass //WinClient/share /mnt/share Mount a windows network share
6. Disk space operation commands
df -h Display the mounted partition list
ls -lSr |more Arrange files and directories by size
du -sh dir1 Estimate the used disk space of directory 'dir1'
du -sk * | sort -rn Sort by capacity Display the size of files and directories
7. User and group related commands
groupadd group_name Create a new user Group
groupdel group_name Delete a user group
groupmod -n new_group_name old_group_name Rename a user group
useradd -c "Name Surname " -g admin -d /home/user1 -s /bin/bash user1 Create a user belonging to the "admin" user group
useradd user1 Create a new user
userdel -r user1 Delete a user ('-r' also deletes the home directory)
passwd user1 Modify a user User's password (only allowed to be executed by root)
##chage -E 2005-12-31 user1 Set the expiration period of the user password
##ls - lh show permissionchmod 777 directory1 Sets the permissions of the directory owner (u), group (g) and others (o) to read (r), write (w) and execute (x) chmod 700 directory1 Delete the read, write and execute permissions of the group (g) and others (o) on the directory chown user1 file1 Change the ownership of a file The human attribute is use1. chown -R user1 directory1 changes the owner attribute of a directory and simultaneously changes the attributes of all files in the directory to be owned by use1 chgrp group1 file1 changes the group of the file to group1 chown user1:group1 file1 changes the owner and group attributes of a file. The group it belongs to is group1 and the user is use1. find / -perm -u s List all files controlled by SUID in a system chmod u s /bin/file1 Set up a binary File's SUID bit - The user running the file is also granted the same permissions as the owner chmod u-s /bin/file1 Disables the SUID bit of a binary file chmod g s /home/public Set the SGID bit of a directory - similar to SUID, but this is for the directory chmod g-s /home/public Disable a directory SGID bit chmod o t /home/public Set the STIKY bit on a file - only allows legitimate owners to delete the file chmod o-t /home /public disables the STIKY bit of a directory 8. Commands for packaging and decompressing files bunzip2 file1.bz2 Unzip a file called 'file1.bz2' bzip2 file1 Compress a file called 'file1' gunzip file1.gz Unzip a A file called 'file1.gz' ##gzip file1 Compress a file called 'file1' gzip -9 file1 Maximum compression rar a file1.rar test_file Create a package called 'file1.rar' rar a file1.rar file1 file2 dir1 Package 'file1 ', 'file2' and directory 'dir1' rar x file1.rar Unpack the rar package unrar x file1.rar Unpack the rar package tar -cvf archive.tar file1 Create a non-compressed tar package tar -cvf archive.tar file1 file2 dir1 Create a file containing 'file1', 'file2' 'dir1' package tar -tf archive.tar displays the contents of a package tar -xvf archive.tar releases a package tar -xvf archive.tar -C /tmp releases the compressed package to the /tmp directory (-c is the specified directory) tar -cvfj archive.tar.bz2 dir1 Create a compressed package in bzip2 format tar -xvfj archive.tar.bz2 Decompress a compressed package in bzip2 format Package tar -cvfz archive.tar.gz dir1 Create a compressed package in gzip format tar -xvfz archive.tar.gz Unzip A compressed package in gzip format zip file1.zip file1 Create a compressed package in zip format zip -r file1.zip file1 file2 dir1 Compress several files and directories into a zip format compressed package at the same time unzip file1.zip Decompress a zip format compressed package 9. Commands about RPM packages rpm -ivh package.rpm Install an rpm package rpm -ivh --nodeeps package.rpm Install an rpm package and ignore dependency warnings rpm -U package.rpm Update an rpm package without changing its configuration file rpm -F package.rpm Update an rpm package that has been installed rpm -e package_name.rpm Delete an rpm package rpm -qa displays all installed rpm packages in the system rpm -qa | grep httpd displays all rpm packages whose names contain the word "httpd" rpm -qi package_name Get special information about an installed package rpm -ql package_name displays a list of files provided by an installed rpm package ##rpm -qc package_name displays a list of configuration files provided by an installed rpm package rpm -q package_name --whatrequires Displays a list of dependencies with an rpm package rpm -q package_name --whatprovides Displays an rpm package The volume occupied by the package rpm -q package_name --scripts Displays the scripts executed during installation/removal l rpm -qf /etc/httpd/conf/httpd.conf Confirm which rpm package the given file is provided by rpm --import /media/cdrom/ RPM-GPG-KEY Import the public key digital certificate rpm --checksig package.rpm Confirm the integrity of an rpm package rpm - qa gpg-pubkey Confirm the integrity of all installed rpm packages rpm -V package_name Check file size, license, type, owner, group, MD5 check and last modification time rpm -Va Check all installed rpm packages in the system - use with caution rpm -Vp package.rpm Confirm that an rpm package is still available Not installed rpm2cpio package.rpm | cpio --extract --make-directories *bin* Run executable file from an rpm package rpm -ivh /usr/src/redhat/RPMS/`arch`/package.rpm Install a built package from an rpm source code rpmbuild --rebuild package_name.src. rpm Build an rpm package from an rpm source code
10.YUM package upgrader yum localinstall package_name.rpm will install an rpm package, using your own software repository to resolve all dependencies for you yum update package_name.rpm Update all rpm packages installed in the current system yum update package_name Update an rpm package yum remove package_name Delete an rpm package yum list List all packages installed in the current system yum search package_name Search for software packages in the rpm repository yum clean packages Clean rpm cache and delete downloaded packages yum clean headers Delete all header files yum clean all Delete all cached packages and header files
The above is the detailed content of Share a complete list of CentOS basic commands. For more information, please follow other related articles on the PHP Chinese website!

Hot AI Tools

Undress AI Tool
Undress images for free

Undresser.AI Undress
AI-powered app for creating realistic nude photos

AI Clothes Remover
Online AI tool for removing clothes from photos.

Clothoff.io
AI clothes remover

Video Face Swap
Swap faces in any video effortlessly with our completely free AI face swap tool!

Hot Article
Hot Tools

Notepad++7.3.1
Easy-to-use and free code editor

SublimeText3 Chinese version
Chinese version, very easy to use

Zend Studio 13.0.1
Powerful PHP integrated development environment

Dreamweaver CS6
Visual web development tools

SublimeText3 Mac version
God-level code editing software (SublimeText3)


 .NET Core Quick Start Tutorial 1. The beginning: Talking about .NET Core
May 07, 2025 pm 04:54 PM
.NET Core Quick Start Tutorial 1. The beginning: Talking about .NET Core
May 07, 2025 pm 04:54 PM
1. The Origin of .NETCore When talking about .NETCore, we must not mention its predecessor .NET. Java was in the limelight at that time, and Microsoft also favored Java. The Java virtual machine on the Windows platform was developed by Microsoft based on JVM standards. It is said to be the best performance Java virtual machine at that time. However, Microsoft has its own little abacus, trying to bundle Java with the Windows platform and add some Windows-specific features. Sun's dissatisfaction with this led to a breakdown of the relationship between the two parties, and Microsoft then launched .NET. .NET has borrowed many features of Java since its inception and gradually surpassed Java in language features and form development. Java in version 1.6
 Hadoop pseudo-distributed cluster construction
May 07, 2025 pm 04:45 PM
Hadoop pseudo-distributed cluster construction
May 07, 2025 pm 04:45 PM
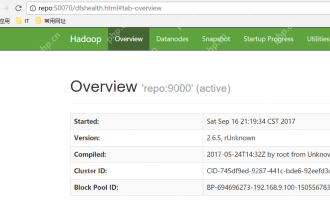
Software preparation I am using a virtual machine with CentOS-6.6, with the host name repo. Refer to the steps to install a Linux virtual machine in Windows, I installed JDK in that virtual machine, refer to the guide to installing JDK in Linux. In addition, the virtual machine is configured with a key-free login itself, and the settings for configuring key-free login between each virtual machine are referenced. The download address of Hadoop installation package is: https://mirrors.aliyun.com/apache/hadoop/common/. I am using hadoop 2.6.5 version. Upload the Hadoop installation package to the server and unzip [root@repo~]#tarzxv
 Postman Integrated Application on CentOS
May 19, 2025 pm 08:00 PM
Postman Integrated Application on CentOS
May 19, 2025 pm 08:00 PM
Integrating Postman applications on CentOS can be achieved through a variety of methods. The following are the detailed steps and suggestions: Install Postman by downloading the installation package to download Postman's Linux version installation package: Visit Postman's official website and select the version suitable for Linux to download. Unzip the installation package: Use the following command to unzip the installation package to the specified directory, for example /opt: sudotar-xzfpostman-linux-x64-xx.xx.xx.tar.gz-C/opt Please note that "postman-linux-x64-xx.xx.xx.tar.gz" is replaced by the file name you actually downloaded. Create symbols
 CentOS: What Led to the Decision to End Support
Apr 23, 2025 am 12:10 AM
CentOS: What Led to the Decision to End Support
Apr 23, 2025 am 12:10 AM
RedHatendedsupportforCentOStoshifttowardsacommerciallyfocusedmodelwithCentOSStream.1)CentOStransitionedtoCentOSStreamforRHELdevelopment.2)ThisencourageduserstomovetoRHEL.3)AlternativeslikeAlmaLinux,RockyLinux,andOracleLinuxemergedasreplacements.
 How to optimize HDFS configuration on CentOS
May 19, 2025 pm 08:18 PM
How to optimize HDFS configuration on CentOS
May 19, 2025 pm 08:18 PM
Optimizing the performance of Hadoop distributed file system (HDFS) on CentOS systems can be achieved through a variety of methods, including adjusting system kernel parameters, optimizing HDFS configuration files, and improving hardware resources. The following are detailed optimization steps and suggestions: Adjust the system kernel parameters to increase the limit on the number of files opened by a single process: Use the ulimit-n65535 command to temporarily adjust. If it needs to take effect permanently, please edit the /etc/security/limits.conf and /etc/pam.d/login files. Optimize TCP parameters: Edit /etc/sysctl.conf file, add or modify the following content: net.ipv4.tcp_tw
 CentOS: A Community-Driven Linux Distribution
Apr 17, 2025 am 12:03 AM
CentOS: A Community-Driven Linux Distribution
Apr 17, 2025 am 12:03 AM
CentOS is a stable, enterprise-grade Linux distribution suitable for server and enterprise environments. 1) It is based on RedHatEnterpriseLinux and provides a free, open source and compatible operating system. 2) CentOS uses the Yum package management system to simplify software installation and updates. 3) Support advanced automation management, such as using Ansible. 4) Common errors include package dependency and service startup issues, which can be solved through log files. 5) Performance optimization suggestions include the use of lightweight software, regular cleaning of the system and optimization of kernel parameters.
 CentOS: Security, Stability, and Performance
Apr 21, 2025 am 12:11 AM
CentOS: Security, Stability, and Performance
Apr 21, 2025 am 12:11 AM
CentOS is the first choice for server and enterprise environments for its superior security, stability and performance. 1) Security provides forced access control through SELinux to improve system security. 2) Stability is supported by the LTS version for up to 10 years to ensure the stability of the system. 3) Performance significantly improves system response speed and resource utilization by optimizing kernel and system configuration.
 How to customize the interface of GitLab on CentOS
May 19, 2025 pm 08:03 PM
How to customize the interface of GitLab on CentOS
May 19, 2025 pm 08:03 PM
Customize the GitLab interface on CentOS system to easily create a personalized workspace! The following steps will guide you how to change the interface language and customize the homepage style: Interface language settings Log in to GitLab: Access your GitLab server address in your browser and log in. Access settings: Click on your user avatar in the upper right corner and select "Settings". Go to User Interface Settings: In the menu on the left, find "Preferences" and select "UserInterface". Select language: In the "User Interface" drop-down menu, select "Chinese(Simplified)",
