

Preface
This article is for Spring SpringMVC Mybatis background development The project integration of the framework (based on maven) and the vue front-end framework (based on webpack) is introduced. The construction of separate ssm and vue projects is not the focus of this article, but focuses on the key points of the interaction between the two.
Related learning recommendations: javascript video tutorial
SSM
## Project structure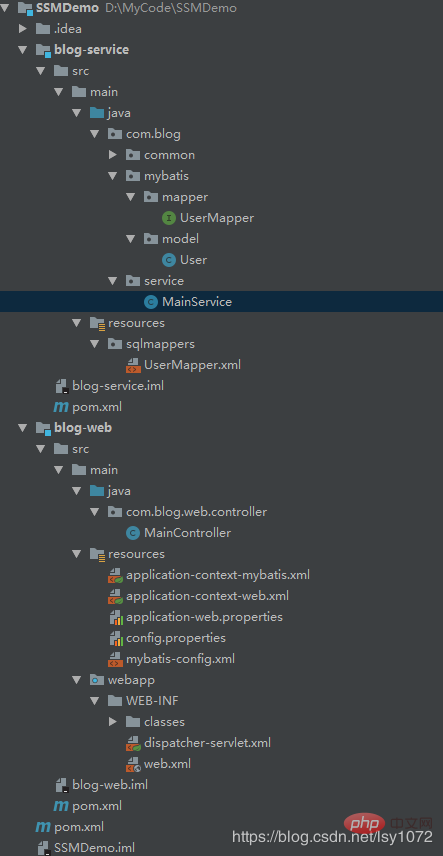
The project consists of two sub-projects: service and web. Web depends on service. Web is mainly the content of the control layer, and service corresponds to service layer, and the MyBatis content is placed in the service project, and the spring configuration file is placed in the web project. Separating the control layer and service layer into two sub-projects is beneficial to project maintenance.
Vue
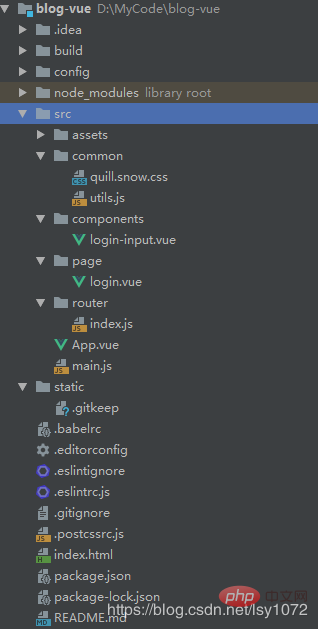
##2. As you can see, this is a standard build using webpack The vue project
Front-end and back-end interaction (key points)The key point is that the front-end and back-end interaction is nothing more than the front-end being able to access the back-end interface, and Successfully received backend return data. During the configuration process, you need to pay attention to two points. One is configuring the backend interface address, and the other is cross-domain issues.
Configure the back-end interface address In vue, axios is used to send ajax requests and interact with the background. We need main.js Configure axios default access address.
Add
// 引用axios,并设置基础URL为后端服务api地址
var axios = require('axios')
axios.defaults.baseURL = "http://127.0.0.1:8080/blog/api"
//设置全局,每次ajax请求携带cookies
// axios.defaults.withCredentials = true
// 将API方法绑定到全局
Vue.prototype.$axios = axios
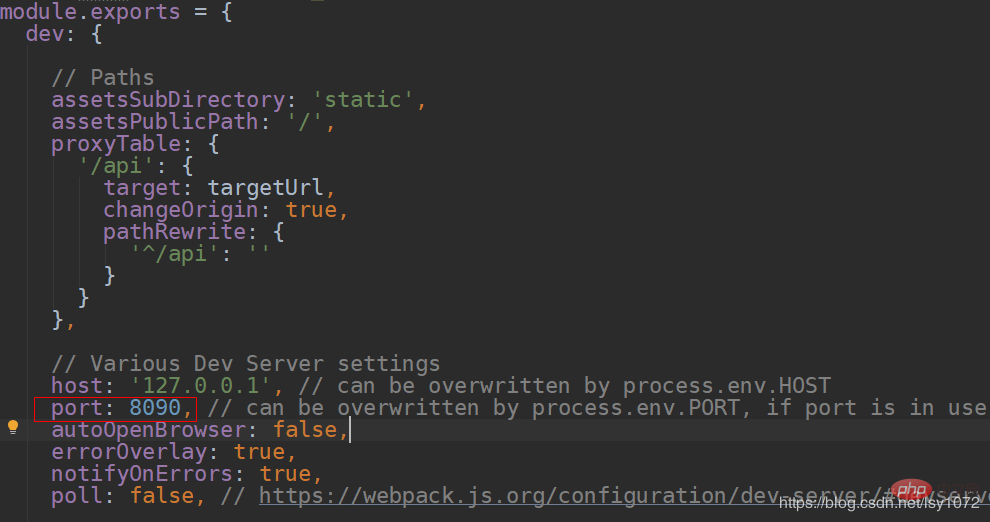
to the src/main.js file. We configure http://127.0.0.1:8080/blog/api as the default request address for all axios, and the background port number is 8080, and the default port number of the vue project is also 8080, so you need to modify the default access port number in the vue project to 8090 (it does not conflict with the background port).
Modify in config/index.js
Test code:
created:function(){
  var data = Qs.stringify({});
  this.$axios
  .post('/check', data)
  .then(successResponse => {
   this.responseResult = JSON.stringify(successResponse.data)
   if (successResponse.data.code === 200) {
    this.$notify({
     title: '成功',
     message: successResponse.data.message,
     type: 'success'
    });
   }else{
    this.$notify({
     title:"失败",
     message:successResponse.data.message,
     type:'error'
    })
   }
  })
  .catch(failResponse => {})
}After configuration, run the project It was found that the front end was still unable to access the backend interface, and the following error occurred. It can be seen that there is a cross-domain problem.

Solving cross-domain issuesFor cross-domain issues, SpringMVC provides annotations@ CrossOrigin handles this problem (if you want to know what @CrossOrigin does, please go to Spring @CrossOrigin annotation principle). You only need to add @CrossOrigin to the corresponding interface (it can also be set through global configuration, which will not be introduced here) .
MainController.java:
package com.blog.web.controller;


import com.blog.common.Result;
import org.apache.log4j.Logger;
import org.springframework.stereotype.Controller;
import org.springframework.web.bind.annotation.CrossOrigin;
import org.springframework.web.bind.annotation.RequestMapping;
import org.springframework.web.bind.annotation.RequestMethod;
import org.springframework.web.bind.annotation.ResponseBody;


@Controller
@RequestMapping("/blog/api")
public class MainController {

  private Logger logger = Logger.getLogger ( MainController.class );
  @RequestMapping ( value = "/check", method = RequestMethod.POST )
  @ResponseBody
  @CrossOrigin
  public Result check () {
    logger.info("MainController run");
    Result result = new Result();
    result.setMessage("SSM vue前后端框架搭建成功");
    return result;
  }

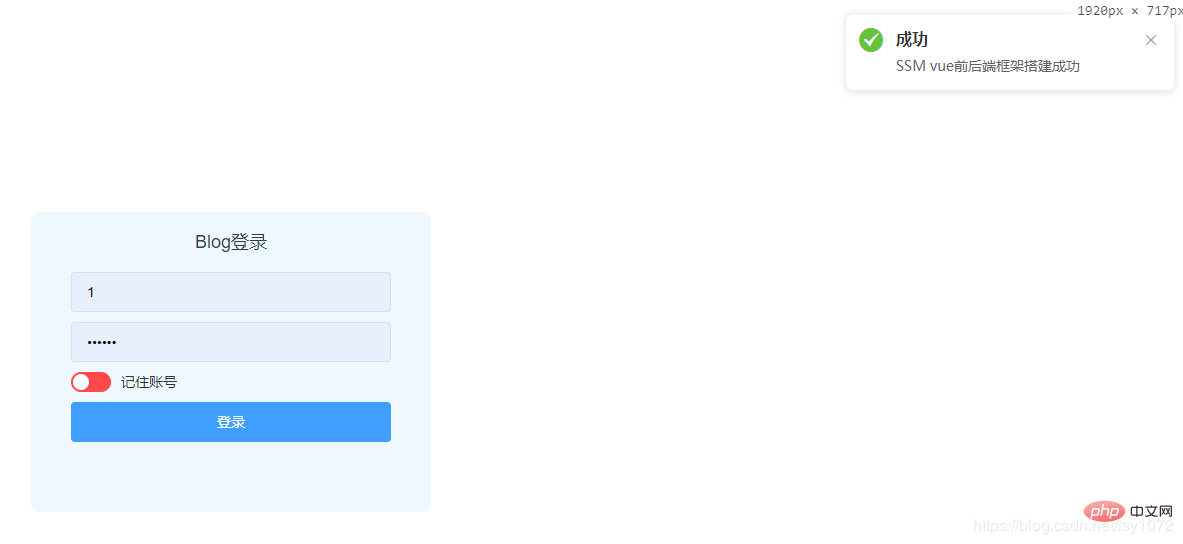
}Restart the project and return the correct results.
 Source code
Backend code: SSMDemo
Front-end code: VueDemo
This concludes this article about ssm vue before and after This concludes the article on the integration and implementation of the end-side separation framework (source code attached).
The above is the detailed content of Javascript's ssm+vue front-end and back-end separation framework integration implementation. For more information, please follow other related articles on the PHP Chinese website!