

In vscode, click the spider button

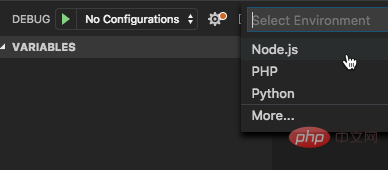
to see the debug sidebar, and then add the configuration

Select the environment
You will see the launch.json file.
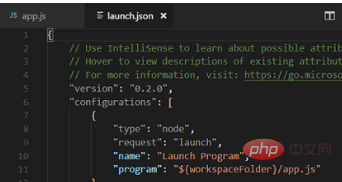
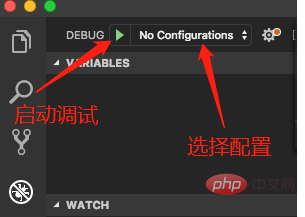
When starting, select the corresponding configuration, and then click the green triangle pointing to the right
launch mode and attach mode
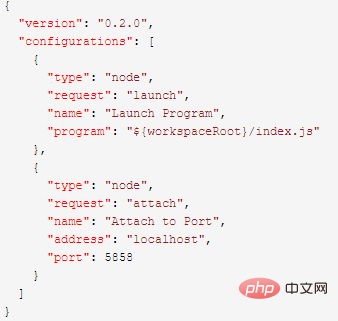
When request is launch, it is launch mode. This is the program started from vscode. If it is debugging, it will always be in debugging mode. The attach mode is to connect to an already started service. For example, if you have started the project outside and suddenly need to debug it, you do not need to close the started project and restart it in vscode. As long as you start it in attach mode, vscode can connect to the already started service. When debugging is over, just disconnect, which is obviously more convenient than launch.
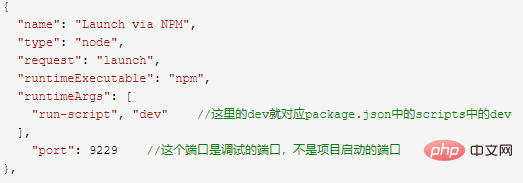
Use npm to start in debug
Many times we write long startup commands and configurations in the scripts of package.json, such as:

We want vscode to start and debug using npm, which requires the following configuration:
Use nodemon to start in debug
Only use npm to start. Although nodemon is used in the dev command, the program can be restarted normally. However, after restarting, debugging is disconnected. So you need to let vscode use nodemon to start the project.
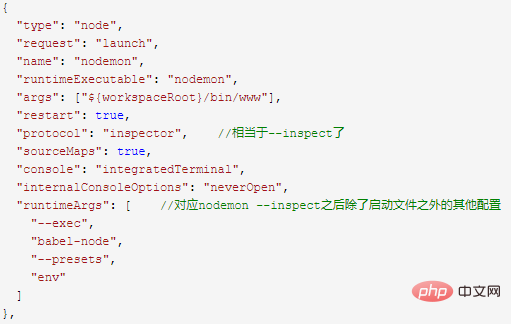
Pay attention to the runtimeArgs here. If these configurations are written in package.json, it will be like this
nodemon --inspect --exec babel-node --presets env ./bin/www
This is very convenient, the project can Normal restart, the debugging function will be enabled every time you restart.
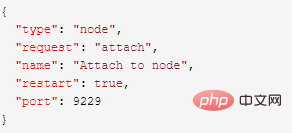
But what should we do if we don’t want to enable the debugging function all the time? This requires using the attach mode mentioned above.
Use the following command to start the project normally
nodemon --inspect --exec babel-node --presets env ./bin/www
When we want to debug, run the following configuration in the debug of vscode
Related recommendations: vscode tutorial
The above is the detailed content of How to debug node.js in vscode. For more information, please follow other related articles on the PHP Chinese website!


