Configuration server
1. Connection configuration
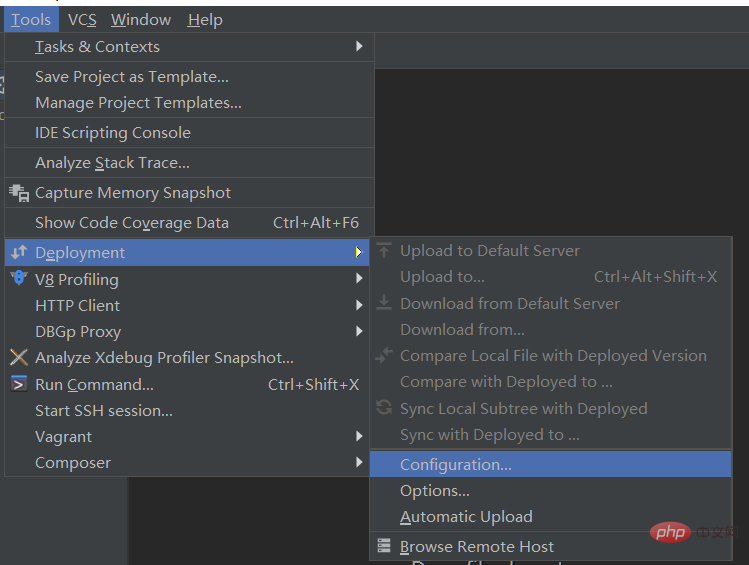
Open the menu bar Tools -> Deployment -> Configuration (recommended learning: phpstorm)

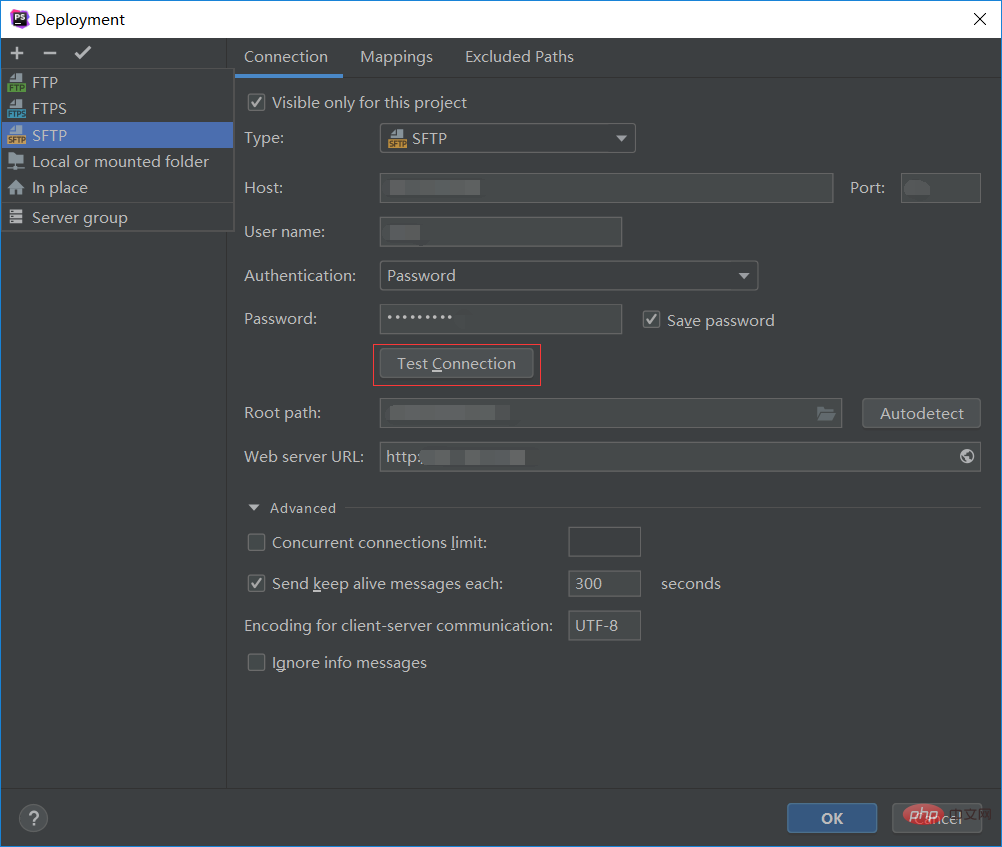
##Click to select SFTP and fill in the relevant Server information:
Type:连接类型,这里选择SFTP
Host:服务器ip地址
Port:端口,默认22
User name:登录账户名,例如:root
Authentication:验证登录方式,选择password密码
Copy after login
After filling in, you can click Test Connection to test whether the connection is successful. If successful, you will be prompted Successful
Root path: Select the root path when accessing the server. The starting point is the server root path. , files other than this configuration will no longer be accessible through PHPstorm
Web server URL: The address when connecting, automatically filled in, ignore it
 2. Address configuration
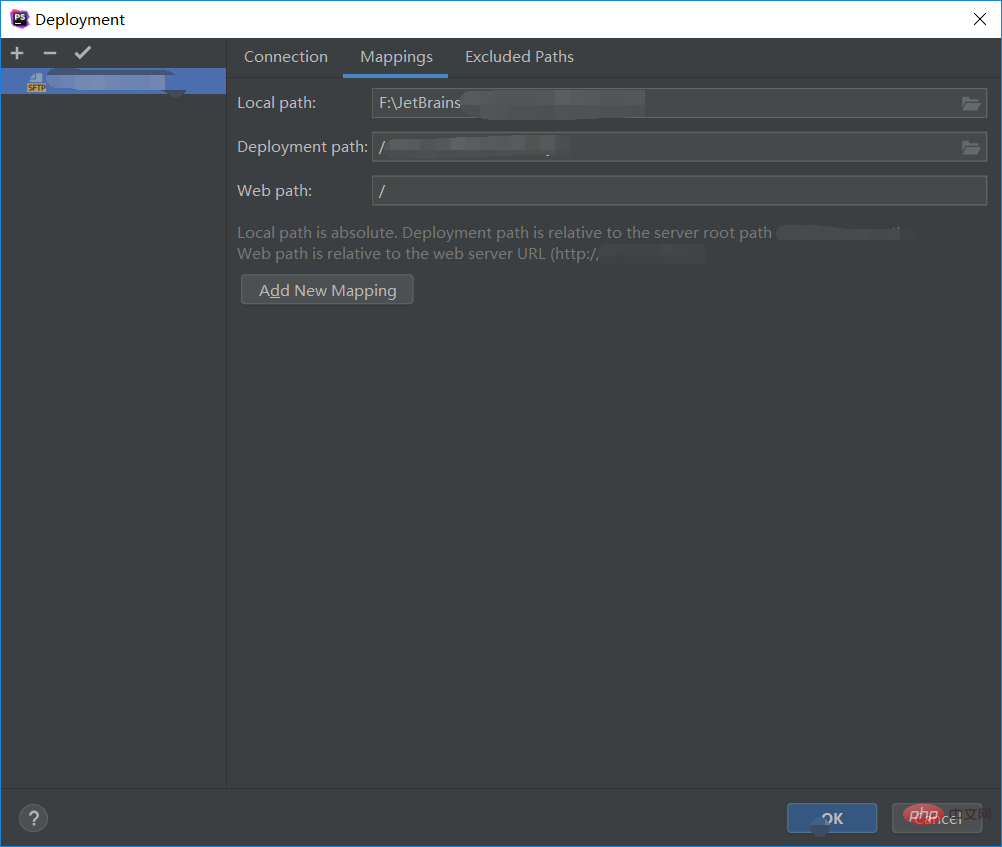
Click the Mapping option at the top of this page and fill in the relevant configuration
Local path: Select the local warehouse path to be synchronized with the server
Deployment path: Select the warehouse path of the synchronization server , the starting point is the path just configured in the Root path. There can be multiple different Mapping paths under the Root path. Click the Add New Mapping button to add
Web path: The path of the Web on the server
Click OK to save
The above is the detailed content of PHPstorm configure synchronization server files. For more information, please follow other related articles on the PHP Chinese website!


 2. Address configuration