
PHP is a scripting language used to write dynamic web pages and is suitable for web development. The first step to get in touch with PHP is to build a development environment platform that can execute PHP programs. The configuration of the PhpStorm PhpStudy development environment is chosen here.

PhpStorm is specially used to write code. PhpStudy works with PhpStorm to compile and run PHP programs. PhpStudy is actually a program integration package for PHP debugging environment. The program integration package includes the latest Apache PHP MySQL phpMyAdmin ZendOptimizer, which can be installed at one time and is convenient and practical. (Recommended study: phpstorm detailed explanation)
PhpStorm and PhpStudy can be downloaded directly from their official websites to download the latest versions and install them yourself. The focus here is to take a look at how these two development environments match up, that is, how to connect them together.
Open PhpStorm, click to create an empty project, fill in the project name, project storage address, etc. in the input box, as shown in the figure below (the address of the project storage in the figure below is shown in the PHP folder in the F drive) untitled folder):
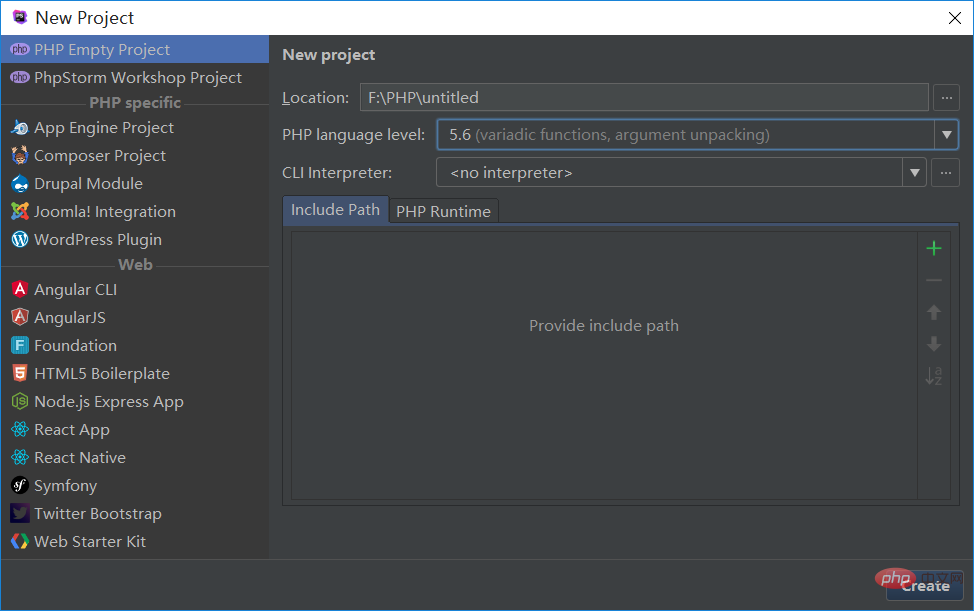 2. In the PHP language level column, I selected the PHP-5.6 version, and then clicked the "..." button in the CLI Interpreter column. Jump to another interface.
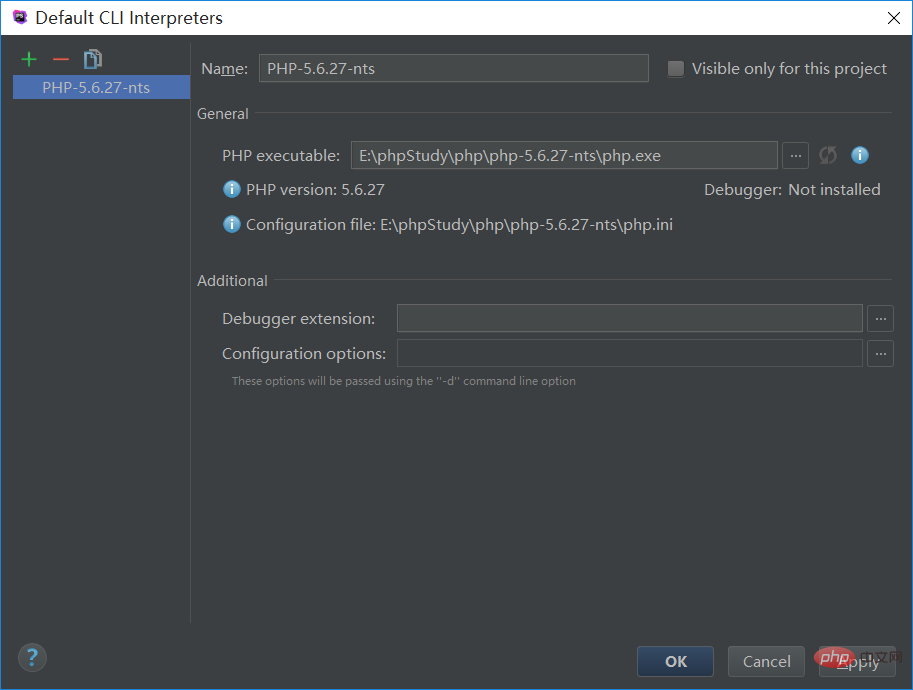
Click the " " button in the upper left corner of the new interface to add an Interpreter, fill in the name of the Interpreter in the box to the right of "Name", and click "..." in the PHP executable column. button to add the php.exe file location we want to set, and select the php.exe file location in our PhpStudy in the pop-up dialog box. The configured PHP-5.6 version is as shown below:
3. Configuration After completion, click "OK" to return to the previous interface. Pull down to see the Interpreter we configured, as shown in the figure below: 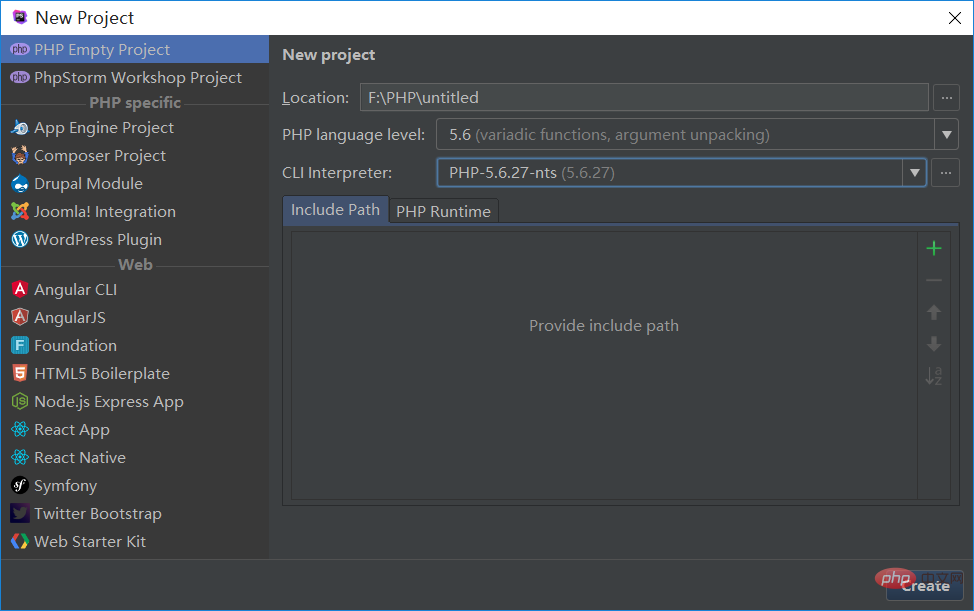
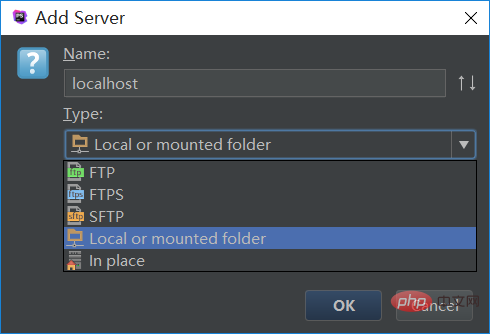
4. After the project is successfully created, create a new test.php file , to make the content in the test.php file displayed in the browser, you must configure the local server and select: Tools-->Deployment-->Configuration. In the pop-up interface, click the " " button in the upper left corner and perform relevant configurations according to the information in the figure below, as shown below:
5. Click "OK" " button, return to the previous interface, and configure according to the information shown in the figure below. The right frame of the Folder column indicates the WWW folder in the directory where the PhpStudy software was previously downloaded and installed (the WWW folder is our The storage address information of the website root directory) is as follows:
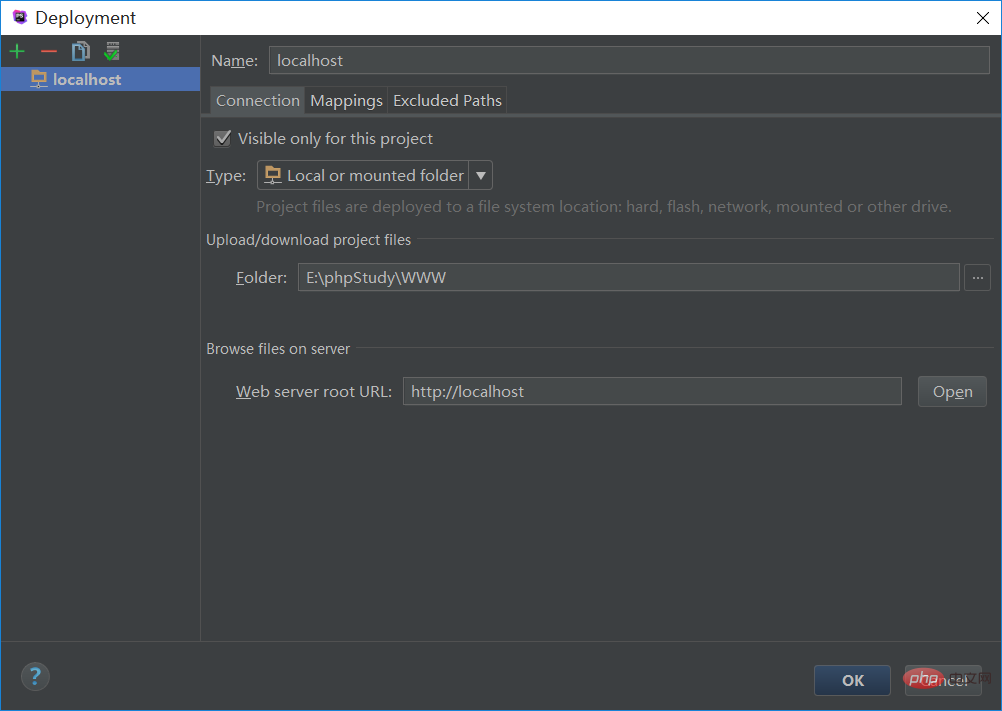
6. Configure the running and debugging environment, click: Run-->Edit Configrations.. ., expand Defaults --> PHP Web Application, now it is in the
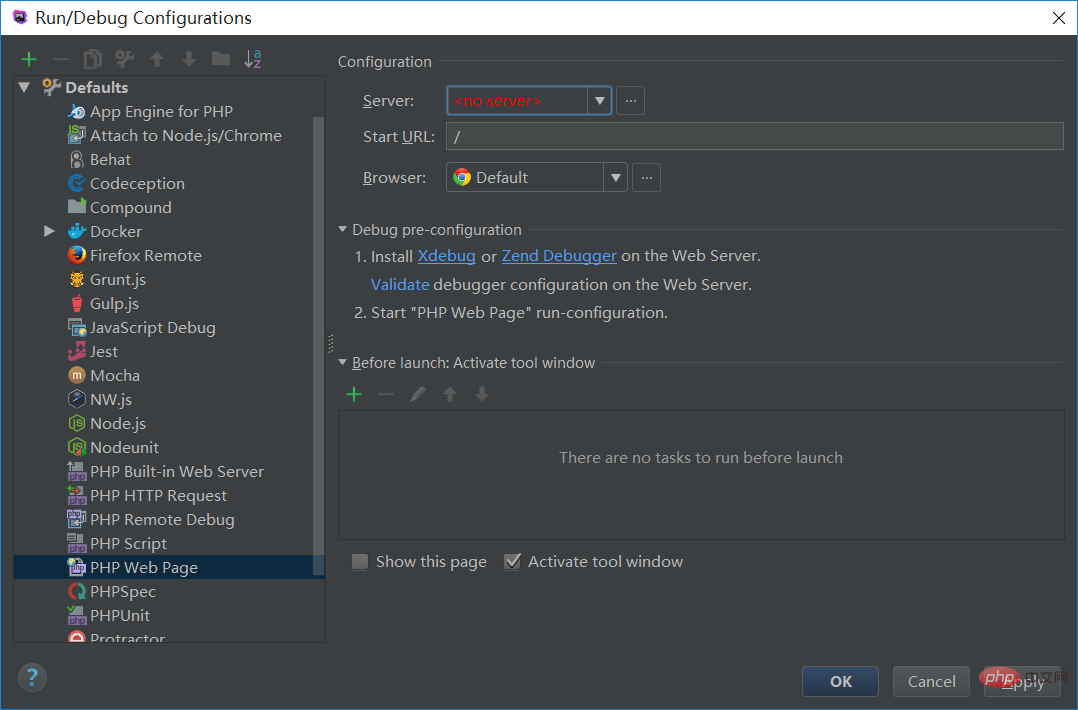
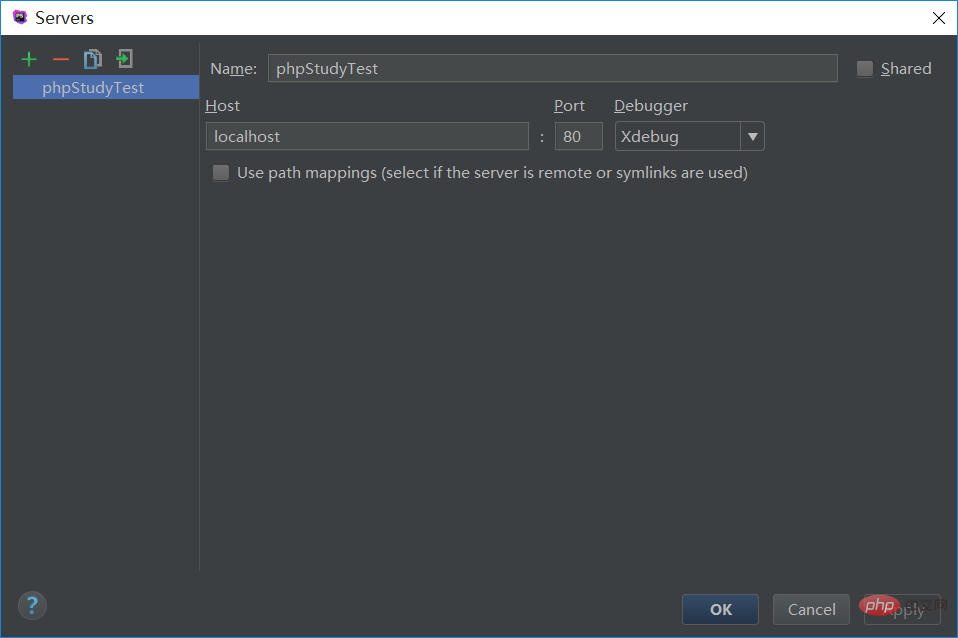
The above is the detailed content of Super detailed PhpStorm+PhpStudy development environment configuration. For more information, please follow other related articles on the PHP Chinese website!