
layui upload is similar to bootstrap upload, except that you don’t need to download a plug-in.
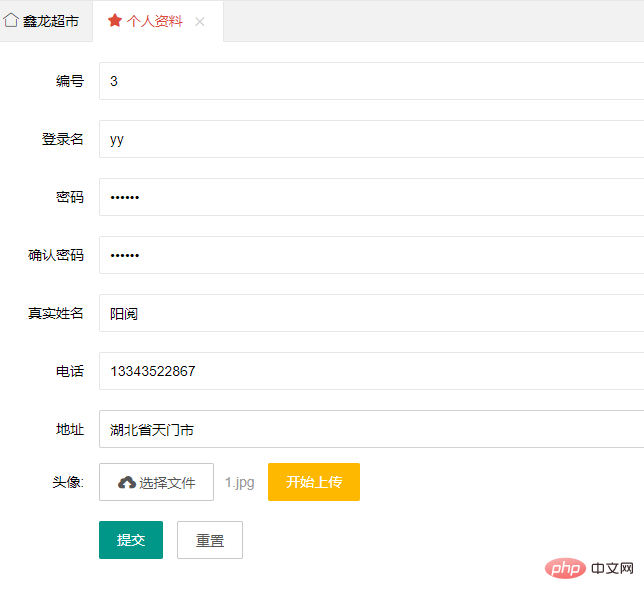
layui’s own one is enough. Let’s take a look at the front interface first. Here is the upload used. Avatar

Click first to start uploading. The avatar is uploaded to the server.
Return json and add it to the form, and submit it together with other data
Let’s take a look at the jsp interface first
<%@ page language="java" contentType="text/html; charset=UTF-8"
pageEncoding="UTF-8"%>
<!DOCTYPE html PUBLIC "-//W3C//DTD HTML 4.01 Transitional//EN" "http://www.w3.org/TR/html4/loose.dtd">
<html>
<head>
<meta http-equiv="Content-Type" content="text/html; charset=UTF-8">
<title>个人资料</title>
<link href="${pageContext.request.contextPath }/js/layui/css/layui.css"
rel="stylesheet" />
<script src="${pageContext.request.contextPath }/js/layui/layui.js"
charset="utf-8"></script>
<script src="${pageContext.request.contextPath }/js/jquery-1.8.3.js"></script>
<script type="text/javascript">
layui.use('upload',function(){
var upload = layui.upload;
upload.render({
elem: '#fileBtn'
,url: '../updatePersonalById.do'
,accept: 'file'
,auto: false
,bindAction: '#uploadBtn'
,done: function(res){
alert(res.data.src);
$("[name=userImage]").val(res.data.src);
}
});
});
</script>
</head>
<body>
<form class="layui-form" action="../updatePersonalByIdSuccess.do" method="post" charset="utf-8" target="_parent">
<div class="layui-form-item" style="margin-top: 20px;">
<label class="layui-form-label">编号</label>
<div class="layui-input-block">
<input type="text" name="userId" required lay-verify="required" value="${ui.userId }" autocomplete="off" readonly="readonly" class="layui-input">
</div>
</div>
<div class="layui-form-item" style="margin-top: 20px;">
<label class="layui-form-label">登录名</label>
<div class="layui-input-block">
<input type="text" name="userName" required lay-verify="required" value="${ui.userName }" autocomplete="off" readonly="readonly" class="layui-input">
</div>
</div>
<div class="layui-form-item" style="margin-top: 20px;">
<label class="layui-form-label">密码</label>
<div class="layui-input-block">
<input type="password" name="userPwd" required lay-verify="required" value="${ui.userPwd }" autocomplete="off" class="layui-input">
</div>
</div>
<div class="layui-form-item" style="margin-top: 20px;">
<label class="layui-form-label">确认密码</label>
<div class="layui-input-block">
<input type="password" name="reuserPwd" required lay-verify="required" value="${ui.userPwd }" autocomplete="off" class="layui-input">
</div>
</div>
<div class="layui-form-item" style="margin-top: 20px;">
<label class="layui-form-label">真实姓名</label>
<div class="layui-input-block">
<input type="text" name="userrealName" required lay-verify="required" value="${ui.userrealName }" autocomplete="off" class="layui-input">
</div>
</div>
<div class="layui-form-item" style="margin-top: 20px;">
<label class="layui-form-label">电话</label>
<div class="layui-input-block">
<input type="text" name="userPhone" required lay-verify="required" value="${ui.userPhone }" autocomplete="off" class="layui-input">
</div>
</div>
<div class="layui-form-item" style="margin-top: 20px;">
<label class="layui-form-label">地址</label>
<div class="layui-input-block">
<input type="text" name="userAds" required lay-verify="required" value="${ui.userAds }" autocomplete="off" class="layui-input">
</div>
</div>
<div class="layui-upload">
<label class="layui-form-label">头像:</label>
<div class="layui-upload layui-input-block">
<input type="hidden" name="userImage" value="${ui.userImage }" required lay-verify="required" />
<button type="button" class="layui-btn layui-btn-primary" id="fileBtn"><i class="layui-icon"></i>选择文件</button>
<button type="button" class="layui-btn layui-btn-warm" id="uploadBtn">开始上传</button>
</div>
</div>
<div class="layui-form-item" style="margin-top: 20px;">
<div class="layui-input-block">
<button class="layui-btn" id="btn1" lay-submit lay-filter="formDemo">提交</button>
<button type="reset" class="layui-btn layui-btn-primary">重置</button>
</div>
</div>
</form>
</body>
</html>Interaction with Controller.do
package com.supermanager.controller;

import java.io.File;
import java.io.IOException;
import java.util.Date;
import java.util.List;
import java.util.Random;

import javax.annotation.Resource;
import javax.servlet.http.HttpServletRequest;
import javax.servlet.http.HttpSession;

import org.springframework.context.annotation.Scope;
import org.springframework.stereotype.Controller;
import org.springframework.web.bind.annotation.ModelAttribute;
import org.springframework.web.bind.annotation.RequestMapping;
import org.springframework.web.bind.annotation.RequestParam;
import org.springframework.web.bind.annotation.ResponseBody;
import org.springframework.web.multipart.MultipartFile;

import com.supermanager.entity.LogsInfo;
import com.supermanager.entity.RoleInfo;
import com.supermanager.entity.StoragesInfo;
import com.supermanager.entity.UserInfo;
import com.supermanager.service.LogsService;
import com.supermanager.service.RoleInfoService;
import com.supermanager.service.StoragesService;
import com.supermanager.service.UserInfoService;

import net.sf.json.JSONArray;

@Controller
@Scope("prototype")
public class UserInfoController {

    @Resource
    private UserInfoService userInfoService;
    @Resource
    private LogsService logService;
    @Resource
    private RoleInfoService roleInfoService;
    @Resource
    private StoragesService storagesService;


    /**
     * 修改个人资料
     * @param session
     * @param file
     * @param ui
     * @return
     * @throws IOException
     * @throws IllegalStateException
     */
    @RequestMapping(value="updatePersonalById")
    public @ResponseBody String updatePersonal(@RequestParam("file") MultipartFile file,@ModelAttribute UserInfo ui,HttpServletRequest request) throws IllegalStateException, IOException{
        String oldName = file.getOriginalFilename();
        String path = request.getServletContext().getRealPath("/upload/");
        String fileName = changeName(oldName);
        String rappendix = "upload/" + fileName;
        fileName = path + "/" + fileName;
        File file1 = new File(fileName);
        file.transferTo(file1);
        String str = "{\"code\": 0,\"msg\": \"\",\"data\": {\"src\":\"" + rappendix + "\"}}";
        return str;
    }
    public static String changeName(String oldName){
        Random r = new Random();
        Date d = new Date();
        String newName = oldName.substring(oldName.indexOf('.'));
        newName = r.nextInt(99999999) + d.getTime() + newName;
        return newName;
    }
    @RequestMapping(value="updatePersonalByIdSuccess")
    public  String updatePersonalByIdSuccess(@ModelAttribute UserInfo ui){
        UserInfo uif = userInfoService.FindUserByUserId(ui.getUserId());
        ui.setRoleId(uif.getRoleId());
        ui.setUserSex(uif.getUserSex());
        ui.setUserAge(uif.getUserAge());
        int a = userInfoService.Update(ui);
        if(a!=0){
            return "redirect:exitSystem.do";
        }
        return "error";
    }


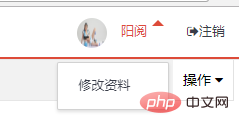
}The effect after successful upload is as shown in the figure

For more layui related articles, please pay attention to the layui usage tutorial column.
The above is the detailed content of Detailed explanation of uploading images in layui (with code). For more information, please follow other related articles on the PHP Chinese website!
 How to restart the service in swoole framework
 The relationship between bandwidth and network speed
 How to switch between Huawei dual systems
 Python online playback function implementation method
 Remove header line
 What is the difference between a demo machine and a real machine?
 What are the common secondary developments in PHP?
 Introduction to article tag attributes