
1. Install the plug-in
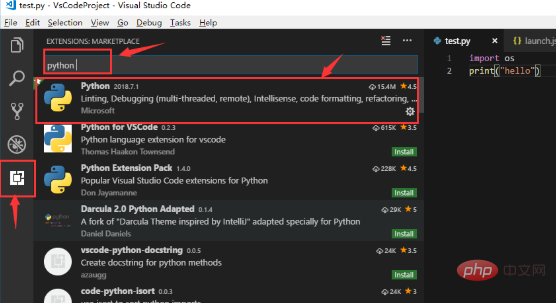
As shown below, after installation, open the software, click on the bottom icon on the left, search for Python, select the first plug-in in the list and click install Installer.
2. Open the working directory
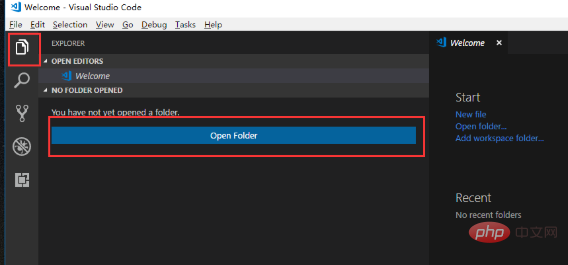
As shown below, click the file icon on the left, then click the "Open Folder" button to select a folder as the working directory , all newly created files will be stored in this directory.
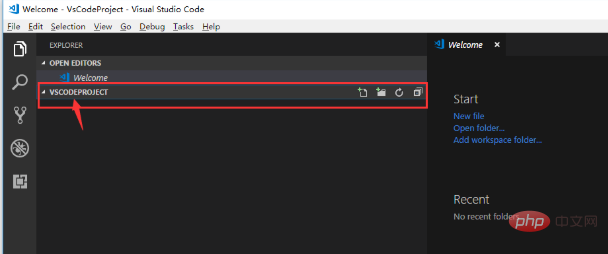
After adding it, as shown below, my file name is VSCodeProject. After adding, all letters will become uppercase.
3. Add configuration
As shown below, select the third icon on the left, click "Add Configuration" to add the configuration file, and select the Python option .
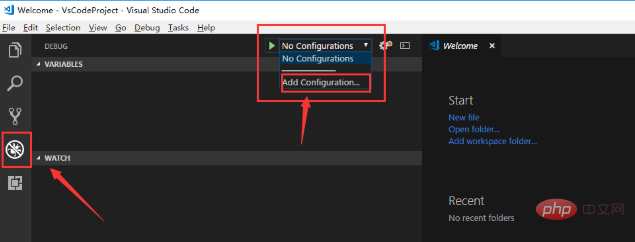
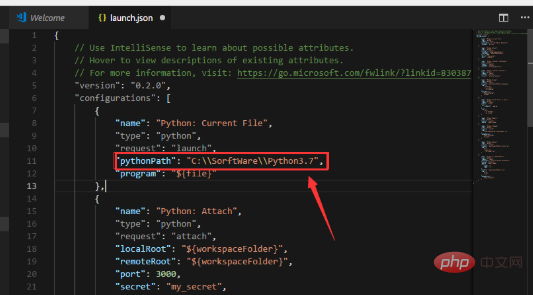
After selecting Python, the Python configuration file launch.json will be generated and added to the Python installation directory: , remember to use double inclined rods, otherwise an error will be reported.
4. Add user configuration
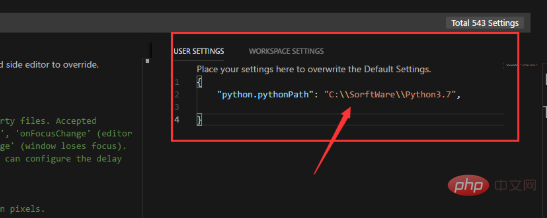
Click File->Prefrences->Settings to generate a "User Settings" file and fill in the Python installation directory :, as shown in the following figure:
5. Create a new hello. py
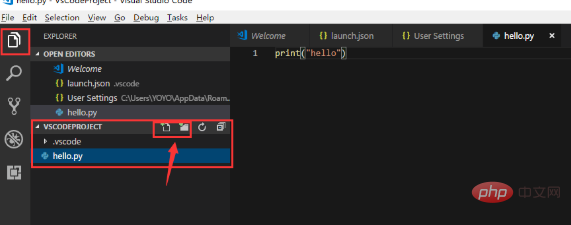
As shown below, click the icon of the file on the left, move the mouse to the directory name of the project, mine is VSCODEPROJECT, a file with a number will come out, click it, and then enter hello.py and it will be generated. py file, how to print ("hello"), click F5, a hello will appear in the debugging window below. If no error is reported, it means the configuration has been successful, and you can then develop Python.
Recommended tutorial: vscode tutorial
The above is the detailed content of How vscode configures the python development environment. For more information, please follow other related articles on the PHP Chinese website!


