

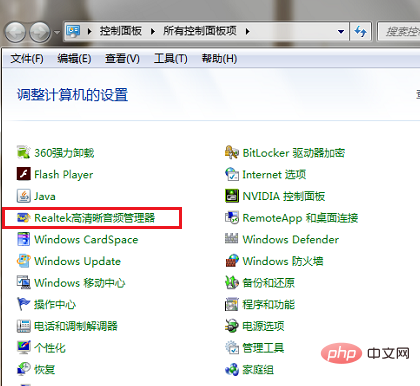
The first step is to open the control panel, view it as a small icon, and click Realtek High Definition Audio Manager, as shown below:
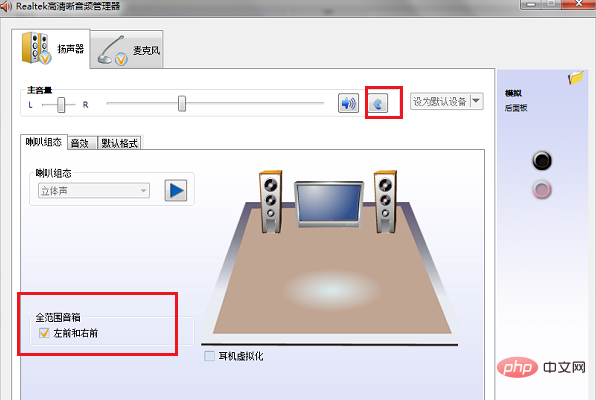
The second step, after entering the Realtek High Definition Audio Manager, you can see the main settings for the speakers and microphones. First, set the speakers. The main volume of the speakers can be set to balanced, and the volume and hearing protection can be set as needed. , in the speaker configuration, set it to stereo, check the left front and right front, as shown in the following figure:
Related recommendations: "FAQ"
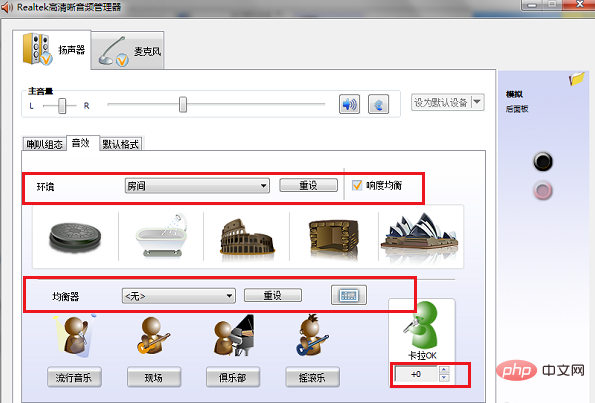
The third step is to set the sound effect of the speaker. First set the environment, usually set to room, check the loudness equalization, set the equalizer to none, do not select live, pop music, etc., as shown in the figure below:
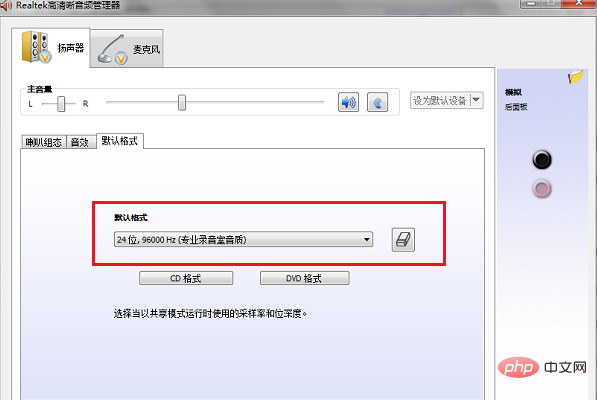
The fourth step is to set the default format of the speaker. The default format can be set to 24-bit, 96000Hz (professional recording studio sound quality), which will have better sound quality and is good for the computer. The performance will not cause a big load, as shown in the following figure:
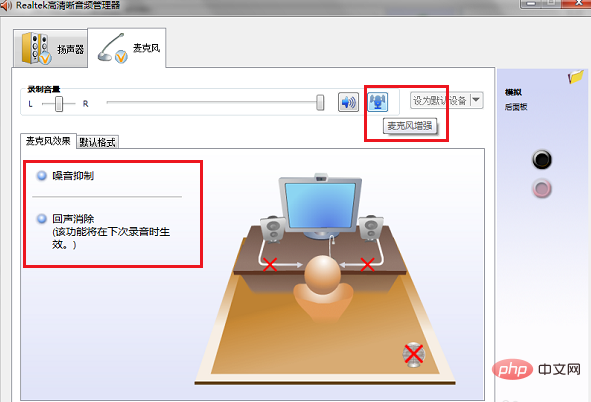
The fifth step is to set the effect of the microphone. First, you can set the recording volume of the microphone. Set it to Balance, check the echo cancellation and noise suppression below, and you can choose whether to use a microphone, as shown in the figure below:
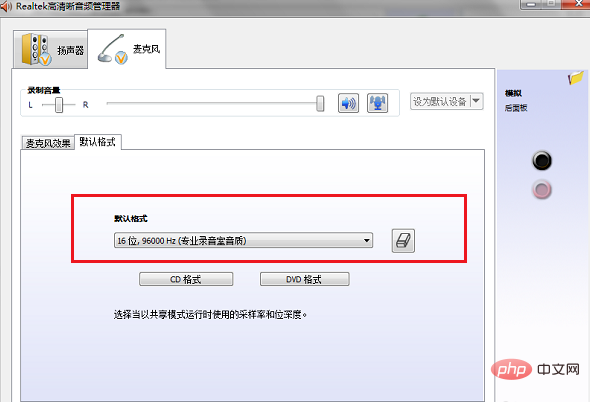
The sixth step is to set the default format of the microphone to 16 bit, 96000Hz (professional recording studio sound quality), click OK to complete the setting, which can enhance the sound quality and sound effects of the computer, as shown in the following figure:
The above is the detailed content of How to set up audio manager. For more information, please follow other related articles on the PHP Chinese website!


