How to connect Alibaba Cloud server to navicat

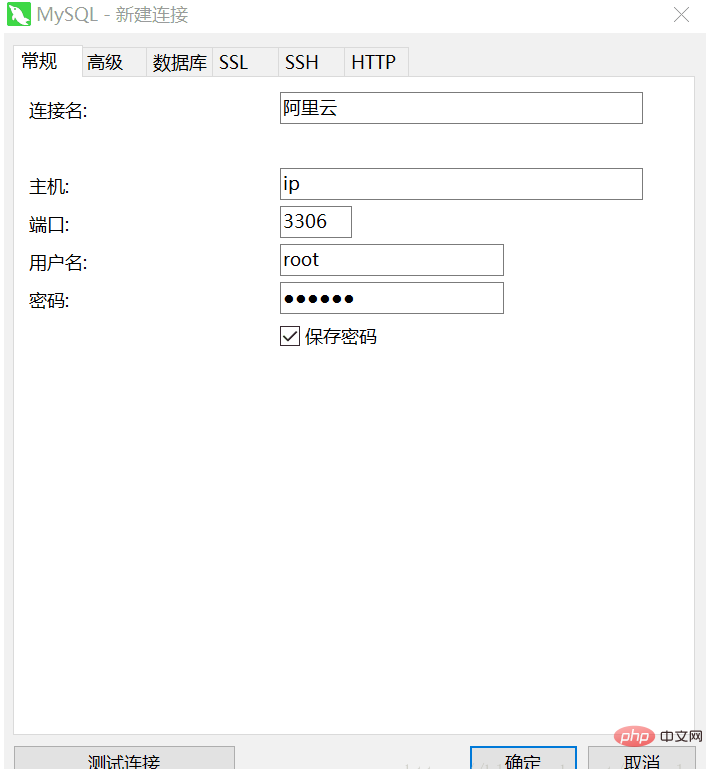
1. Open the local Navicat, click Connection--New Connection--MySQL, the following picture will appear:
Connection name: fill in any
Host: Alibaba Cloud's IP address
Password: The password configured when installing MySQL.
Then, click "OK".

Related recommendations: "Navicat for mysql graphic tutorial"
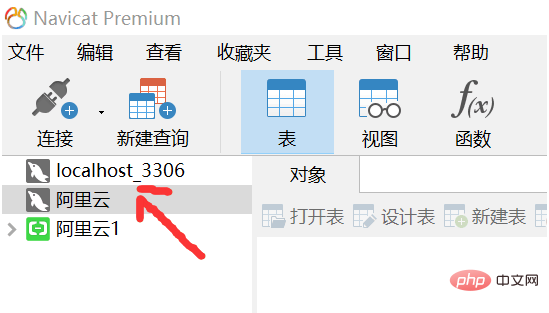
2. At this time, click on the newly created "Alibaba Cloud" link. There was an error in mine (but I forgot to take a screenshot)

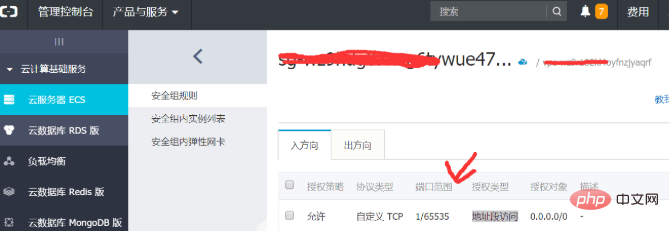
3. Set the port range, and set the port range 3306 here.

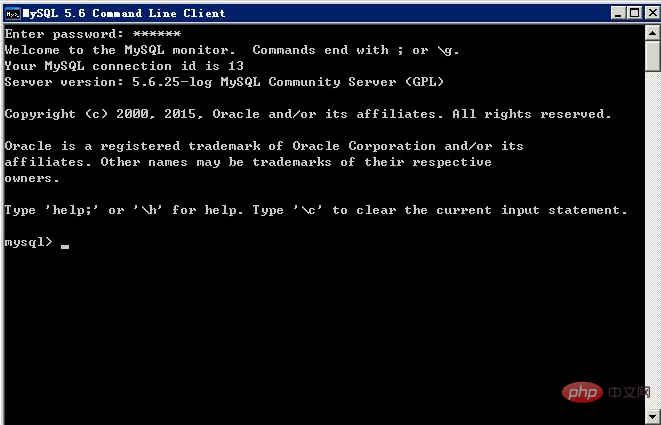
#4. Then log in to the Alibaba Cloud server, open the MySQL 5.6 control panel, and enter the password. Change the host's defense scope by changing the table.
Run to the interface below:
mysql>use MySQL
mysql> update user set host='%' where user='root';
mysql>select host,user from user;

4. It’s time to configure, double-click the “Alibaba Cloud” connection. If the error as shown below still occurs, then perform the fifth step and restart the MySQL database on the Alibaba Cloud server.

#5. Then restart MySQL, click the win icon - enter "Service" - double-click "Service".

Then find and restart the MySQL service.
#6. The error that appeared above will disappear. Double-click the "Alibaba Cloud" link created in Navicat. The connection is successful.
The above is the detailed content of How to connect Alibaba Cloud server to navicat. For more information, please follow other related articles on the PHP Chinese website!

Hot AI Tools

Undress AI Tool
Undress images for free

Undresser.AI Undress
AI-powered app for creating realistic nude photos

AI Clothes Remover
Online AI tool for removing clothes from photos.

Clothoff.io
AI clothes remover

Video Face Swap
Swap faces in any video effortlessly with our completely free AI face swap tool!

Hot Article

Hot Tools

Notepad++7.3.1
Easy-to-use and free code editor

SublimeText3 Chinese version
Chinese version, very easy to use

Zend Studio 13.0.1
Powerful PHP integrated development environment

Dreamweaver CS6
Visual web development tools

SublimeText3 Mac version
God-level code editing software (SublimeText3)

Hot Topics
 1793
1793
 16
16
 1737
1737
 56
56
 1588
1588
 29
29
 267
267
 587
587
 How to see if navicat is activated
Apr 09, 2025 am 07:30 AM
How to check if Navicat is activated: View the Registration Information section in the "About Navicat" of the Help menu: Activated: Show valid registration information (name, organization, expiration date) Not activated: Show "Not Registered" or "Register Information Not Available" Check the activation icon in the toolbar: The green icon indicates that the active observation trial period countdown: The trial version will show the countdown at startup, the activated version will not view feature limitations: The trial version may limit advanced features, and the activated version will unlock all functions
 What to do if the error is running sql file in navicat
Apr 09, 2025 am 09:09 AM
To resolve errors when Navicat runs SQL files, follow these steps: 1. Check for SQL syntax errors; 2. Make sure the database connection is established; 3. Check file encoding; 4. Adjust server settings; 5. Check temporary space; 6. Disable certain plugins; 7. Contact Navicat Support if necessary.
 How to roll back navicat
Apr 09, 2025 am 08:36 AM
You can perform a rollback operation through Navicat. The steps are as follows: 1. Connect to the database; 2. Locate the transaction log; 3. Select the rollback point; 4. Select "Rollback"; 5. Confirm the rollback.
 How to analyze navicat explanation
Apr 09, 2025 am 07:33 AM
Navicat provides data analysis capabilities, including: Create pivot tables: Aggregate data by field. Draw charts: Visualize data patterns. Writing SQL queries: perform complex analysis.
 How to use the navicat registration machine
Apr 09, 2025 am 07:42 AM
How to register with Navicat? Download and install the Navicat Registration Machine to obtain the Navicat machine code. Run the registration machine, paste the machine code, and generate the registration code. Copy and paste the registration code into the Navicat registration window to complete the registration. Note: Please be careful when using it and make sure to download the registration machine from a trusted source.
 Navicat: Pricing Details for Different Database Systems
Apr 16, 2025 am 12:10 AM
Navicat provides flexible pricing solutions based on different database systems, and users can choose the appropriate version according to their needs. 1.NavicatforMySQL has standard version ($199), enterprise version ($499) and education version ($99). 2.NavicatPremium supports multiple databases, standard version $499 and enterprise version $999, suitable for medium and large enterprises.
 Navicat: An Introduction to Database Management Tools
Apr 21, 2025 am 12:06 AM
Navicat is a powerful and user-friendly database management tool for beginners and veterans. 1. It supports multiple database types and provides unified interface management. 2. Communication with the database through JDBC or ODBC to simplify operations. 3. Provide SQL editing and optimization tools to improve query efficiency. 4. Support data migration and model design to improve work efficiency.
 Navicat: Free to Try, But Is It Free to Keep?
Apr 20, 2025 am 12:01 AM
Navicat is not free, it offers a 30-day trial and paid version. 1. The trial version allows users to experience all functions and a license is required after the expiration of the period. 2. The paid version has personal, corporate and educational licenses, providing full functionality and support.


