
WordPress is a personal information publishing platform that focuses on aesthetics, ease of use, and web standards. Although WordPress is free and open source software, its value cannot be measured in terms of money. The graphic design of WordPress is easy to operate and browse in terms of performance; it is elegant in appearance, fresh in style, and attractive in color. WordPress can be used to build a powerful network information publishing platform, but it is more commonly used for personalized blogs. For blog applications, WordPress allows you to save yourself from worrying about backend technology and focus on the content of your website.
It is precisely because of WordPress’s powerful functions and ease of use that many companies and individuals use it to build websites. Although WordPress is so easy to use, there are some details that we need to fine-tune. For example, after using WordPress to build a website, you will find that the website navigation menu bar only has two menus: "Homepage" and "Sample Page". This is of course not the navigation menu bar we want, so we need to create our own multi-level navigation menu bar.

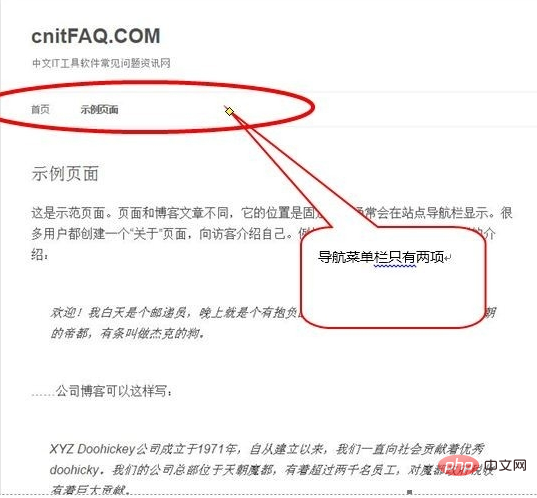
In the first step, after installing WordPress and building the website, we will find that the website is empty, and the more important navigation menu only has "Home" and "Sample Page".
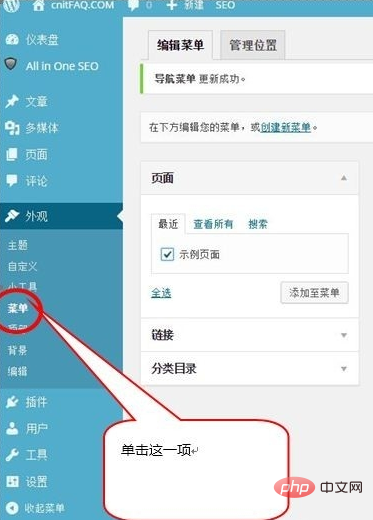
Second step, first, we enter the WordPress backend management page, select [Appearance]-->[Menu] on the left toolbar, where we can first create A menu.
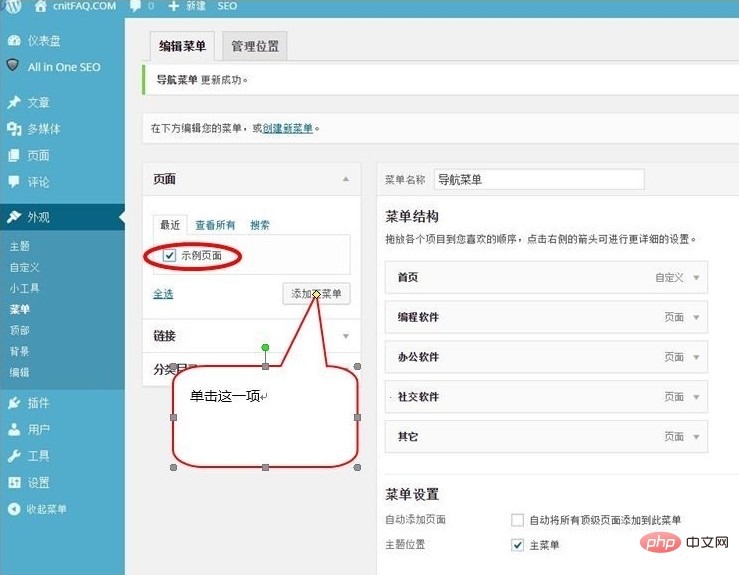
The third step is to check [Sample Page], and then click [Add to Menu]. This is to add a new first-level menu item, and then select the menu Item modification name. By analogy, multiple first-level menu items can be created.
Related recommendations: "WordPress Tutorial"
The fourth step, on the right, drag one of the [Sample Page] menus Go to [Programming Software] to create a secondary menu item. By analogy, multiple secondary menu items can be created.
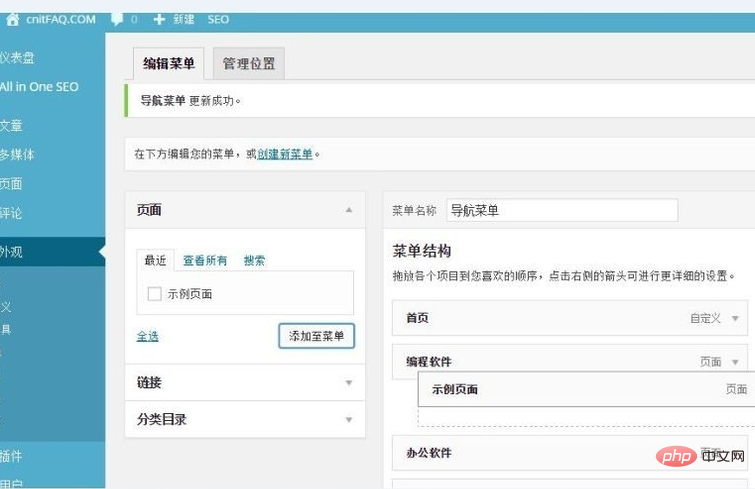
The fifth step is to modify the name and attributes of the corresponding secondary menu. Press the fourth step to add secondary menu items in multiple cycles.
The sixth step is to sort the secondary menu items through the [Previous] and [Next] buttons. , so that we can get the order we want.
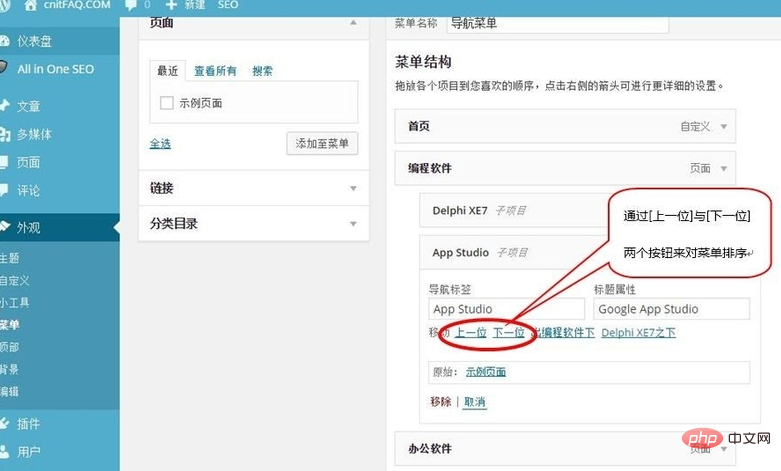
The seventh step is to complete the personalized second-level menu navigation bar through the fourth to sixth steps. If necessary, you can also build a third-level menu. Navigation bar, this is done as needed.
#It’s done, let’s take a look at the display effect of the final website and we’ll find that it’s exactly what we wanted.
 ##
##
The above is the detailed content of How to do multi-level classification in wordpress. For more information, please follow other related articles on the PHP Chinese website!
 wordpress seo
 How to install wordpress after downloading it
 How to solve the problem that laptop network sharing does not have permissions?
 The difference between heap and stack
 The difference between xls and xlsx
 WeChat steps
 How to skip network connection during win11 installation
 What is the difference between php and java