
How to use python to build a website?
Related recommendations: "python Video"

1-Project environment setup.
1.1 Third-party library preparation
The development environment is mac os and ubantu. It is recommended that you download a third-party software called "Anaconda". The installation is very simple, just run the script directly.
After the installation is complete, you can run pip list on the command line. You can see the installed python third-party libraries.
At this time we do not have a django library.
pip install Django
Installation is complete in one sentence. What counts as success? You can directly import django in the python you write, and it will succeed without error. The database we chose is mysql, and django also needs to install middleware, which is similar to JDBC in java.
pip install MySQL-python
How to succeed? Just import _mysql in python. If there is no error, congratulations, the installation is basically completed.
1.2 IDE installation
IDE uses eclipse, talk about a tool Pydev, install Baidu by yourself, just click.
Then go to Eclipse New->Project->Pydev->Pydev Django Project, all the way to next. I found that eclipse could not find the Django environment. I came back and clicked here to configure an interpreter and then deleted the one named python in the python interpreter. It is the system default and changed it to python in bin/ under the anaconda directory. The default is 2.7.11. Forgot the installation directory? Type sudo find / -name anacon* .

2-Database configuration and use
2.1 Database connection file configuration
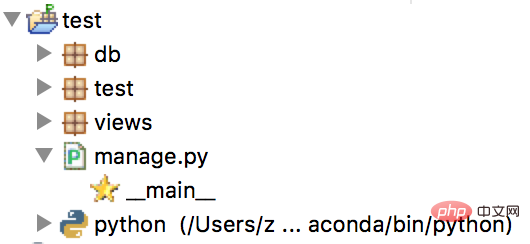
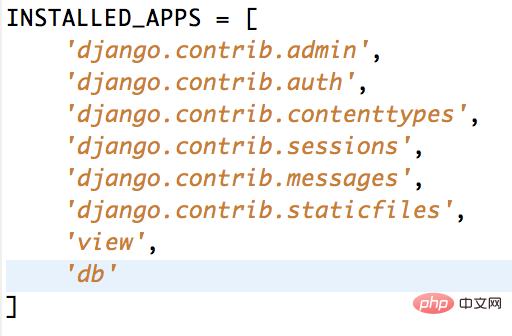
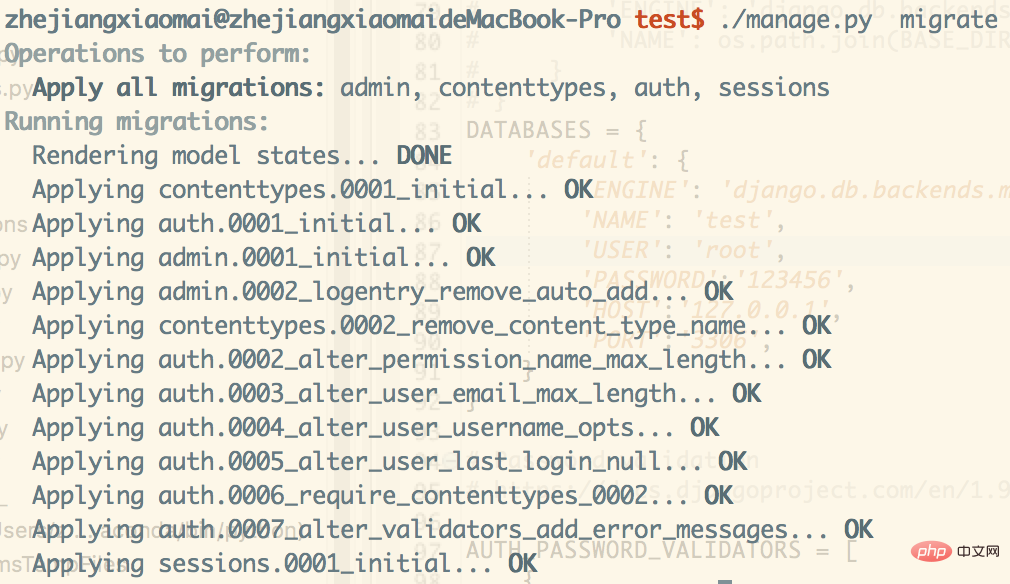
I chose mysql, of course You should have determined your mysql account and password before this. mysql configuration should be simple. But if you want to support remote access, for example, if you put the database on the cloud or on someone else's machine, after all, development is not a one-person thing. The pitfall I encountered was "about the bind-address" in the mysql configuration file. I went to Baidu. The solution is to just delete it. (I recommend several desktop software for mysql connection, Navicat or mysql workbench are both good). (Later I found that entering the password and account here was of no use and I had to modify the settings in the app with the same name as the project).Because the web page is mainly in MVC mode, let’s create two. One called db is dedicated to managing the database (models layer) and the second is dedicated to background logic. The name is chosen casually because it may correspond to multiple modules. To add an app in Django, you need to add the app name to Installed_app in the setting of the app with the same name as the project (Figure 4). We add the next directory structure.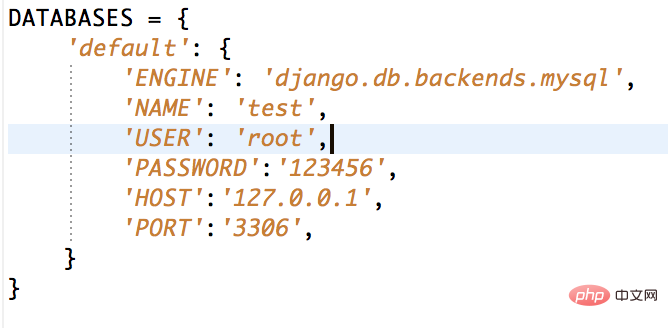 Good fields, because Django's goal is to completely separate programmers from database operations. So let’s not create the table first, cd to your project directory, and type the manage.py migrate command from the command line.
 If your configuration is correct, django has already created many tables in your database at this time, all of which come with django, and I have not used them. , the only thing used is the database management interface that comes with Django, which is similar to Navicat and also supports search functions. Go to the documentation http://python.usyiyi.cn/django_182/intro/tutorial02.html to learn it yourself.
from __future__ import unicode_literals from django.db import models # Create your db here. class Message(models.Model): user_id = models.BigIntegerField(blank=True, null=True) [object Object]
 You will know after using it, it will generate the code of the table in reverse, and then copy it directly into the models.
3.1url matching processing function
In Django, generally url parsing is divided into two layers.
The first layer is responsible for parsing the name of the APP, like what I wrote in urls.py in the test. The first parameter represents the response URL, and the second parameter represents the processing module.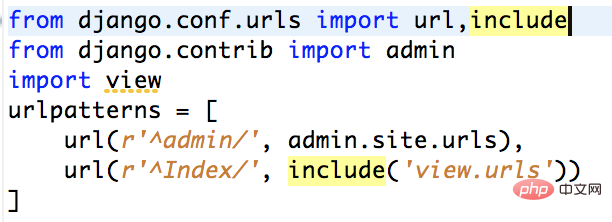
The second level is to parse to a function in a specific module to respond to the corresponding url.
For example, in the urls.py in the view app (you need to create it yourself), the home in the url written (the first parameter in the function is the matching path, and the latter is the corresponding function name) corresponds to the views in the view app. The function home in .py
3.2 Static web page configuration
In fact, the response can be achieved by this time. (There is still a problem to solve here 'Index/home.html') Where is it? We now create a folder called templates. All html should be placed here. Index is the name of a module. You can create many folders under templates, corresponding to many APP modules. (HTML does not belong to the scope of this article) At this time, the directory structure is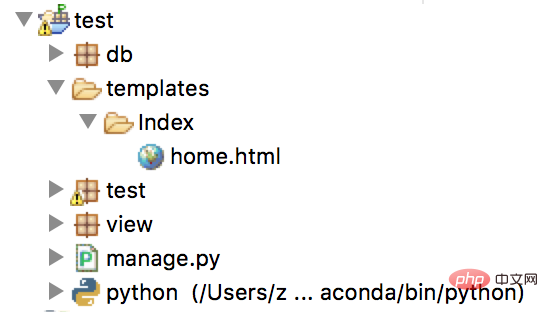
After you have done that, don’t forget to add a code in the test setting.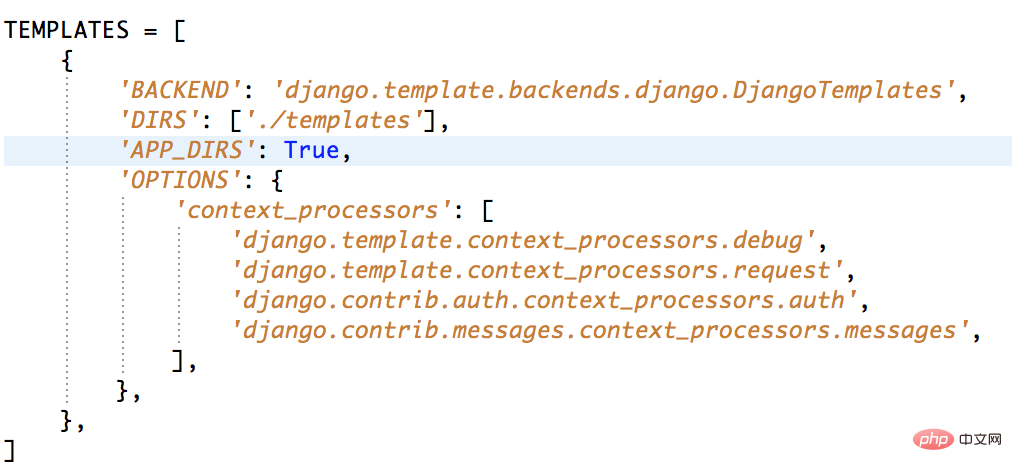
"It’s in DIRS" . Think about it, otherwise how would Django know that our html is placed here.
4-Logical layer (which is the last step, how to find out the things in the database and put them into HTML.)
4.1 Data in the database
Insert two pieces of data into the table
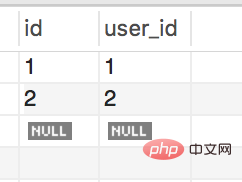
4.2 Dynamically display data
Look at the code: html part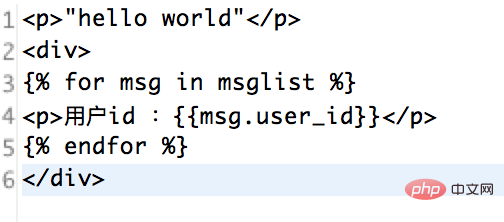

The above is the detailed content of Basic steps to build a website in python. For more information, please follow other related articles on the PHP Chinese website!