This article mainly introduces the MVC structure of the PHP source code differentiation platform. It has a certain reference value. Now I share it with you. Friends in need can refer to it.
Main:
Model singleton factory
Directory structure optimization
Differentiate platforms (frontend, backend....)
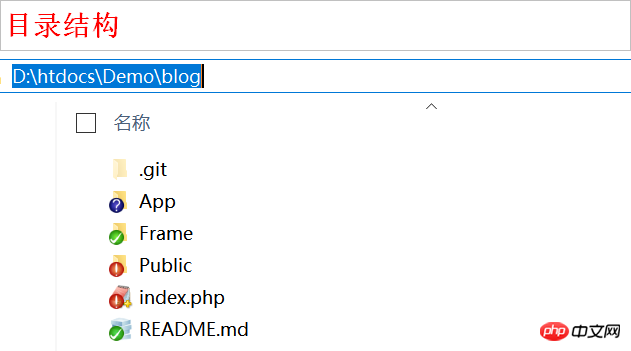
--------------:-------------------------------------- blog ├─App │ ├─Model 模型 │ │ └─UserModel.class.php 用户模型类 │ ├─View 视图 │ │ ├─Back后台 │ │ │ └─Index │ │ │ └─index.html 后台首页面 │ │ └─Home前台 │ │ └─User 用户视图目录 │ │ └─login.html 登录表单页面 │ ├─Controller 控制器 │ │ ├─Back后台 │ │ │ └─IndexController.class.php 后台首页控制器 │ │ └─Home前台 │ │ └─UserController.class.php 用户控制器 ├─Public 静态公共文件(js,css,images) │ ├─Plugins 插件 │ │ └─layui 前端框架插件 │ ├─Back后台 │ │ ├─js/ js文件 │ │ ├─css/ css样式文件 │ │ └─image img图片 │ └─Home前台 │ ├─js/ js文件 │ ├─css/ css样式文件 │ └─image img图片 ├─Frame 公共使用的类 │ ├─BaseModel.class.php 数据库连接类 │ ├─BaseController.class.php 控制器公共操作(设置编码,信息跳转) │ ├─FactoryModel.class.php 模型工厂类 │ └─MySQLDB.class.php 数据库操作工具类 └─index.php 入口文件 ----------------------------------------------------------------
Download and view the source code of this project: https://gitee.com/NewbiesYang/young_blog
Preparation: Create branch
1 $ git checkout master 2 $ git checkout -b "folder-model-app"
Instructions:
1) 3 lines in the program. . . Indicates omitted code. You can view
from the front or from the source code 2) [XXX/XXX] indicates the relative path of the project file
Problem: Model in the project To operate a data table, one action may require operating the database once and requesting multiple actions at a time. Each action needs to instantiate the corresponding model
Solution idea: Create a model class singleton factory
Implementation: Create a singleton model class FactoryModel.class.php
Attribute $model=array(); Store model class instance
Method: M($cmodelName, array $conf=null) Instantiate model class
Use : Use the model class instance in the controller: $model=FactoryModel::M('Model name')
1) Create a model singleton factory【 Frame/FactoryModel.class.php】
1

         Copy after login
2) Introduce the class file【index.php】
1

         Copy after login
Entry file introduces the factory model class
3) Application: Used in controllers, such as login operations in user controller UserController [Controller/UserController.class.php]
1 checkLoginInfo($data); 24 //替换上面两行 25 $result = FactoryModel::M('User')->checkLoginInfo($data); 26 27 //跳转提示 28 if($result){ 29 $this->msg('登录成功!', '?a=index',3); 30 } else { 31 $this->msg('用户名或密码不正确!!'); 32 } 33 } 34 }
4) Test program running, http://www.test.com/ blog/index.php The login test results are consistent with the previous ones. Submit the code for the time being
1 git add - 2 git commit -m "完成模型工厂类"
Multiple platforms (modules): front and back, backend
MVC structure sub-platform
C: Controllers/Home Controllers/Admin .....
V: Views/Home Views/Admin .....
M: Operation Data Table General Module Common Public Resource Directory Public Public Public Public Public Public Public Public Public Public Public Public Public Public Public Public Public Public Public Public Public Public Public that Public Resource Directory Public Public Public : Public/Home Public/Admin .....
The directory structure changes, and the paths of all loaded classes and views change accordingly
1)目录构建: step 1: 根目录下创建目录App, 将Model目录,View目录,Controller目录放大App目录下 既根目录只有: App/ Public/ Frame/ index.php step 2: 在Controller目录中,创建Back目录和Home目录。将UserController控制器类文件放入Home目录中 step 3: 在View目录中,创建Back目录和Home目录。将login.html文件放入Home目录中 step 4: 在Public目录中,创建Back目录,Home目录,Plugins目录。将js,images,css目录放入Home目录中,公共插件放入对应的Plugins目录中 2)文件引入修改: step 5: index.php入口文件对UserCotroller类的引入路径修改 step 6:UserController类中对视图login.html的include路径的修改 step 7: 视图login.html中对css和js路径的引入
Operation step ideas
2) Specific code modification operations Entry file introduction class path modification [index.php] Mainly It is the introduction and modification of the user model class and user controller class path1 $a();
Modification of the entrance file introduction class
The modification of the login form view path introduced by the user controller class【 App/Controller/Home/UserController.class.php】1
Copy after login
User controller display login interface modification
Login form view【App/View/Home/User/ login.html] Modification of static resource pathLogin form view
Submit and save code
1 git add -A 2 git commit -m "目录结构优化"
You can know by receiving the get data in the entry file: Platform, Controller, Action
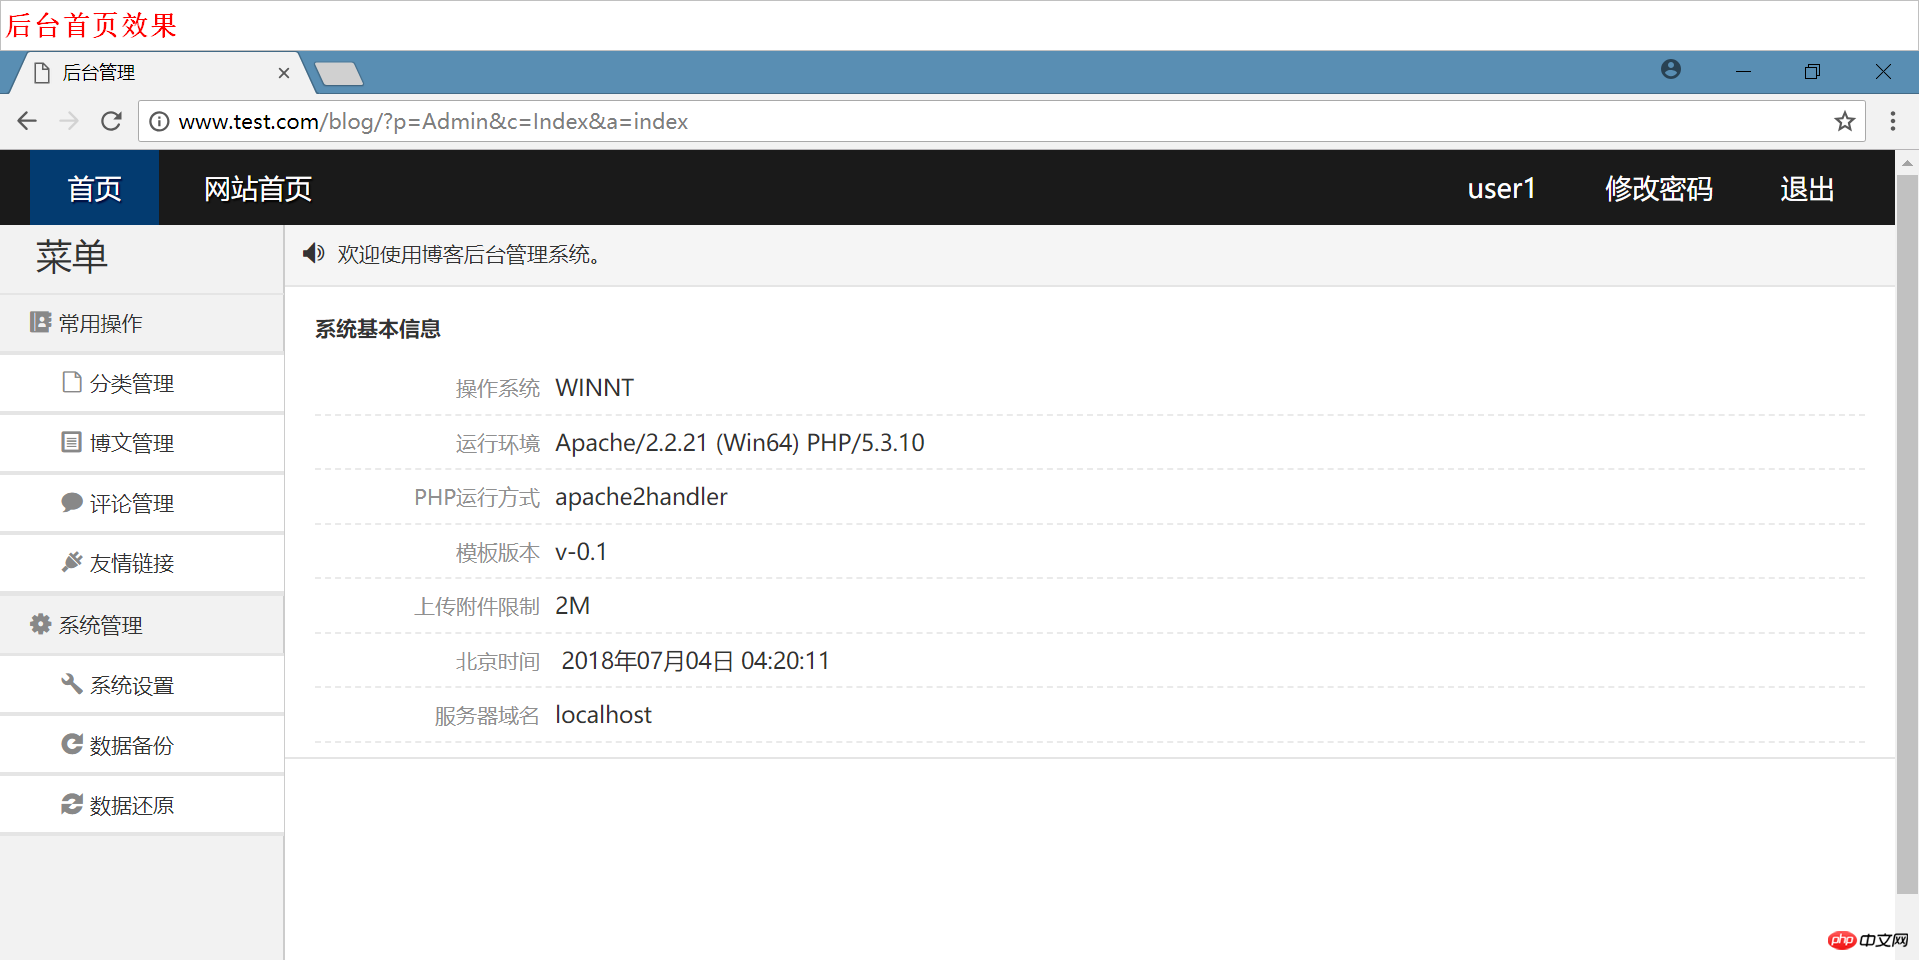
1)入口文件平台区分: step 1: 入口-登录页面提交的action="?p=Home&c=User&a=dlogin" step 2: 入口文件index.php 接收$_GET step 3: 登录判断成功跳转地址: $this->msg('登录成功!', '?p=Admin&c=Index&a=index',3); 2) 后台首页: step 1: 静态css,js,img文件放置 Public/Admin/ step 2: 创建后台首页控制器类, index() 载入后台首页视图文件 step 3: View/Admin/Index/index.html 修正css等静态文件路
Operation step ideas
2) Login form submission action =“?p=Home&c=User&a=dlogin” [App/View/Home/User/login.html]Login form form submission action modification
3 ) Entry file distinguishes the platform [index.php]$a();
1 checkLoginInfo($data); 22 23 //跳转提示 24 if($result){25 $this->msg('登录成功!', '?p=Admin&c=Index&a=index',3);26 } else { 27 $this->msg('用户名或密码不正确!!'); 28 } 29 } 30 }
Jump path modification after successful login operation
1)模板准备:
准备后台视图模板程序。可以自己写前端视图模板程序,也可以到网上下载别人写好的前端模板,如到 模板之家 选择所需求的 前台,后台模板
寻找模板: www.mycodes.net
2) 将后台模板视图的静态资源文件(如 js, css,image)拷贝到 【Public/admin/】目录下
3) 创建后台首页控制器 【App/Controller/Admin/IndexController.class.php】
1

         Copy after login
4) 创建后台首页视图 【App/View/Admin/Index/index.html】
1 2 3 4 522 23后台管理 6 7 8 9 10 11 12 13 14后台管理
18
24
29 30 31 3233 34 35 36 37
67
68
69 70 欢迎使用博客后台管理系统。 71
72 7374
75
78
后台首页视图
 代码提交,推送
1 $ git add -A 2 $ git commit -m "区分平台,实现后台首页" 3 $ git checkout master 4 $ git merge 'folder-model-app' 5 $ git push origin master
小结: 根据平台进一步优化目录结构,制作模型的单例工厂,实现后台首页
1. 项目中可以看到 include或require的文件路径很长,容易出错,也不便于使用 ==> 如何更加简单引入且不易出错
2. 写一个类,就要到入口文件引入一次, 比较麻烦 ==> 如何实现自动加载类
3. 随着类的引入增加,入口文件代码量会越来越大 ==> 如何 封装,简化入口文件
4. 现在项目中任何一个目录,都可以随意访问 ==> 如何加强安全访问,限制目录的访问
下一步:常量使用,自动加载类实现,入口封装,限制目录访问
以上就是本文的全部内容,希望对大家的学习有所帮助,更多相关内容请关注PHP中文网!
相关推荐:
The above is the detailed content of PHP source code differentiation platform MVC structure introduction. For more information, please follow other related articles on the PHP Chinese website!


