
This article mainly introduces the relevant information on the detailed explanation of the properties of canvas lines. The editor thinks it is quite good, so I will share it with you now and give it as a reference. Let’s follow the editor and take a look.
1. Line Cap
Value: butt (default value), round head ,square square head
var canvas=document.getElementById("canvas");

canvas.width=800;
canvas.height=800;

var context=canvas.getContext("2d");

context.lineWidth=40;
context.strokeStyle="#005588";

//三个beginpath()画了3条平行线
context.beginPath();
context.moveTo(100,200);
context.lineTo(700,200);
context.lineCap="butt";
context.stroke();

context.beginPath();
context.moveTo(100,400);
context.lineTo(700,400);
context.lineCap="round";
context.stroke();

context.beginPath();
context.moveTo(100,600);
context.lineTo(700,600);
context.lineCap="square";
context.stroke();

//baseline
context.lineWidth=1;
context.strokeStyle="#27a";
context.moveTo(100,100);
context.lineTo(100,700);
context.moveTo(700,100);
context.lineTo(700,700);
context.stroke();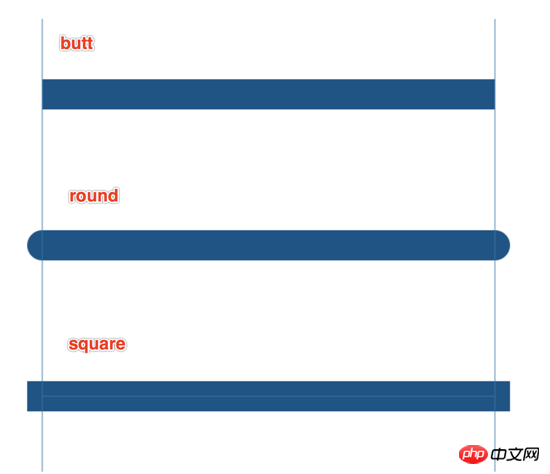
round. When doing animation, rounded corners can be drawn directly, while the effect of lineCap can only be used At the beginning and end of line segments, it cannot be used at junctions.
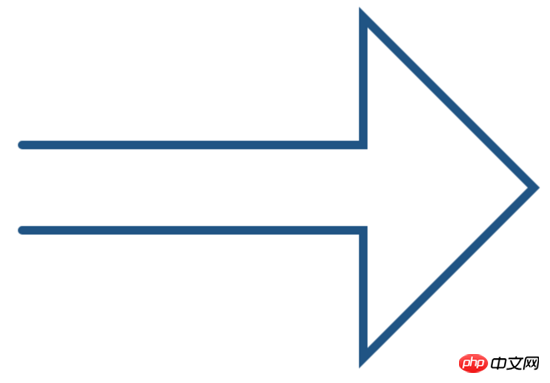
lineCap="square" can be used to completely close the line segment when it is closed, but it is still recommended to use clothPath() to close it.
var canvas=document.getElementById("canvas");

canvas.width=800;
canvas.height=800;

var context=canvas.getContext("2d");

context.beginPath();
context.moveTo(100, 350);
context.lineTo(500,350);
context.lineTo(500,200);
context.lineTo(700,400);
context.lineTo(500,600);
context.lineTo(500,450);
context.lineTo(100,450);
context.lineTo(100,350);
// context.closePath(); //推荐

context.lineWidth=10;
context.lineCap="square"; //不推荐
context.fillStyle="yellow";
context.strokeStyle="#058"

context.fill();
context.stroke();2. Draw a five-pointed star and explain other status attributes of the line
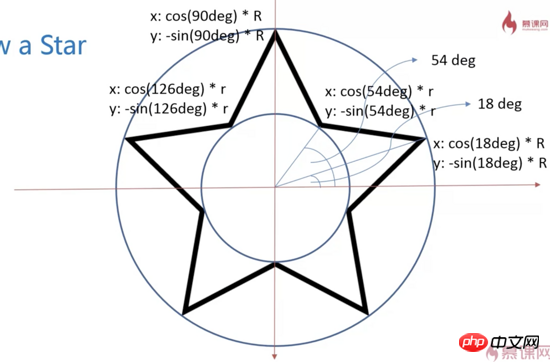
The five angles on the circle bisect 360°, each angle is 72°, 90°-72°=18°
The angles on the small circle bisect 72°, 18° 36 °=54°
Angle to radians——radians=angle*π/180 That is (18 i*72)*Math.PI/180
var canvas=document.getElementById("canvas");

canvas.width=800;
canvas.height=800;

var context=canvas.getContext("2d");
context.beginPath();
//角度转弧度:除以180*PI
for(var i=0;i<5;i++){
    context.lineTo(Math.cos((18+i*72)/180*Math.PI)*300+400,
        -Math.sin((18+i*72)/180*Math.PI)*300+400);
    context.lineTo(Math.cos((54+i*72)/180*Math.PI)*150+400,
        -Math.sin((54+i*72)/180*Math.PI)*150+400);
}

context.closePath();

context.lineWidth=10;
context.stroke();
Encapsulated into a function:
window.onload=function(){
    var canvas=document.getElementById("canvas");

    canvas.width=800;
    canvas.height=800;

    var context=canvas.getContext("2d");
    context.lineWidth=10;
    drawStar(context,150,300,400,400)
}

function drawStar(ctx,r,R,x,y,){
    ctx.beginPath();
    //角度转弧度:除以180*PI
    for(var i=0;i<5;i++){
        ctx.lineTo(Math.cos((18+i*72)/180*Math.PI)*R+x,
            -Math.sin((18+i*72)/180*Math.PI)*R+y);
            ctx.lineTo(Math.cos((54+i*72)/180*Math.PI)*r+x,
            -Math.sin((54+i*72)/180*Math.PI)*r+y);
    }

    ctx.closePath();
    ctx.stroke();
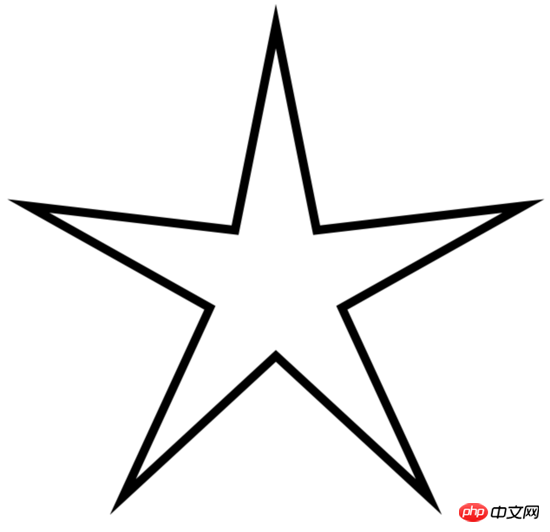
}Modify the small r=80, 200, 400 respectively to get the following graph
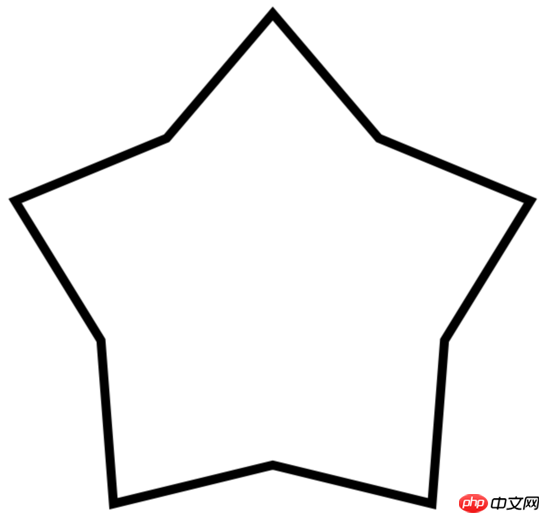
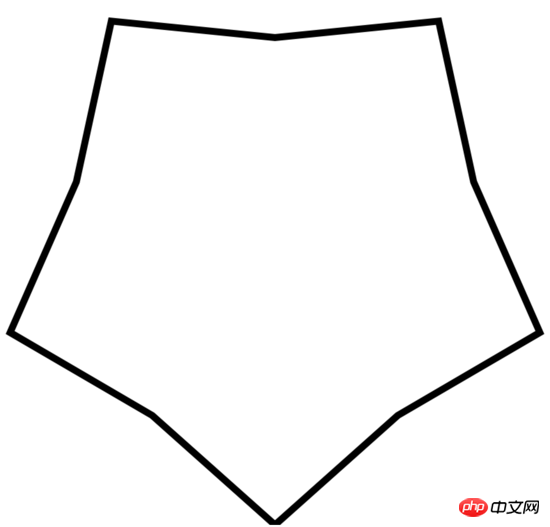
#Add a clockwise rotation parameter: rot
window.onload=function(){
    var canvas=document.getElementById("canvas");

    canvas.width=800;
    canvas.height=800;

    var context=canvas.getContext("2d");
    context.lineWidth=10;
    drawStar(context,150,300,400,400,30);
}


//rot顺时针旋转的角度
function drawStar(ctx,r,R,x,y,rot){
    ctx.beginPath();
    //角度转弧度:除以180*PI
    for(var i=0;i<5;i++){
        ctx.lineTo(Math.cos((18+i*72-rot)/180*Math.PI)*R+x,
            -Math.sin((18+i*72-rot)/180*Math.PI)*R+y);
            ctx.lineTo(Math.cos((54+i*72-rot)/180*Math.PI)*r+x,
            -Math.sin((54+i*72-rot)/180*Math.PI)*r+y);
    }

    ctx.closePath();
    ctx.stroke();
}The effect of rotating 30 degrees is as follows:
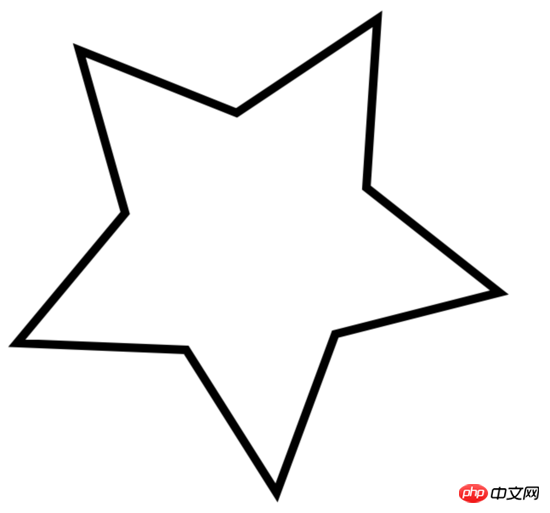
##3. Line connection lineJoin and miterLimit
1. LineJoin valuemiter (default) always presents a sharp corner, bevel miter, round cornerbevel is like the effect of a ribbon folded down. 
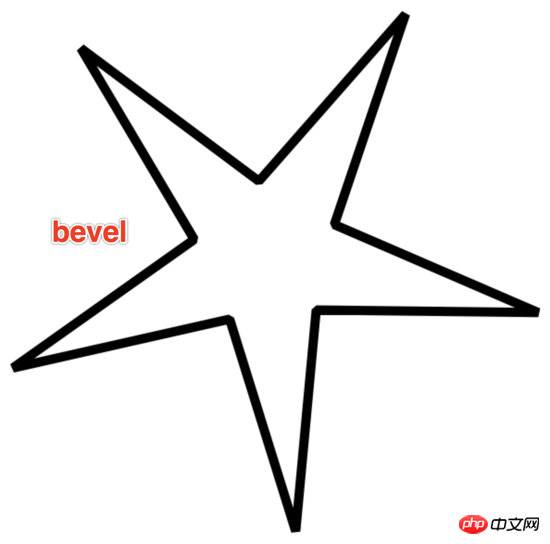
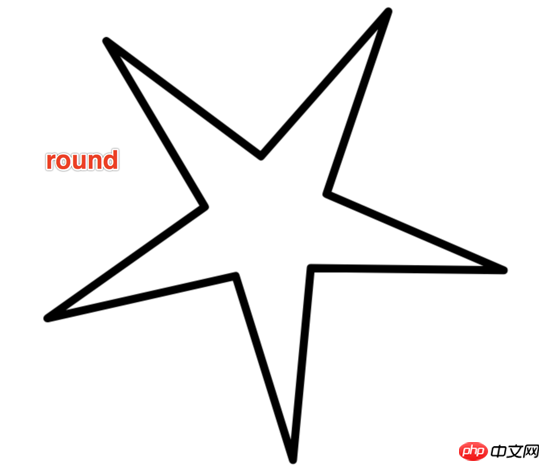
context.lineJoin="miter";
drawStar(context,30,300,400,400,30);
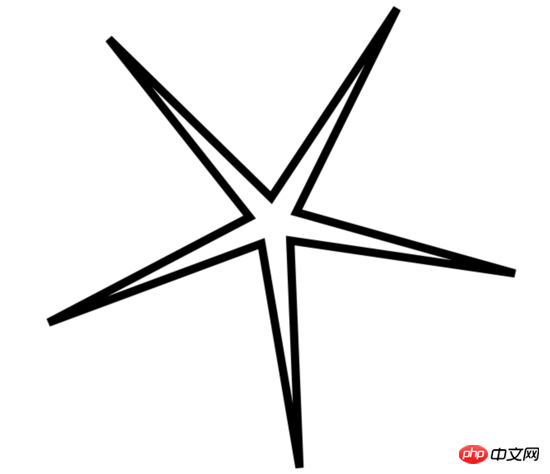
distance between the inner and outer corners that is generated when using miter as a way to connect lines. The default value is 10, which means the maximum value is 10px. Once it exceeds 10px, it will be displayed in bevel mode.
When the inner circle radius r is set to 30, the sharp angle formed is very sharp, and the distance between the inner corner and the outer corner exceeds the miterLimit of 10.
Now make the miterlimit larger and change it to 20, the effect is as follows:
context.lineJoin="miter";
 context.miterLimit=20;
 drawStar(context,30,300,400,400,30);
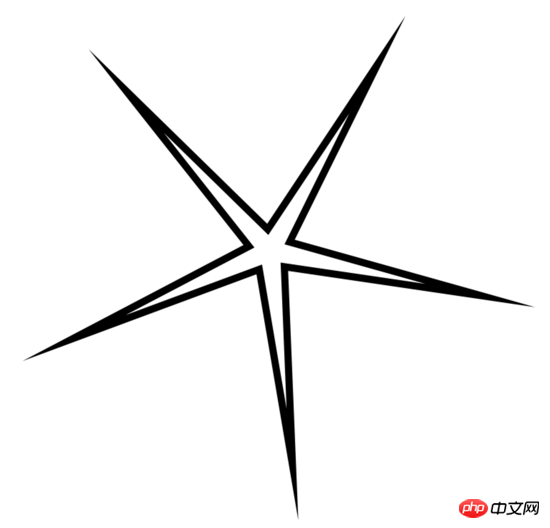 Note: miterLimit is not the distance from the white tip to the black tip. This The distance is much greater than 20px.
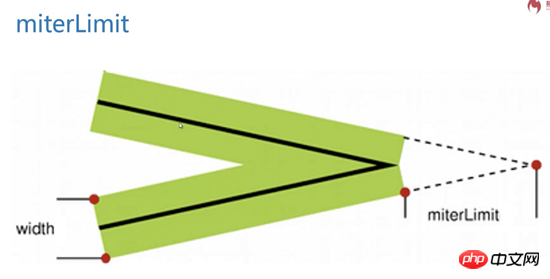 When miterLimit is generated, the line must have width, and the sharp corner of the middle line of the line with width is the direct distance from the outer sharp corner.
canvas gives a miterLimit experience value of 10. Only in extremely special circumstances, when very sharp corners need to be represented, miterLimit needs to be modified.
The above is the entire content of this article. I hope it will be helpful to everyone's study. For more related content, please pay attention to the PHP Chinese website!
Related recommendations:
How to use HTML to draw a vertical line between two div tagsHow to use HTML5
Canvas realizes snowflakes falling
The above is the detailed content of About the properties of canvas lines. For more information, please follow other related articles on the PHP Chinese website!


