

This article mainly introduces the method of packaging js with webpack. Now I will share it with you and give you a reference.
Webpack is a front-end resource loading/packaging tool. It will perform static analysis based on module dependencies, and then generate corresponding static resources for these modules according to specified rules.
Before practicing the code, let’s talk about the basic knowledge of webpack.
1. Why use WebPack
Many web pages today can actually be regarded as feature-rich applications. They have complex JavaScript codes and a lot of Dependency package. In order to simplify the complexity of development, many good practices have emerged in the front-end community
Modularization allows us to refine complex programs into small files;
Similar to TypeScript, a development language based on JavaScript: it allows us to implement features that cannot be used directly in the current version of JavaScript, and can later be installed into JavaScript files so that the browser can Recognition;
Scss, less and other CSS preprocessors
…
2. What is Webpack
WebPack can be regarded as a module packager: what it does is to analyze your project structure and find JavaScript modules and other extension languages that cannot be run directly by browsers. (Scss, TypeScript, etc.) and package it into a suitable format for browser consumption.
3. What are the characteristics of WebPack compared to Grunt and Gulp?
In fact, Webpack is not much comparable to the other two. Gulp/Grunt is a A tool that can optimize the front-end development process, and WebPack is a modular solution, but the advantages of Webpack allow Webpack to replace Gulp/Grunt tools.
The way Grunt and Gulp work is: in a configuration file, specify the specific steps to perform tasks such as compilation, combination, compression, etc. on certain files. This tool can then automatically complete these tasks for you.
These improvements have indeed greatly improved our development efficiency, but the files developed using them often require additional processing to be recognized by the browser, and manual processing is very anti-locking. This is Provides requirements for the emergence of tools like WebPack.
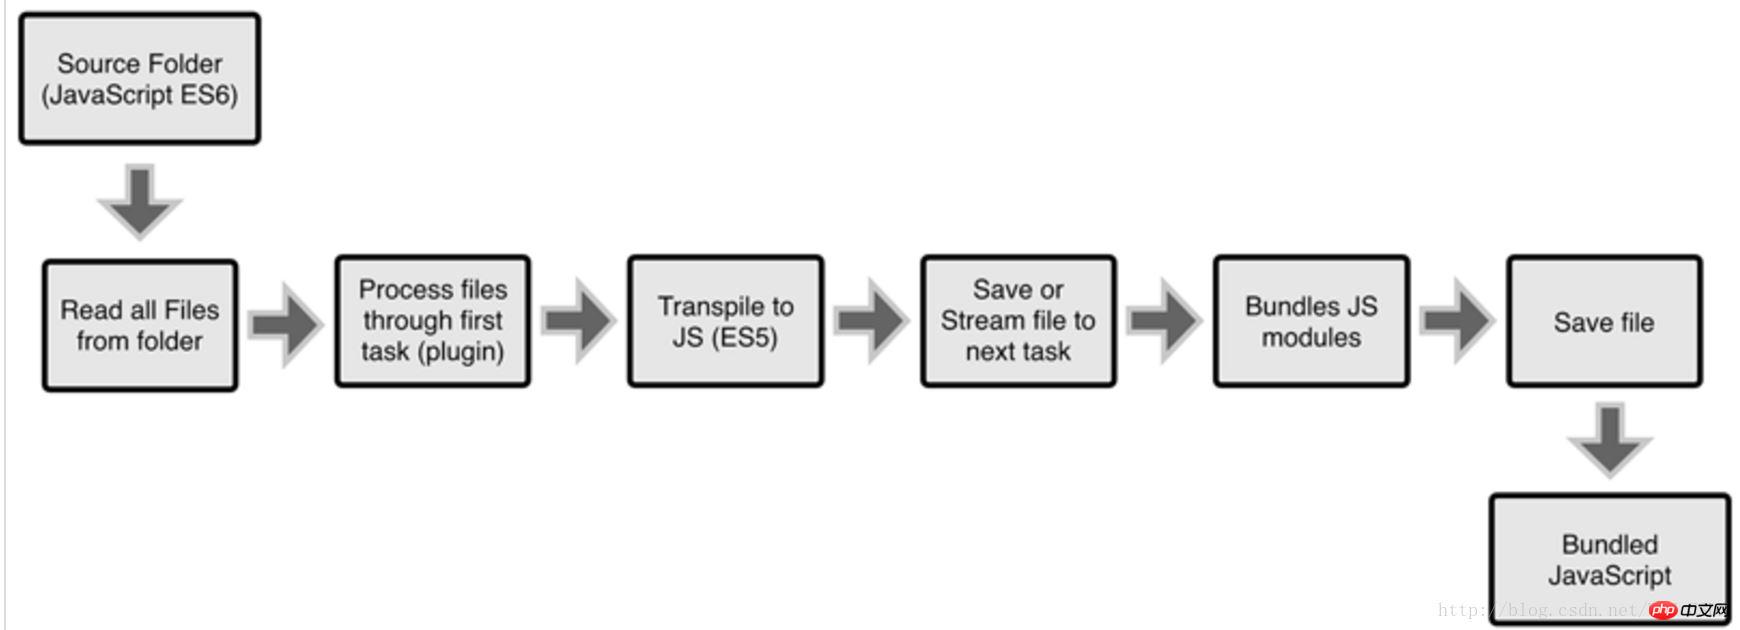
The way Webpack works is: treat your project as a whole, through a given main file (such as: index.js), Webpack will start from this file Find all the dependency files of your project, use loaders to process them, and finally package them into a JavaScript file that can be recognized by the browser.
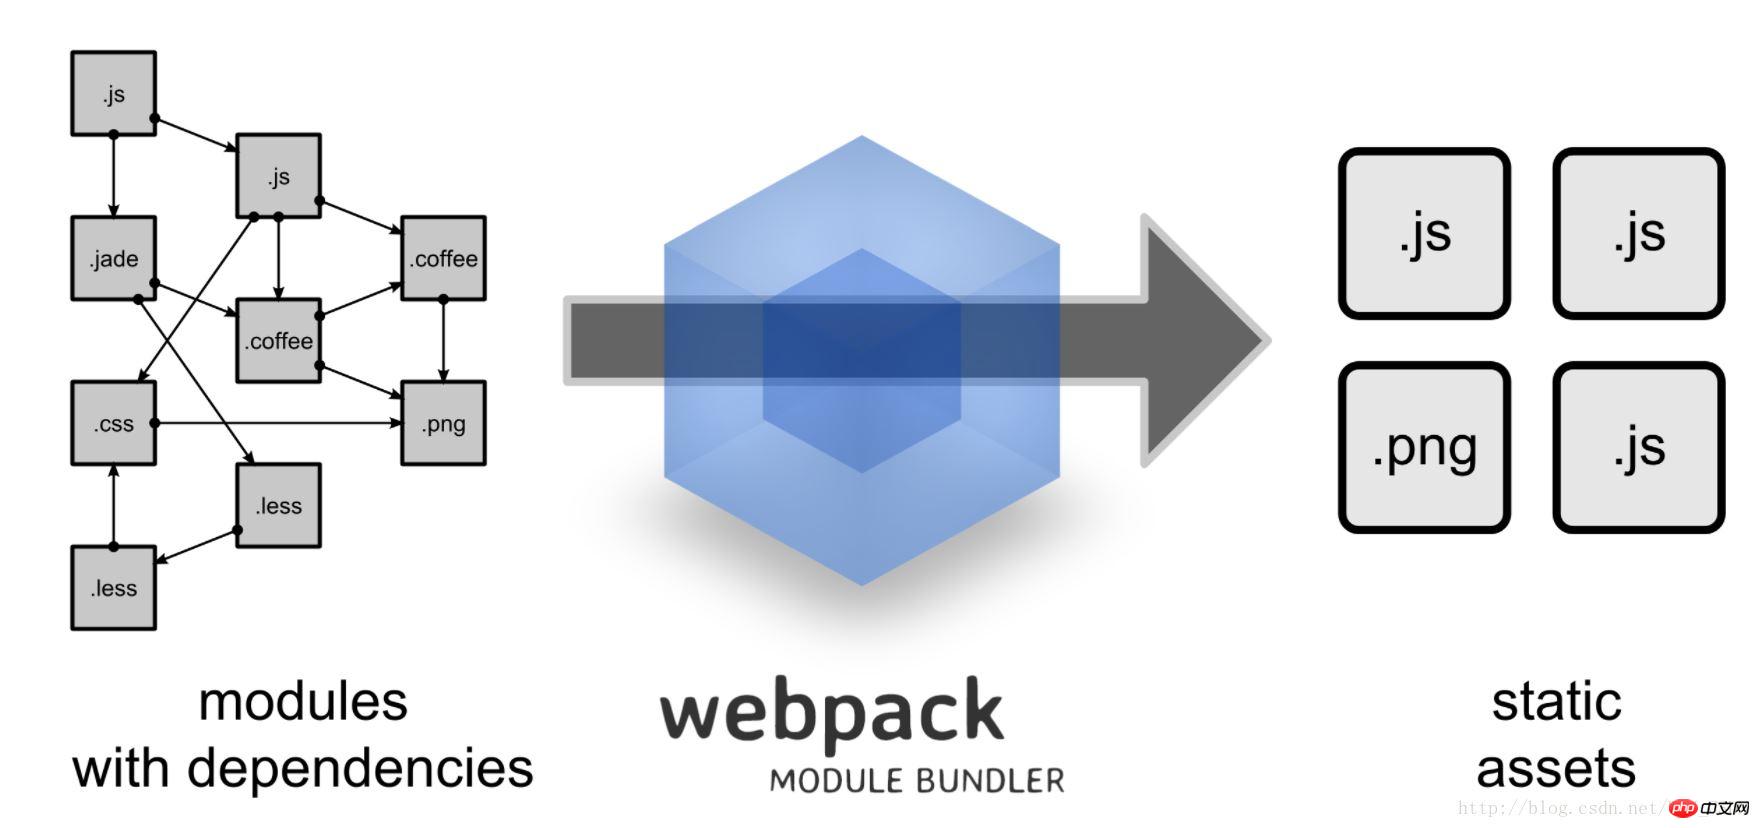
We can see from the picture that Webpack can convert a variety of static resources js, css, and less into a static file, reducing page requests.
If you really want to compare the two, Webpack's processing speed is faster and more direct, and it can package more different types of files.
Next, we will briefly introduce
How Webpack merges multiple js files (note that this is just the merging of files, that is, merging multiple written js into one js file to reduce http requests).
Install webpack
Before installing Webpack, your local environment needs to support node.js. To install node.js, please refer to the official node documentation.
Use the following command to install webpack globally.
$ npm install webpack -g
webpack has been installed on your computer and you can now use the webpack command.
Use webpack in the project
Use the following command to generate the package.json file in the project root directory.
$ npm init
Install webpack into the project
Add webpack to the pageage.json configuration file, use the following command :
$ npm install --save-dev webpack
Look at the package.json file again at this time. Compared with when package.json was just created, a new piece of code has been added.

Two ways of webpack packaging
webpack entry
webpack -config webpack.conf.js (specify webpack configuration file)
Use command line Packaging js
1: Create two js files
Create app.js, sum.js, export one sum.js Addition function, app.js uses this function.
// app.js import {sum} from './sum'; console.log('sum(21, 22)', sum(21, 22)); // sum.js export function sum(a, b) { return a + b; }
Two: Use the webpack command to package
Use in the current directory: webpack app.js bundle.js ; The entry here is app.js, and the output file is bundle.js, so you will see an extra bundle.js file in the file.
Create an html file to run, introduce bundle.js to run, the console will print: sum(21, 22) 43.
使用webapck的配置文件打包(还是上面的两个js文件)
创建一个webpack.conf.js,编写wepack的配置文件
// 配置文件使用commonjs规范 module.exports = { // 入口,是一个对象 entry: { app: './app.js' }, // 输出 output: { // 带五位hash值的js filename: '[name].[hash:5].js' } }
在命令行输入:webpack --config webpack.conf.js,发现生成了一个app.dd1c6.js带hash的js文件。将这个js文件引入HTML里面发正常输出:sum(21, 22) 43
配置文件的命名为webpack.config.js,则直接在命令行输入webpack就可以。
webapck配合babel打包ES6、7
在项目根目录安装bable-loader和babel-core,babel-preset
使用npm init生成一个配置文件
npm install babel-loader babel-core --save-dev
新建app.js,index.html,webpack.config.js等文件
编写webpack.config.js
安装babel-preset来指定编译的版本:npm install babel-preset-env --save-dev
在app.js里面随便写一些ES6的语法
使用命令行输入webpack进行编译
webpack配置文件
// 配置文件使用commonjs规范 module.exports = { // 入口,是一个对象 entry: { app: './app.js' // 相对路径 }, // 输出 output: { // 带五位hash值的js filename: '[name].[hash:8].js' }, // 指定loader module: { // rules中的每一项是一个规则 rules:[ { test: /\.js$/, // 值一个正则,符合这些正则的资源会用一个loade来处理 use: { loader: 'babel-loader', // 使用bable-loader来处理 options: { // 指定参数 presets: [ ['babel-preset-env', { targets: { browsers: ['> 1%', 'last 2 version'] //具体可以去babel-preset里面查看 } }] ] // 指定哪些语法编译 } }, exclude: '/node_module/' // 排除在外 } ] } }
app.js和编译之后带hash的js
// app.js let func = () => {}; const num = 30; let arr = [3, 4, 5, 6]; let newArr = arr.map(item => item * 2); // 将以前数组每一项*2 console.log(newArr); // ==================// // 编译之后(直接截取了编译的代码) "use strict"; var func = function func() {}; var num = 30; var arr = [3, 4, 5, 6]; var newArr = arr.map(function (item) { return item * 2; }); // 将以前数组每一项*2 console.log(newArr);
babel的两个插件:Babel Polyfill 和 Babel Runtime Transform
用来处理一些函数和方法(Genertor,Set,Map,Array.from等未被babel处理,需要上面的两个插件)
Babel Polyfill(全局垫片),npm install babel-polyfill --save, 使用:import "babel-polyfill";
Babel Runtime Transform(为开发框架准备),npm install babel-plugin-transform-runtime --save, npm install babel-runtime --save
新建一个.babelrc来进行配置
app.js里面新增代码
import "babel-polyfill"; let func = () => {}; const num = 30; let arr = [3, 4, 5, 6]; let newArr = arr.map(item => item * 2); // 将以前数组每一项*2 console.log(newArr); // 需要babel-polyfill arr.includes(8); // Genertor 函数 function* func2() { }
webpack配置
// 配置文件使用commonjs规范 module.exports = { // 入口,是一个对象 entry: { app: './app.js' // 相对路径 }, // 输出 output: { // 带五位hash值的js filename: '[name].[hash:8].js' }, // 指定loader module: { // rules中的每一项是一个规则 rules:[ { test: /\.js$/, // 值一个正则,符合这些正则的资源会用一个loade来处理 use: { loader: 'babel-loader', // 使用bable-loader来处理 options: { // 指定参数 } }, exclude: '/node_module/' // 排除在外 } ] } }
.babelrc文件配置
{ "presets": [ ["babel-preset-env", { "targets": { "browsers": ["> 1%", "last 2 version"] } }] ], "plugins": ["transform-runtime"] }
上面是我整理给大家的,希望今后会对大家有帮助。
相关文章:
The above is the detailed content of How to package js with webpack. For more information, please follow other related articles on the PHP Chinese website!


![[Web front-end] Node.js quick start](https://img.php.cn/upload/course/000/000/067/662b5d34ba7c0227.png)


