

This time I will bring you a detailed explanation of the steps for configuring a self-signed https server in nodejs express. What are theprecautionsfor configuring a self-signed https server in nodejs express. The following is a practical case, let's take a look.
It can be said that it is very simple and convenient to use express to build a framework in nodejs, but generally the http server is created by default, which means it can only be accessed through the http protocol. Nowadays, https has become a development trend, and we should follow the trend of the times. In this article, we will create a certificate using a self-signed method, then use the express framework to build an https server, and finally let the browser orclient use thehttps protocol for access.
First we need to generate the certificate file:
(1) Generate the private key key file (the path below indicates the path location of the file you want to save)
openssl genrsa 1024 > /pathway/private.pem
(2) Generate a CSR certificate signature through the private key file generated above
openssl req -new -key /pathway/private.pem -out csr.pem
(3) Generate a certificate file through the above private key file and CSR certificate signature
Copy codeThe code is as follows:
openssl x509 -req -days 365 -in csr.pem -signkey /pathway/private.pem -out /pathway/file.crt
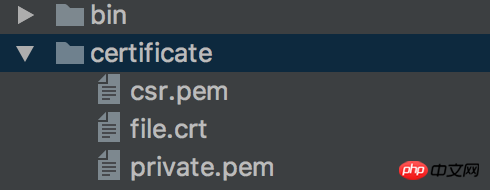
The three files generated at this time As follows:

At this time, copy these three files to your nodejs project directory. For example, I create a new certificate folder directly in the project root directory, and then put the three File:
After completing the above steps, modify the startup file of the project. My startup file here is app.js, or someone else is server.js. The following code implementation is Same:
var express = require('express'); // 项目服务端使用express框架 var app = express(); var path = require('path'); var fs = require('fs'); //使用nodejs自带的http、https模块 var http = require('http'); var https = require('https'); //根据项目的路径导入生成的证书文件 var privateKey = fs.readFileSync(path.join(dirname, './certificate/private.pem'), 'utf8'); var certificate = fs.readFileSync(path.join(dirname, './certificate/file.crt'), 'utf8'); var credentials = {key: privateKey, cert: certificate}; var httpServer = http.createServer(app); var httpsServer = https.createServer(credentials, app); //可以分别设置http、https的访问端口号 var PORT = 8000; var SSLPORT = 8001; //创建http服务器 httpServer.listen(PORT, function() { console.log('HTTP Server is running on: http://localhost:%s', PORT); }); //创建https服务器 httpsServer.listen(SSLPORT, function() { console.log('HTTPS Server is running on: https://localhost:%s', SSLPORT); }); //可以根据请求判断是http还是https app.get('/', function (req, res) { if(req.protocol === 'https') { res.status(200).send('This is https visit!'); } else { res.status(200).send('This is http visit!'); } });
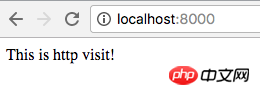
After the code is implemented, start the app.js script. You can use the "node app.js" command to start it, or run it in other IDEs, and then access it in the browser (note that express is not a system Built-in modules, need to be installed through npm):
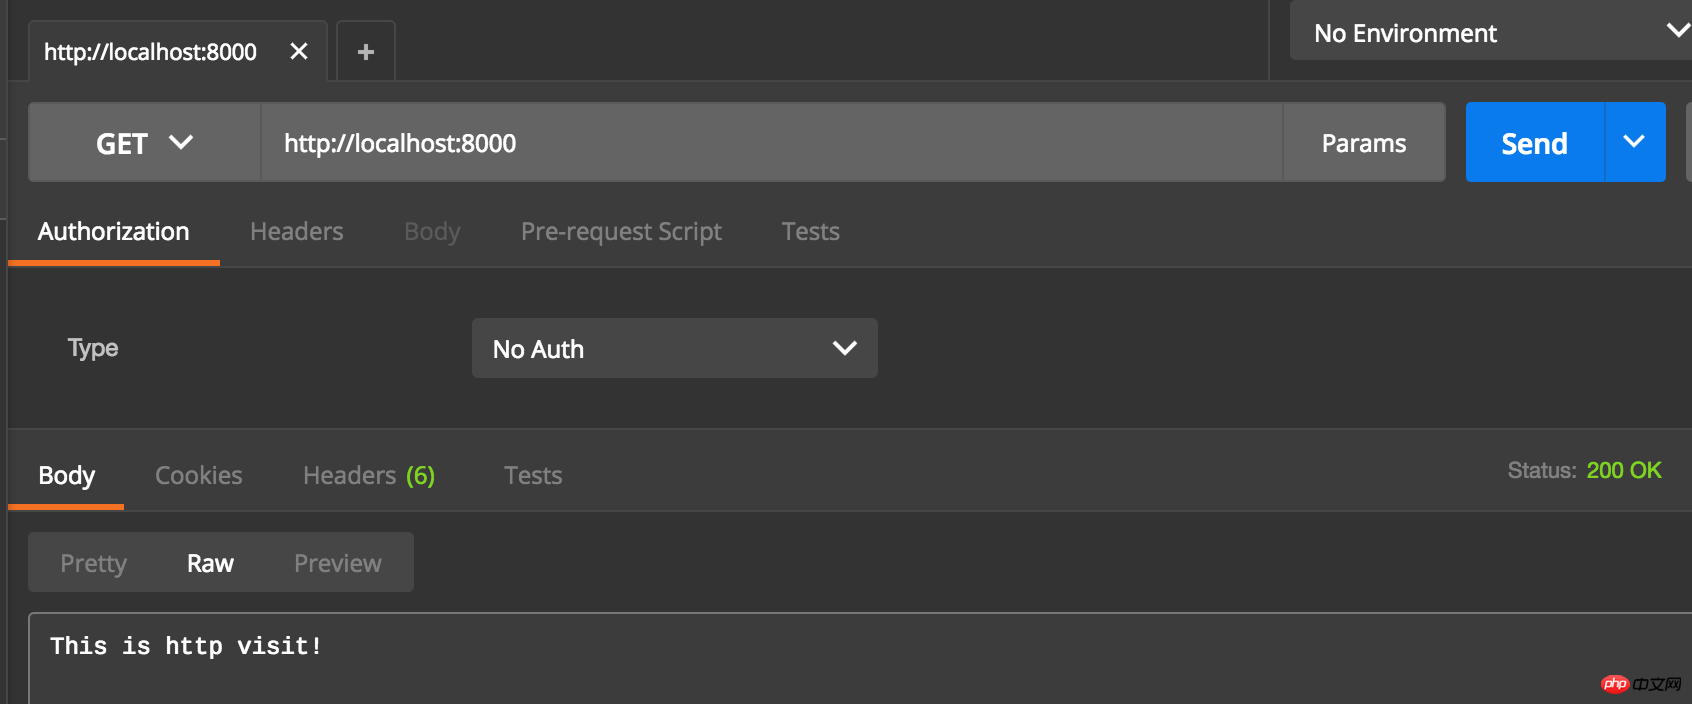
http access:
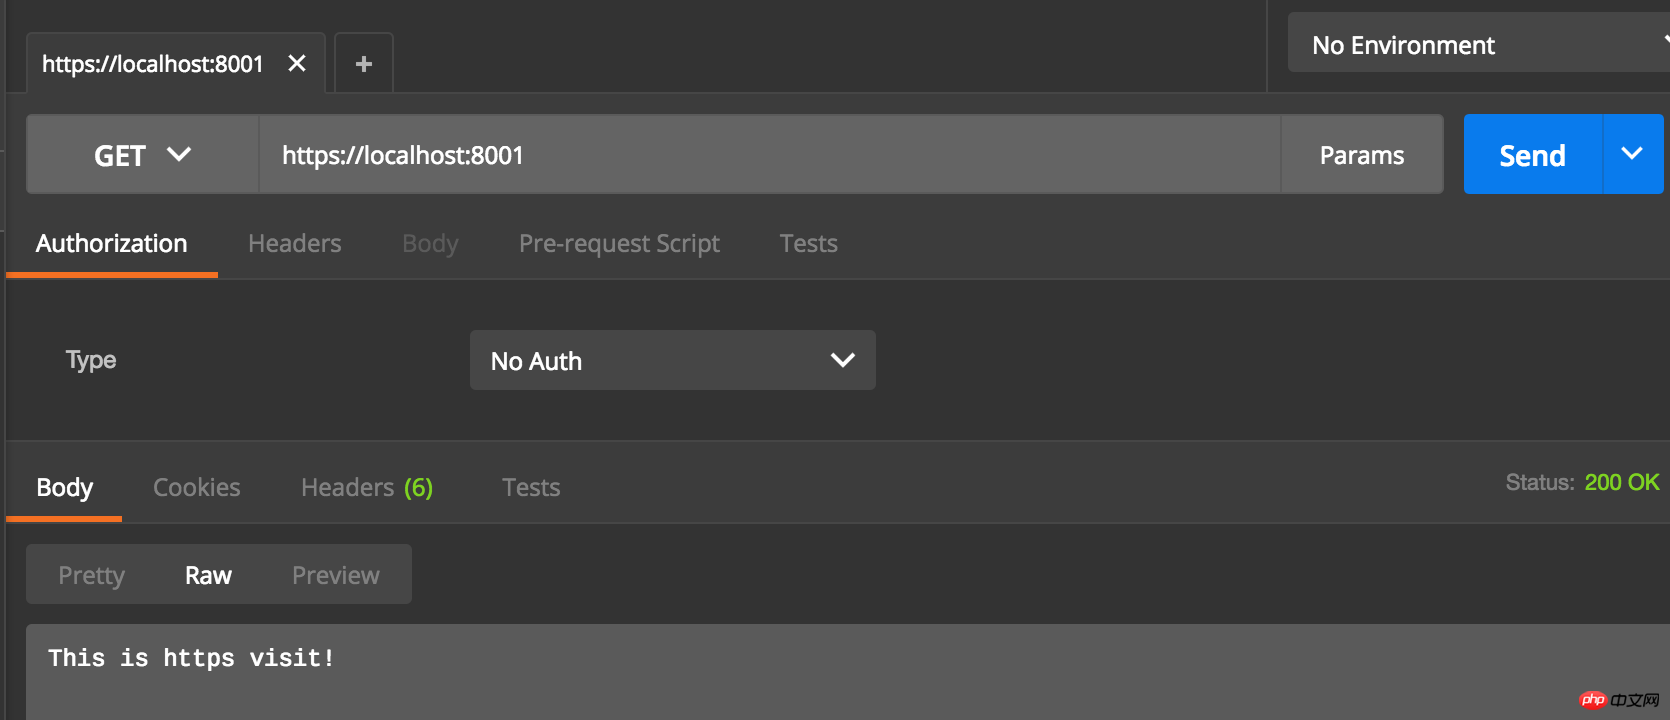
https access:
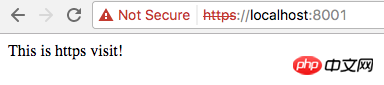
You can see that we have successfully used https to access our server, but the Chrome browser displays a red Not Secure. This is because this certificate was built by us and has not been verified by a third-party agency, so a warning will appear. . We will introduce how to apply for a certified certificate in a subsequent blog.
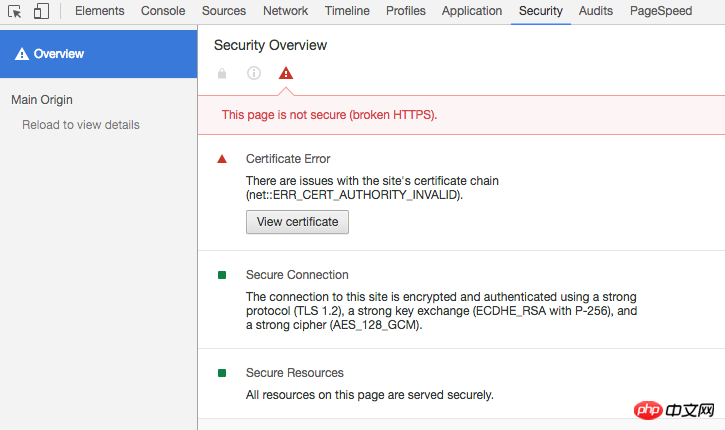
Turn on the developer mode in the Chrome browser, and you can see the certificate information of the current page in the Security page, as shown below:
Click "View certificate" allows you to see the details of the certificate:
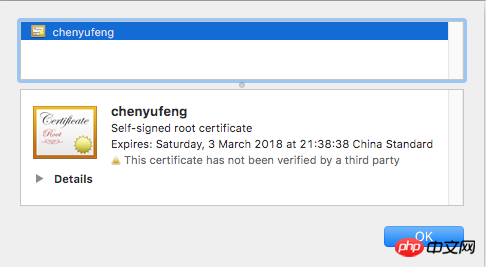
Expand the details and you can see the various certificate information we entered when we created the certificate.
At the same time, we can also use Postman to simulate client requests (in actual development, server students can send certificates to client students, and https communication can be achieved after simple configuration):
http request:
https request:
I believe you have mastered the method after reading the case in this article, more Please pay attention to other related articles on the php Chinese website!
Recommended reading:
Sharing the steps to build a ghost blog in centos
https use case analysis in Node.js
Chart.js lightweight HTML5 chart drawing tool library detailed explanation of usage steps
The above is the detailed content of Detailed explanation of the steps to configure a self-signed https server in nodejs express. For more information, please follow other related articles on the PHP Chinese website!


![[Web front-end] Node.js quick start](https://img.php.cn/upload/course/000/000/067/662b5d34ba7c0227.png)


