

This time I will show you how to deploy HTTPS in Node.js. What are the precautions for deploying HTTPS in Node.js? The following is a practical case, let's take a look.
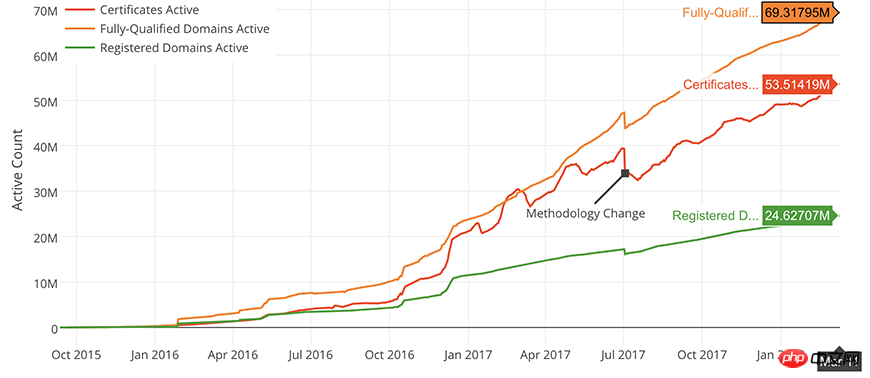
With the rapid development of the Internet, Internet information security has attracted more and more attention.HTTPS should be one of the technologies that major manufacturers have been trying to popularize in the past two years. Major domestic manufacturers have basically fully popularized HTTPS.
Node.js How to deploy free HTTPS and simple deploymentHTTP/ 2.
HTTPS Certificate Services.

Services provided by ISRG (Internet Security Research Group, Internet Security Research Group), free, fast access, stable, etc.So the certificate deployed this time also revolves around
Let's Encrypt.
To deploy Let's Enctrypt certificate, you only need to introduce this package and use it:
Let's Encrypt Certificate
The related certificate ecosystem is very complete, and there is also greenlock-koa that supports koa. Installation and use
greenlock-express:<div class="code" style="position:relative; padding:0px; margin:0px;"><pre class="brush:php;toolbar:false">$ npm install --save greenlock-express@2.x</pre><div class="contentsignin">Copy after login</div></div>It’s very simple to use, it’s
The demo provided by default: <div class="code" style="position:relative; padding:0px; margin:0px;"><pre class="brush:php;toolbar:false">const greenlock = require('greenlock-express')
require('greenlock-express').create({
// 测试
server: 'staging',
// 联系邮箱
email: 'john.doe@example.com',
// 是否同意 Let's Encrypt 条款... 这必须为 true 啊,不然走不下去
agreeTos: true,
// 申请的域名列表,不支持通配符
approveDomains: [ 'tasaid.com', 'www.tasaid.com' ],
// 绑定 express app
app: require('express')().use('/', function (req, res) {
res.end('Hello, World!');
})
}).listen(80, 443)</pre><div class="contentsignin">Copy after login</div></div>The certificate exists
. Of course the above code can only be used in the test/development environment, because it does not apply for a valid certificate, but generates a self-signed certificate (the same as the previous 12306 self-signed certificate), which is used Debugging in a development environment.
API
greenlock-express’s create(options) Function parameters are signed as follows: After testing, in a real production environment, interface Options {
/**
* Express app
*/
app: Express
/*
* 远程服务器
* 测试环境中可用为 staging
* 生产环境中为 https://acme-v01.api.letsencrypt.org/directory
*/
server: string
/**
* 用于接收 let's encrypt 协议的邮箱
*/
email: string
/**
* 是否同意协议
*/
agreeTos: boolean
/**
* 在注册域名获取证书前,会执行这个回调函数
* string[]: 一组需要注册证书的域名
* 函数: 第一个参数跟 Options 格式差不多,第二个参数是当前自动获取的域名信息,第三个参数是在处理完之后传递的回调函数
*/
approveDomains: string[] | (opts, certs: cb) => any
/**
* 更新证书最大天数 (以毫秒为单位)
*/
renewWithin: number
/**
* 更新证书的最小天数(以毫秒为单位)
*/
renewBy: number
}Copy after login
must be a function, and passing an array will not take effect. Production environment
Update package:
$ npm i --save greenlock-express@2.x
$ npm i --save le-challenge-fs
$ npm i --save le-store-certbot
$ npm i --save redirect-https
Production code:
const greenlock = require('greenlock-express')
const express = require('express')
const app = express()
const lex = greenlock.create({
  // 注意这里要成这个固定地址
  server: 'https://acme-v01.api.letsencrypt.org/directory',
  challenges: {
    'http-01': require('le-challenge-fs').create({ webrootPath: '~/letsencrypt/var/acme-challenges' })
  },
  store: require('le-store-certbot').create({
    webrootPath: '~/letsencrypt/srv/www/:hostname/.well-known/acme-challenge'
  }),
  approveDomains: (opts: any, certs: any, cb: any) => {
    appLog.info('approveDomains', { opts, certs })
    if (certs) {
      /*
       * 注意这里如果是这样写的话,一定要对域名做校验
       * 否则其他人可以通过将域名指向你的服务器地址,导致你注册了其他域名的证书
       * 从而造成安全性问题
       */
      // opts.domains = certs.altnames
      opts.domains = [ 'tasaid.com', 'www.tasaid.com' ]
    } else {
      opts.email = '你的邮箱@live.com'
      opts.agreeTos = true
    }
    cb(null, { options: opts, certs: certs })
  },
})
// 这里的 redirect-https 用于自动将 HTTP 请求跳到 HTTPS 上
require('http').createServer(
  lex.middleware(
    require('redirect-https')()
   )
  ).listen(80, function () {
    console.log('Listening', `for ACME http-01 challenges on: ${JSON.stringify(this.address())}`)
})
// 绑定 HTTPS 端口
require('https').createServer(
    lex.httpsOptions,
    lex.middleware(app)
  ).listen(443, function () {
    console.log(('App is running at http://localhost:%d in %s mode'), app.get('port'), app.get('env'))
    console.log('Press CTRL-C to stop\n')
})If it does not take effect, you can check the certificate information of
~/letsencrypt and whether port 443 is correct Open. Deploying HTTP/2
服务器推送:解决 HTTP/1.x 时代最大的痛点
值的注意的是,HTTP/2 是支持 HTTP 协议的,只不过浏览器厂商都不愿意支持 HTTP,所以基本上可以认为,用上 HTTP/2 的前置条件是必须部署 HTTPS。
早在 2009 年,Google 开发了一个实验性协议,叫做 SPDY,目的解决 HTTP/1.x 中的一些设计缺陷。在 SPDY 发布几年后,这个新的实验性协议得到了 Chrome、Firefox 和 Opera 的支持,应用越来越广泛。然后 HTTP 工作组 (HTTP-WG) 在这个 SPDY 的基础上,设计了 HTTP/2,所以可以说 SPDY 是 HTTP/2 的前身。
关于 HTTP/2 的详情可以参考 这篇文章。
引入 HTTP/2 在 Node.js 中也十分简单,只需要引入 spdy 包即可:
$ npm i --save spdy
然后我们把上一节的代码做一点修改即可支持 HTTP/2:
const greenlock = require('greenlock-express')
const express = require('express')
// HTTP/2
const spdy = require('spdy')
const app = express()
const lex = greenlock.create({
  // 注意这里要成这个固定地址
  server: 'https://acme-v01.api.letsencrypt.org/directory',
  challenges: {
    'http-01': require('le-challenge-fs').create({ webrootPath: '~/letsencrypt/var/acme-challenges' })
  },
  store: require('le-store-certbot').create({
    webrootPath: '~/letsencrypt/srv/www/:hostname/.well-known/acme-challenge'
  }),
  approveDomains: (opts: any, certs: any, cb: any) => {
    appLog.info('approveDomains', { opts, certs })
    if (certs) {
      /*
       * 注意这里如果是这样写的话,一定要对域名做校验
       * 否则其他人可以通过将域名指向你的服务器地址,导致你注册了其他域名的证书
       * 从而造成安全性问题
       */
      // opts.domains = certs.altnames
      opts.domains = [ 'tasaid.com', 'www.tasaid.com' ]
    } else {
      opts.email = '你的邮箱@live.com'
      opts.agreeTos = true
    }
    cb(null, { options: opts, certs: certs })
  },
})
// 这里的 redirect-https 用于自动将 HTTP 请求跳到 HTTPS 上
require('http').createServer(
  lex.middleware(
    require('redirect-https')()
   )
  ).listen(80, function () {
    console.log('Listening', `for ACME http-01 challenges on: ${JSON.stringify(this.address())}`)
})
// HTTP/2
spdy.createServer(lex.httpsOptions, lex.middleware(app)).listen(443, function () {
  console.log('Listening https', `for ACME tls-sni-01 challenges and serve app on: ${JSON.stringify(this.address())}`)
})相信看了本文案例你已经掌握了方法,更多精彩请关注php中文网其它相关文章!
推荐阅读:
The above is the detailed content of How to deploy HTTPS in Node.js. For more information, please follow other related articles on the PHP Chinese website!


![[Web front-end] Node.js quick start](https://img.php.cn/upload/course/000/000/067/662b5d34ba7c0227.png)


