I have been working on a small mobile demo of Vue for a few months recently, one of which implements the unified skinning function of each page. This article mainly introduces the sample code of the skin-changing function based on Vue. The editor thinks it is quite good, so I will share it with you now and give it as a reference. Let’s follow the editor to have a look.
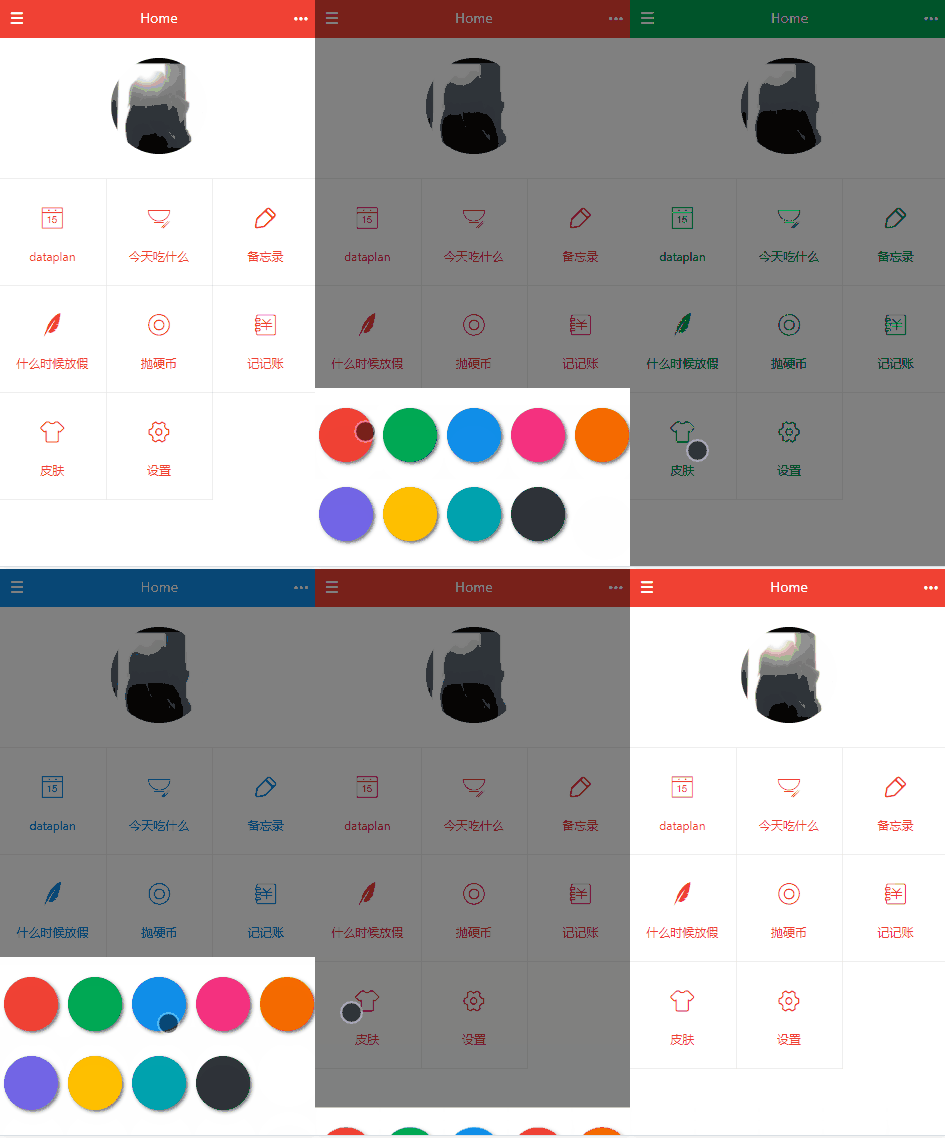
Let’s take a look at the implementation first

Set the theme color
It makes sense for such a function, I I think these points can be discussed and implemented step by step:
1. Selection of color values
2. Some niche usages of scss (batch setting of multi-variable CSS values)
3. Application of Global Event Bus
1 Selection and Principles of Color Value
It is recommended that you read the design guidelines of Ant Financial, which covers common There is a good set of guidelines and suggestions for interaction and interface design. Those who like reading can also read "Design Book for Everyone".
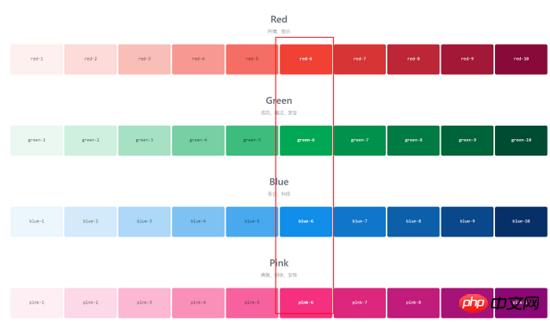
For color elements in the interface, we generally need to maintain visual continuity, that is, the same set of colors, and try to use the color values on the same color wheel

The color values on the same ring will appear more coordinated as a set of colors
So here we adopt the suggestion of ant design and take a certain column of color values as the theme color of our series (the specific color value refers to its Official website~)

In some special occasions, it is necessary to show the difference in color, such as the two colors on the coin tossing page,

2 Convert the format color value into a hexadecimal color value
Here we distinguish different colors by setting the transparency of the theme color, and then we pass Store a hexadecimal color global variable such as #123456 as our theme. Here we need to convert the color value in such a format into a color value represented by rgba. The code is as follows, for backup
hexToRgba (hex, opacity = 0.3) {
let color = []
let rgb = []
hex = hex.replace(/#/, '')
for (let i = 0; i < 3; i++) {
color[i] = '0x' + hex.substr(i * 2, 2)
rgb.push(parseInt(Number(color[i])))
}
return `rgba(${rgb.join(',')},${opacity})`
}3 Some niche uses of scss
We finally got such a list of theme colors we wanted
Copy code The code is as follows:
$colors: #f04134, #00a854, #108ee9, #f5317f, #f56a00, #7265e6, #ffbf00, #00a2ae, #2e3238;
A very straightforward idea, we need to define the color of the elements we need to set the theme in each view page, such as the color of text and icon, and the background of the header, etc. So we define a color variable in the app and distribute it to each view component. We use this global variable to control the color of all routing pages to achieve different theme effects.
The implementation of distribution will be discussed in the next section. Here we will complete our first step. We can easily extract our requirements:
4 Set and save a global color
Little things about the interface:
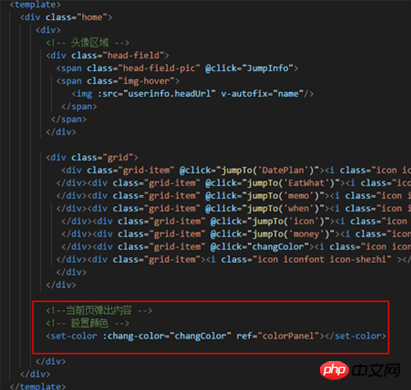
I implemented this function directly on the homepage. In the project, I introduced the mint-ui framework (the mobile framework of the Ele.me team, which is a bit regretful to use) Not as comfortable as element.ui), the set interaction is in the form of elastic layer mt-popup, and then directly click on the color block to set the corresponding color value
<!-- 設置顏色 -->
<mt-popup v-model="changColor" position="bottom" class="color-panel">
<p class="color-items">
<span class="color-item" v-for="(item, $index) in colors" :key="$index" @click="chooseColor(item)">
<span class="color-cycle" :class="'bg-color' + ($index + 1)"></span>
</span>
</p>
</mt-popup>Then It is the presentation of the color block p. From the above code, I can easily find a css style sheet like this
.bg-color1 {background: #f04134}
.bg-color2 {background: #f04134}
.bg-color3 {background: #f04134}
.bg-color4 {background: #f04134}
···When writing code, if we generally find that something like this When something reappears, I always feel that it is ready to start performing. And it is foreseeable that this situation means that after the project grows, there may be many style sheets that set the font color or border color alone, such as color1, borderColor1 ···In this way, we need to write each form of expression according to our theme color array one by one, and the modification cost will also become high. So my writing style is like this,
// mixin.scss:
$colors: #f04134, #00a854, #108ee9, #f5317f, #f56a00, #7265e6, #ffbf00, #00a2ae, #2e3238;

// setColor.vue:
@import '~@/assets/mixin.scss';
···
@for $i from 1 to 10 {
    .bg-color#{$i} {
     background-color: nth($colors, $i)
    }
}scss In addition to the commonly used nested writing of class names, there are also many... low-key and luxurious syntax. For this kind of For style types that need to be written repeatedly, my convention is to add a scss variable in the mixin file, introduce it as a variable when writing a repeated loop style, and use the sass loop to reference the corresponding value when writing the style, so that no matter How to expand and change the color setting style, whether it is a color background border, I only need to maintain the color values in a mixin file. The same practice can also be applied to the font size and spacing values in the project. Unification and the like, let’s try to experience it more
5 Little things about logic
这个项目里面localstorage 基本被当成数据库使用了,所以点击色块设置主题时候,我们假装发出请求,在localstorage存储我们改变的颜色就好了( ./static/api.json 是一个返回helloword 的json, 为了写实在这里这么用,$bus 事件巴士下面说, 作用就是设置全局的主题颜色变量,localStorage 模拟我们把设置存储到后台,每次重新打开页面就去获取这些设置值), 目前为止,我们的设置页面就大致完成了
// 假装调用接口设置颜色
  chooseColor (color) {
   this.$axios.get('./static/api.json')
    .then((data) => {
     this.$bus.$emit('set-theme', color)
     this.changColor = false
     localStorage.setItem('themeColor', color)
    })
    .catch((data) => {
     console.log(data)
    })
}6 事件巴士的运用
在上一步最后我们有个关键的东西没完成, this.$bus.$emit('set-theme', color) ,将选取的颜色设置到全局,我的代码结构是这样的

子组件
我们可以很直接地用绑定事件配合 emit() 的做法,在 app.vue 定义一个 setglobalColor 方法, 并绑定到router-view(包含了home.vue),接着在home组件继续定义一个 setglobalColor 方法, 实现的功能就是 emit('setglobalColor') 去触发app.vue的方法, 并把 home.vue 的这个 setglobalColor 继续绑定到组件, 组件里面点选颜色时候,直接emit这个方法就行了。
为什么我想用事件巴士.vue 的事件巴士和 vuex, 在一些有追求的程序员手里总是小心翼翼的,我也一样,因为作为涉及全局的东西,一般觉得能不用就不用,代码能精简就精简,我们经常用一个词,不提倡。
可是有朝一日我经常在想,代码的可读性可维护性,和性能以及“风险”相对比,到底哪个更重要。对于事件巴士和vuex 这类全局性质的方案的主要担忧大部分在于, 他们是全局的,可能因为一个事件名变量名一致就造成冲突,在小型项目还会造成冗余和额外开销。 但事实上,事件和变量的命名我们都可以通过约定去规范,而在表现上,使用了事件巴士和vuex的项目,在性能上和直接 props 传递数据,emit 回调事件的项目相比,其实并没有太大区别,反而是无止境的 props 和 emit ,给人一种麻烦难以维护的感觉。 像上述的 setglobalColor , 仅仅是跨越了两层组件, 过程就显得繁琐了。所以我建议在出现两级以上组件层次,数据流稍微多的项目中都可以这么去做,定义一个全局的事件巴士
export default (Vue) => {
 let eventHub = new Vue()
 Vue.prototype.$bus = {
  $on (...arg) {
   eventHub.$on(...arg)
  },
  $off (...arg) {
   eventHub.$off(...arg)
  },
  $emit (...arg) {
   eventHub.$emit(...arg)
  }
 }
}将事件巴士绑定到当前vue对象,使用时候只需要:
this.$bus.$on('set-theme', (color) => {··· })
this.$bus.$emit('set-theme', '#000000')在这个demo中,我在app.vue 绑定了
this.$bus.$on('set-theme', (color) => {
   this.loadingColor = color
   this.userinfo.color = color
})而在 setColor.vue 则在点击颜色块时候触发 this.$bus.$emit('set-theme', color), 则能实现我们设置全局颜色的效果。这样的好处在于,对于跨了多个层次,或者兄弟组件的通信,我们不再需要太繁琐的props,比如我在header.vue 也绑定了 this.$bus.$on('set-theme', (color) => { }) ,在 this.$bus.$emit 发生时候,header 的背景颜色就能直接改变,而不需要等待app.vue 将 全局的color值props传递到header.vue里面(仅做示例,这里 header.vue 只是 app.vue 的下一层级,通过props数据流会更清晰)
而对于其他路由页面组件,和 app.vue 都是直接上下级关系,我们依然采用props保持一个清晰的数据流向下传递, demo 里我是将 color 存在userinfo(以后还有其他数据), userinfo传到每个子路由, 最后,每个页面在创建时候,通过拿到这个全局的颜色,再用dom去更改对应的样式就好啦,例如
mounted () {
  this.$nextTick(() => {
   // 绑定设置主题的事件,一旦触发修改主题,则将当前字体颜色改为对应颜色
   this.$el.querySelector('.myTitle').style.color = this.userinfo.color
   this.$el.querySelector('.weui-btn_primary').style.backgroundColor = this.userinfo.color
   this.$el.querySelector('.add_icon').style.color = this.userinfo.color
  })
}详细的实现请参照项目代码,这里我只挑一些比较清奇的点出来讨论,项目和代码的一些规范和习惯还是挺重要的,希望有好的实践能互相借鉴进步~
相关推荐:
jQuery结合jQuery.cookie.js插件实现换肤功能示例
Javascript结合css实现网页换肤功能_javascript技巧
The above is the detailed content of Vue skin changing function example tutorial. For more information, please follow other related articles on the PHP Chinese website!


