


This article mainly introduces the jQuery Validate form verification plug-in implementation code. Friends who need it can refer to it. I hope it can help everyone.
1 Preparation for form verification
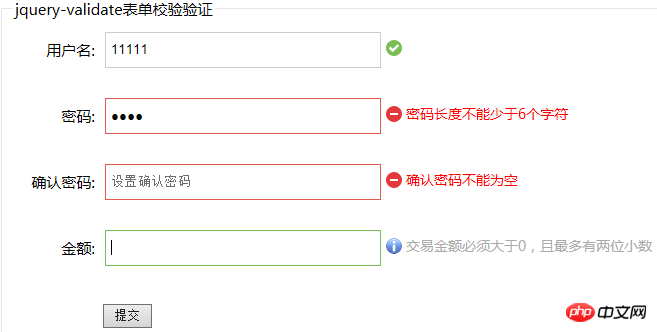
Before starting a long discussion, let me first show you the effect of form verification.
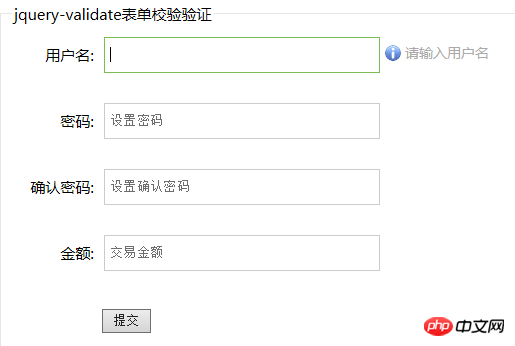 Error prompts and help reminders when the mouse is moved in
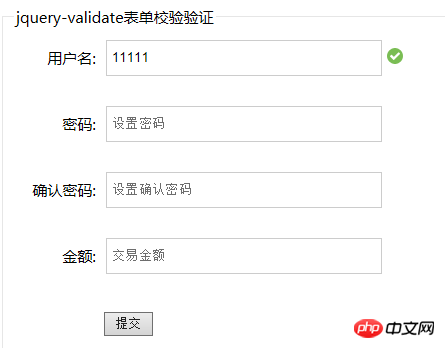
 For beginners, HTML form validation is an extremely trivial matter. To do a good job in form verification, you need to prepare the following basic elements:
1.html form structure: contains the form elements that need to be verified;
2.js logic control: in the form that needs to be verified Bind events to elements, such as clicks, focus acquisition, focus loss, etc., and set execution functions corresponding to these events;
3.css style settings: For form elements that need to be verified, you need to set the default The initial style, and the changed style after the element binding event is triggered.
Among these three basic elements, the creation of html form structure is relatively simple. The focus and difficulty of form verification is how to use js to promptly and effectively remind users of information about form operations. Here I refer to the registration pages of well-known Internet companies such as Baidu, 163 Mailbox, JD.com, and summarize the main prompt information required for form verification as follows:
1. Help information after the form element obtains focus (corresponding to the plug-in class name "tip");
2. Success information when the form element is verified (corresponding to the class name "valid" in the plug-in);
3. Error message when the form element verification fails (The corresponding class name "error" in the plug-in).
Without the help of any plug-ins, we need to spend a lot of time writing different types of information prompts, considering switching back and forth between various styles, and writing some basic validation rules. The famous saying goes: "The reason why I can see further is because I stand on the shoulders of giants." Why not just use some existing mature plug-ins to help us quickly write a form validation function, which can not only improve efficiency, but also allow us to take time to focus on our own logic.
Among the many form validation plug-ins, the jQuery validate plug-in is one of the oldest jQuery plug-ins and has been verified by different projects around the world. Its characteristics are as follows:
1. Built-in verification rules: It has built-in verification rules such as required fields, numbers, emails, URLs and credit card numbers;
2. Customized verification rules: It can be very convenient Locally customized verification rules (implemented through $.validator.addMethod(name, method, message));
3. Simple and powerful verification information prompt: The verification information prompt is defaulted, and custom override default information is provided Prompt function (achieved by setting the message parameter in the plug-in);
4. Real-time verification: Verification can be triggered through keyup or blur events, not just when the form is submitted.
Next we choose this plug-in to implement a simple and beautiful form validation example.
2 A small example of jquery validate plug-in implementing form validation
Before introducing the jquery validate plug-in, you need to introduce the file jquery.js it depends on (the version of jquery in the example is 1.9); During the implementation process, in order to achieve better results, I extended the original functions of jquery validate in the jquery.validate.extend.js file and modified the relevant default options; therefore, the files need to be introduced at the head of the document There are three:
2.1 Form html
Among the three elements of form verification, you first need to complete the writing of the html form structure code. In order to make the form structure simple and clear, we wrap each element of the form in a p structure: the label tag is used to mark the name of the element, followed by the form element itself. [Note: 1. The benefit of using label tags is improved usability for mouse users. When you click text within the label element, the browser will automatically shift focus to the form control related to the label. 2. Each form element that needs to be verified should set the id and name attributes to facilitate binding verification rules and verification information to the element when using the plug-in. 】
The form implementation code is as follows:
2.2 Form verification js logic
接着我们通过js来实现对表单元素的校验。在校验之前,我对jquery validate插件进行了功能扩展,对默认的选项进行了重写覆盖。jquery validate插件默认只提供了校验正确及错误时的提示,缺少我们常见的帮助信息提示。为了解决这个问题,我仔细研究了插件的源码,发现插件本身提供了onfocusin(校验元素获得焦点时调用)和onfocusout(校验元素失去焦点时调用)这两个函数。通过修改默认参数的这两个接口,可以实现党用户鼠标点击或选择元素时(即元素获得焦点),提示帮助信息;在用户鼠标离开元素时(即元素失去焦点),移除帮助信息。
此外,jquery validate默认提供表单元素输入时的实时校验,因为我们要求在输入时只提示用户帮助信息,故需要关闭输入的实时校验,为此我们将默认参数中的onkeyup设置为null。
具体的扩展改进代码我放到了新增js脚本jquery.validate.extend.js中,代码如下:
/*******************************插件新功能-设置插件validator的默认参数*****************************************/ $.validator.setDefaults({ /*关闭键盘输入时的实时校验*/ onkeyup: null, /*添加校验成功后的执行函数--修改提示内容,并为正确提示信息添加新的样式(默认是valid)*/ success: function(label){ /*label的默认正确样式为valid,需要通过validClass来重置,否则这里添加的其他样式不能被清除*/ label.text('').addClass('valid'); }, /*重写校验元素获得焦点后的执行函数--增加[1.光标移入元素时的帮助提示,2.校验元素的高亮显示]两个功能点*/ onfocusin: function( element ) { this.lastActive = element; /*1.帮助提示功能*/ this.addWrapper(this.errorsFor(element)).hide(); var tip = $(element).attr('tip'); if(tip && $(element).parent().children(".tip").length === 0){ $(element).parent().append(""); } /*2.校验元素的高亮显示*/ $(element).addClass('highlight'); // Hide error label and remove error class on focus if enabled if ( this.settings.focusCleanup ) { if ( this.settings.unhighlight ) { this.settings.unhighlight.call( this, element, this.settings.errorClass, this.settings.validClass ); } this.hideThese( this.errorsFor( element ) ); } }, /*重写校验元素焦点离开时的执行函数--移除[1.添加的帮助提示,2.校验元素的高亮显示]*/ onfocusout: function( element ) { /*1.帮助提示信息移除*/ $(element).parent().children(".tip").remove(); /*2.校验元素高亮样式移除*/ $(element).removeClass('highlight'); /*3.替换下面注释的原始代码,任何时候光标离开元素都触发校验功能*/ this.element( element ); /*if ( !this.checkable( element ) && ( element.name in this.submitted || !this.optional( element ) ) ) { this.element( element ); }*/ } });
完善插件的功能后,现在就是重头戏——使用插件为表单元素绑定校验规则和校验信息。jquery validate插件提供validate方法实现form表单的元素校验,该方法的参数是一个包含键值对的对象。其中最常用的键有rules(为不同元素定义校验规则),messages(为不同元素定义错误提示信息),success(校验正确后的字符串或者是执行函数)。常见的校验规则有:required(是否必填),minlength(最小长度),maxlength(最大长度),email(email格式规则),url(url格式规则),date(date格式规则),rangelength(给定长度范围规则),equalTo(要求元素等于另一元素例如equalsTo:"#password")。下面的代码呈现了如何对表单中的用户名、密码等字段绑定校验规则:
2.3 表单验证css样式
最后还要为页面元素添加css样式。插件中有一系列默认选项:其中默认错误显示标签为label,错误样式为label.error。上面在jquery.validate.extend.js文件中,有一个success函数需要说明一下。这个函数是在校验成功的时候执行的,我们在函数中为label提示标签添加了校验正确对应的样式label.valid。因此在css中如果要美化信息提示,需要对label相关样式如error,valid样式进行设计。此外我们在扩展插件功能中添加了一个class为tip的label标签,该标签仅在校验元素获得焦点时生成。为此,还需要设置label的tip样式。
完整的样式文件内容具体如下:
body{ font-family: Microsoft Yahei; font-size: 15px; } fieldset{ width: 680px; } legend{ margin-left: 8px; } .item{ height: 56px; line-height: 36px; margin: 10px; } .item .item-label{ float: left; width: 80px; text-align: right; } .item-text{ float: left; width: 244px; height: 16px; padding: 9px 25px 9px 5px; margin-left: 10px; border: 1px solid #ccc; overflow: hidden; } .item-select{ float: left; height: 34px; border: 1px solid #ccc; margin-left: 10px; font-size: 14px; padding: 6px 0px; } .item-submit{ margin-left: 88px; } input.error{ border: 1px solid #E6594E; } input.highlight{ border: 1px solid #7abd54; } label.error,label.tip{ float: left; height: 32px; line-height: 32px; font-size: 14px; text-align: left; margin-left: 5px; padding-left: 20px; color: red; background: url('error.png') no-repeat left center; } label.tip{ color: #aaa; background: url('tip.png') no-repeat left center; } label.valid{ background: url('valid.png') no-repeat left center; width: 32px; }
3 表单验证效果演示
至此,表单校验的代码编写和插件的应用已经全部完成。在浏览器中运行代码,显示效果如下图:
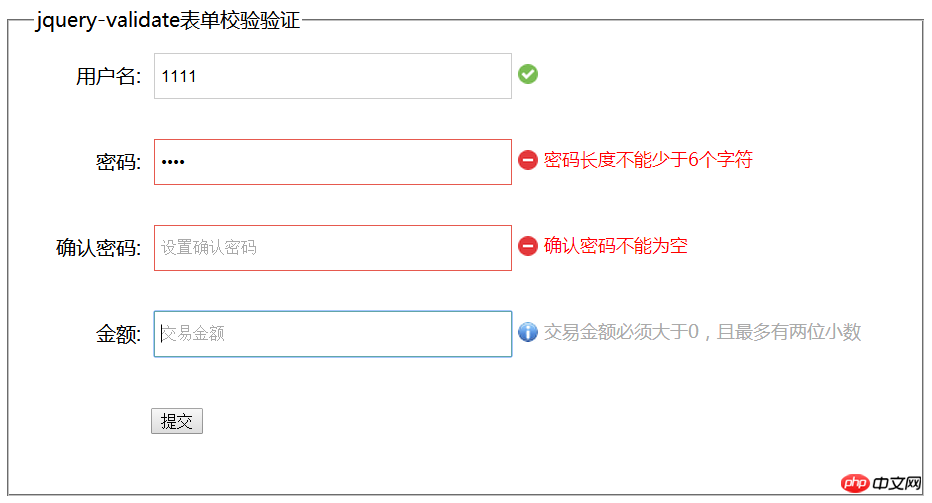
基本上满足现在大多数网站表单验证的要求,如果需要增加验证规则,只需要在jquery.validate.extend.js中增加校验规则即可,例子如下:
/*******************************插件字段校验*****************************************/ $.validator.addMethod( "amtCheck", function(value, element){ /*var dotPos = value.indexOf('.'); return value > 0 && dotPos < 0 && (dotPos > 0 && value.substring(dotPos + 1) <= 2);*/ return value && /^\d*\.?\d{0,2}$/.test(value); }, "金额必须大于0且小数位数不超过2位" );
相关推荐:
jquery.validate.js 多个相同name的处理方式详解
The above is the detailed content of Detailed explanation of jQuery Validate form validation plug-in. For more information, please follow other related articles on the PHP Chinese website!


![[Web front-end] Node.js quick start](https://img.php.cn/upload/course/000/000/067/662b5d34ba7c0227.png)


